Search the Community
Showing results for tags 'Affinity photo'.
-
 Hi there, In the Export persona, is there a way to include a specific layer for one slice only (between various other slices)? So far I know I can exclude a specific layer/group of layers for all slices by unchecking the eye mark. But I want to do like the opposite. For example: I have a usual project file with the original image, various changes in multiple layers and groups. On top of that is a soft-proof profile placed as well as some smaller tweaks for printing. Now if I export those image I want copys for the digital media without those printing tweaks, so I simply uncheck those. But for printing I want a dedicated filename_print.tiff with those printing tweaks applied on top. I know I can go the long road and do two exports but that somewhat defies the logic behind the export persona. And if I try to create a slice from a selection of layers it creates one slice per layer which obviously also isn't what I want.
 -
 Hello. I use windows version. I change brush size with mouse by old Crl + Alt + Left mouse. But in This time it don't change size of brush, it make brush with three dot (make a row). Thank you. ❤️
-
 Before the last update for photo I was able to use such tools as cloning, dodge and burn, or any other tool I chose to use on a pixel layer I had applied adjustments to. But now, if I apply an adjustment layer to an existing pixel layer then try and use the clone tool etc, it doesn't work unless I first rasterise the layer in question. There are times when I don't want to rasterise the layer simply because I am not done with my editing of that layer. Is this expected behaviour? If it is then I'm not a fan.
 -
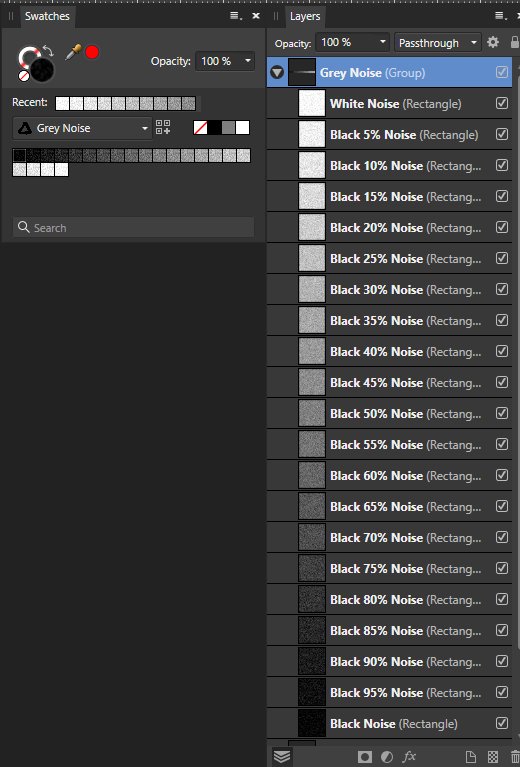
Here is a greyscale noise(100%) palette I created while working on some metallic surfaces. This is a vector - texture palette that doubles as a pixel greyscale palette (duel use). Enjoy, - T V Grey Noise.afpalette
- 2 replies
-
- 9
-

-

-
- affinity photo
- affinity designer
- (and 3 more)
-
 Hello, Recent convert from Photoshop here, and I'm pretty happy with Affinity's products so far! Transition has been fairly easy, and lots of features to like. One problem I'm having, however, involves the Pixel Tool. I did a lot of my pixel work in Photoshop using their Pencil tool, with pen pressure controlling opacity. However, when I attempt the same thing with AP's Pixel Tool, pen pressure seems to be binary? Like 0-50% pressure = no mark made, 51-100% pressure = 100% opacity. Am I missing a setting somewhere? The brush tool seems to behave correctly to pen pressure, but I want the rough/aliased edges of the pixel tool, not smooth/antialiased edges that Paint Brush Tool produces. Also, bizarrely, the pixel tool's size seems to work fine with pen pressure. Just accumulation is on/off like this. Any suggestions? I've attached a screenshot of both the brush and pixel tools attempting the same stroke with a pressure pen (Huion Inspiroy H950P). Best, Dan
-
 Hello everyone, I have just been provided with a scan of a pencil drawing. The original was not very legible, and the scan did not improve it. Can we improve the legibility of this image with Affinity Photo? How do I do this? Thank you for your explanations.
 -
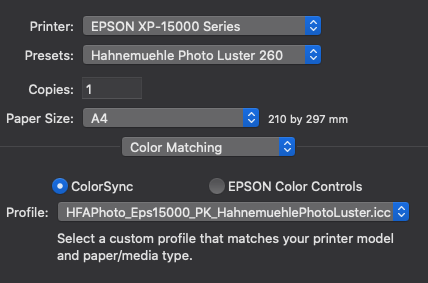
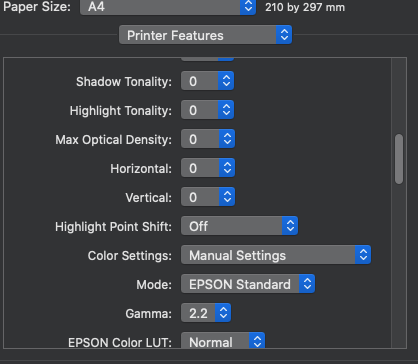
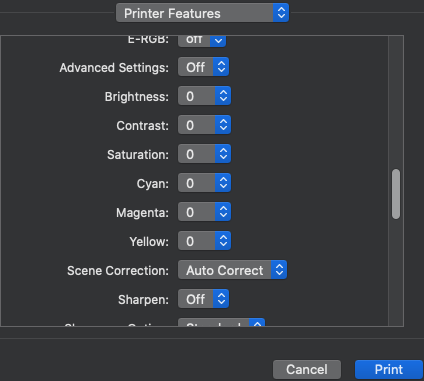
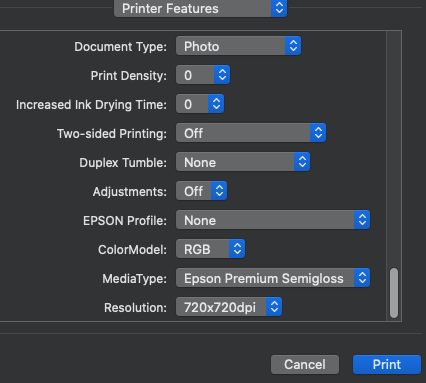
 Hello everyone, I bought an Epson XP-15000 and I'm trying to print from affinity photo on MacOs. I've done the soft proof correctly and now I'm in Print menu but I have some doubt. About color matching I set up this: But here in printer features there are a large number of parameters. How can I set them, please?
-
 Hello. Could someone help me? I am exporting an image to be used on Instagram and Facebook but the red always comes out with very bad quality as I can see. I've tried saving in JPG, PNG but it didn't help. Would I have a tutorial on how to export images to social networks without losing quality? I thank you all.
-
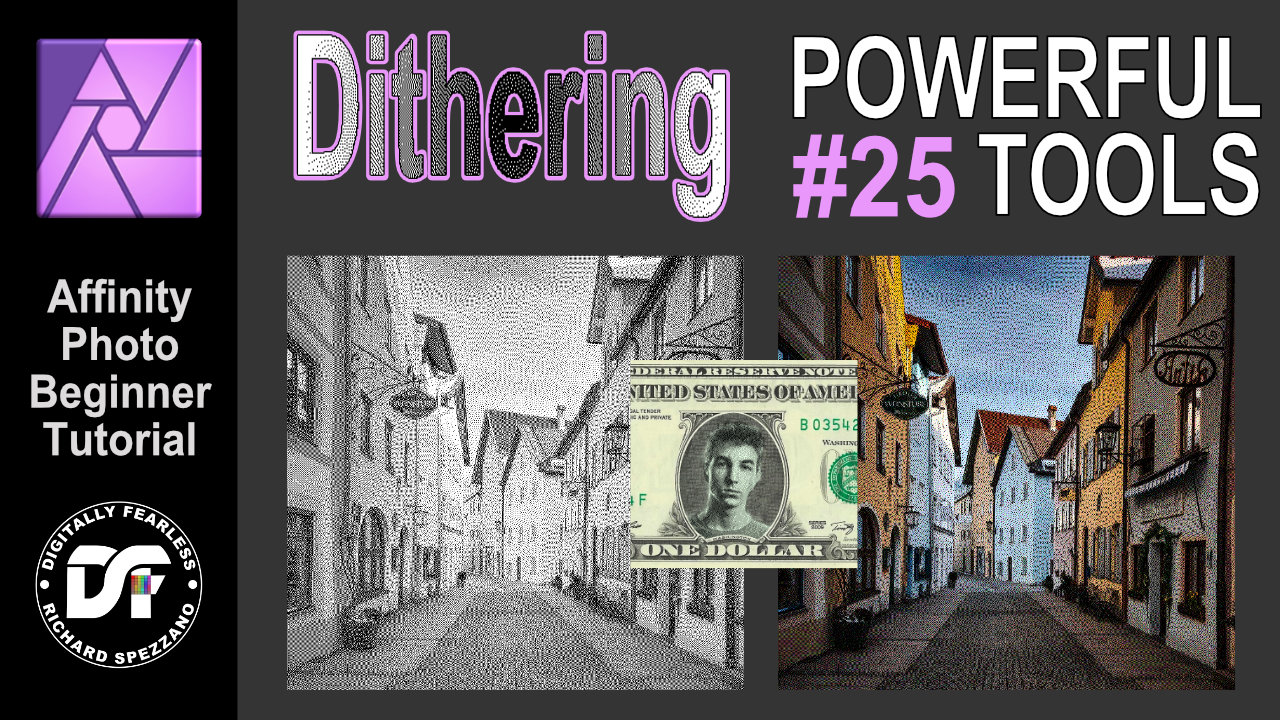
 Dithering filter. Affinity Photo beginner tutorial Power Tools #25 You can create some interesting effects by combining the Dithering filters and blend modes. This is an Affinity Photo beginner tutorial and number 25 of my Digitally Fearless Power tools of Affinity Photo playlist. https://youtu.be/x5aqafgKbyo
-
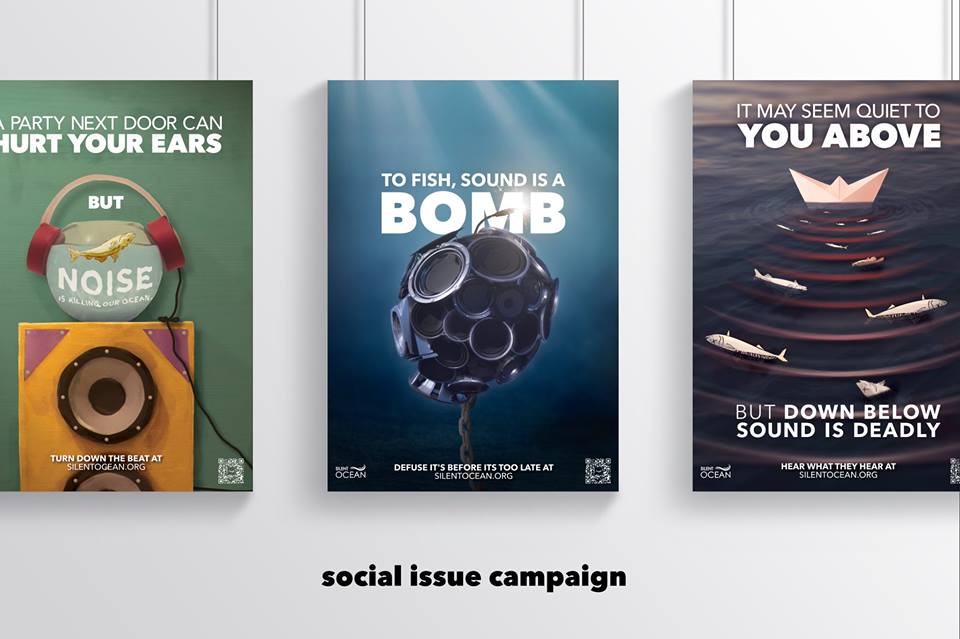
Silent Ocean - Campaign (2018) While studying at SAE for my Bachelor of Design, I got the change to work on a social issue campaign around noise pollution in the ocean with the goal to make 10 posters around the campaign and ended up making 12 posters, 10 badges, art display piece, and a website. This project was amazing to work on allowing myself to break out of my "normal design style" and really allow me to just play around with mix design, merging vector, paper craft, images and 3D together to create something amazing Made with: Affinity Photo (Mac + iOS (iPad Pro) Affinity Designer Autodesk Maya (for 3D) "Click Here" to view the website. __ Need of a graphic designer? Check out my work: http://bit.ly/2vjCmTi Social Media: Website: www.andrewsalfinger.com Portfolio: http://bit.ly/2vjCmTi Twitter: http://bit.ly/andrewdestwitter Facebook: http://bit.ly/andrewdesfacebook Instagram: http://bit.ly/andrewdesinstagram Behance: http://bit.ly/andrewdesbehance Etsy: http://bit.ly/andrewdesetsy
- 22 replies
-
- 24
-
-
-
- maya
- affinity designer
- (and 6 more)
-
I was wondering if it might be possible to provide access to assets installed in different Affinity products via the studio link feature. Imagine creating an asset in say Designer which you would like to use in a publication in Publisher but not have to go through the rigmarole of exporting the asset and importing it into the other application. If using studio link you could gain temporary access to the assets of the other application then it would make the studio experience even more seamless. Another option would be to create a suite assets folder which could be shared by the programs in the suite. I think the first option would be the best way forward from a user point of view, but either would be a boon. I know that shared assets have been requested before, but I thought I would add my 'spin' on it.
-
 First of, stating the obvious, everything was working right until the latest update on March 5th. Running an Acer 5 laptop. 16 gb of RAM, i7, 7th generation CPU, 1050ti GPU. Here's what my image is supposed to look like. Then I try to export it as any image file. JPEG, PNG, etc. I also tried with the Export persona. I tried by fusing all the visible layers into a single pixelated one. Regardless, it turns into this corrupted mess. And every time I do it, the corrupted bits are placed differently. I've tried a couple documents with the same background elements, still does it. I tried copying the layers into a new document, still does it. HOWEVER, I've opened the Photo file into Affinity Designer, and exported it from there, and there was no corruption at all. So at least I've got this temporary fix. Here's what my background layers look like. They have various layer effects and transparency, nothing out of the ordinary. Has anyone experienced a similar bug? Have you fixed it? Is the Affinity team aware of its existence? Is it just me? 😂 Thanks in advance for the help, and I'll give any other details you guys may ask for.
-
 I recently switched from Photoshop and I somewhat have a problem with the selection tools. When I use the tools like freehand selection for example, I don't get a sharp edge. When I want to refine it I can change the sharpness of the edge, but that makes the edge more fuzzy. I am sure selecting with sharp edges must be possible - but somehow I don't find out how... ...does anyone have any suggestions? Thank you.
 -

affinity photo [AP] some of the work I made with Affinity Photo
Que posted a topic in Share your work
Check Out My IG
- 1 reply
-
- 3
-
-
The last client illustration project I worked on in 2020, and the first one I've posted in 2021 - had an absolute blast creating this! 👾 I used Affinity Designer (for plotting the initial layout and perspective guides), and Affinity Photo, with an XP-Pen tablet, for the drawing/painting, colouring, and finishing effects. There's a bit more insight into the process on my Bēhance if anyone's interested: https://www.behance.net/gallery/111102577/Pips-Meadery-Code Hope you guys like it! Stay safe out there, Christi. 🤙 http://www.instagram.com/christidutoit
- 1 reply
-
- 16
-
-
- design
- illustration
- (and 3 more)
-
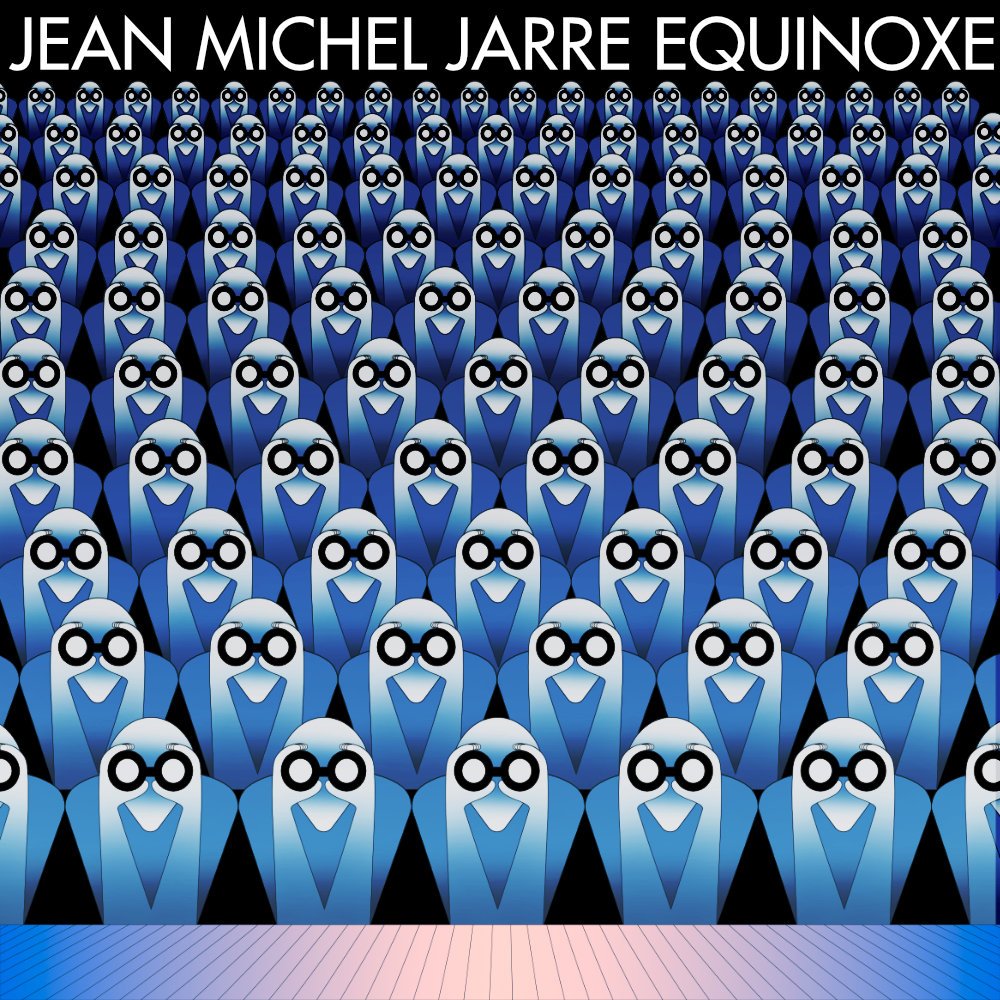
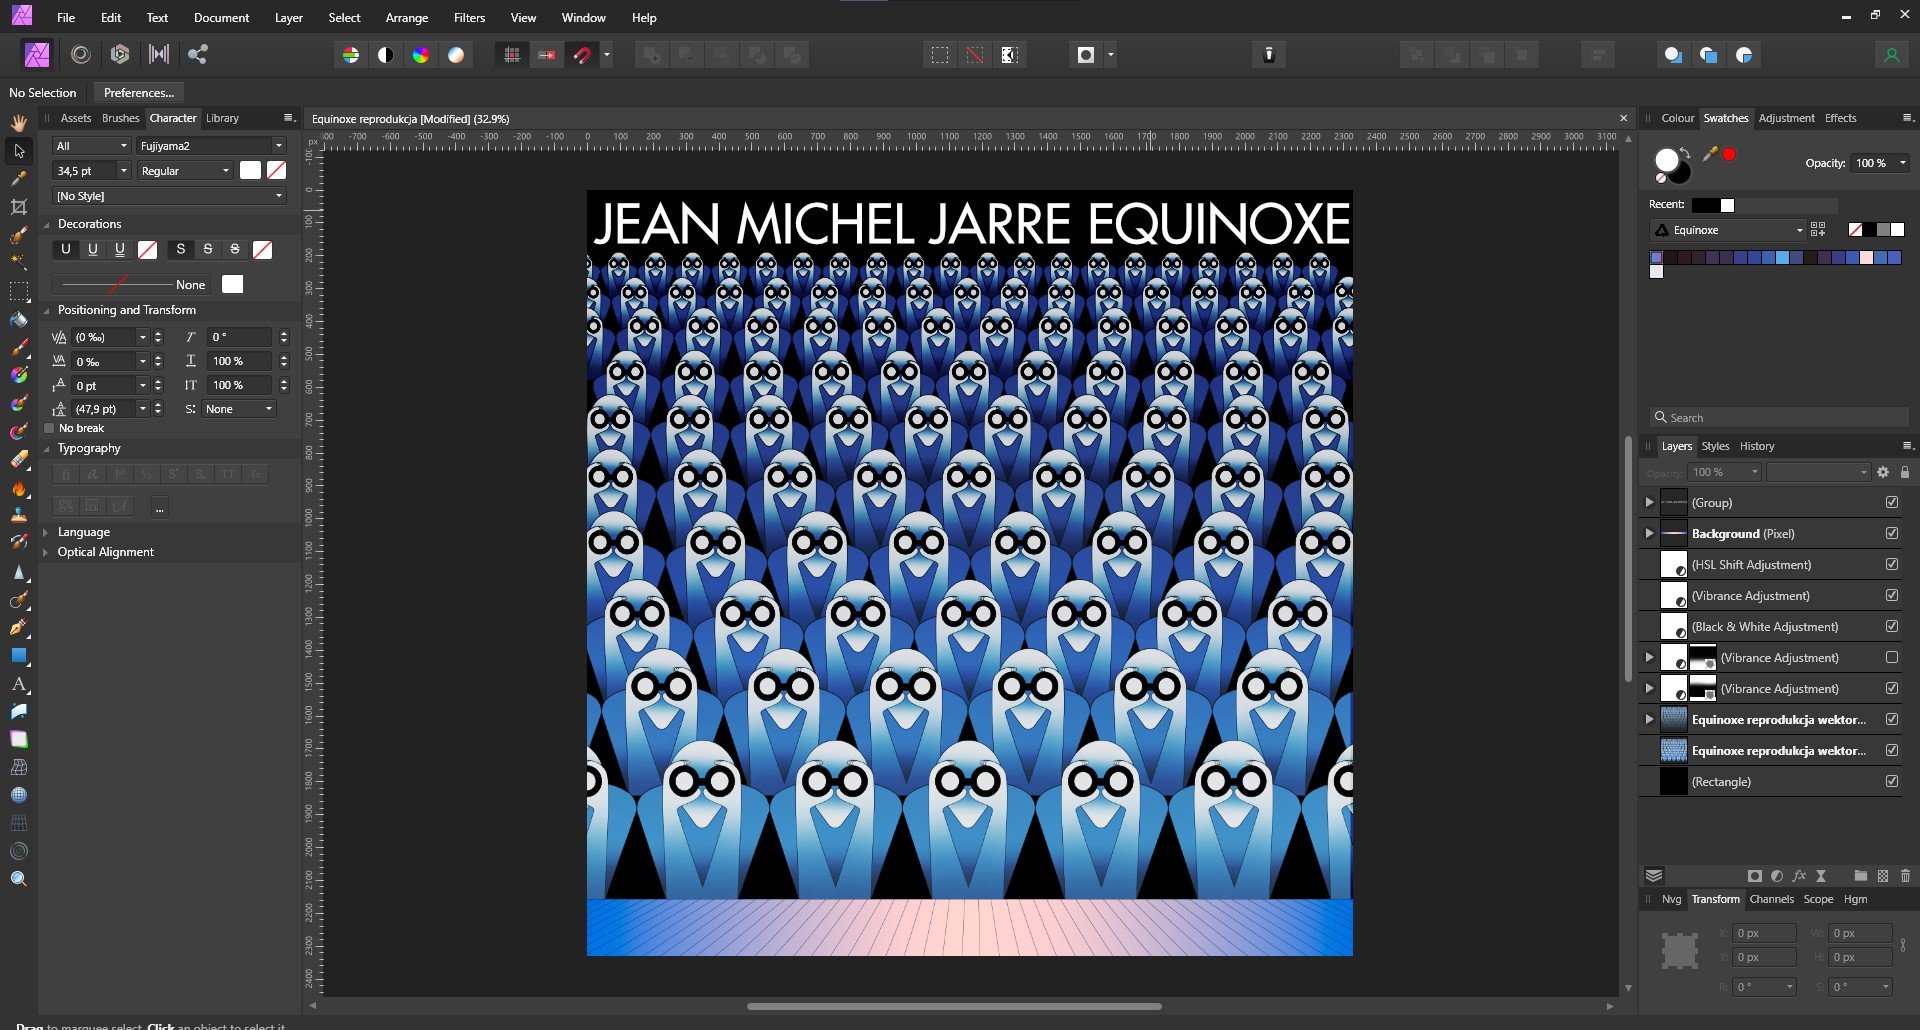
Hey Everyone! I decided to play with the Equinoxe cover reproductions. Post-production is done in Affinity Photo, but before that, everything in Affinity Designer.
-
 Find over 100 Tutorial on my Channel Learn to Master the Liquify Persona in this easy to follow Tutorial. Create fun Caricature Style Images. Prepare a Mesh for your T-Shirt or Fashion Print Company. Many more uses. I explain all the tools and settings in detail and give some important tips on what to look out for. A great way to get started is to play with Portraits, as shown in this video. Let's get started Support me on Patreon: https://www.patreon.com/sarikas Follow me on Facebook: https://www.facebook.com/sarikastutorials Photo used: https://unsplash.com/photos/Pk1zfSzZtXQ
 -
 Is there any faster way to rename layers or do I really have to click in each and everyone and type? Even a *rename* *press tab* *rename next* would do, as Photoshop. Thanks!
- 15 replies
-
- 4
-
-
-
- affinity designer
- affinity photo
- (and 2 more)
-
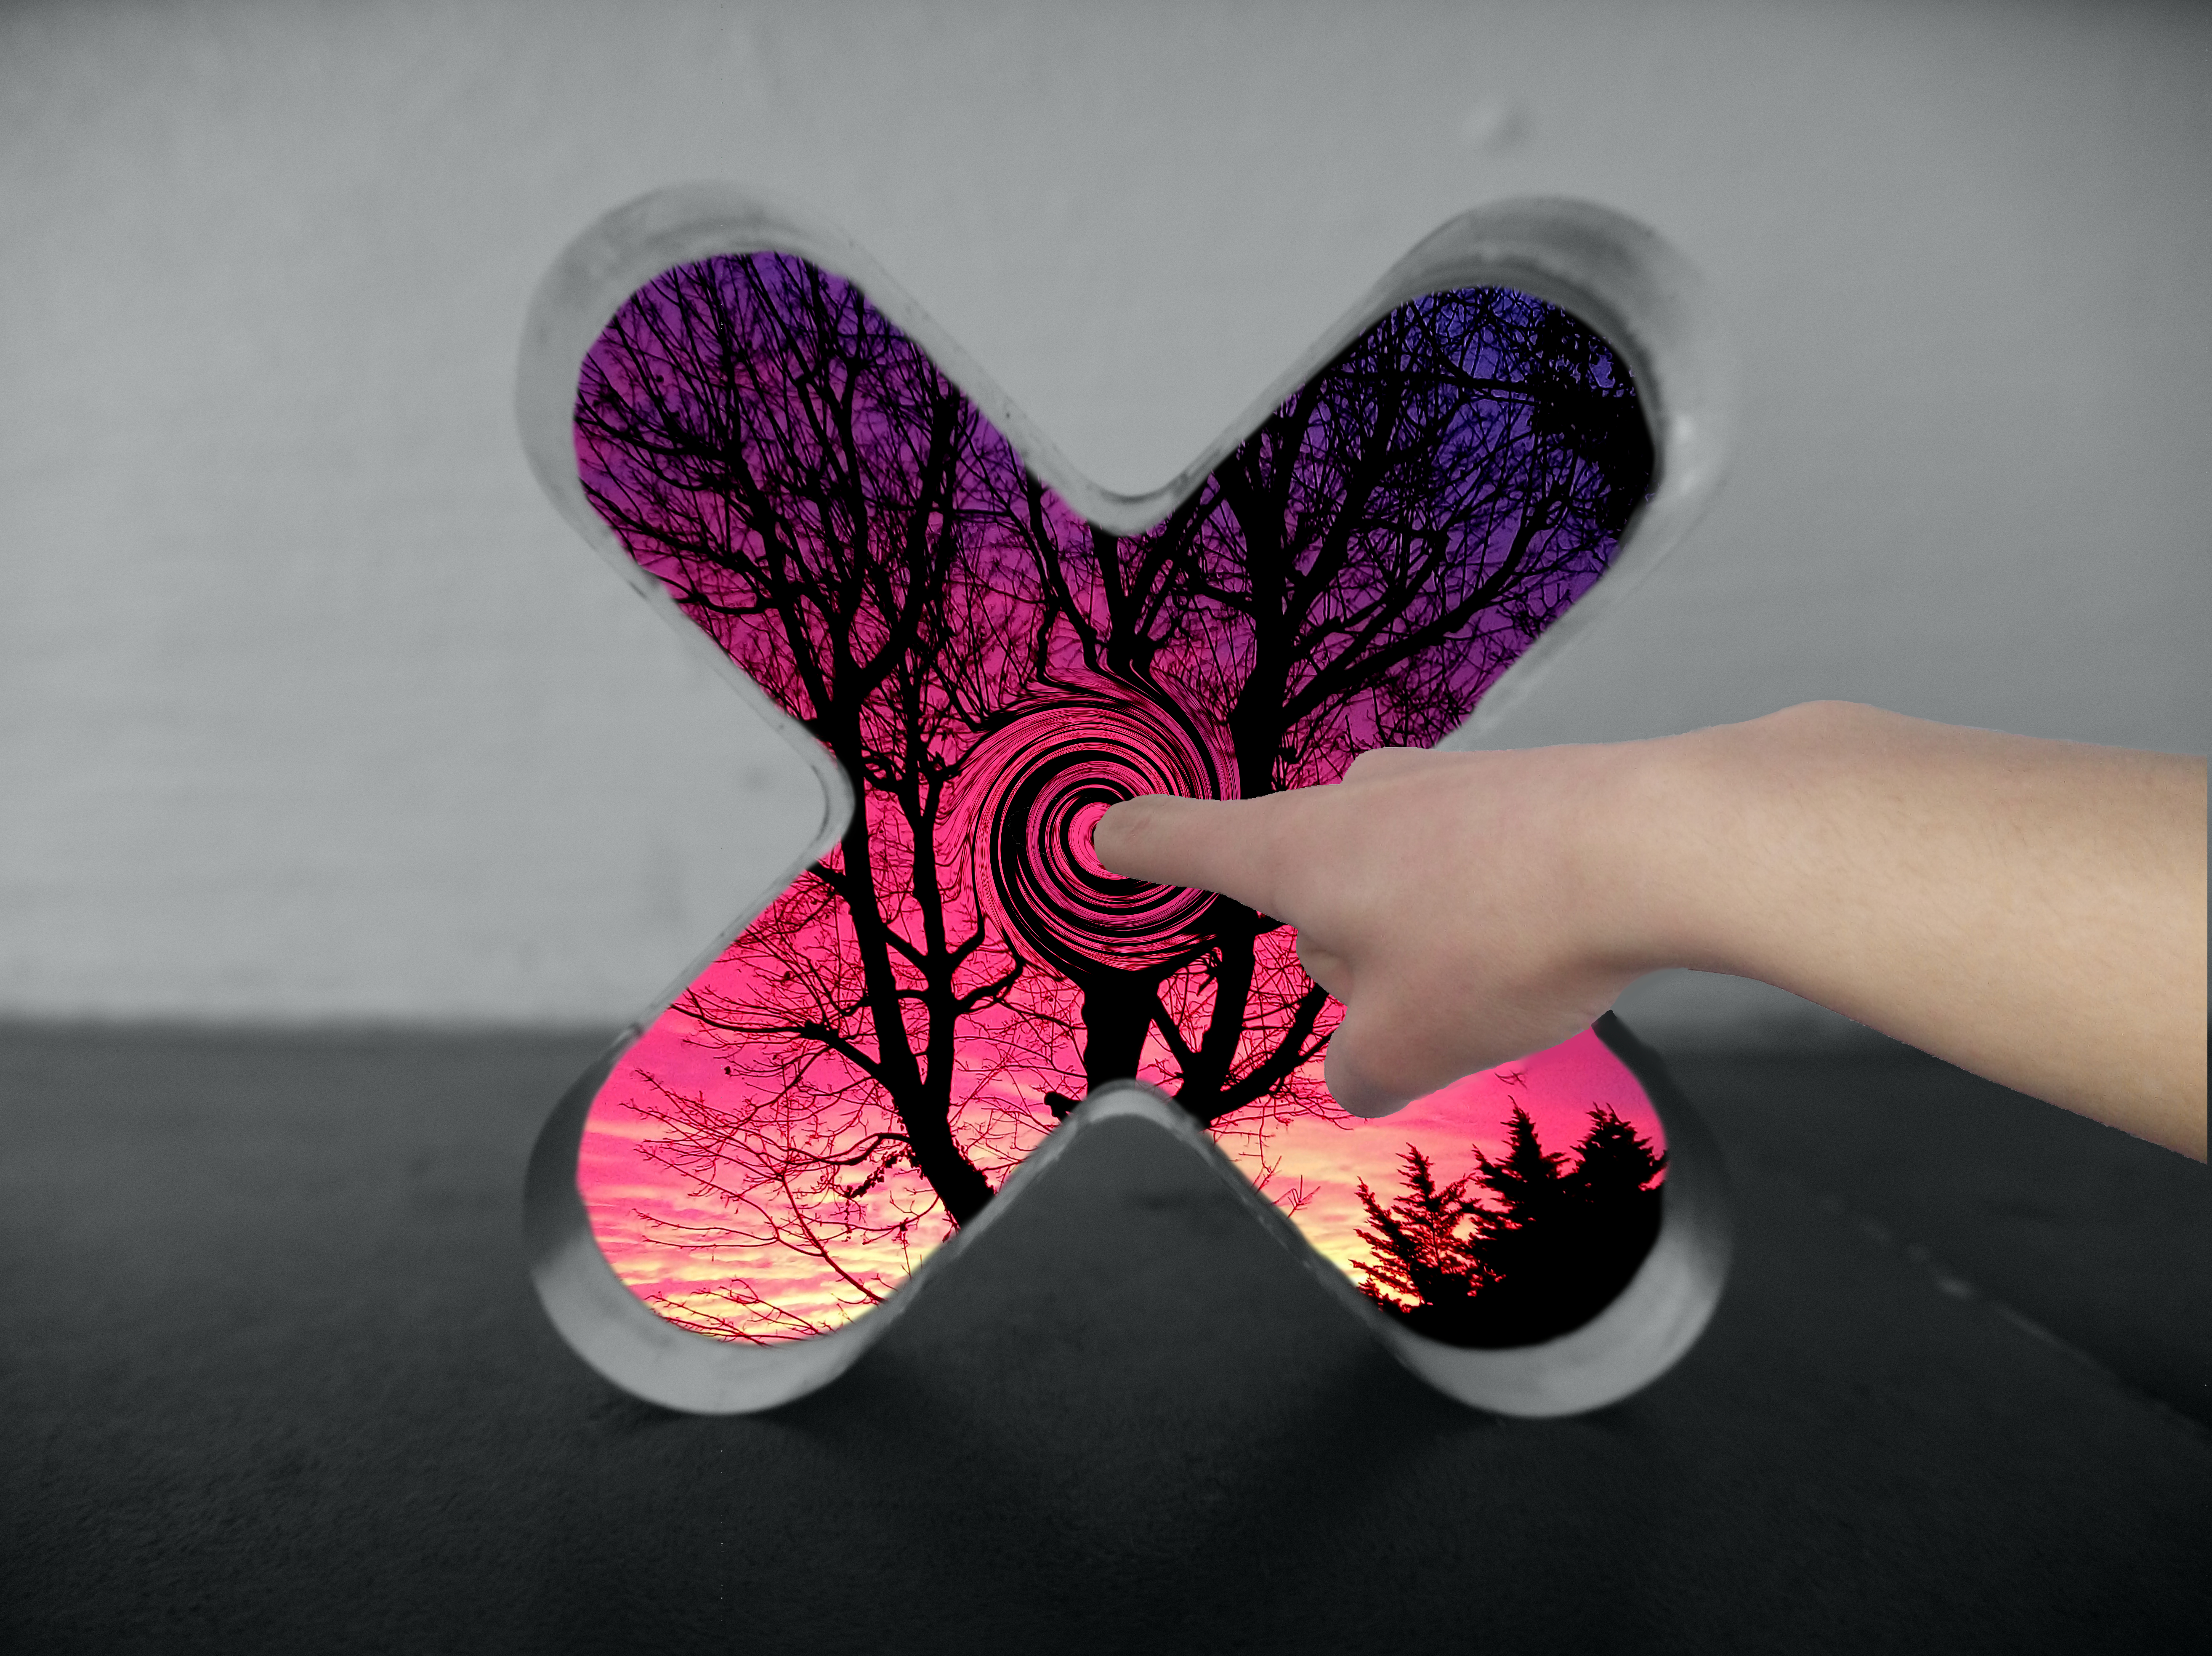
A funky piece of work that I had much fun creating. Composed of 3 images all taken by me. Thoughts and feedback much appreciated!
-
 Hi. I bought Affinity Photo to make CMYK book covers for printing presses. They need me to provide a PDF complete with crop marks (and spine marks). They need these crop marks to reach the edge of the document like this: But when I export my file (whether I choose to "include bleed" or not) It always inserts extra whitespace between the image and the crop marks like this (where the yellow is the book cover's color): But I know that it's possible to get the lines flush with the image because I saw a video where a guy does it like this: So what am I doing wrong? I'm not using margins at all (and when I do it doesn't change anything). The bleed and trim are all incorporated within the document. I just want to export a PDF with crop marks touching the very edge! Please help! And thanks for reading. EDIT: Also, if anybody knows how to include "Spine Marks" then that would be great too!
-
 Hi, An option to extend a mask/adjustement area to the whole document area would be usefull. Another for the mask to be smarter, or asking if I want the "Dead Zone"* to be filled with white or black would be usefull too. The main problem is about the mask area: when copying an Adjustement layer or a Mask in another document of different size, when adding a mask/adjustement on a picture smaller than the artboard or page area, when working in APub Photo persona, adding a mask or adjustement layer, => the area of the mask will only encompass the picture or page/artboard size. If you need to move or resize the picture, you'll end up with white/black zones out of the mask area, and you won't be able to fill them with white/black. Problem: you can't modify those areas, but they affect the whole document. In AP, it's a pain to use tricks to correct this or to create another layer with similar properties but full area effect. In AD and APub, you can only cry and swear... * Dead Zone: the white area that appears on a mask when you resize the picture, and we can't modify (but it's affecting the document). The problem occur mainly when copying a layer from a document to another one, or when creating a new document from clipboard (in which there's a picture with different masks and adjustement layers). Here a file as example. example.afpub
-
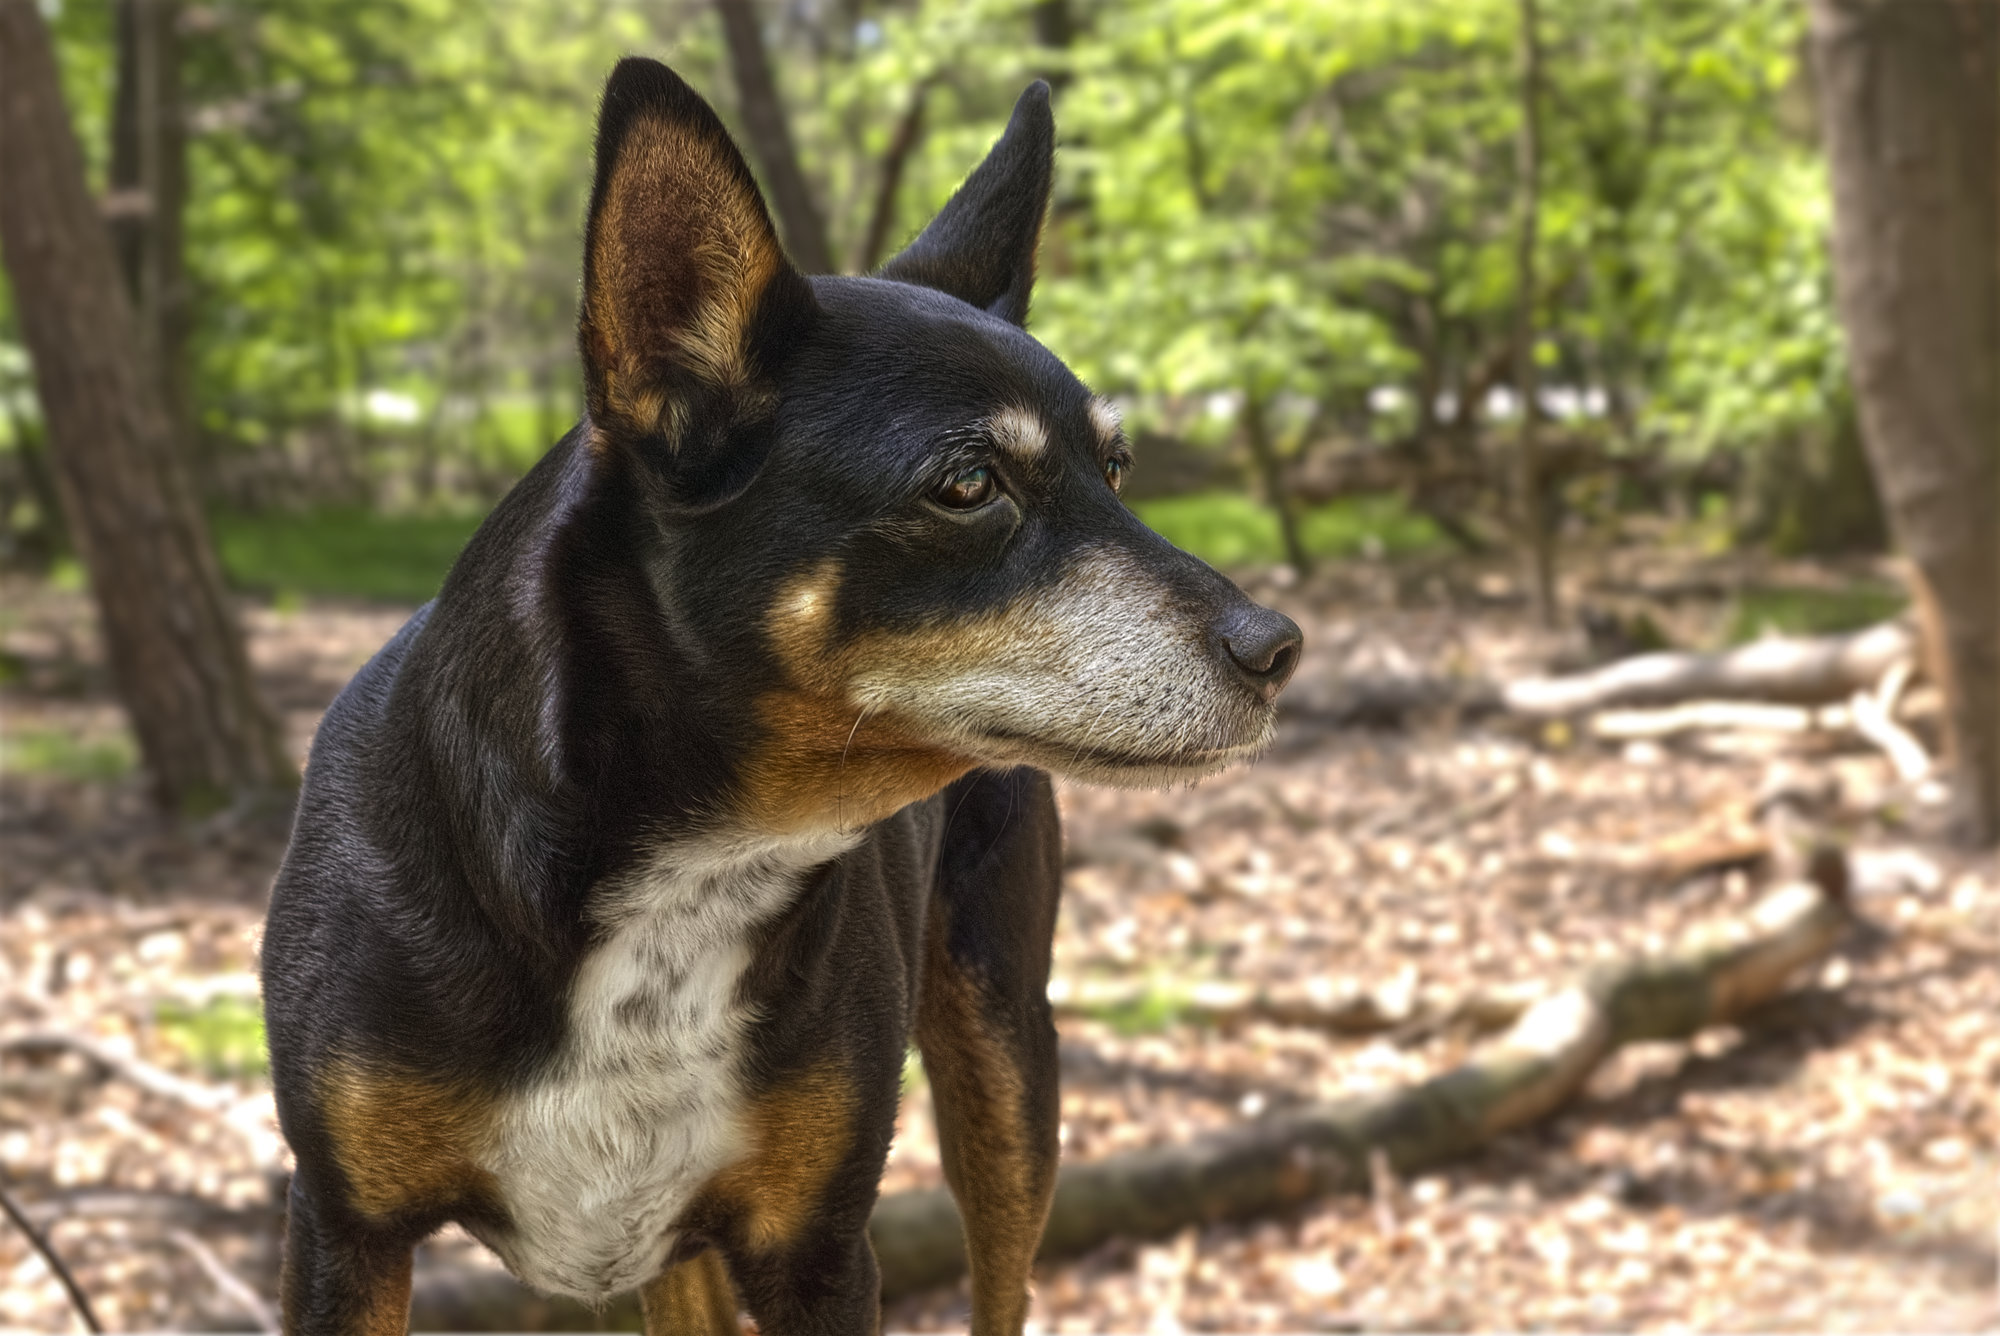
 Ratonero Valenciano, photo taken on May 13th Completely edited, developed, retouched in Affinity Photo. The background is a little more blurred and has a decemted grain. If necessary, I can show the layers as a picture or each one separately.
-
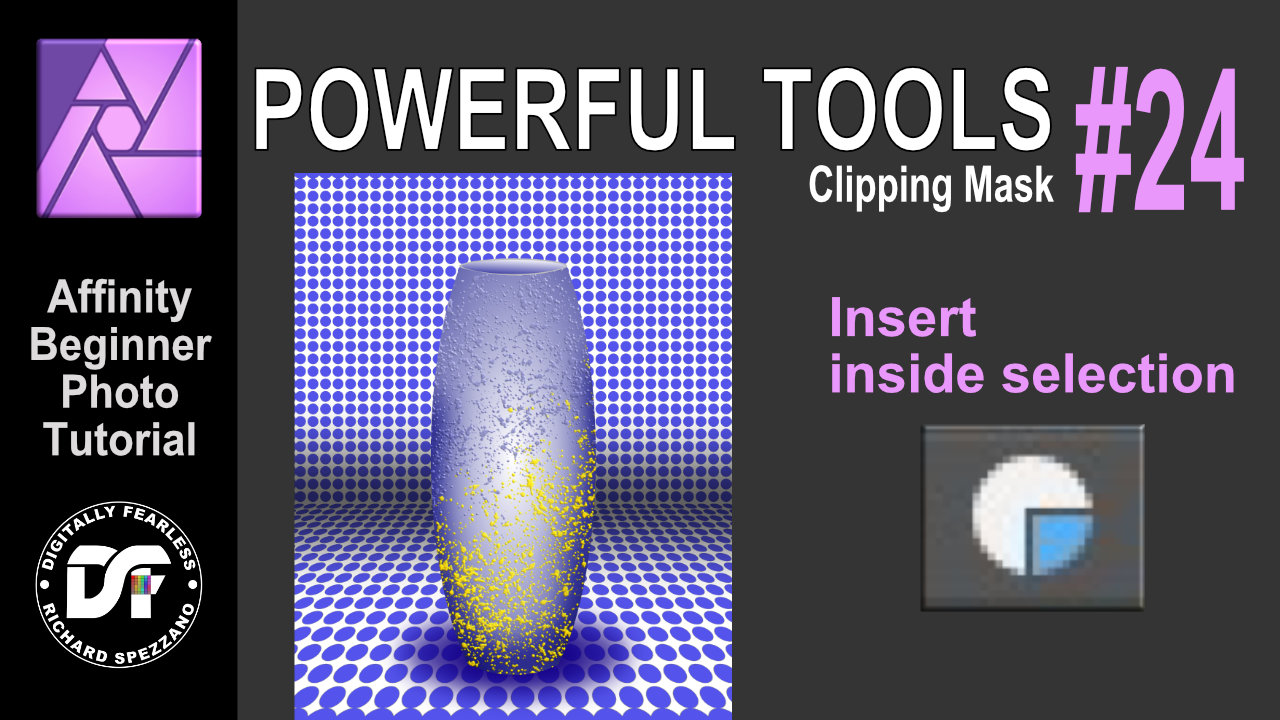
If you have trouble getting layers to clip, try using the Insert Inside Selection button. This is an Affinity Photo beginner tutorial and number 24 of the Digitally Fearless Power tools of Affinity Photo playlist. https://youtu.be/0rkizBHum50
-
 I just purchased Affinity Photo and can't figure out how to crop a layer. I have found some tutorials from a couple of years ago that walk mr through it but they want me to use the "Copy Flattened" feature under Edit, and that is not there. do I need to do something to get that feature to appear, or is there another way to crop a layer?