Search the Community
Showing results for tags 'Affinity designer'.
-
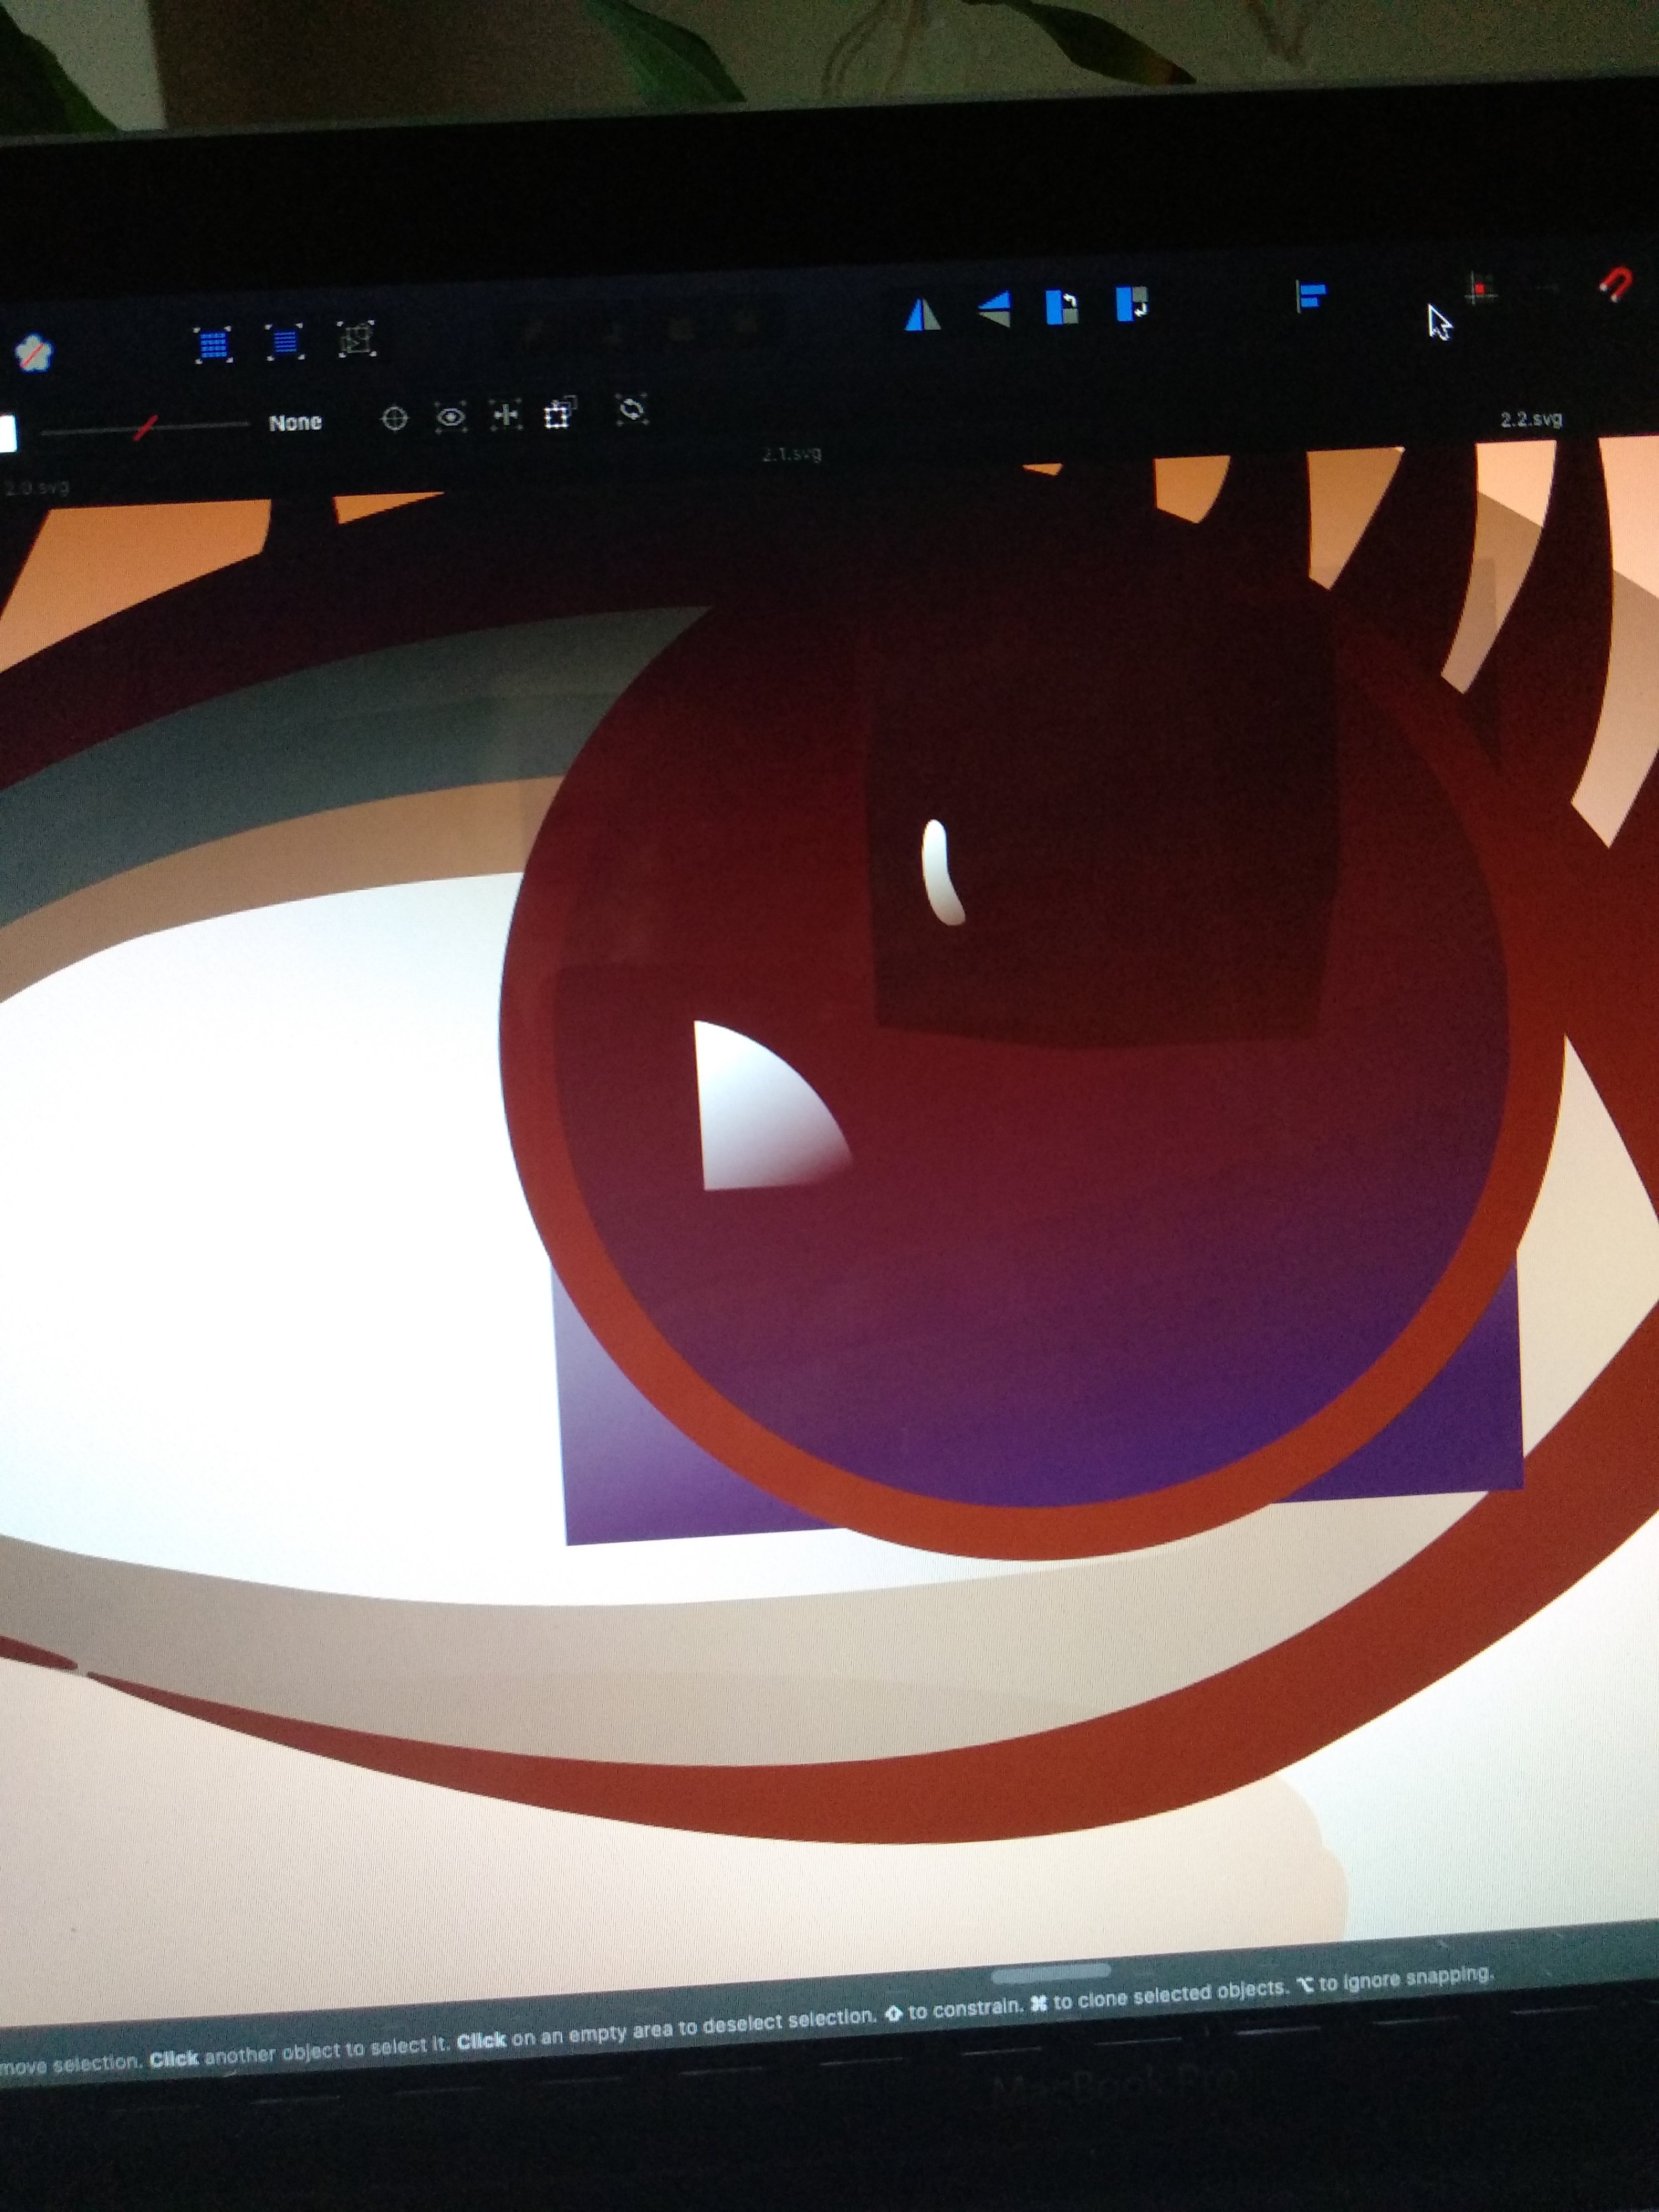
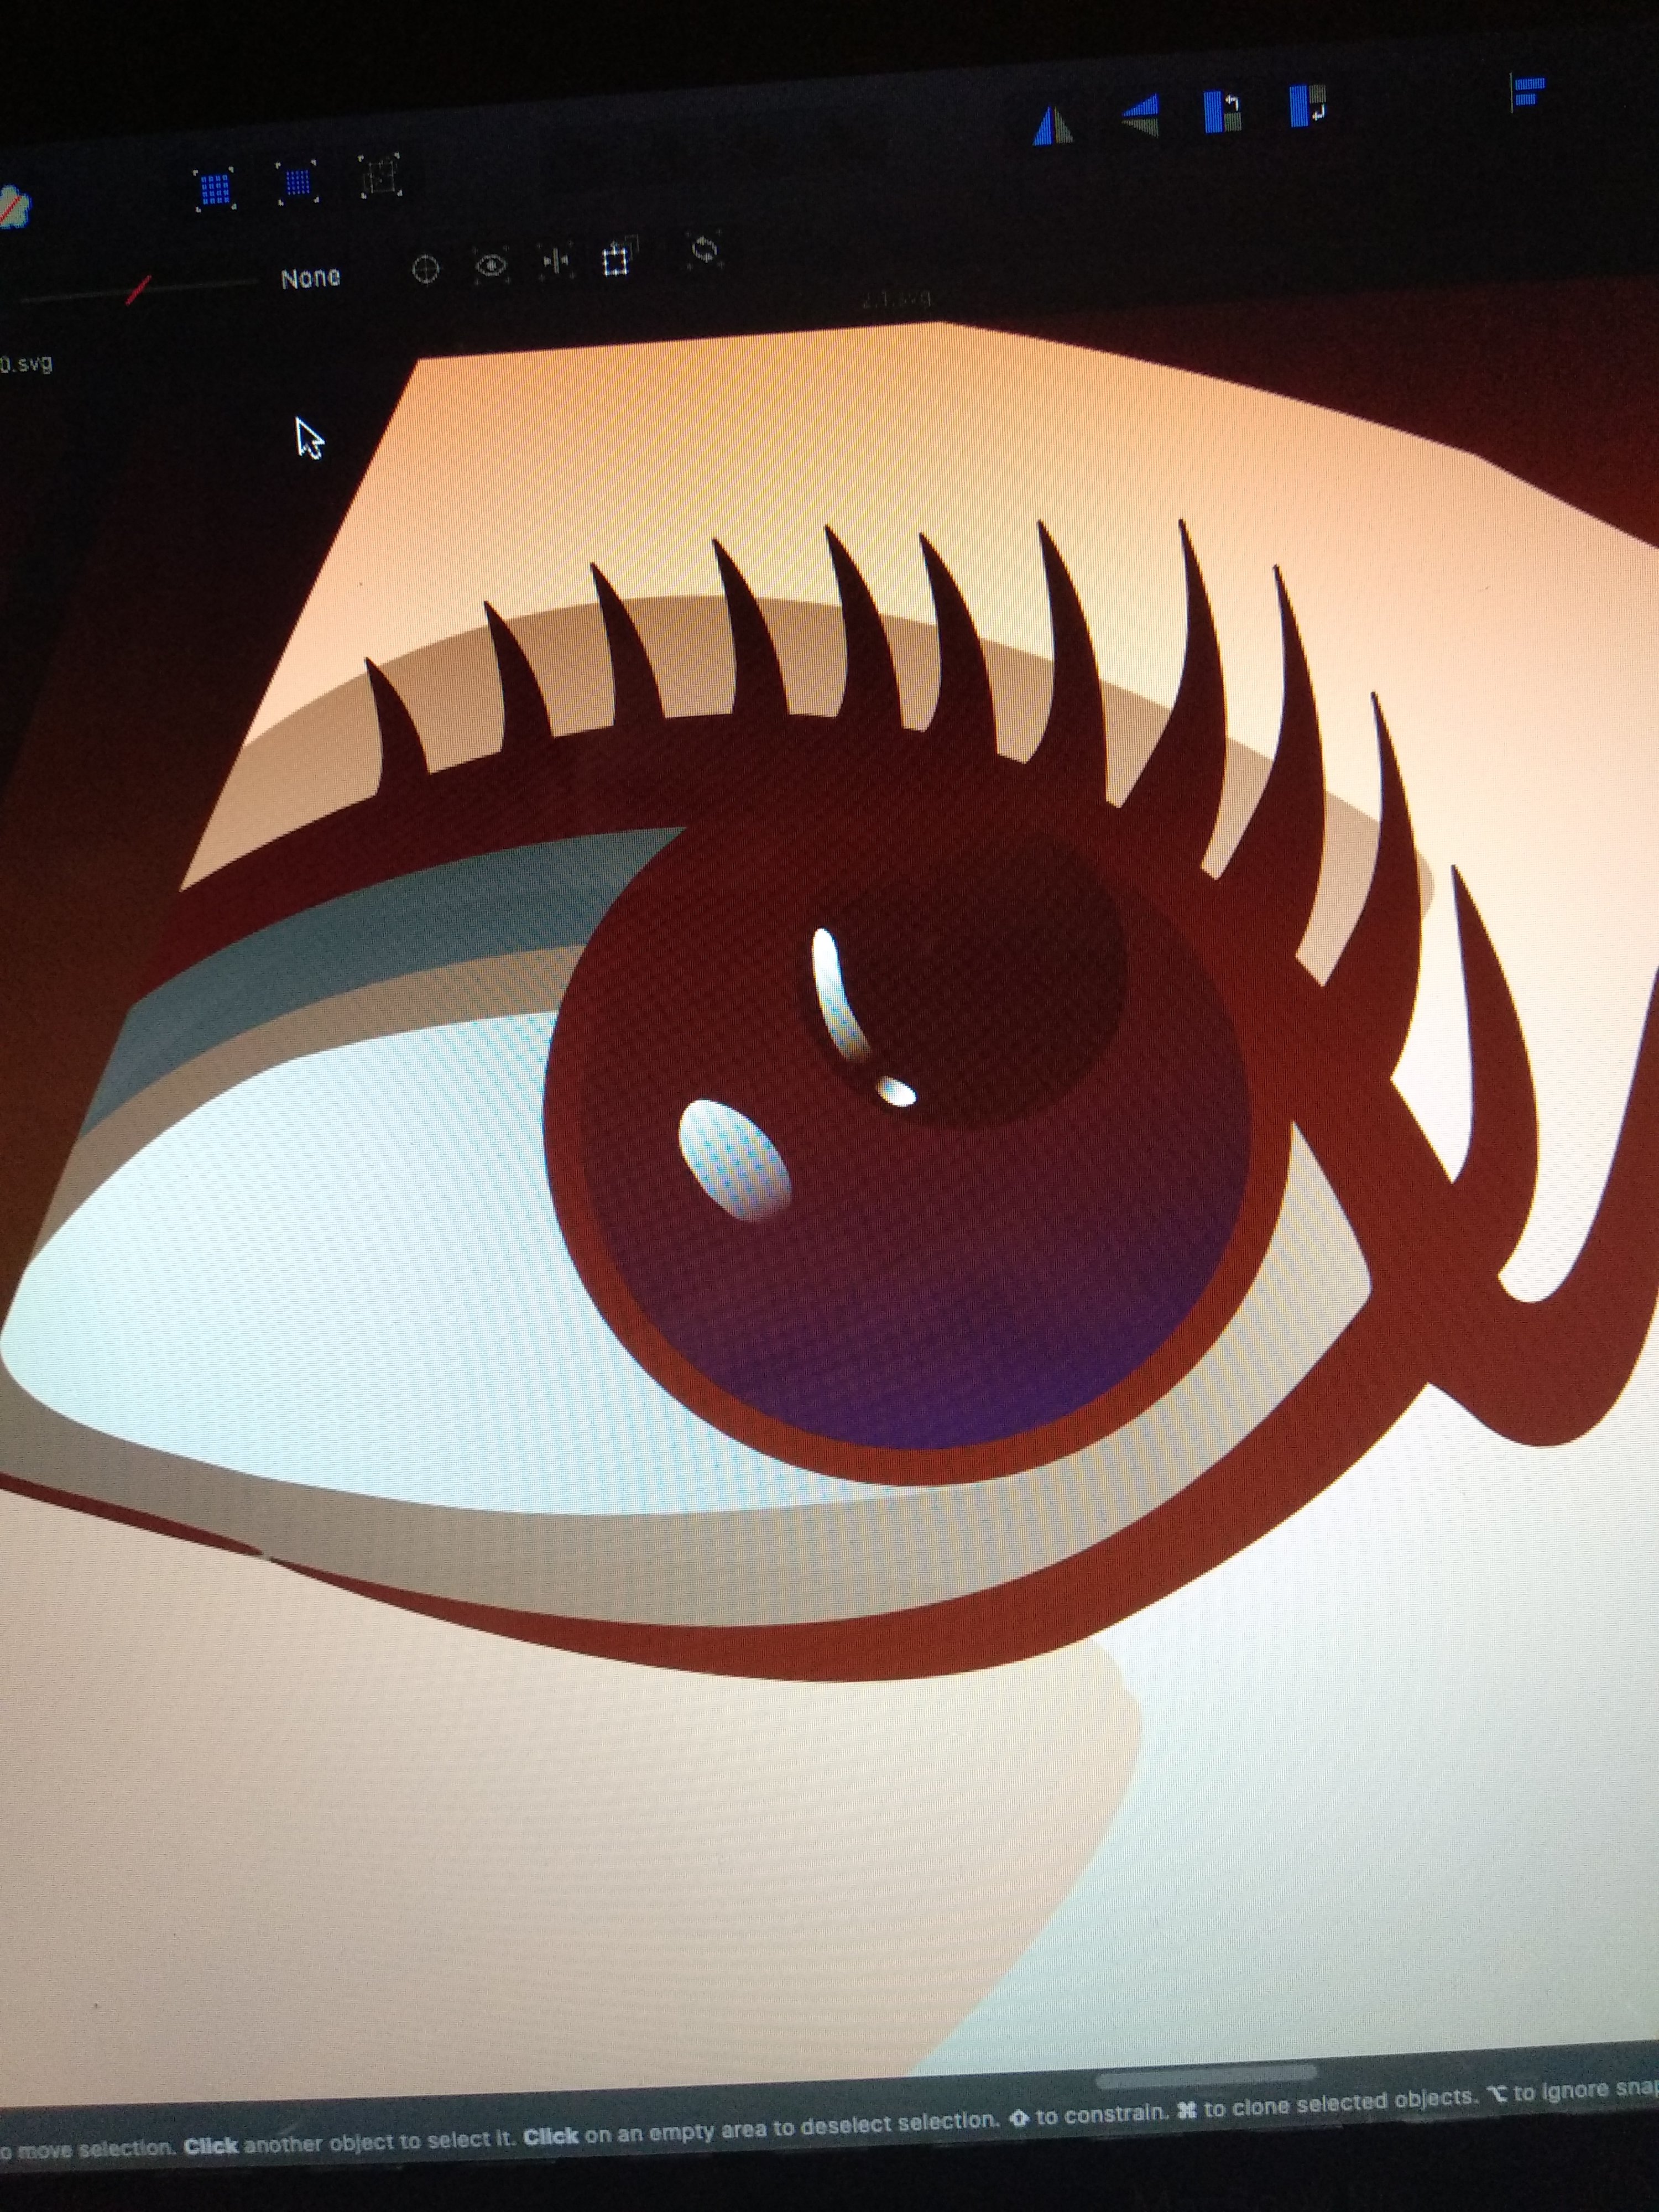
 I have a problem i did vector image and when I want export it as SVG there is a information that "some areas will be raterised 1. When I export it rasterised nothing all is good( second pic) 2. When I export it rasterised unsupported propertis happend this ( first pic) 3. When I export is as rasterised everything all is good
-
After doing Brush Factory 1 I'd like to present to you Brush Factory 2. This is a set of Textured Intensity Brushes for Affinity Designer. My aim is to create repeating patterns that distort as little as possible. I do this by using the following work arounds (which work for 1.7.3): Source file image for the pattern has an aspect ratio of 1 Patterns repeat 3 times within the source image to prevent issues with repetitions Brush offset values are set to 80 and 159,4 to ensure pixel perfect repetitions in loops and skewed lines Source of the patterns is a 240*240px image. This is a rather small image, so in wide lines, the edges of the pattern blur. I’ve created the patterns as a vector drawing, feel free to ask for a brush from a larger source (less blurry) if you need one. @StuartRc says helpful things about the size of sources. When using these brushes on a tightly curving curve or a sharp corner they of course do deform. Experiment with the brush setting for Corners and the Stroke Cap to find the best solution for your project. The attached .zip file contains a PDF with examples and 14 brushes files to import into Affinity Designer. Brush Factory 2.zip
-
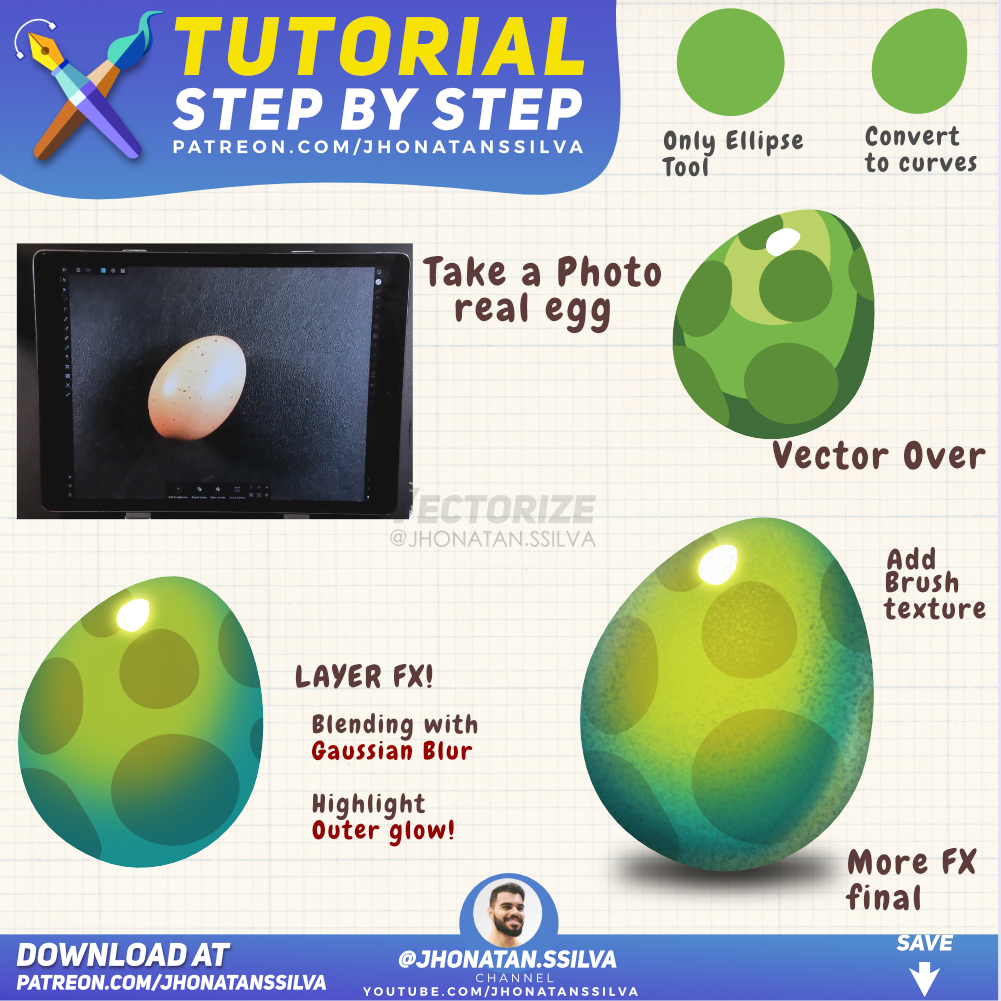
 hey there, Tutorial making an Egg Part-1! using Affinity Designer on Ipad pro cheers!
 -
Newly completed commission: Diesel & Fleur. (Fur a major challenge on this one!)
- 1 reply
-
- 2
-

-
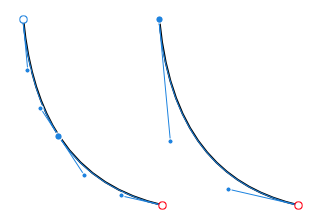
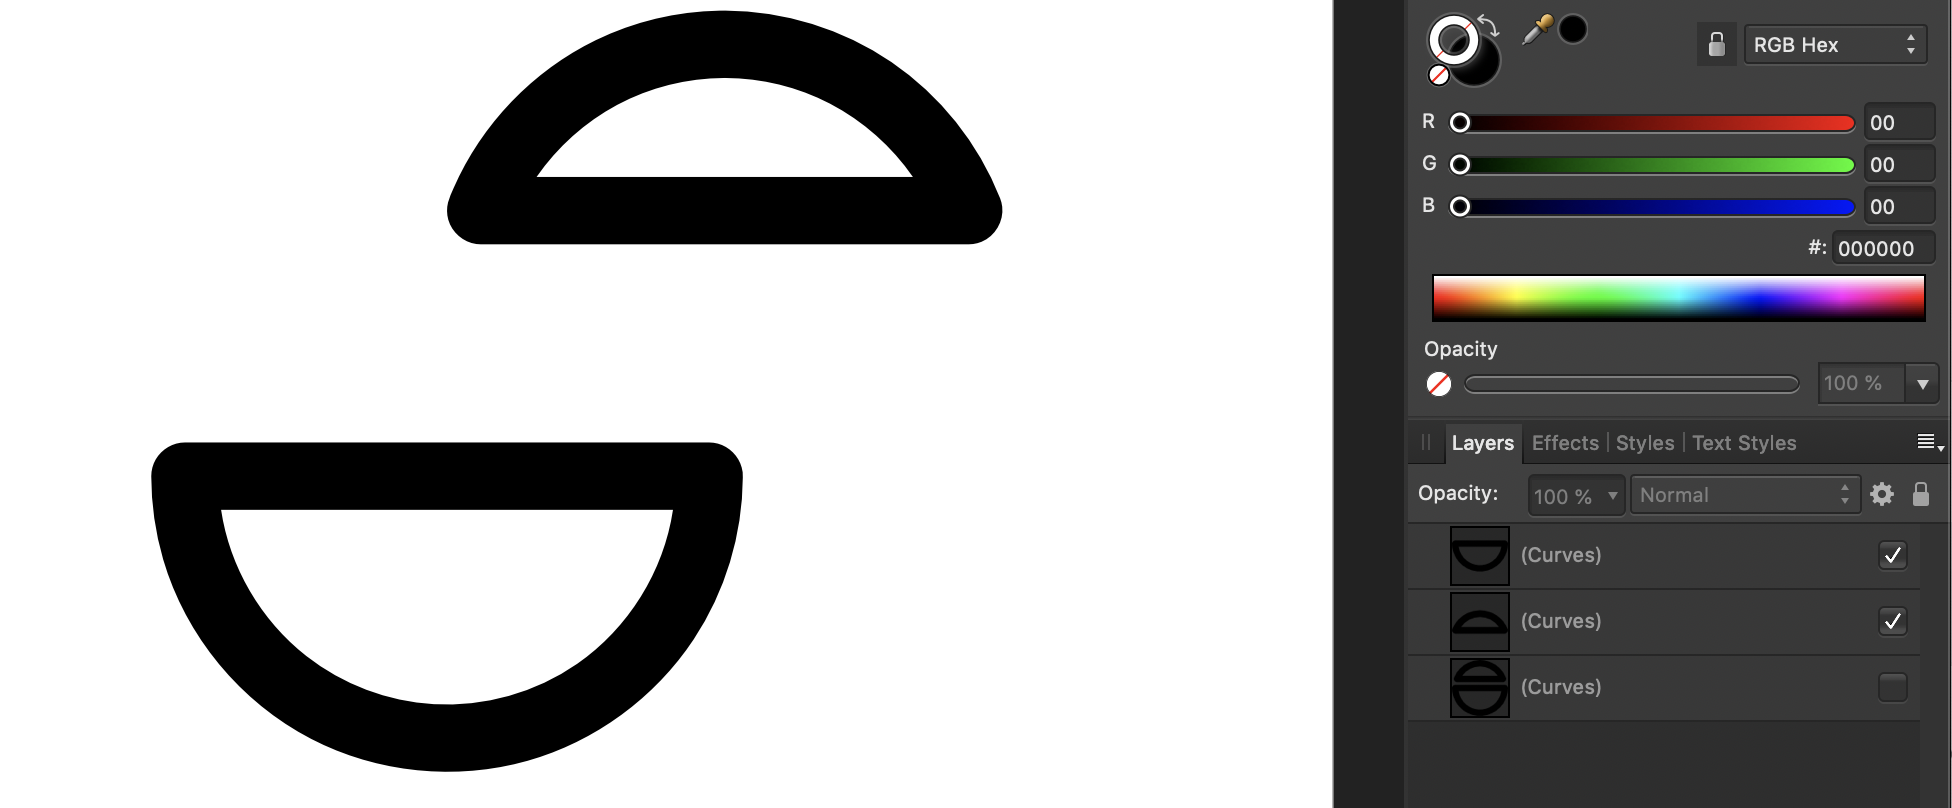
 I seem to remember that this has been possible but I can’t for the life of me remember how that was done or whether I’ve just dreamt that: is it possible to delete a node from a curve and keep the same curvature but with less points (as illustrated in the image)? If not that would be a great feature to be added.
-
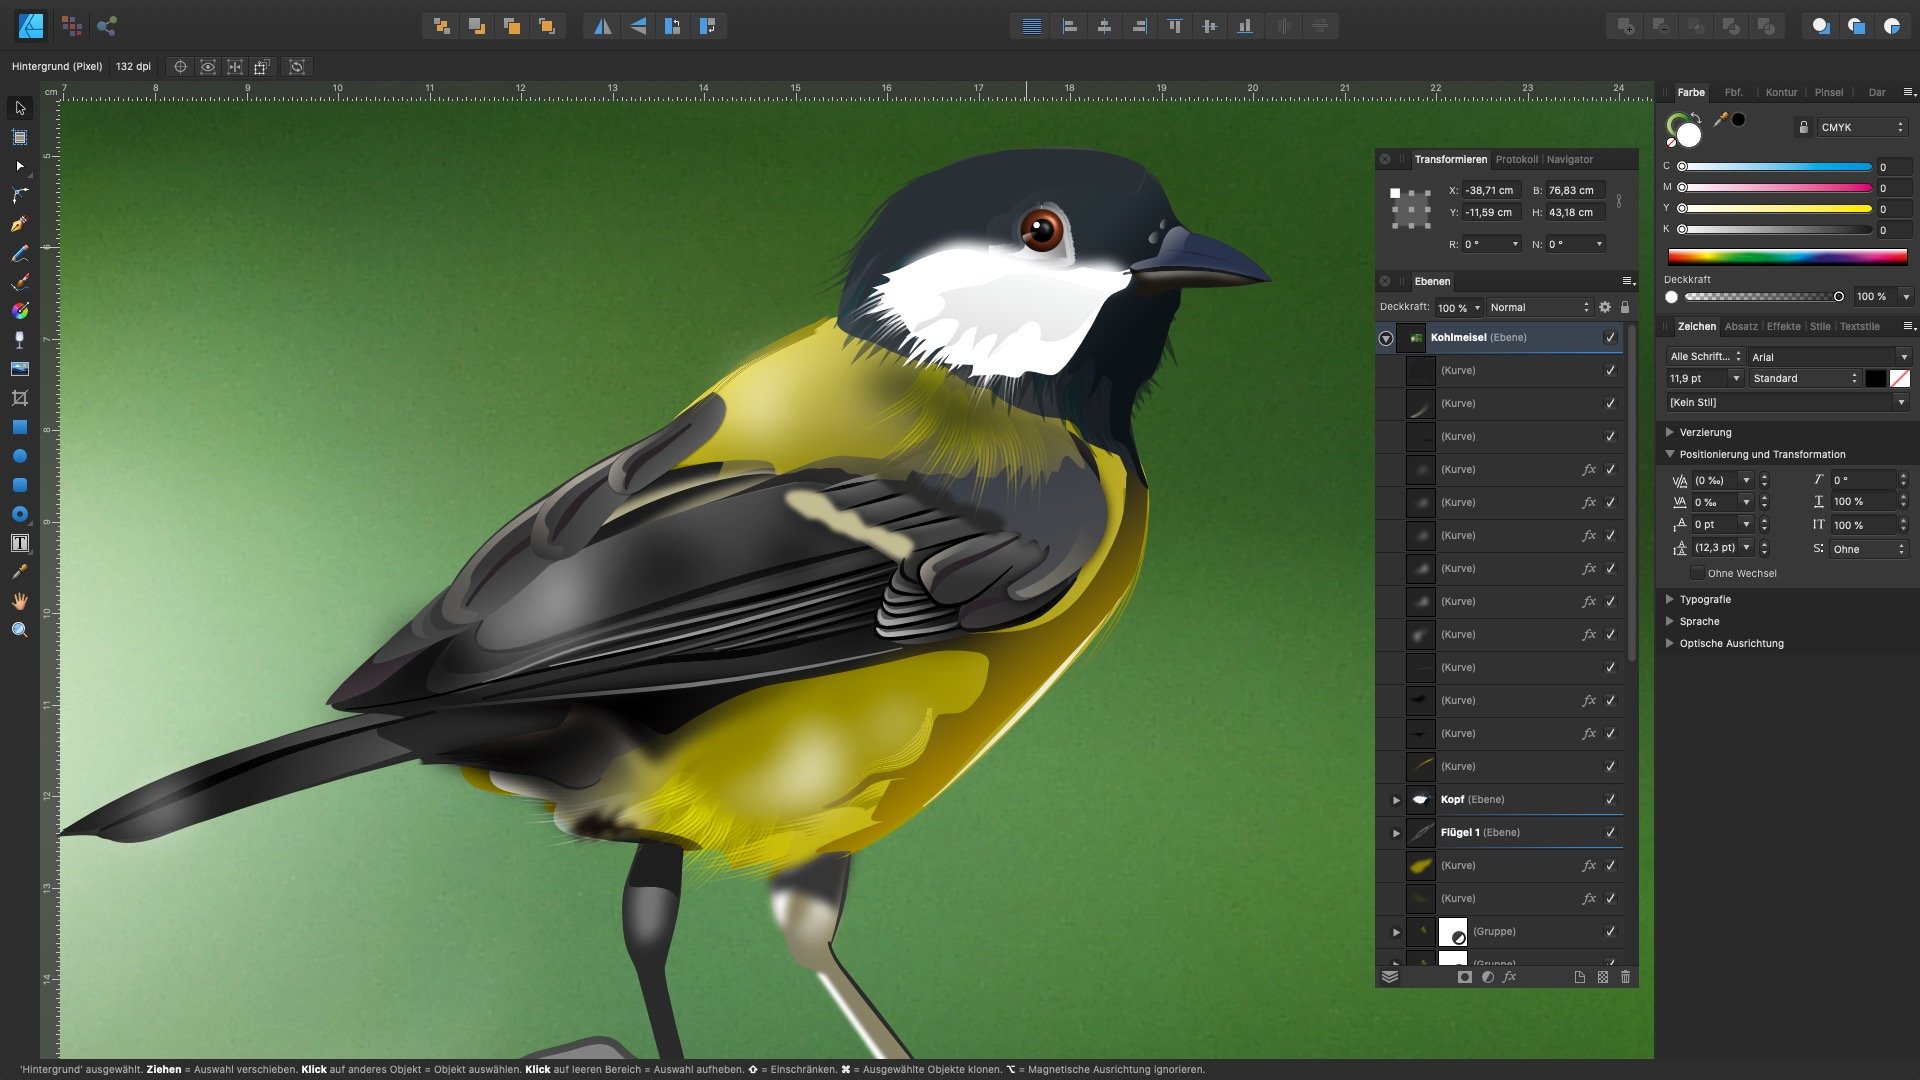
Here is a work from me: A bird (Kohlmeise) as a vector work in Affinity Designer. If you are interested, you are welcome to download the complete original file: Do Download here: Bird-Kohlmeisel.afdesign
-
Hello I am a fan of these programs but I'm have a very real issue with the lag time and slowness of features in the latest 1.7.3.4 Version of DESIGNER. The vector draw brush takes so long to render a stroke that I can't use it to draw with a time delay that long. Adjustment t to ANY and all of the performance options in the preferences tab did not help with lagging of the software. I'm running a new Surface Book so and have no trouble in other programs so this shouldn't be a hardware issue. I'm very interested in helping and believe that it is certainly worth paying for upgrades. Look forward gaining any insights. Many thanks,.
-
The EGG from my live streaming tutorial! the video link is on the tutorial section Thankss!!
-
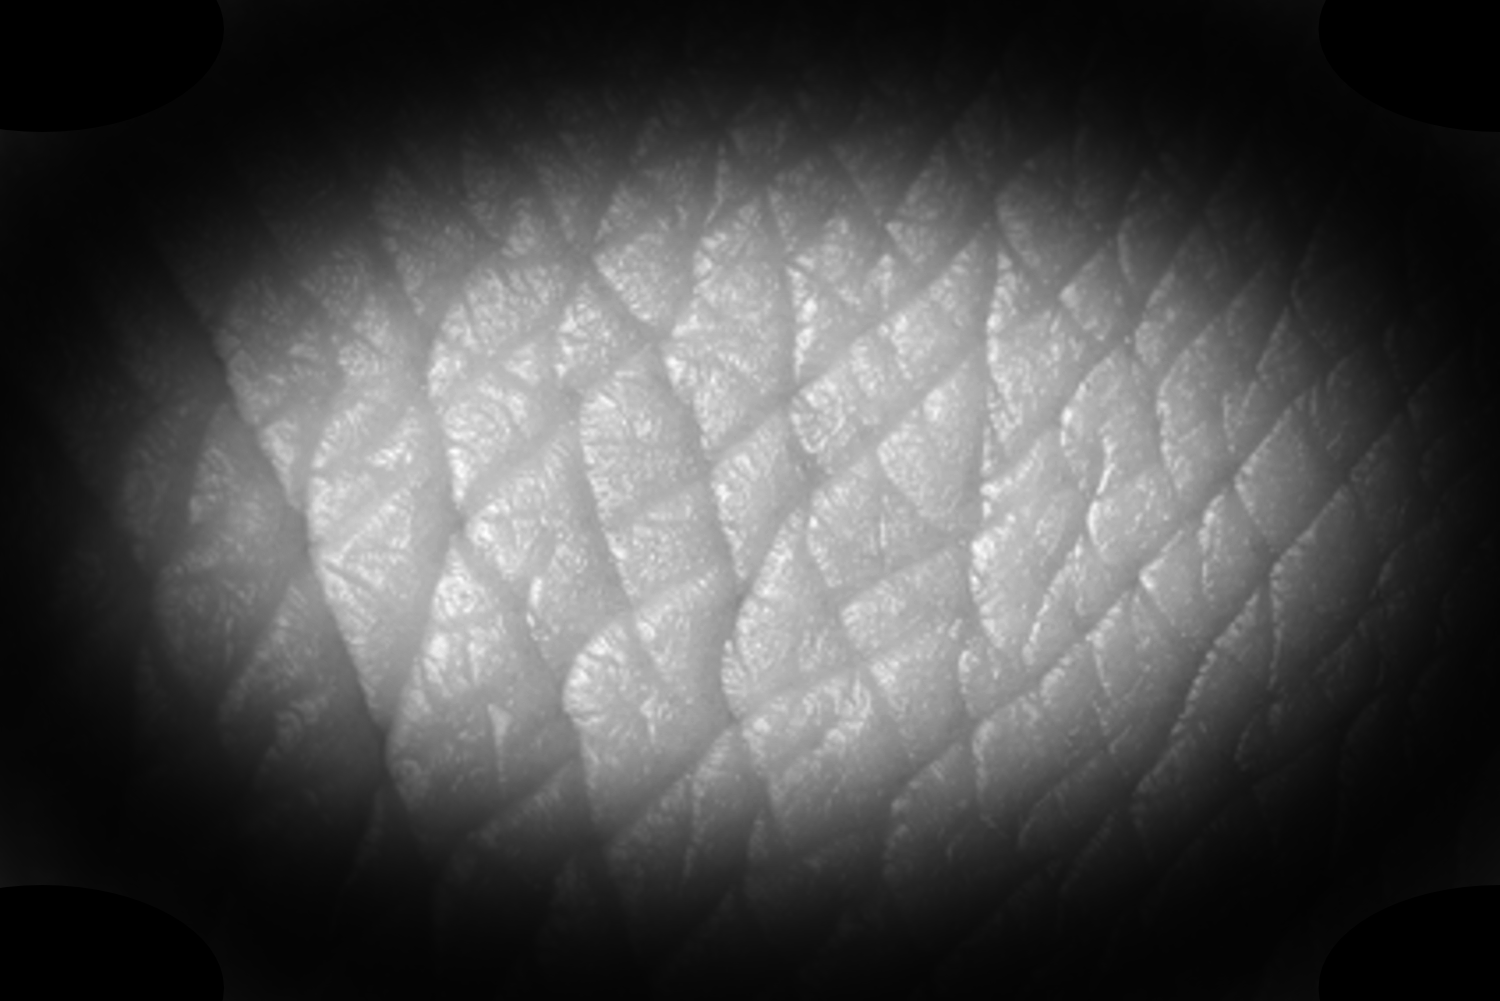
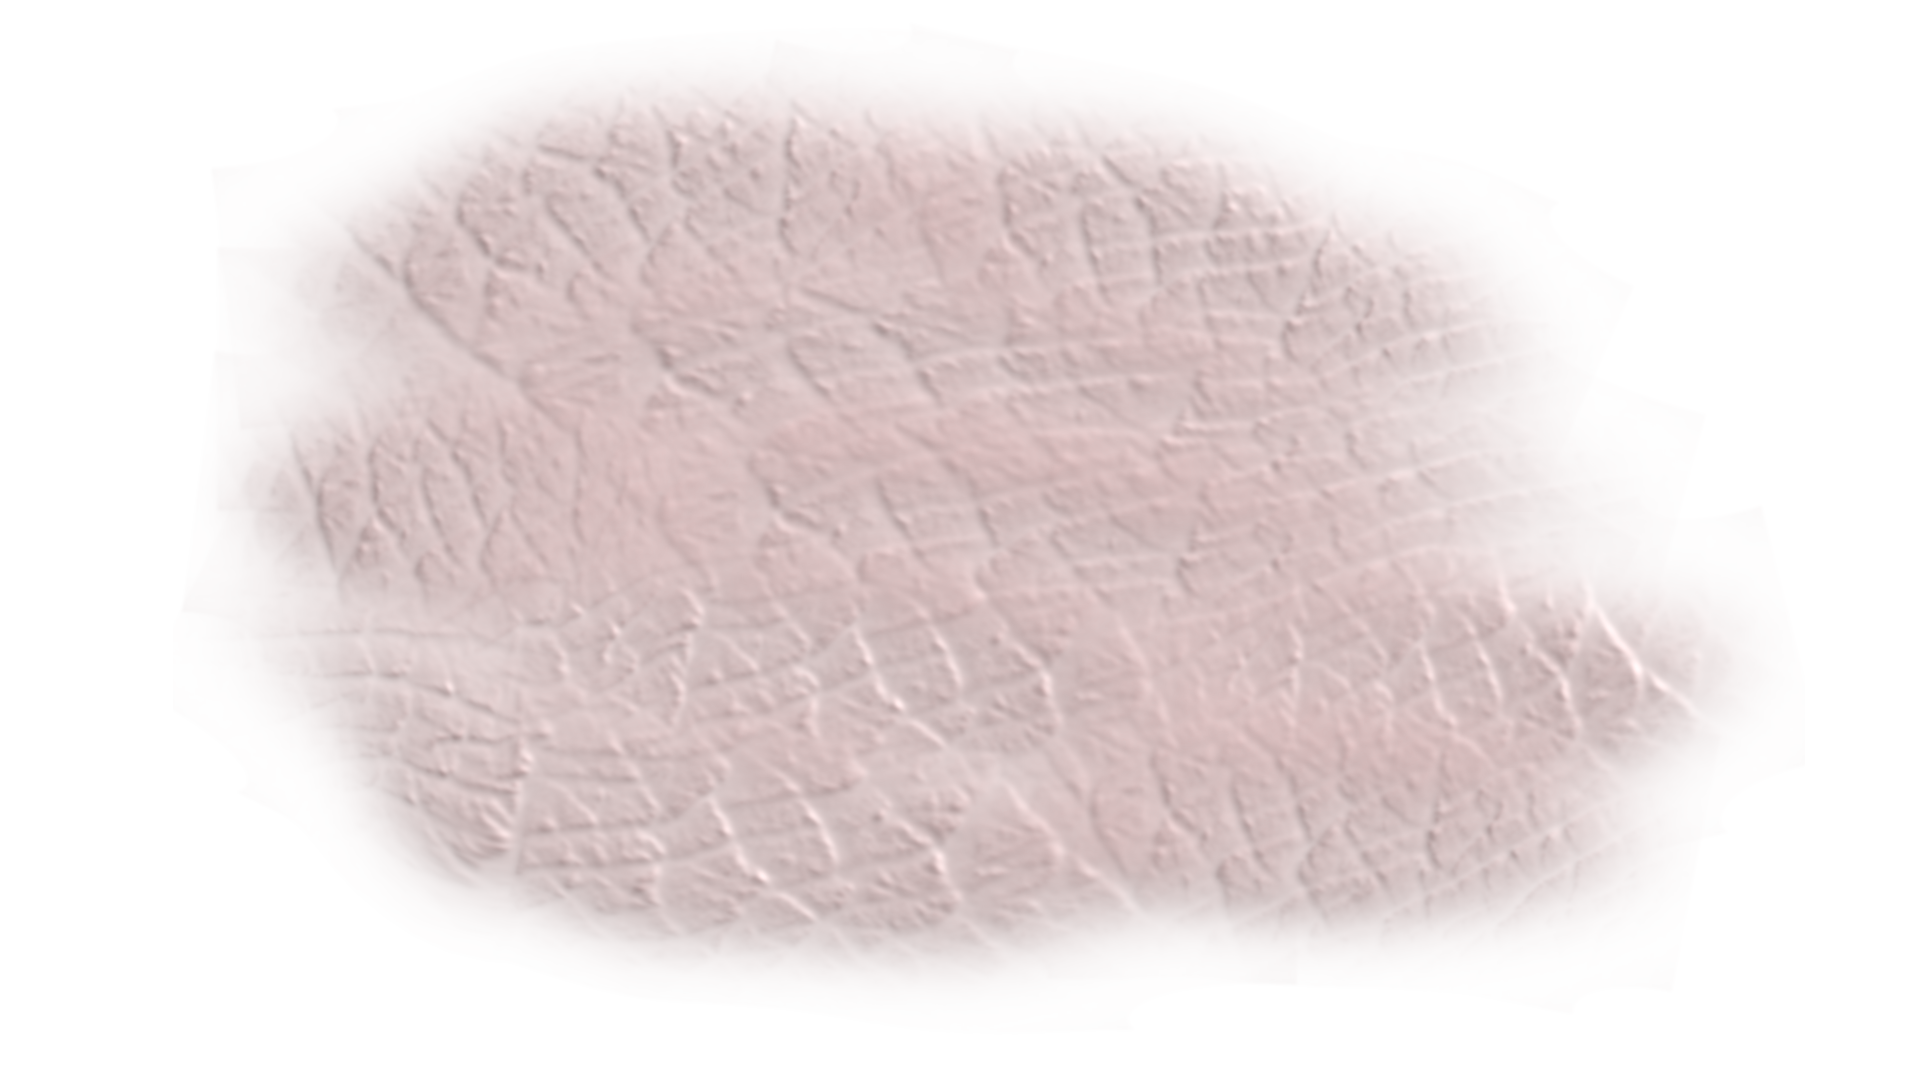
This is an attempt to create realistic vector skin texture. It is not perfect yet, but it is getting there and I am still fiddling with it. I attached all files created in both Affinity Photo and Designer that I created in the process. I am doing this because I like to be able to create realistic vector portraits like this one for example: https://communicats.blogspot.com/2018/03/vladimir-putin-vector-portrait.html. I started with a skin texture photo, then created a vignette around it to give it a black background and from Affinity Photo exported in png. Next I imported in Affinity Designer as a New Textured Intensity Brush. I saved the Photo and Designer files with history, so what I've done to reach this point is visible (they include some intermediate tinkering as well). This is the exported png from Photo. Different types of skin texture can easily be created by replacing the reference image. This is what it looks like in Designer after drawing a few lines with the vector brush. The lines are given a Passthrough filter in the Layers Panel. I grouped the lines and applied a 3D fx to them. And these are the lines drawn with the vector brush in the outline view. It would probably be easier to allow the lines to blend better if Designer would include a feather function, but I think I recall seeing that is in the future roadmap (which is one of the functions I eagerly await). If I succeed in getting better results I will post them here. TEST soft edged - Realistic pores 06.afphoto Realisti skin texture TEST.afdesign
- 3 replies
-
- 1
-
-
- affinity designer
- affinity photo
- (and 1 more)
-
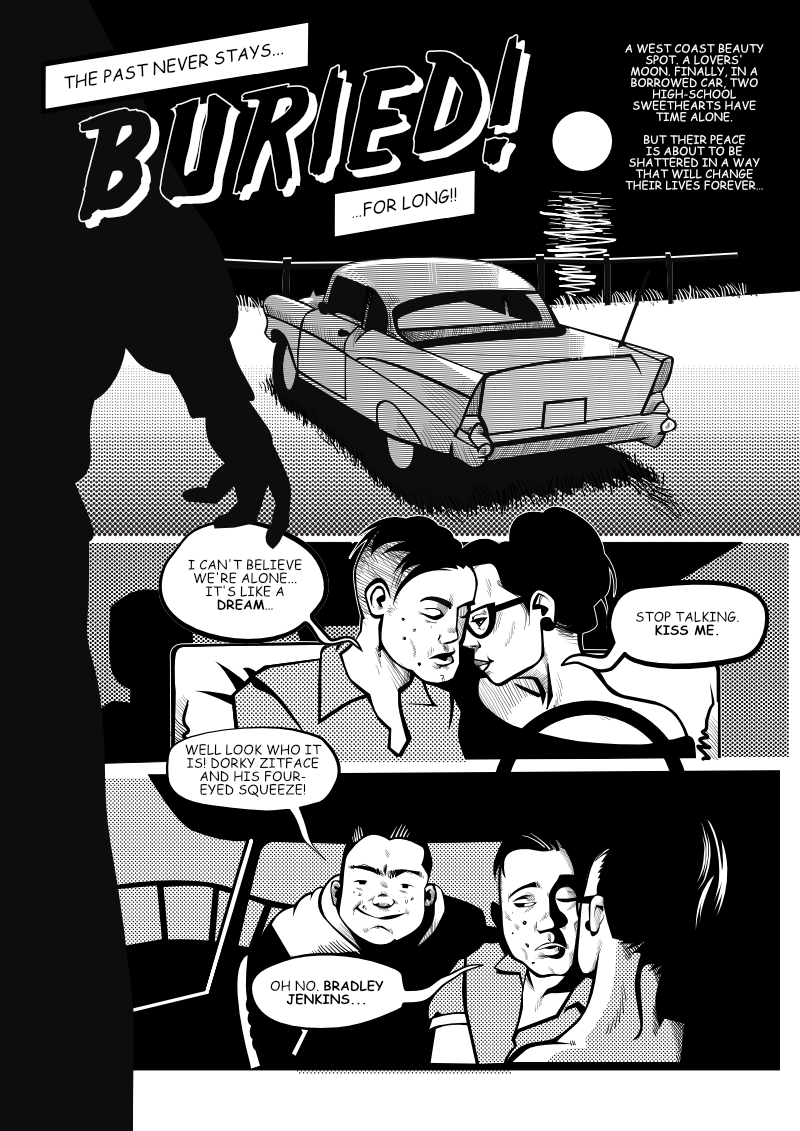
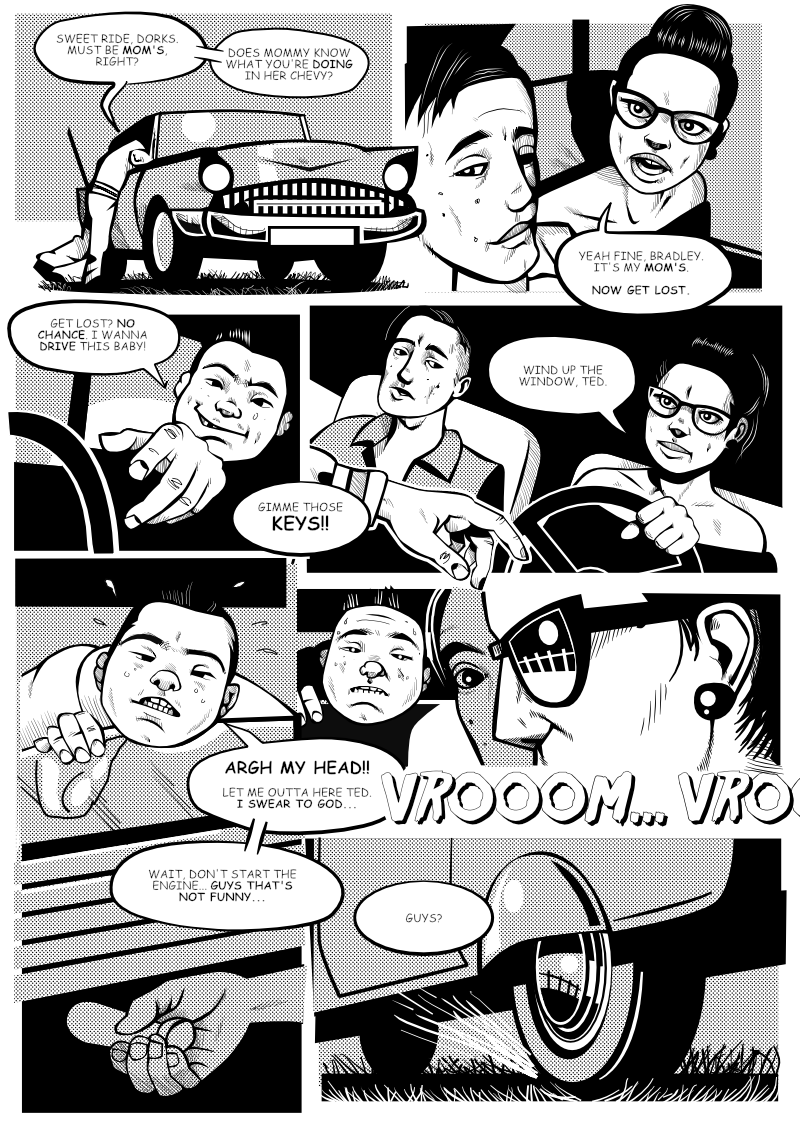
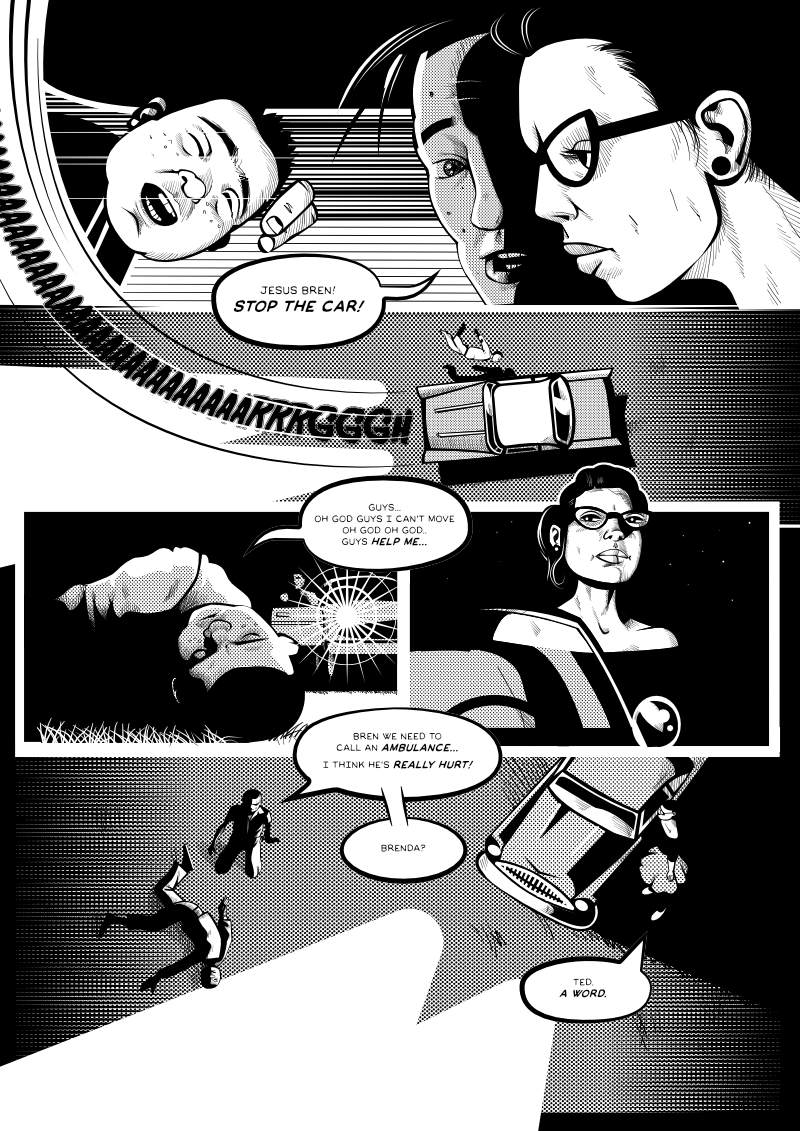
Creating my own "pre-code" horror comic... just a taster. Addendum: have added page 2. Addendendum: have added page 3. This is all for now, cos I'm back on an animation job for the next two weeks :( Another addendendendum: have been animating for the man for three months and have finally got back onto this. Page 4 added! I have missed working with Affinity. How's that iPad version coming along?
- 30 replies
-
- 18
-
-
 Hi Everyone, I'm a totally newby and watching the tutorial vids didn't helped me. I just run a first trial by drawing some kind of horizontal "8" with the pen tool and adding an extra line to it (in the added picture figure A) Now i want to colorize the separate sequences (1, 2 and 3) individually. It just won't work and ends up with the colorization like seen in Figure B. When i seperate my figure with the geometry-tools the added extra line from the biginning get closed (figure C). That's not what i want. I want the three areas 1, 2 and 3 of my figure to behave as if they were three objects. I'm totally blind or dumb or whatever - I just didn't get it. Can anyone help me? In a second step I want to try to combine the areas 2 and 3 to one single area and get rid of the intersection line (figure D) I'm still looking for some kind of merging tool. Thanks a lot Fabian
-
Hello, I hope you are doing well. This is the second time that my Affinity Designer freezes. Everytime I copy .svg files or copying other artworks into Affinity it kinda crashes and stops working for no reason. Please check the video. Thank you System-Crash.mp4
-
 Hi y'all, I created a logo composed of text that is filled in with a bitmap image (using the fill tool), and an outline. However, when I export to anything other than afdesign file type, the outline is really choppy and doesn't look smooth like in the app. If I increase the outline, spots start appearing outside of the text outline. Thoughts? TIA!!
 -
 Hi y'all, When expanding or combiningg curves or shapes, one often ends up with objects that contain multiple curves. Is there a simpler way to separate them, other than duplicating the object and deleting the unwanted nodes? Thanks, Lars
-
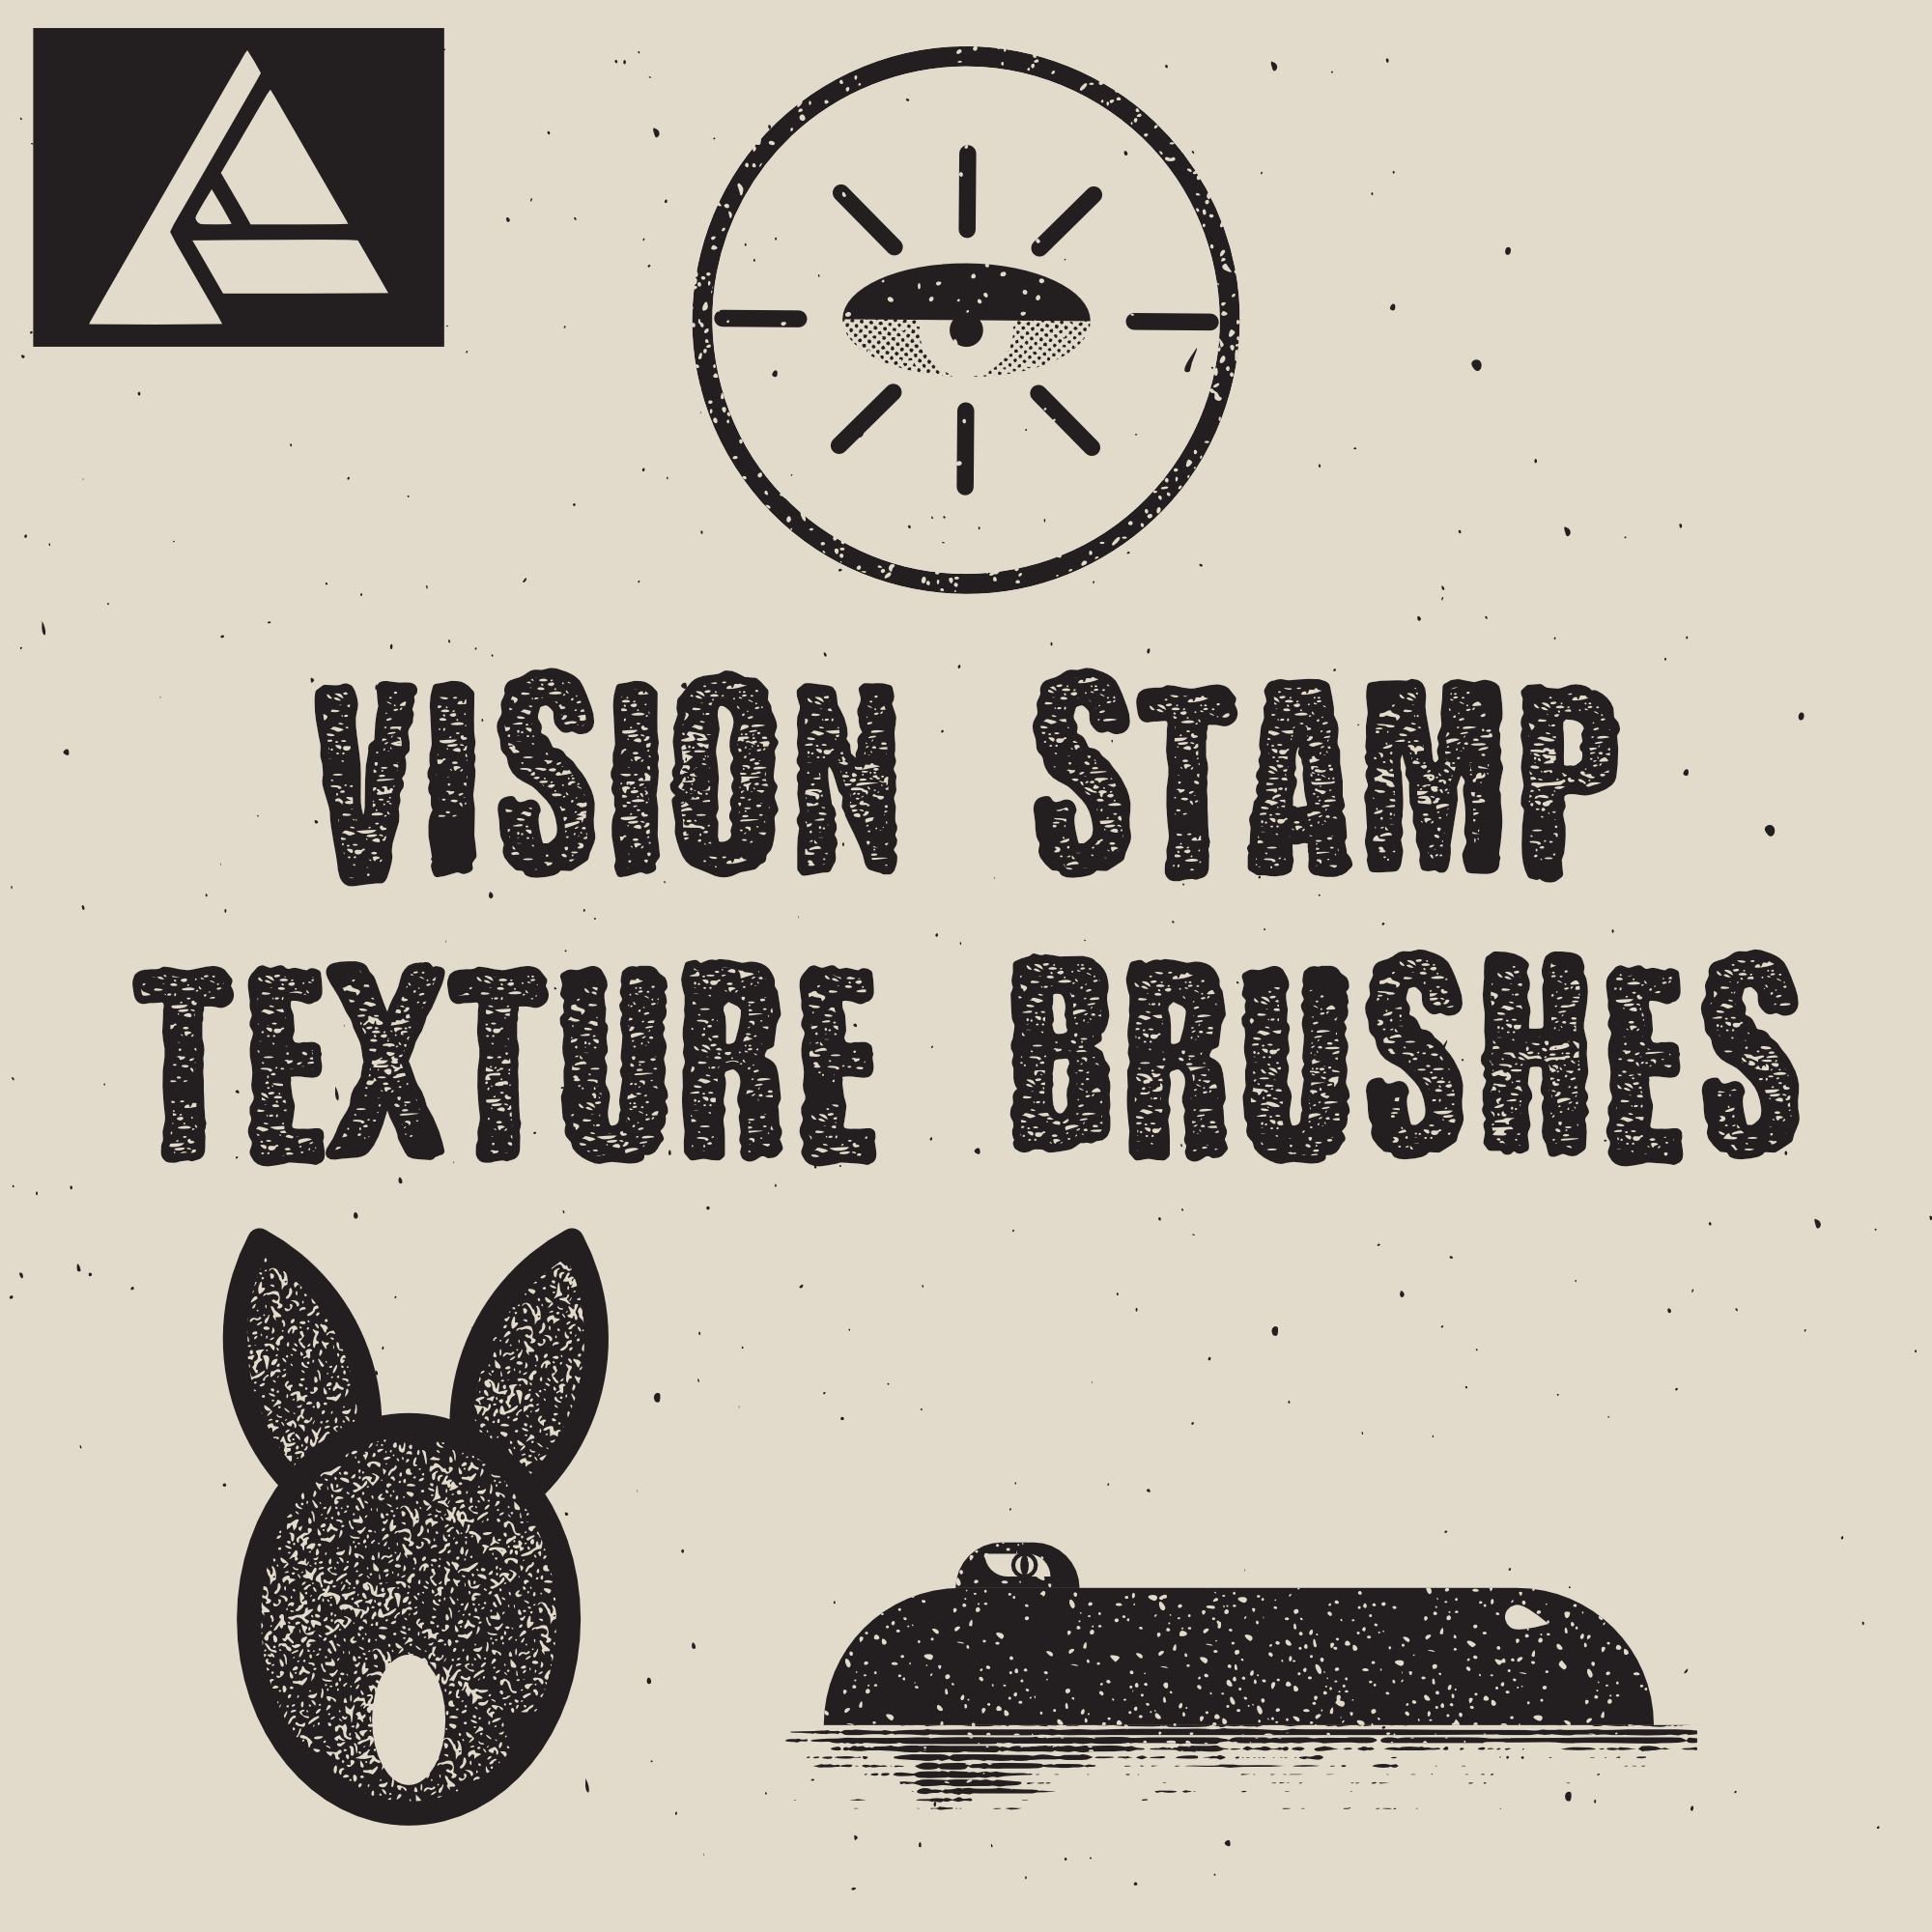
A set of 20 high-quality ink stamp textures brushes. Add hand stamped texture to your objects with just a one click or more if needed. Vision Stamp Texture Brushes I hope you like the pack.
-
As I’m coming from Adobe Fireworks I’m sometimes still struggling with muscle memory (or memory in general). In FW it is simple to draw a rectangle marquee over an image, for example, and then copy and paste this selection into a new raster object, or, to drag a marquee, switch to the transform tool, and be able to transform that selection (e. g. stretch a part of the image) right there. How would something like this be done in AD? In AD, I’ve been able to extract part of an image with the workaround of duplicating the image, using the vector crop tool and rasterizing the result. But now, if I resize the object it is adding semi-transparency to the edges; in Fireworks I was also used to being able to resize/stretch such an object while keeping hard edges. What am I missing here? Or am I thinking this from the wrong side?
-
Create new doc in A10 size on US English macOS. Fill entire document with rectangle filled with other than white. Print document to PDF (preview). PDF document size will be Letter and not A10 as there's an enormous amount of whitespace and tiny rectangle of color..
-
Hi to all, I am encountering a strange behaviour which might be a bug (or a feature? - I don't know). I have a document in designer which consist of multiple embedded pictures. One picture needed further retouching so I want to open it in Photo. The problems came when I tried to get things back to designer. I tried two different approches 1) In designer I selected the picture and clicked "Edit image" (I don't know the correct english words as I am using the German version). Then I clicked File->Edit in Affinity Photo in the menu. Photo opened up, I did my retouching and saved. A dialog appeared if I wanted to save a reduced version for the desired file format can only contain pixel data -> ok. Then I closed Photo. But the changes did not appear in Designer at all. Bad luck. So I tried a different approach: 2) In designer I selected File->"Edit in Affinity Photo" for the whole document. Photo opens up. There I select the desired picture and select Edit image. Retouching. Save. Reduced format -> ok. Everything's fine. Then I save the whole document and open it again in Designer. But there the picture looks really ugly with huge pixels (like 32 x 24 or so). When I click "edit image" I have the HQ result from Photo but when I close the editing mode, again I have those big blocks. If I try to export a pdf for example - the picture is just not present (in my case there is a coloured square - the container which holds the image in the document). I am not quite sure if this is the correct behavior. But in my opinion at least (2) should have worked properly. So it seams that there is a bug somewhere. Anyway - it would be grad to have a better way to edit an embedded image in photo, like it works in publisher. That's really cool. The workflow to edit an image and then start up the other application while the document in the original application is closed is a bit clumsy imho. Thanks so far. Jan
-
 Hi, I created a new document and set the size to 1100 x 1100 pixels (~3.5" x 3.5") and resolution to 300 DPI. I created a few layers and printed the image and it looks great, the size is correct. When I export the *.afdesign file as a PNG and go to print the image it is much larger than 3.5" x 3.5". How do I maintain the same image size and resolution when I export the afdesign to a PNG? Please advise. Thank you, lai1
 -
 What’s the best way to create this effect (in designer, publisher or photo)? The face and background of each photo have different color overlays. Thanks in advance!
-
 Hey I am using affinity designer and cant seem to get A3 landscape options ... any clues!!
 -
 This is happening because strokes within your document have a Pressure Profile applied to them. To fix this issue, go to the Stroke panel and click the Pressure input box. Now click Reset. When you next export to an EPS file the stroke will no longer be expanded.
 -
 Hi, I'm trying to create a pattern design template. I've designed some objects and added it to the "symbols" library. If I save the affinity designer document and send it to my client, can he/she be able to use my "symbols library with sync enabled" in that document? Or He has to change each and every same objects in that pattern. Please check my attached template file. If you could open this document with the "symbols" library sync enabled, please share me the screenshot. Thank You mypattern_template.afdesign
 -
Hello folks, here is a vector portrait of David Bowie, created with Affinity Designer. Would appreciate feedback, that would be great. https://www.bodobe.de/bowie-vector-portrait/