Search the Community
Showing results for tags 'Affinity designer'.
-
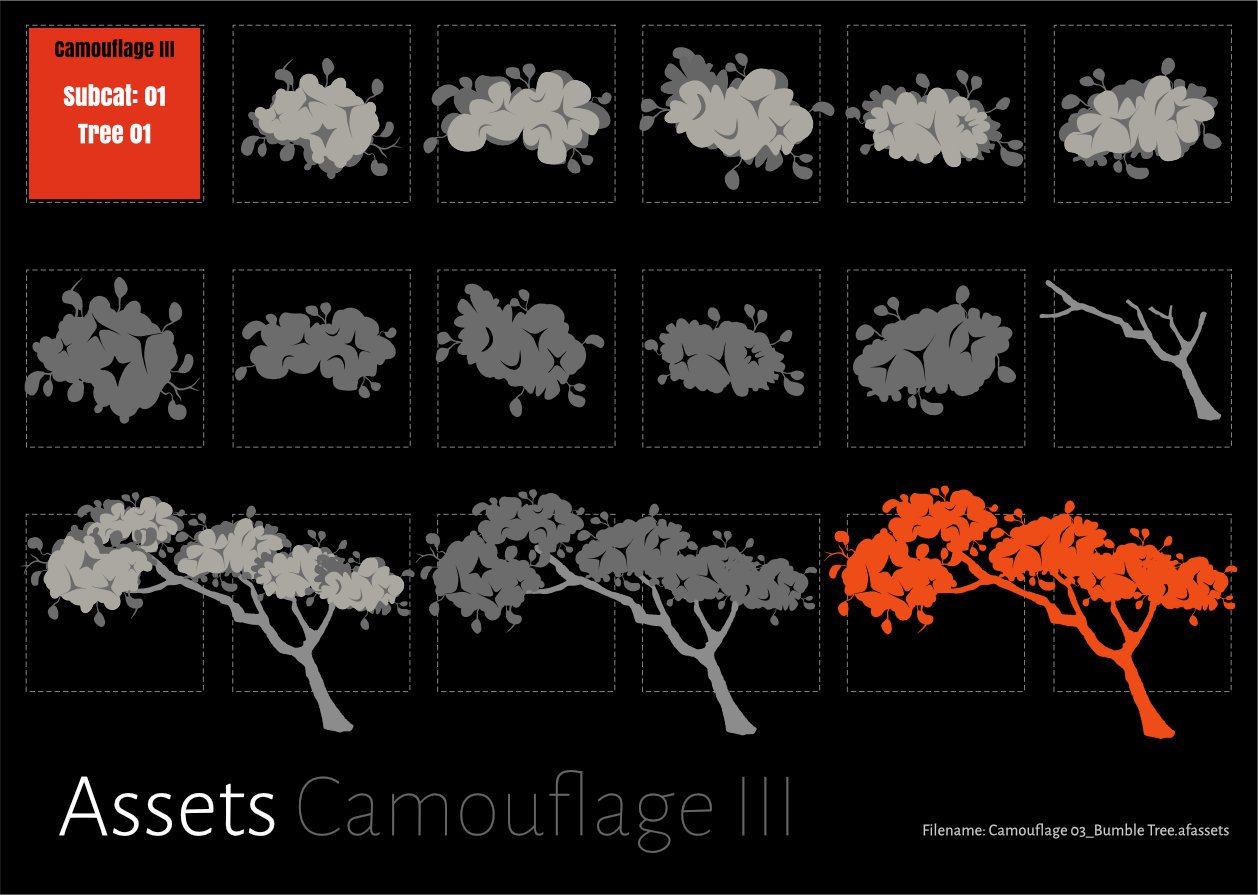
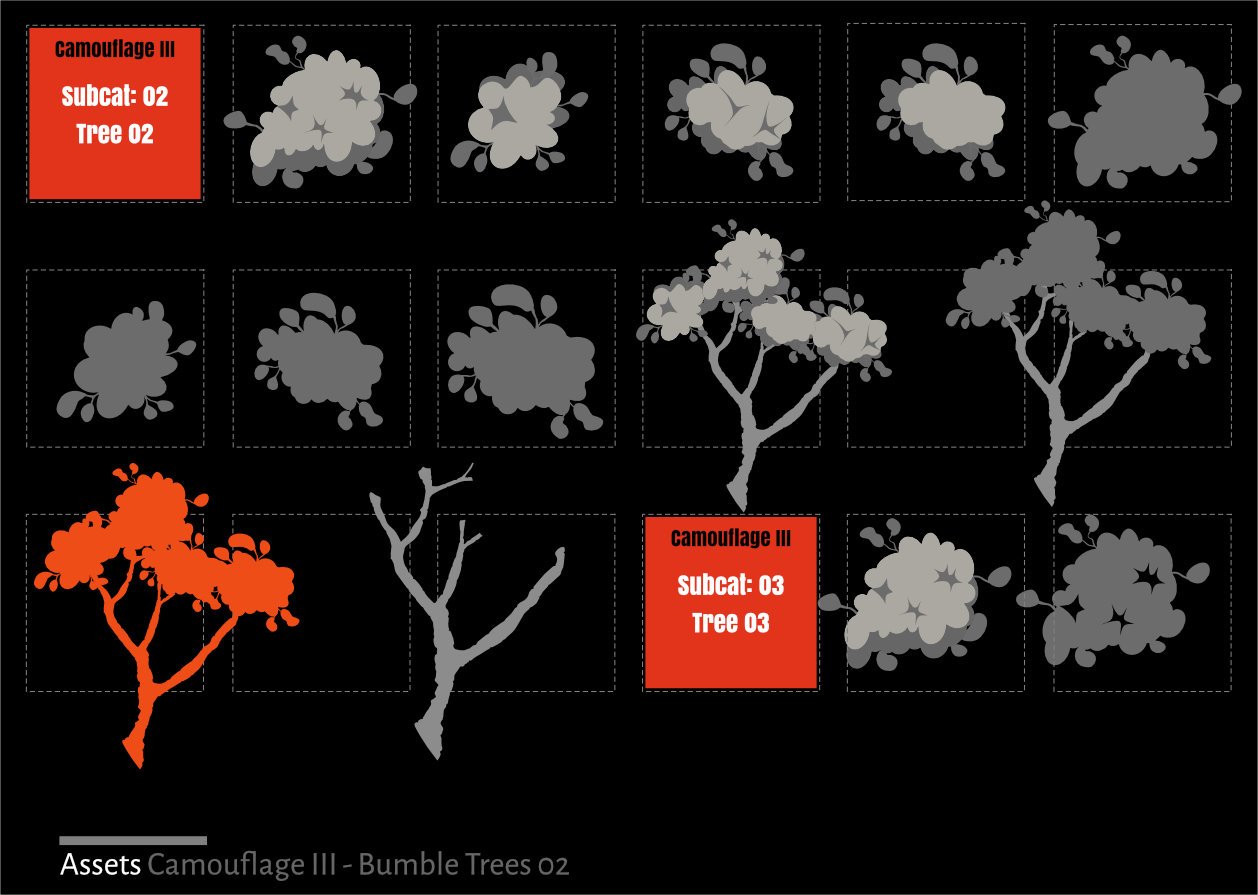
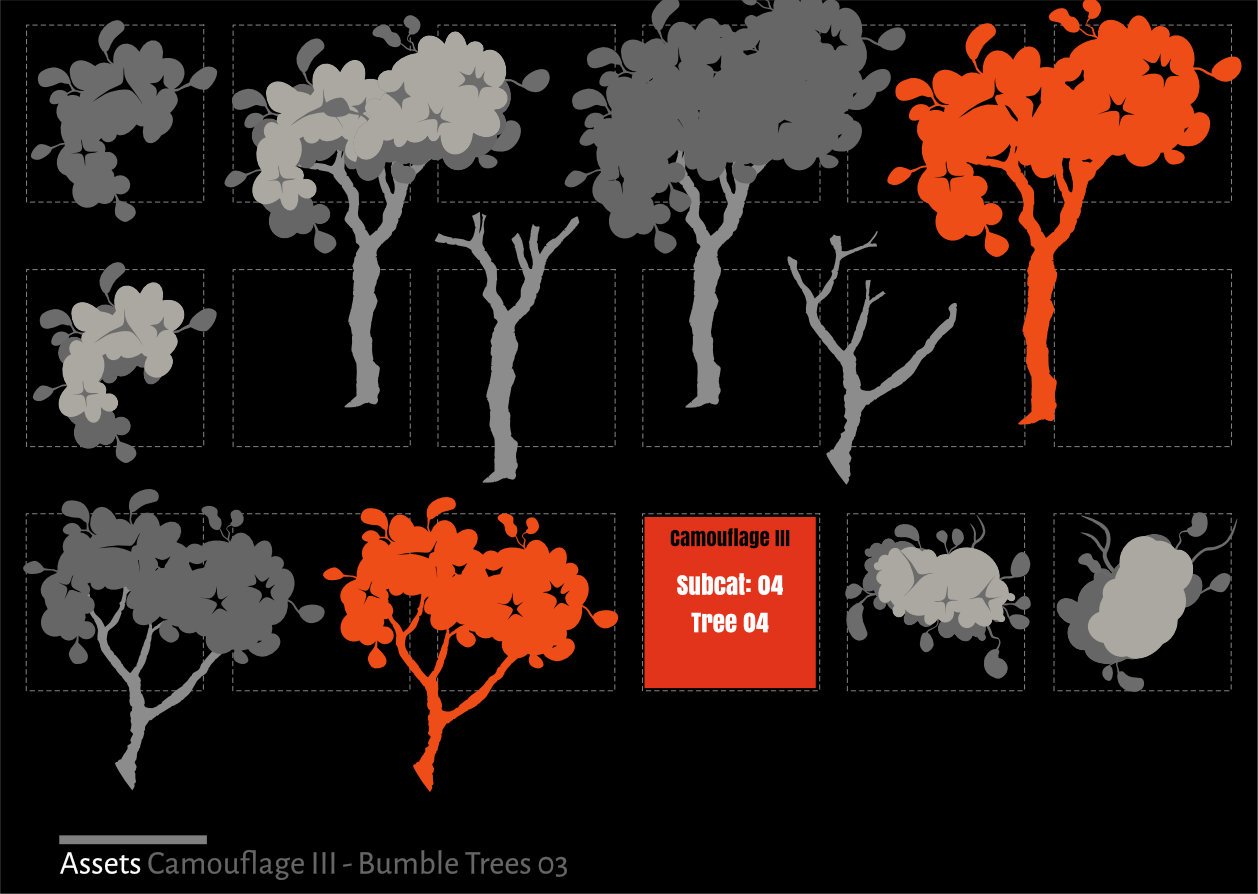
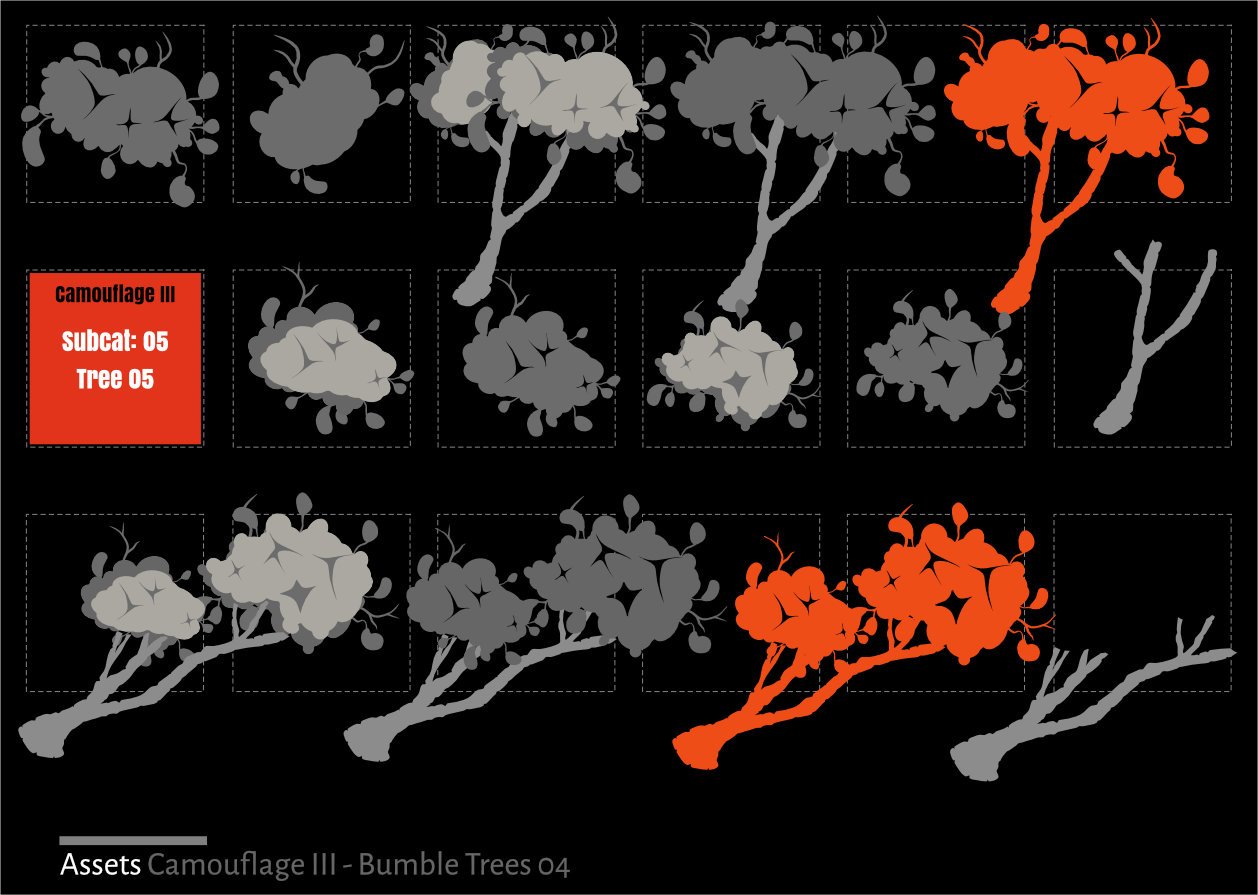
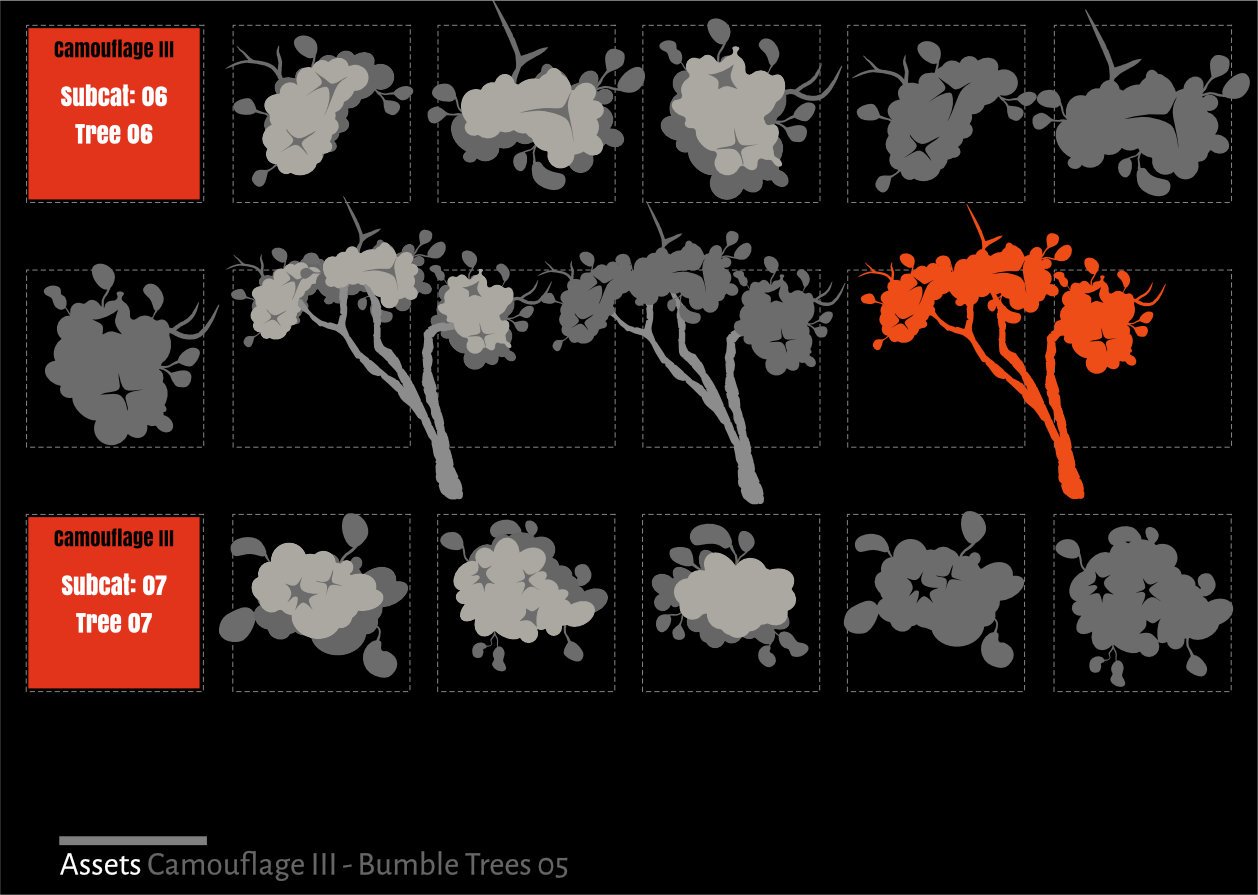
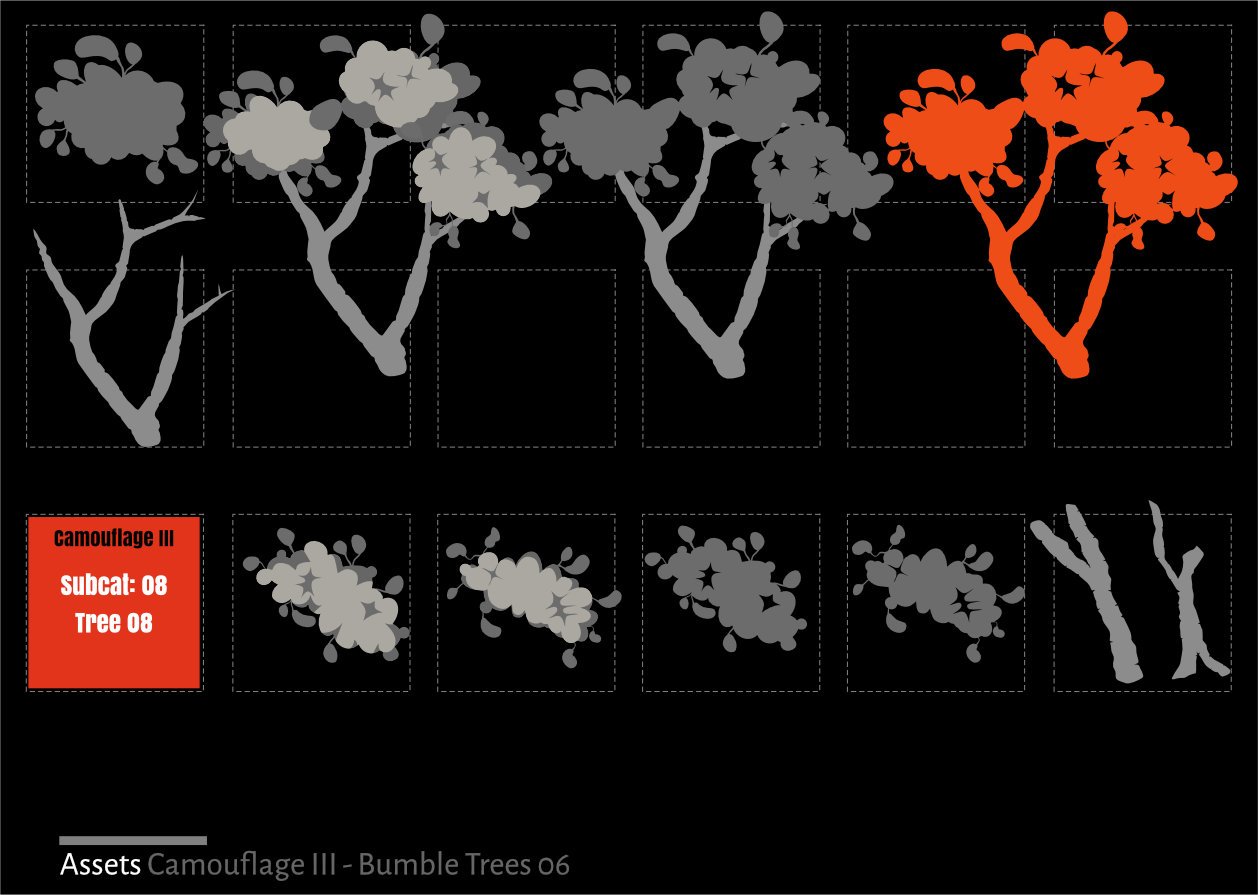
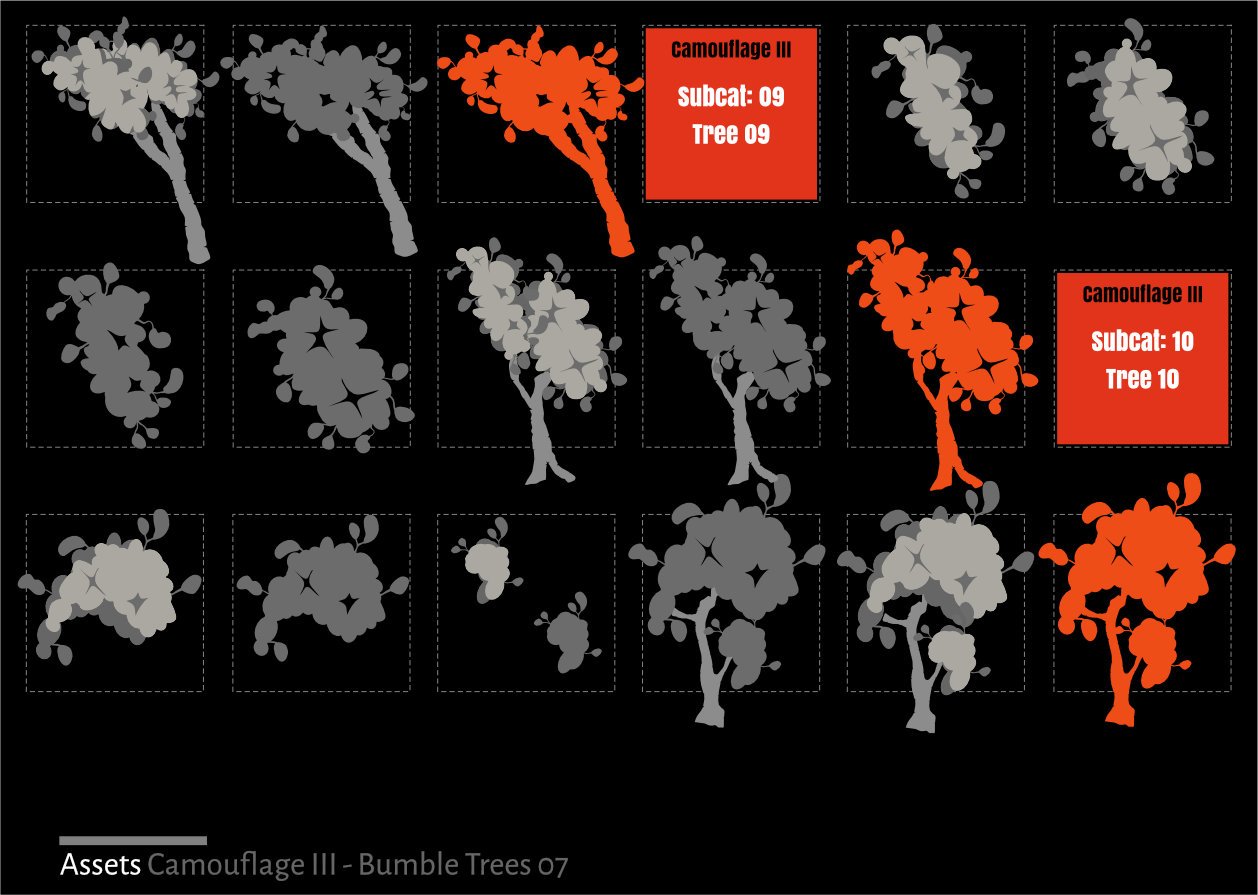
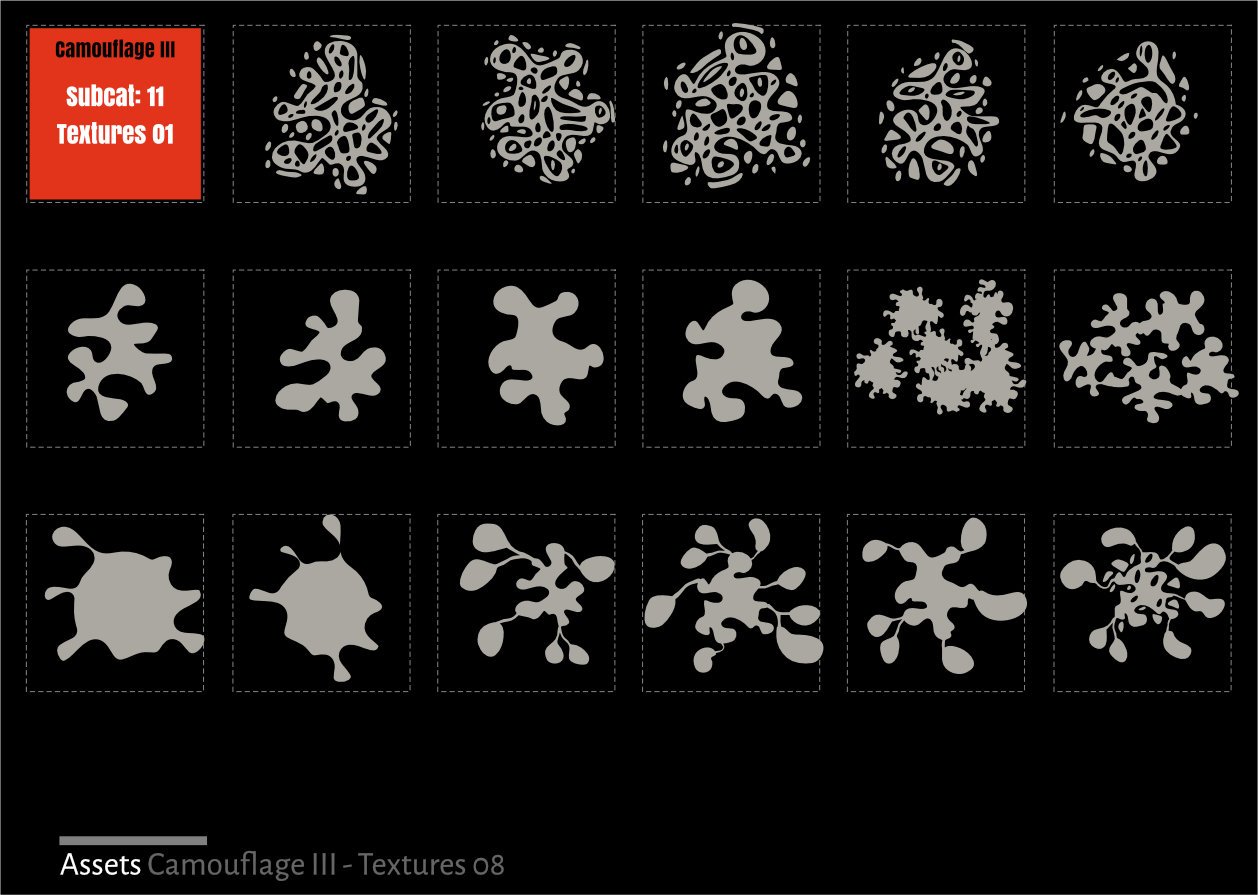
Vector Assets: Camouflage III Part of the Tree Builder Project A simplified cartoon like Tree Construction Kit based on the 'Bumble Tree' assemblage in Camouflage III Supplements Tree Builder Kit 03 which has a lot more assets! There is also a Landscape Kit associated with these 'base vectors' Categories 1. CF 01 - CF 10 Tree 2. Textures Detailing has been removed. Samples as below and .zip file for installation: Camouflage_03_Bumble_Tree.zip

-
 Hi guys, (Windows 10, Affinity Designer v1.10.5, desktop) So I have a workflow where I use groups a lot. To go straight to some object within a group I click CTRL + left-mouse click. Then after sometime I realize it made a copy. I only see this when I make changes to objects afterwards because then they overlap and everything looks off. But it's not only that, when 2 identical objects are one over another (e.g. text), they become bold-er, but that I usually don't manage to notice after accidental copying. This has become a real problem for me, I make around 10+ such accidental copies a day. I guess the core problem is that AffinityDesigner allows copying 2 ways: 1) With nothing selected: CTRL + left-click object + drag it 2) With object selected: ALT + left-click object + drag it But my interaction with object starts with selecting the object by CTRL + left-click (which as you see is half-way through copying routine), but somehow AD registers slight mouse movement (obviously) and creates a copy underneath that I do not notice until later in the day. I know about double-clicking solution, but that's not an option for me, I have groups within groups and so on. Clicking mouse 6+ times just to get to the object is not an option. How do I combat this? I have more such small nuances which slow my productivity, but those are for later discussions. P.S. There's a chance I make copies somehow differently, but then I have no idea how. When I purposefully try to recreate "accidental copying" I can barely do that. That's just my assumption that it's CTRL + left-click + drag. In any case, I would rather not have it copy with CTRL + click, because a "standard" combination in the industry is ALT + left-click + drag. Oleg
 -
I've asked a Question in Support forum about this issue and it seems there's no way around this. Problem: I use a lot CTRL + single-left-mouse-click to select an object. But what happens very often is that it creates accidental duplicate objects which I don't notice until later in the day. I make 10+ such unwanted duplicates a day and it's very painful. I don't purposefully drag the mouse, I just single-click, but it still creates copies (10+ times a day). Suggestion: Edit > Preferences > Tools. Add a configuration like: "Deep object selection (CTRL+ click)" : "Do not copy when dragged by default" So a dropdown selection, with current behavior and new behavior.
-
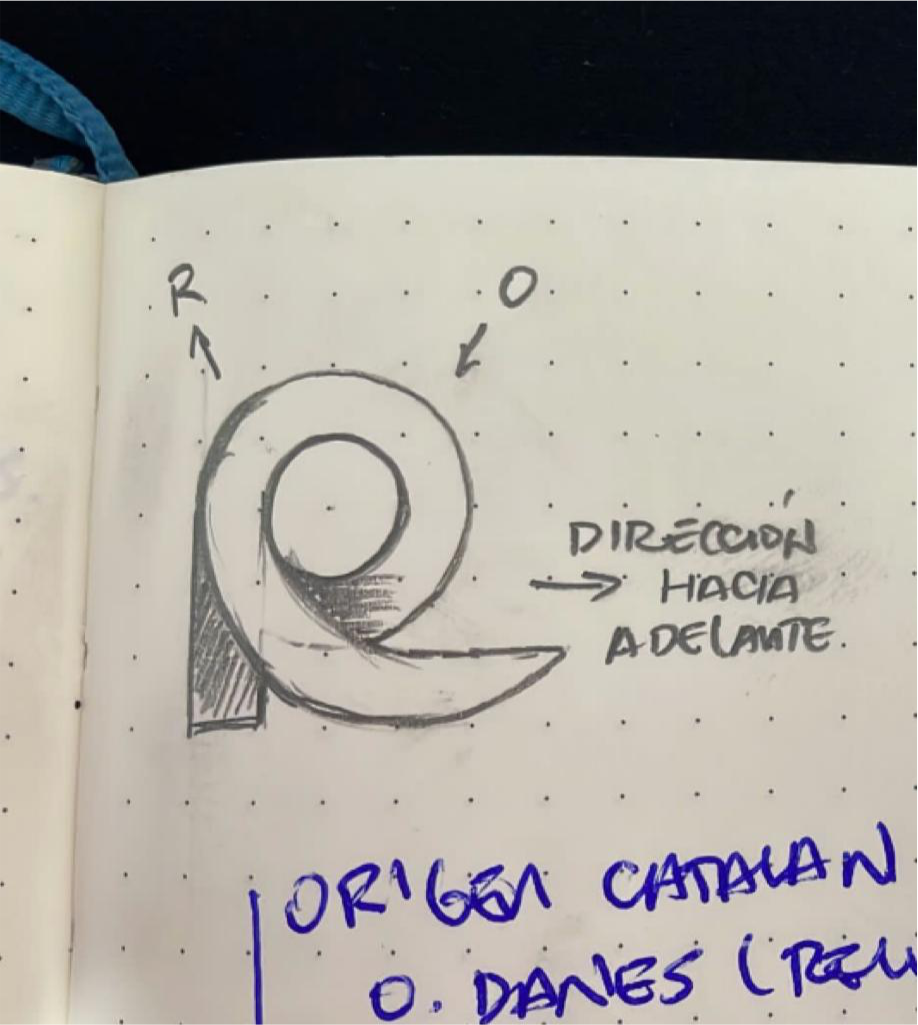
 Hi all, I am very new to handling independent shapes and the boolean options. I am trying to join two shapes, previously separated or subtracted from each other, because I want the bottom part not to join. It's a bit strange, attached as it should be the final result. After putting basic shapes together I have arrived at this: But now I need the circle to be divided from the bottom curve, something like this: According to the original drawing, I should make the complete curve and cut at the intersection. For example if I apply a gradient I can see the complete direction. I hope I understand and you can help me, thank you very much.
-
 Busy illustrating and animating 66 (!!) different animals for on a new Interactive Map. Happily using Affinity Designer for all graphics on the map to have them vector-based. Starting with the elephant 🐘! Such beautiful animals! 😀 2-Elephant-1080p-60fps.mp4
- 39 replies
-
- 11
-

-
A lil’ imp character I’ve been working on
-
Here are a few examples of book covers I created in Affinity Designer (and used in books created in Publisher). They were all for educational purposes in the advanced composites industry, mainly the aviation and space departments. I also DTP-ed the books in Publisher that contain between 100 and 300 pages, in which hundreds of 2D and 3D drawings, schematics, tables, graphs and formulas, that were made from scratch, were placed. A few examples of the tech art created for these books can be seen in my portfolio blog: https://communicats.blogspot.com/2022/04/book-cover-pages-flyers-and-educational.html Designer and Publisher (apart from the 3D programs I used) are a perfect combination even when the Betas are not recommended for commercial use 😁. The books are all proprietary material. One thing that was something of an issue though, the pdf's generated were really large... Structural Repair training cover for a book about commercial aviation practices Bonded repair curriculum and training cover book Structural repair training cover for a book about the space industry One off cover design for Lufthansa Technical Training department Cover for a (rather dull) SAE report
-
 Hi, I got the following problem for a few days or weeks. I vaguely remember that this only happend after I installed the latest version, but I am not sure: When opening a file or creating a new document the Designer app hangs. The installed and re-installed version is 1.10.5.1342. I disabled HW acceleration and cleared the font cache. Befora a files is opened, the application is responding normally, but in the task manager I alread se a process crashpad_handler.exe. When opening the file then, the designer process is reported having high power usage and nothing happens. When trying to interact with the applicaiton, Windows pops up a message if I want to close it or continue waiting. Any ideas? -- Oliver My OS version: Edition Windows 10 Pro Version 21H2 Installed on 13.11.2020 OS build 19044.1586 Experience Windows Feature Experience Pack 120.2212.4170.0 eventViewerCrash.txt Report.wer
-
Had fun allowing the background to double as a color with this one. Although I have never done it myself, one of my favorite illustration production methods is screen printing. With each color applied separately, there are happy accidents like the plates not lining up exactly right that make every copy unique. Because I went even simpler by omitting overlapping colors, this piece had to be planned and executed differently than previous pieces I’ve done. I had to allow for contrast, details, and a light source within a very limited color palette of 3 colors (near black, orange, and grey) on a more vintage off-white base. This is true vector with one subtle texture raster layer over the top that can easily be replicated for any size. Happy Sunday, all!
- 1 reply
-
- 10
-
-
- affinity designer
- ad
- (and 3 more)
-
Still relatively new to Aff.Des., I've been learning by recreating some old illustrations I made in AI years ago. My notion is to learn the differences and find out how to do what I did with different software. Cancer is the first one I've tried. There have been a couple of things that I did in AI that I can't do in AD, and a couple of things that I can't remember how I did them.
-
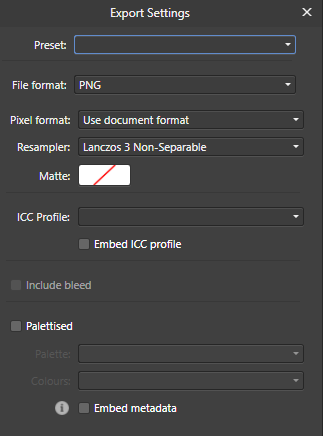
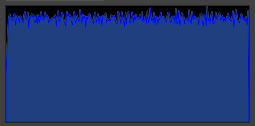
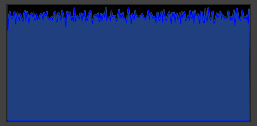
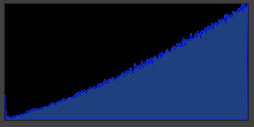
 When I export the same image from Affinity Designer, there is a very clear difference in terms of brightness. To test it, I created a simple black to white gradient. Using the three different Colour Formats (with the same Colour Profile: sRGB IEC61966-2.1 (Linear)) in the "Document Setup..." panel, I exported three images. Here are RGB/8, RGB/16, and RGB/32 (HDR) respectively: Also here are the histograms for the three images, put through Affinity Photo: I am a self learning graphic designer so if this is intentional then I'm sorry, but shouldn't the images be virtually looking the same, save for the "banding" and the noises from PNG compression?
-
Here is an image that I produced as part of an ongoing attempt to design, and hopefully eventually commission the building of, an unusual clock. This is not some huge ornamental clock, it would be about the same size as a typical wall clock. I am thinking in terms of the clock being made from a clock movement that costs £4.25, some clock hands that are a few pounds and a printed sheet of thick card that has a design that includes the clock face, the artwork of the card being produced by me using Affinity Designer, together with such other parts, perhaps an adapted picture frame, to hold it all together to produce a complete ready-to-use clock. What some readers might find of interest is how I produced what I have thus far. It is all vector art, the background was produced using the Rectangle Tool, the rectangle being added last and then moved to the back. The centre of the clock design consists of three stars. The reason for three stars rather than two is because I wanted a star with sixty points, but at the time I thought that the Affinity Designer Star Tool only goes up to a maximum of forty-eight points for a star. So I drew a star with thirty points, then copied and pasted the copy on top then rotated the copy about its centre by six degrees clockwise. I then pasted another copy of the original star, changed it to twelve points for the star, reduced the radius and enlarged it about its centre point, precisely using the Transform Panel, changed the fill colour, then moved it behind the other two stars. However, I have now been informed that on the desktop version of Affinity Designer, which is what I am using, that although the slider only goes up to 48 points on a star, typing a larger number into the box allows one to obtain a star with more points than forty-eight points. Here is a link to a thread where there is more about the design of the clock for those readers who may be interested. https://punster.me/serif/viewtopic.php?id=101 William
-
Perhaps it is just me? 1. Type beach into the search box of the Stock panel for Pixabay 2. Drag the scroll bar 8 times completely down to the bottom Result: The panel shows Connection failed and all images shown before vanish.
-
 I am working a on project in Affinity Designer and exporting it as a pdf. But whenever I export, the exported files shows a huge white border around one of the elements which shouldn't be there as shown below: Can someone please help me solve this problem? Thank you so much!
-
 Earlier this evening I produced a drawing using Affinity Designer. As it happens, the reason that I was doing this was because I was trying to try out producing an image, basically as a concept test, using the palette made avaiable in the following thread, so my focus was on installing the palette and producing something using colours from the palette. https://forum.affinity.serif.com/index.php?/topic/159573-free-goodies-vizier-amenemopes-palette/ So i selected the bruah tool in the toolbox, chose the blue from the palette, and just drew, just using the default brush. Aferwards I checked and found that the width is 3.8 pt, which I preume is 3.8 points. As I am using 300 dots per inch and working in pixels I am not sure how many pixels there are in a point in this picture. But I cannot find what is the default brush that I am using. Is it a regular brush or is it a defailt built-in brush please? William
 -
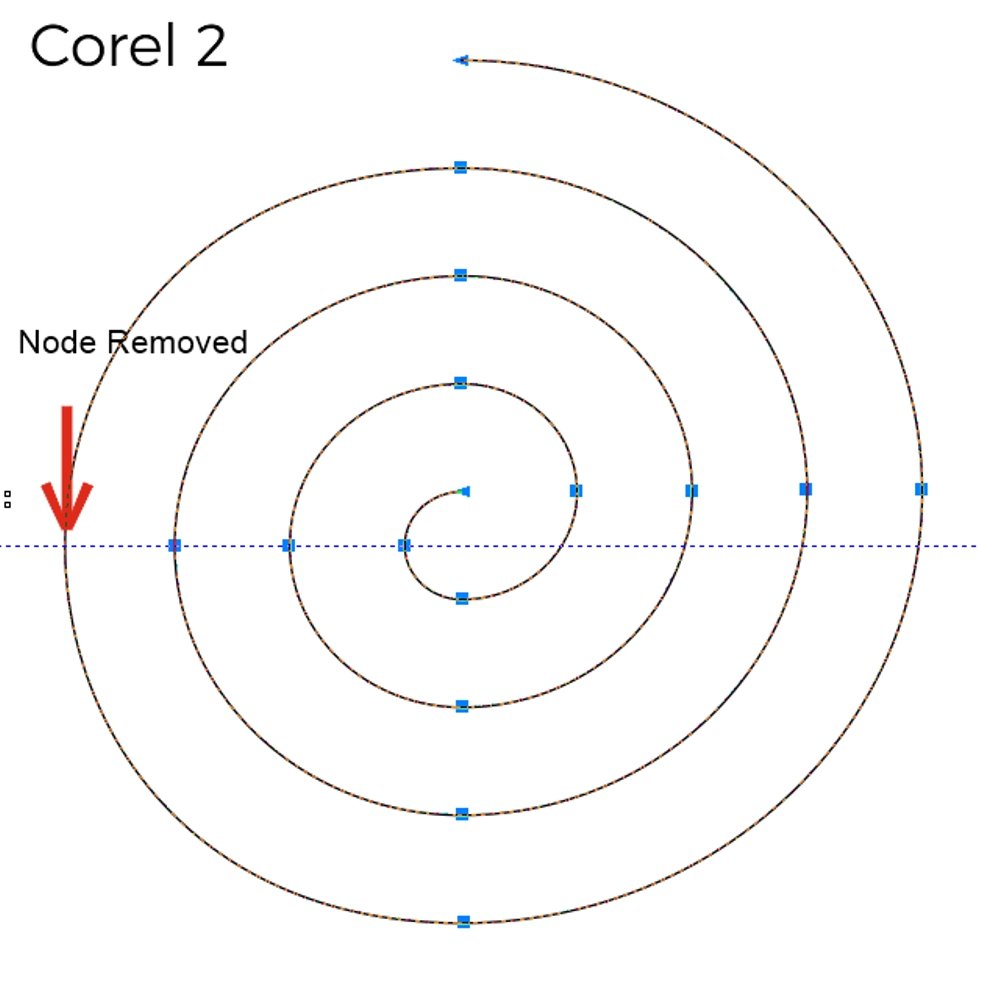
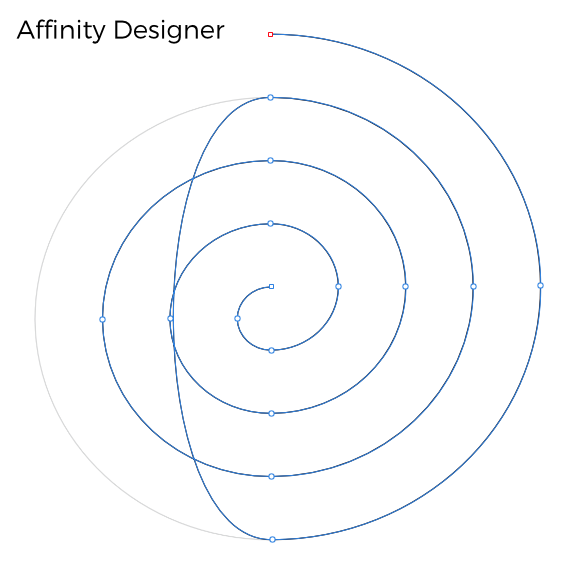
 Is there a way to maintain line integrity when removing nodes in Affinity Designer? Being a Corel Draw user, I've always appreciated the way that Corel will try to maintain the flow of a line when a node is removed. It's handy for smoothing curves and areas where shapes have been joined together. Affinity Designer and Illustrator tend to really lose the shape when a node is removed so I'm always having to manually re-align the curve. Affinity Designer's node editing tools seem pretty basic when compared to Corel Draw and it's not even a recent version of Corel that I'm comparing to. The curve smoothing button has a mind of it's own, that's useless too. I've included some examples to illustrate. If anybody could recommend a solution, I'd be most grateful.
-
 I've been busting my head for the better part of this week and I can't figure out how to make an open ended path from a curve. I wanted to delete one path but all it does is create extra nodes on the path and I can't see any other way around this. Am I missing something ? EDIT: Found it. It was break curve. This needs some overhauling as neither the icon, nor the wording is very inspired.
 -
 Hi everyone, I'm struggling with something I think probably can't be done. I've four projects, each with 28 artboards for a set of products. All artboards are "well named" and they work well with Publisher to create client presentations. I've now been asked to send some of these to be printed. Easy - I thought! Because of the number of documents involved the printer is asking if I can include the filename of each variation in the bleed border - i.e. in Page Information. I'm struggling to get a combination of Artboard name, Slice Name and Page Information that makes sense. After lots of experimentation I'm coming to the conclusion that it is broken. Here's my setup: Each artboard is named using the product name and the "role" for the design: I've then set up a slice, prefixing each name with a brand name, with default settings with my export preset: This then creates the following header in the output PDF: No matter what I do I cannot prevent the name being printed twice in the Page Information area. Can anyone suggest a way around what's happening?
-
Pretty happy so far. Over 450 YouTube affinity videos on all apps, on all platforms. I love this software. Affinity Photo. iPad, Mac, PC Affinity Designer. iPad, Mac, PC Affinity Publisher. Mac, PC Still publishing. https://YouTube.com/c/RobertChalmers
- 4 replies
-
- 5
-
-

-
- affinity designer
- affinity photo
- (and 1 more)
-
 Nombre del dispositivo LAPTOP-J9K69HS3 Procesador Intel(R) Core(TM) i7-9750H CPU @ 2.60GHz 2.59 GHz RAM instalada 12.0 GB (11.8 GB utilizable) Id. del dispositivo D660CA1F-1359-4A0E-9F6C-5B09E233D96D Id. del producto 00327-30829-33823-AAOEM Tipo de sistema Sistema operativo de 64 bits, procesador x64 Lápiz y entrada táctil Compatibilidad con entrada manuscrita Edición Windows 11 Home Single Language Versión 21H2 Se instaló el 24/10/2021 Compilación del SO 22000.493 Experiencia Paquete de experiencia de características de Windows 1000.22000.493.0
 -
 I have a MacBook Pro late 2011 edition running Mac OS high Sierra . I recently purchased affinity designer after owning the iPad version for years . Right from the first time the app crashes and won’t open !!! I have attached the crash report . Please help ! text.txt
 -
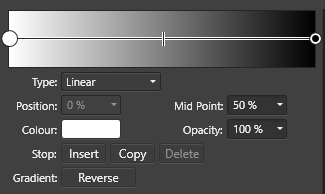
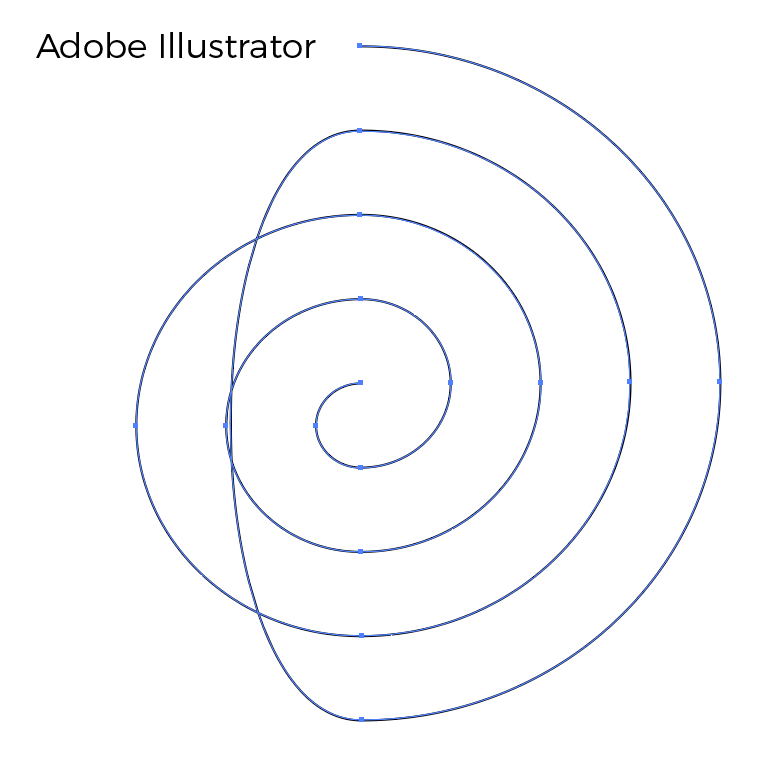
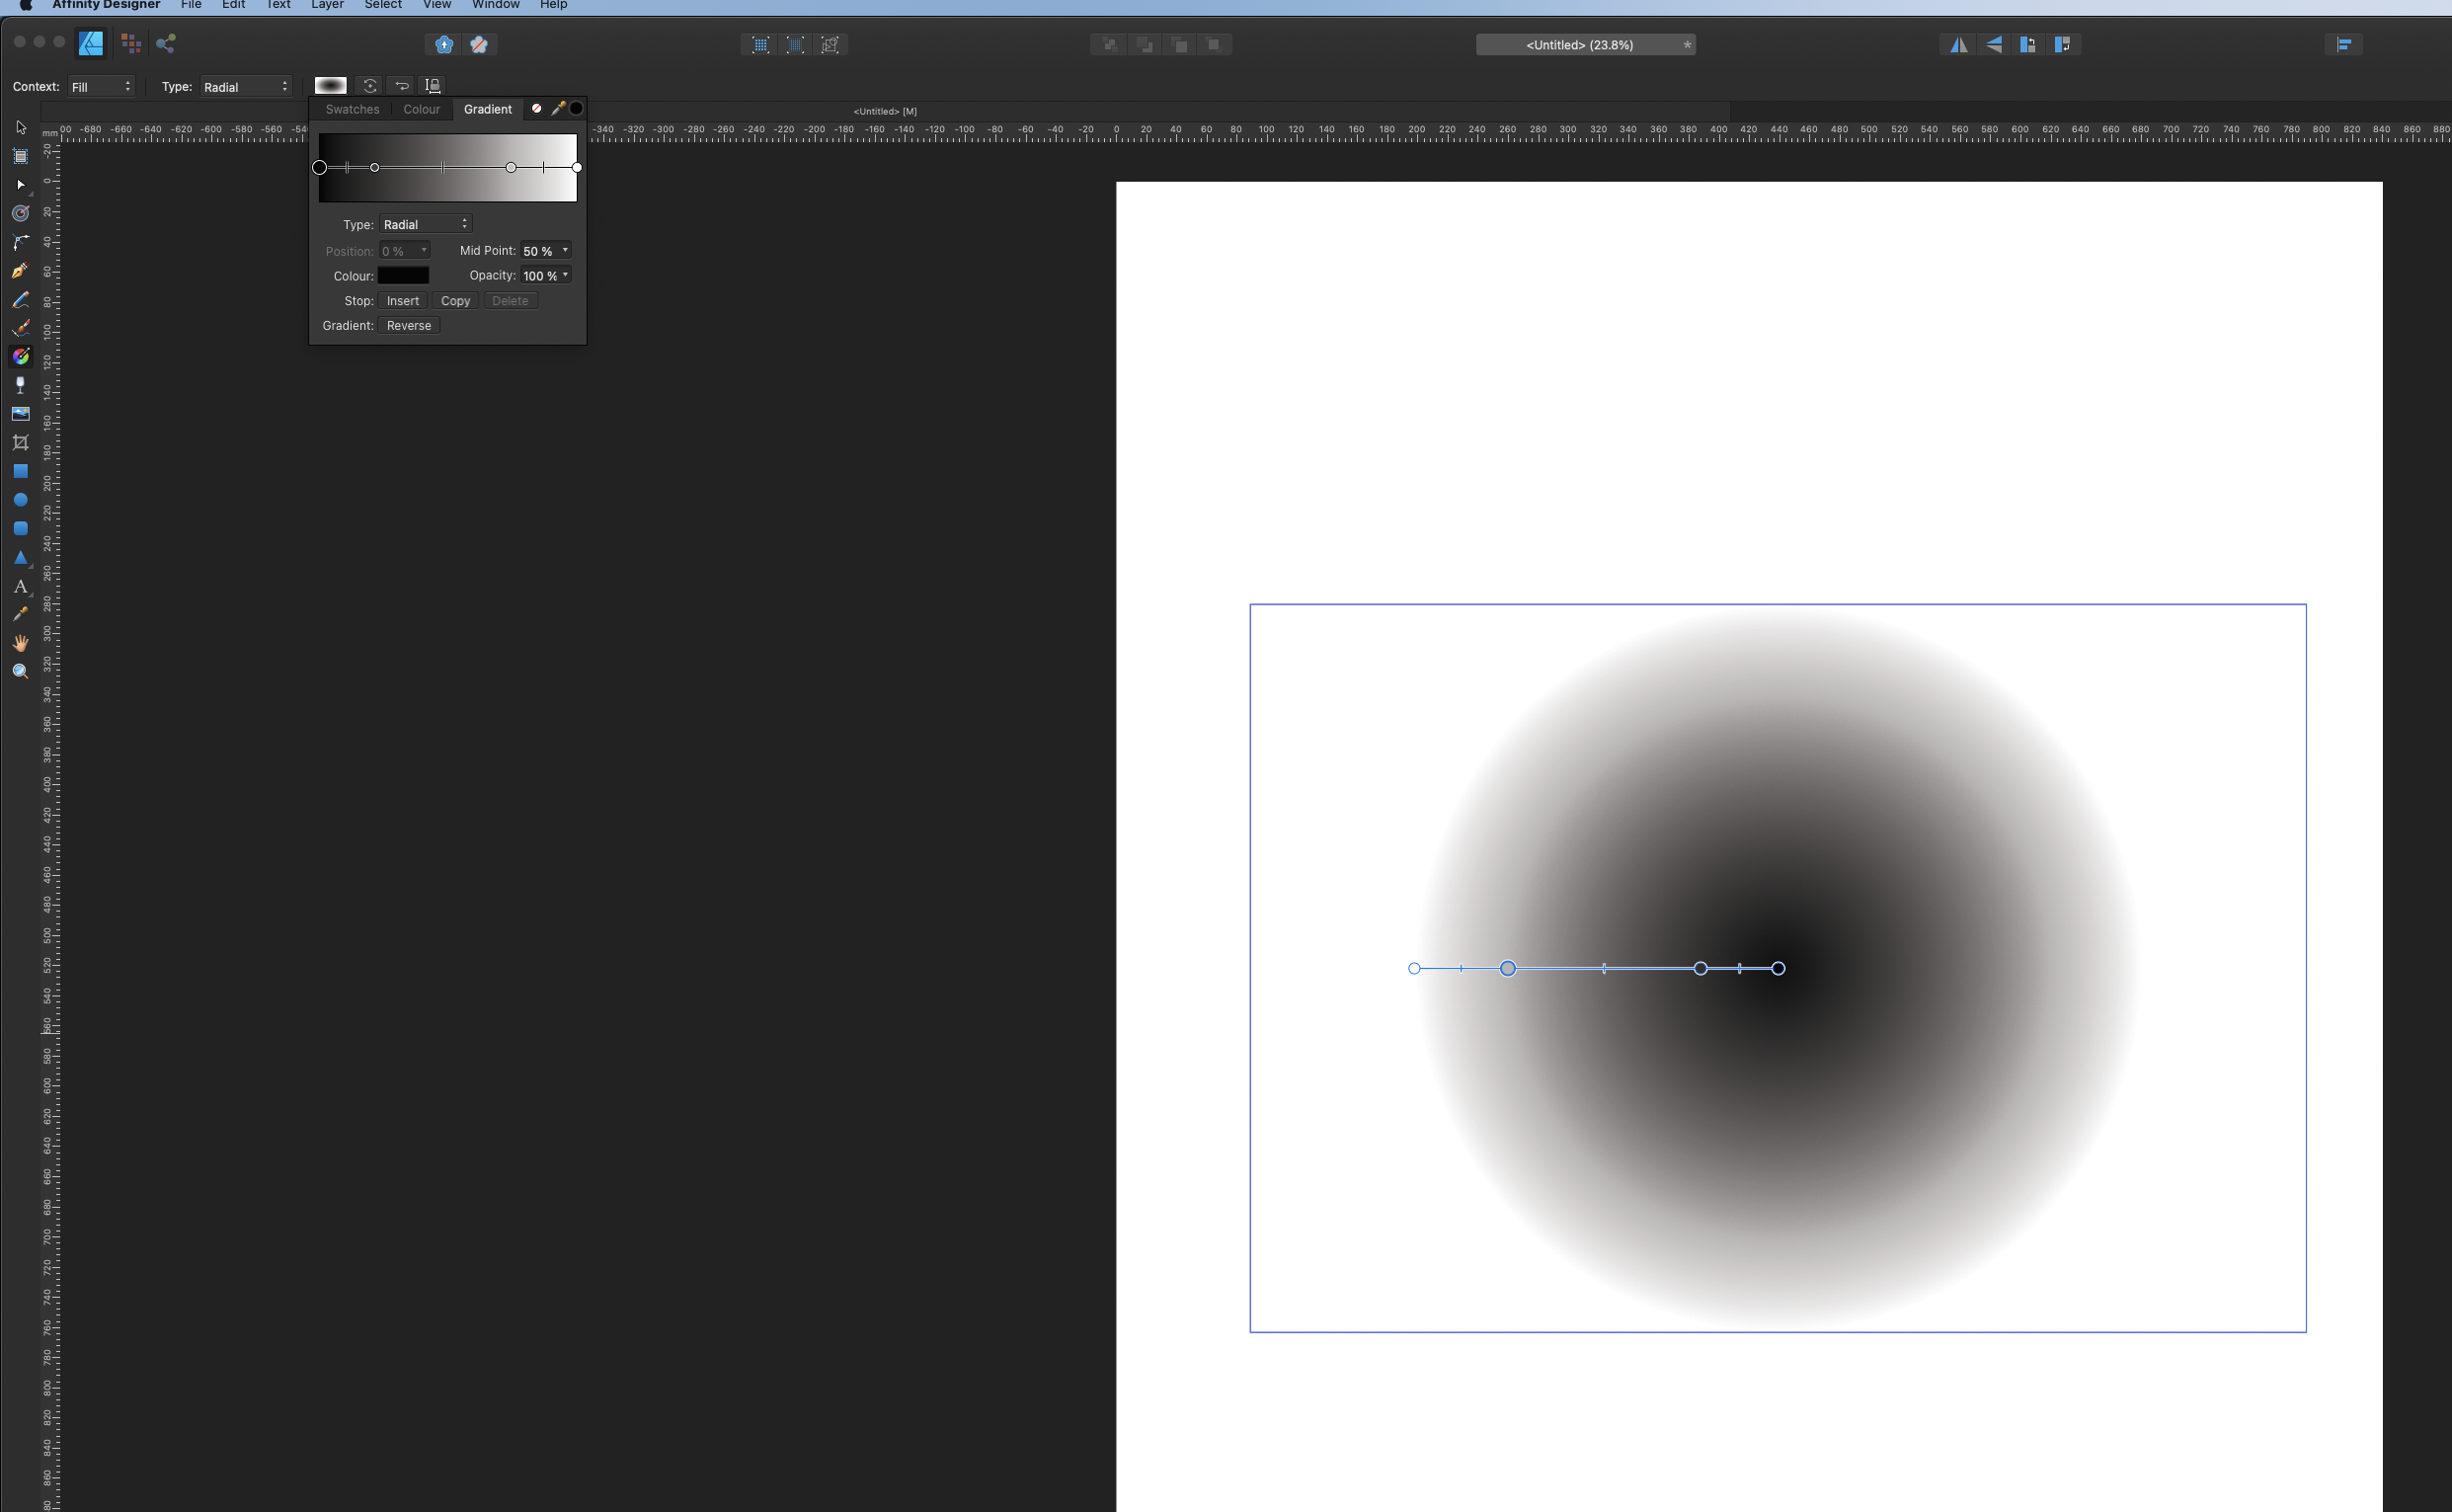
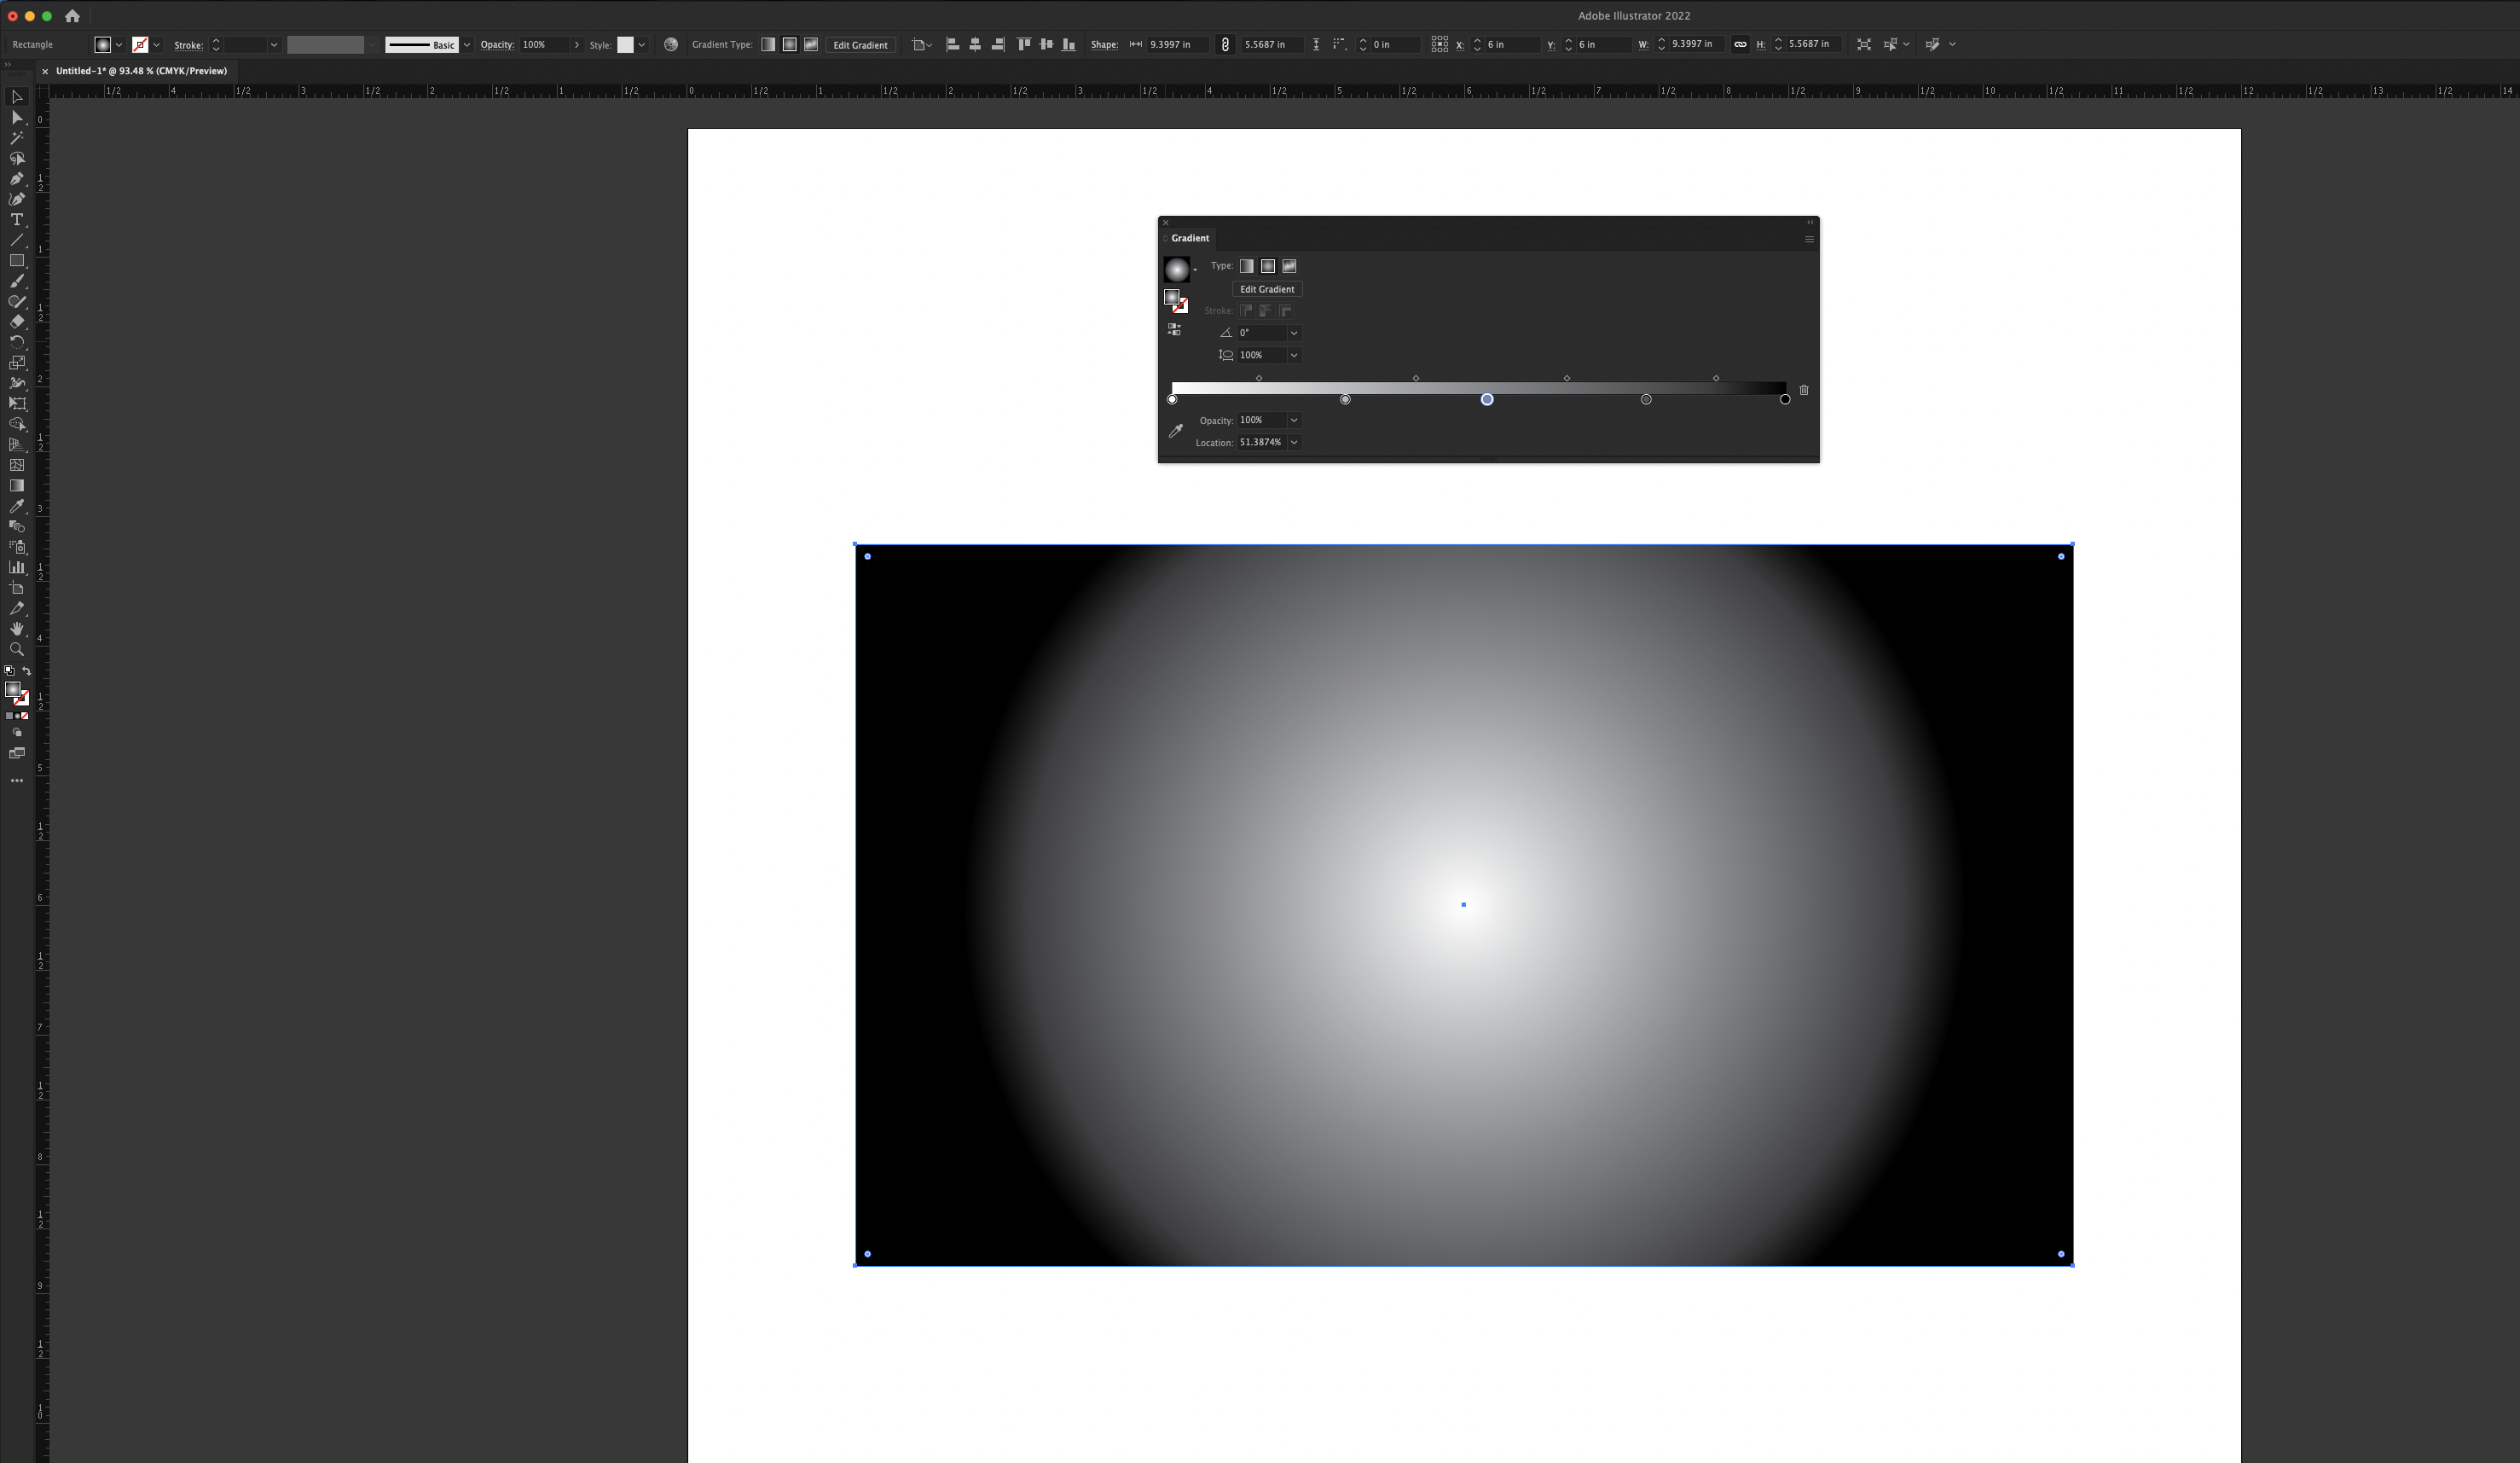
 Hello there, I have been having some issues searching not only the forums but the web for this answer as well. Attached is are two images of my monitor with Affinity Designer and with Adobe Illustrator open and with the gradient properties editor open in each. I have a 4K monitor, which of course makes everything smaller, but I need the screen real estate. I also know it is not necessarily fair to compare Designer to Illustrator, but I am looking for the Affinity solution compared to the Adobe solution. I have a gradient that needs multiple points. In this case, around but not specifically 20. When working with the gradient editor as it currently is, being only a small drop down from the bar at the top, this is nearly impossible to achieve without some massive mouse and keyboard acrobatics. I know that in Illustrator, I have the option of resizing the gradient editor and even detaching it from the menu as shown here. I need that huge gradient editor for the gradient I am creating. I really need to have the numeric values available to me since I have to place them precisely and set specific colour values for each point, like the image of Illustrator attached. I would like to know how to detach it from the top menu bar and make it its own flyout window panel, or put it in a different spot, but either way, be able to resize it so I have a very long gradient editor on which I can place tons of colour points and navigate them with ease, and again, set precise colour values for each. If this is not possible (which I doubt, Affinity is far better than Illustrator so far) then please help me find a work around. Thanks! -Kim
-
 ... or better: Behaving wrong. In my case it is an opened PDF generated from APu having a text frame containing text with 80% black and text with HKS 7 and there is a rectangle with HKS 7. 1. Switch to the Designer Persona (or Edit in Designer - makes no difference) 2. Click the rectangle and use Select > Select Same > Fill Colour 3. Now elements are selected. Use the Colour panel to change the percentage of the tint Result A: Even the gray text is changed although no HKS 7. Apart from that: 4. Revert history to the beginning 5. Select the gray text with the text tool 6. Select > Select Same > Fill Colour Result B: Same as Result A. Conclusion: Colour replacement is not working on text frames having text with different fills. colour-replacement.mp4
 -
 Hey! I love making transit maps and diagrams for in my spare time. Here is today's quick few hours design — my unofficial transitdiagrams of the tramway system in Конотоп/Konotop, Україна/Ukraine. What do you think? Feedback is welcome! Btw: Although I researched very thoroughly it might be possible that some station names are not right. Please tell me any mistake so that I can update the map! Have a nice day/evening! Chris
-
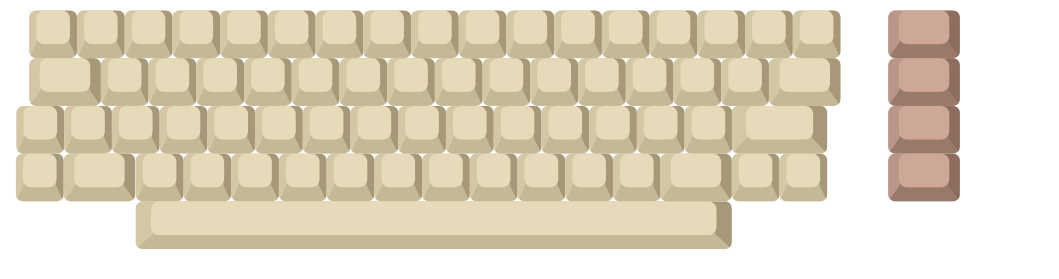
 On a project im working on, i am making a vector illustration of a Commodore 64 computer. I made the entire keyboard, but i forgot to bake in the rounded edges on the original template key i made, and not i am unable to scale it because the edges will go completely round if i scale down. is there a way that i can select the whole thing and apply the rounded edges? it would be a gratuities process to go through and apply this on each individual key. This is the keyboard at its full size This is what happens when i scale it down. Edit: I feel i should also specify that each individual key is a group and i am looking to apply the corner tool, and for future reference the outline tool ect ect, to the items within the group without having to ungroup everything.