Search the Community
Showing results for tags 'Affinity designer'.
-
Hey everyone, Update: Okay, apparently I completely missed the introduction of Key Objects somehow. Thanks for telling me it’s already there! 🤯 Firstly, however, part of my original subject was that key objects should work for any alignment – this includes the spacing operations »Space Vertical« and »Space Horizontal«. They currently work for the general alignment options such as top/bottom, left/right. From my logic it could/should work like this: If NO key object is selected, the last set »Align To:« option works as intended and expected. However, if a key object IS selected, the »Align To:« option should react and prioritise it by changing the »Align To: Key Object«. As soon as there’s no Key Object selected, it switches back to the previous item in the list, like »Last/First Selected«. Without checking, I think this is how it works in Illustrator as well. And I mean, it's just logical (at least to me): If a user actively selects a Key Object (and for Designer this can't be accidental, since you have to hold down an extra key on your keyboard), the user most likely wants to use it as such. So the Key Object should always have the highest priority in the list of alignment candidates/options. Secondly: They also only work from the Context toolbar – when I work with the toolbar popup and want to align (top/bottom, left/right, ...) it prioritises the selected »Align to:« option from the drop down. I think there's an item missing from this list for key objects to work in the toolbar popup as well, and I think that's the culprit. It's not at all obvious that »First Selected« equals »Key Object« in the »Align To:« dropdown in the Toolbar (not Context Toolbar). ––– I very dearly miss the ability to click on one of multiple selected shapes (especially in Designer and Publisher) in order to define it as some sort of »pivot« object, so to speak, around which all other alignments will happen since day one switching to Designer almost ten years ago. (Wow, Designer really turns 10 next year!) The »First/Last Selected« options in the »Align to:« dropdown come close to what I mean, but are not as intuitive, nor do they work for all alignment operations such as »Space Horizontal/Vertical«. Illustrator has solved this more elegantly and functionally by allowing you to mark one of the already selected objects as the »centre« by clicking on it, around which all further alignment operations will take place. They call it »Align to Key Object«. Here's a short clip of how it works. Here’s a video that explains its differences a little bit better compared to other alignment options present in Designer. Please please pleeease Affinity, I need this QOL back in my process and would love to see it and in the Affinity Suite. 🥲 Cheers Dennis
- 20 replies
-
- affinity designer
- alignment
- (and 6 more)
-
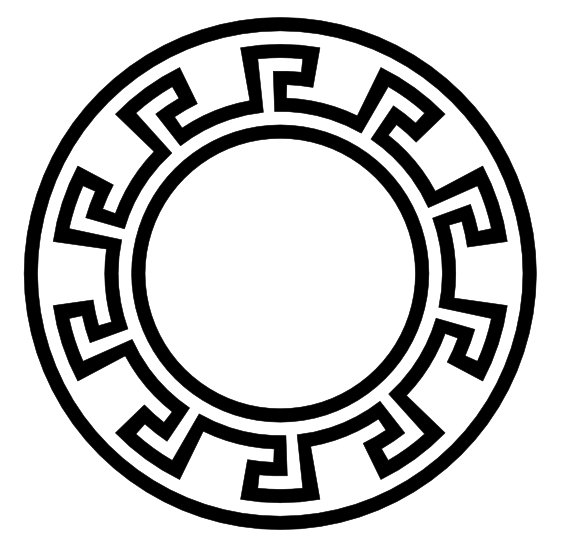
In reaction to a recent question, I’ve attached a video showing one method you can use to create a vector ‘Greek-style’ border using various tools in Designer 2 (some of the tools used aren’t in Photo or Publisher, or earlier versions of Designer). Some of the functionalities/tools used are: Quick Grid (to get the initial grid of squares); Shape Builder Tool (to join the squares up, not actually necessary in this case); Geometry functionality (to tidy things up and make them easier to manipulate); Warp Group (to create the ‘bend’); Move Data Entry (to create multiple copies). If you need a different number of ‘repeats’, or differently-sized/spaced overall result, then you will need to calculate the Warp Value and Rotation differently, and maybe use a different height/width ratio for the initial design. I’ll leave it to you to experiment. 2023-11-28 12-29-33.mp4
-
SAVE 50% ON UNIQUE AFFINITY DESIGNER TOOL KITS IN THE ARTIFEX FORGE BLACK FRIDAY SALE! To claim this massive discount head to artifexforge.com and use the discount code 'BLKFRI23' at checkout. Be quick! The sale must end 11.59pm on 1st December (GMT) See some of our best-sellers below or head to artifexforge.com now to see the full range! >>SAVE 50% ON THE LINOCUT LOVERS COMPANION NOW!<< >>SAVE 50% ON THE STAINED GLASS CREATOR NOW!<< >>SAVE 50% ON THE PATCH WORKS NOW!<< >>SAVE 50% ON THE SPIROGRAPH TOOL KIT NOW!<< >>SAVE 50% ON THE STAMP COLLECTION NOW!<< >>SAVE 50% ON THE MOSAIC MAKER NOW!<< >>SAVE 50% ON ESSENTIAL SHAPES NOW!<< >>SAVE 50% ON THE VINTAGE NAUTICAL MAP MAKER NOW!<< >>SAVE 50% ON THE PALS NOW!<< >>SAVE 50% ON THE ZEN FINE LINER & MANDALA CREATOR NOW!<<
-
Hello all! Contrary to usual belief that only Adobe XD, Figma, Invision are great at UI design, I have a strong feeling that Affinity Designer has more scope to grow because it has a lot more to offer. Designer is intuitive, has WAY MORE control over curves than the popular UI design tools and is a complete design software while the others just barely are one. Affinity sure doesn't have prototyping, but otherwise it is a killer application for UI development, because I get to work with things as small as the pixel perfection of icons in the UI to something as broad as having symbols, constraints and even re-usable assets. According to me, Adobe XD, Figma, etc., are "Tools" but Affinity Designer feels like a (end-to-end) "Solution" to all UI design needs. But I believe there are two little things that Affinity Designer currently needs to do to make the life of a UI designer better: 1. Auto Layout: Affinity's Constraints feature is amazing. It is simple yet very effective when it comes to UI design in Affinity Designer. But it lacks when I add text, that will be changed at different instances, as an element inside constraint group. The text flows into the group and there is no option to set the basic padding beyond which the container resizes according to the height/width of the text that is set to auto layout. Same thing happens when I need any design element to resize according to the padding and not just as a relative size of the parent container. 2.Design System Library: This is a simple one. I'm not sure if this is very important but here I go. I know .afassets, .afpalatte & .afbrushes exist. But it will be awesome if we can combine those files and send it out as one file, a .aflibrary for example, that when loaded, loads up the .afassets, .afpalatte & more at once. This could also mean something to other designers as well. Say the designer develops a icon system, brush style, color palatte and a highlighting system (quotations and more) for a book, he/she, just has to send the ".aflibrary" file to a co-designer (or even if he/she sells that design system) that loads all the required assets into the respective panes at once. Hope this is a usefull suggestion. Have a great day everyone! EDIT: Also, it will be great if the above mentioned ".aflibrary" file also gets saved along with the normal affinity file unlike the other asset files like afassets afpalatte and so on. This saving together could be an option like saving history.
-
Here is the Torus Yantra, a well-know sacred geometry figure, that I created in Affinity Designer, using the ellipse tool, and replicating the ellipse 12 times.
-
- sacred geometry
- torus
-
(and 1 more)
Tagged with:
-
I'm using AD for a while now and one of the major things I still struggle with is a Colour Chooser (both in a popup and Studio panel). It only supports HSL Color Box model (it is called “Hue” in AD). Most major apps right are using HSB Color box. It is more familiar and easier to use: if I need a pure bright color, I'd just move the dot to the top right corner and that's it. In HSL Box though, I'd have to try to aim the center of color box. It is frustrating. Please, add HSB Color Box to Affinity Designer. I understand, that this might be not the most important feature in your road map, but it will definitely make life easier for those who come to AD from Photoshop, Illustrator or Sketch (and especially for those who are constantly switching between these apps in the process) Thanks.
- 4 replies
-
- affinity designer
- color picker
-
(and 1 more)
Tagged with:
-
Hi, On Designer for iPad, the cmd+D shortcut does not work with vector items, however it works just fine on the desktop version. I tried to change The keyboard shortcut to something else, but the function just doesn’t seem to work. Also a trackpad tap outside the selection does not work either. Is it possible to make these basic functions work on the iPad version? I know an iPad is an iPad for a reason, but I do not necessarily want to touch the screen just to deselect something. The function works just fine in the pixel persona btw.
- 4 replies
-
- ipad
- affinity designer
-
(and 2 more)
Tagged with:
-
Since updating to 2.1, whenever I create a new artboard in a linked (non-embedded) file, all linked items in my working file are broken with Designer: Instead of showing the linked artboard, I have the linked file preview for each linked item in my artboard file. (the linked file has multiple artboards). Appears each time I reopen the working file, not during the edit process. So the "working" solution for me is to open the document in Photo, manually update the linked file with the resource manager, save it and open it with Designer in order to get the correct rendering of each linked element. Looks like a bug with the Designer Resource Manager as it should update automatically if there are any changes.
- 17 replies
-
- affinity designer
- artboard
-
(and 2 more)
Tagged with:
-
Hi Im new here but i wish to share my latest artwork and also I have a question about data entry, how to keep letters and numer horizontally around circle? Many thank
-
I'm working up a historical starmap for a fan fiction project, with data adapted from Star Trek, and stylistic cues from the old Dent's Canadian/School Atlas' front half material, which was usually produced in black and white with usage of tones and/or spot colours. This is intended to be ink-usage-friendly for other fans' purposes. I expect to creative derivative works devoted to marking systems particularly notable for "key" resources specific to that mythology, and possibly other spin-offs as well. I'm working in Affinity Designer 1.10.6 because that's as far as my hardware and budget will currently allow. I guess I'm looking for additional "tone"/"Style" resources that may be particularly useful for this project. If you have any recommendations...?
- 6 replies
-
- fan art
- black and white
-
(and 6 more)
Tagged with:
-
A few days ago I made a rather silly picture I titled The perils of poorly-maintained Gents' lavatories (that's men's public restrooms in American). And then I thought I could animate this! There's nothing on view that actually requires censoring, I should point out. The moving parts are all on separate layers, so each one transfers to a layer in MoviePlus X6. (MoviePlus: still doing the business, and more intuitive to use than a lot of other video editors 🙂) I recorded the sound effects in the kitchen on my iPhone; the little bit of speech will be recognisable to Goon Show fans.
- 2 replies
-
- designer
- serif movieplus x6
-
(and 1 more)
Tagged with:
-
Hi, I'm not exactly new to the software but I'm delving into some more complex topics as I keep using it for random stuff. For a simple illustration project, I'm trying to merge the shapes of a character's body while avoiding using destructive operations. What I'd love to achieve is to use a compound shape (made using Alt + boolean Add operation) as a clipping mask for some inner shapes. See the attached example for what I'm trying to achieve (with a very simplified character) and the tests I have made so far. From what I gather I have three options: Use a compound path. This will unfortunately break clipping functionality, and the clipped shapes will get lost inside the original containing shape (Body in teh example). If I move them to the root of the compound the simply become part of the compound itself. Make a compound path, group the inner shapes, then use a copy of the compound path as a compound mask for the grouped inner shapes. This works(ish) but messes with rendering and the inner shape with the gaussian blur FX will exhibit some color banding. Not sure it's noticeable in the example picture, but it definitely is there. This option is kind of a chore to maintain as well, as I'd have to make changes to both the compound path and the mask. It also makes a mess in the level hierarchy. (Note: the color banding seems to be caused by the pass-through rendering mode of the group. I could bypass this by not using a group, and just duplicate the compound yet again to make a mask for each inner shape, but that makes it even harder to maintain) Simply boolean add the shapes. This is visually what I'd like to achieve, but it's a destructive operation. I would need to keep a non-merged copy in case I need to move or redo the ears, for example. Maintaining both copies synced would be a major pain and simply not a good workflow. I'd like to just use the first option, since it's simple and non-destructive, to achieve the visual result of the third option, but I can't get it to work that way. Is it not possible for compound paths to act as clipping masks as well? What other options are there that I'm missing?
-
Hi, I exchange documents from Designer via PDF. There are two cases: a) Export for going directly to the printer. In this case there is no doubt: I choose the Export (for print) option. b) Export for reuse in InDesign, and be sure to have a copy that someone else can read in Illustrator. In this latter case I'm in doubt: would Export (for exchange) be the better choice? I would suspect this would work perfectly fine with InDesign (so it seems), and at the same time preserve most of the original situation when opening into another program for editing. How is it? Paolo
-
I'm not doing something right, it's maybe a bug or a preference I need to activate, but when I make a background on Affinity Designer with Bleed, it does export fine to a Print Format showing the bleed area, but when directly imported the Designer File to Affinity Publisher, it imports it trimmed to the page format and disregards the bleed area. Anything else I can do differently to fix this? I'm on V2. Thank you so much in advance.
- 2 replies
-
- bleed
- background
-
(and 2 more)
Tagged with:
-
About The Box Set is hundreds of vector and raster brushes made for Affinity Photo & Designer. Each brush was handmade using real materials scanned at high resolutions and crafted to simulate real media. I wanted the origin of the brushes to have a heritage of the materials they are simulating. Scanning pools of watercolor, swatches of paint, and stipples of charcoal contributed to creating brushes with the same idiosyncratic material magic. My only request is that you take these brushes, with their clever names, as suggestions. They work superbly out of the box, but I strongly encourage you to adjust the sliders, rearrange or remove the textures, and discover how they can suit your hand(s). Make. Discover. Repeat. Cheers and happy art making, -Jef (WREN) RASTER BRUSHES For use in Affinity Photo and Designer. The blending brush in the Oil Set is the only one exclusive to Affinity Photo. DRAFTING INK OIL Oil Brush Dynamics Most oil brushes have blending built into pen pressure. With a single brush and hue you can adjust the luminosity of the stroke- giving it an oily blend. The Brush's color in the example above is the color of the background. A normal pressure gives you the hue without any lightening or darkening. WATERCOLOR ACRYLIC VECTOR BRUSHES For use with Affinity Designer Only. Pen & Ink Charcoal & Graphite Sumi-E Painterly Drips Handlettering LINKS The Box Set
- 209 replies
-
- affinity designer
- resources
-
(and 4 more)
Tagged with:
-
What I'm thinking of is an alternative to the classic layers: a node editor, where each layer would now be a node, with a mask and before input, so that you can reuse layer groups. What I'm thinking of: Each node has inputs and outputs depending on the type (example blur: input=image, radius form=type, radius, output=image) Creating groups and naming them storing created groups as global templates (like macros, but as components that can be stored) adding custom inputs to groups with custom labels maybe sharing groups online? (like as a marketplace for quick templates) As an orientation for how it would work, I would like something like Blender 3Ds node editor. As for how it's integrated into the UI, either it's a separate editor that you need to toggle on/off on a per-project basis, or it's a layer (like a node layer or something) that then opens a UI
- 1 reply
-
- affinity photo
- affinity designer
- (and 7 more)
-
In Affinity Persona, on my Mac, I can hold Control while using the vector brush to force a straight line. In Pixel Persona (or in Photo), I can't do that. I can only hold the Shift key to force the line vertical or horizontal. It'd be a quality of life improvement if there were a similar straight-line-only modifier for Pixel persona. While I'm asking, it'd be nice to have that same option available in the Eraser Tool (as it is for the Shift modifier). I see that a similar operation can be done by clicking, then shift-clicking on the 2nd point to connect the two points with a straight line, but I'm really asking for similar functionality as the vector brush where I can drag the final point around and see where the line (or eraser mark) will go so I can fine tune the location.
- 7 replies
-
- affinity designer
- affinity photo
-
(and 1 more)
Tagged with:
-
Is there a way to automatically assign matching colors of imported SVGs to the color in the document palette? Maybe by editing the SVG file? thx
- 1 reply
-
- palette
- affinity designer
-
(and 1 more)
Tagged with:
-
In AD V1 hovering over elements highlighted their outlines. This makes sense, since you want to know what to select, even when it's hidden. But when you removed the cursor - the image cleared. In AD V2 they stay and partly cannot be deselected at all, they randomly disappear or shine up when I touch other elements, in both preview and wireframe mode. It is annoying when I want to visually check a little icon and keep on seeing outlines. this is how it is supposed to look when my cursor is out of the way. This is when I touched the elements. Sometimes random artefacts stay visible. in preview and wireframe mode. Cannot deselect them. The only solution is to either export it or to save, close and restart the file. This doesn't make sense when I just want to see the effect and maybe revert it. I cannot find a hint, how to turn off highlighting at all. Is there a setting? I consider this a bug. iMac retina 2017, macOS 13.6.1
- 10 replies
-
- affinity designer
- macos
-
(and 4 more)
Tagged with:
-
Since yesterday, Affinity Designer is broken for me on version 2.2.1. The UI freezes and is stuck on a full-core load (single core) even after terminating the task in Task manager. Uninstalling and reinstalling the app (MSIX) did not resolve the issue. I also tried repairing. It seems to have to do with Windows PowerToys from the look of taskmanager, so I updated PowerToys to 0.75.1. It's weird because I haven't updated PowerToys yesterday... E1: Time to uninstall PowerToys... E2: That fixed the issue, but it's not a long term solution for me. E3: The SVG thumbnails in the recent file window appear to be the culprit with SVG icon preview enabled in the File Explorer Add-ons section of PowerToys. I had several SVG thumbnails in recent files that failed to render. Disabling this specific module was enough to get it to work again.
- 2 replies
-
- affinity designer
- affinity publisher
-
(and 1 more)
Tagged with:
-
I have done some thinking about what direction Affinity is heading relative to the competition. Adobe has been making a lot of strides, specifically with AI powered features. Even if Affinity 2.0 is a very good update, and 2.1 added some good improvements, I still feel that the general perception is that Affinity is stalling a bit. Serif took up a huge task for a small company putting out a very nice integrated suite of programs at a very good price. They took the fight to competition with 3 programs that could replace mre well known industry standard programs, at least to a high degree. By being so affordable, they provided a good entry point for small businesses, freelancers and enthousiasts. I truly appreciate what Serif created in this respect. Providing these apps also on iPad was quite visionary as well. Then the v.2 offered a universal language for all apps at a very good price, making an offer very hard to ignore. However it is a very big task to keep 3 apps on 3 platforms up to date, provide regular updates and not lose the users to the competition. The competetion in this field has become much more severe than it was even 10 years ago and I think this is why Serif really needs to ask the question where to go next. In my vision there is only one way that makes sense: fully integrate the 3 apps in one program! Affinity has been about the integration of the various parts from the start, and this has been its unique selling point. Publisher was the cherry on the pie in this regard. With the Universal License, Affinity made it clear that you get the best result when all apps are installed. Let's not kid ourselves into believe any one of these 3 apps is the best in class in terms of features (best bang for a buck though). It's strength lies in how well the different parts work together. There are 3 apps now, and though I understand they are meant for different use cases, but in real life as a designer, these do not always make sense. Having to jump over from designer to photo to use a filter on an illustration, or from photo to designer to round the corner of a shape is annoying, and it seems arbitrary. Publisher led the way in providing all elements of the suite in 1 program (albeit in reduced form) and I feel this is the only logical way to develop the suite. Making 1 app instead of 3 saves resources and makes it less prone to comparisons to similar programs. The persona approach which was in designer from the start provides a good base, but I would argue that the user should be provided with more options to customize they layout to its preferences. This is an area where Affinity is lacking a lot. I see this as the biggest chance for Affinity to keep their own unique place in the market, but I look forward to other ideas.
- 18 replies
-
- affinity designer
- affinity photo
-
(and 1 more)
Tagged with:


