Search the Community
Showing results for tags 'Affinity Photo'.
-
 Applications Affected: Affinity Photo Operating Systems Affected: iPadOS/iOS Windows macOS Description of the issue: When refining a selection as 'New Layer with Mask' you will see distortion around the refined area. Recipe: Open an image Make a selection using the Selection Brush Tool Click Refine on the context toolbar Use the brush to refine the edges of the selection Change the Output to 'New Layer with Mask' Apply Expand the newly created layer to show the mask Hide the mask Observe - the distortion will be apparent around the refined edges No workaround required. This behaviour is intentional. The selection refinement process performs colour decontamination when output is set to New Layer or New Layer with Mask. Because masking is non-destructive, hiding the mask will reveal the pixels that have been treated and decontaminated. Example
-
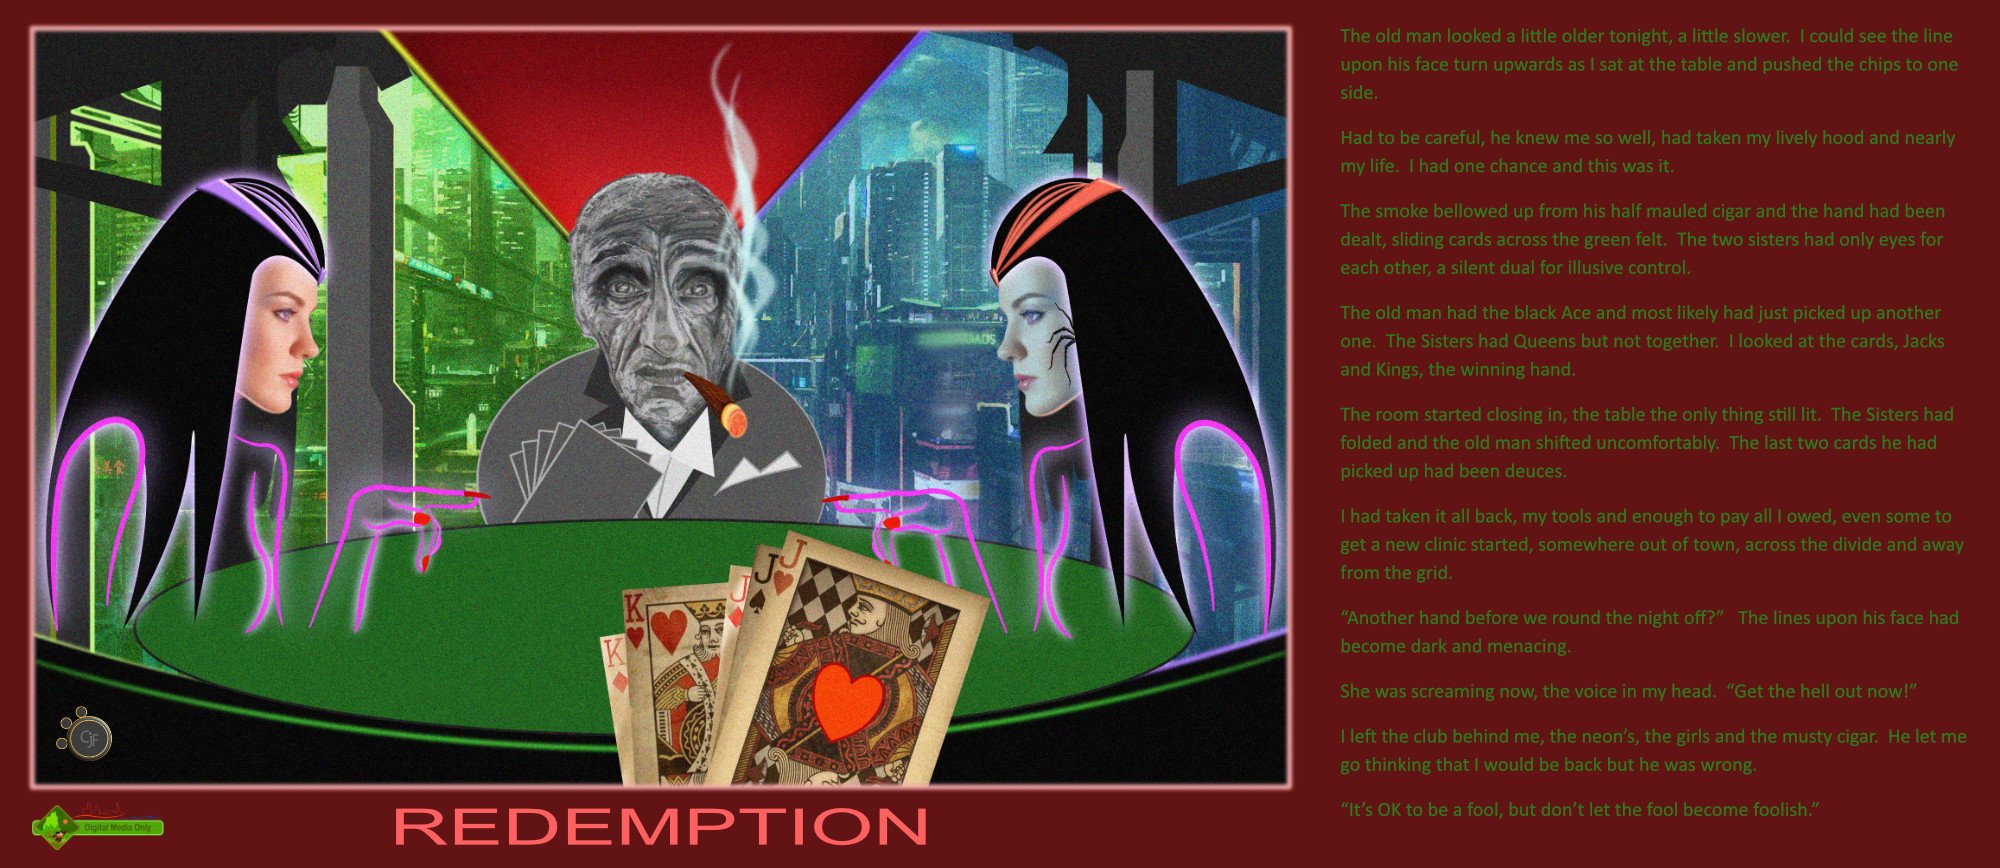
Digital Media Only is finishing the year on a good note. Happy Christmas.
-
 Open the Video Link above and set your reminder. The Time is automatically converted to your timezone
 -
Russian WW2 B-4 203mm Howitzer, heavily weathered in AP
-
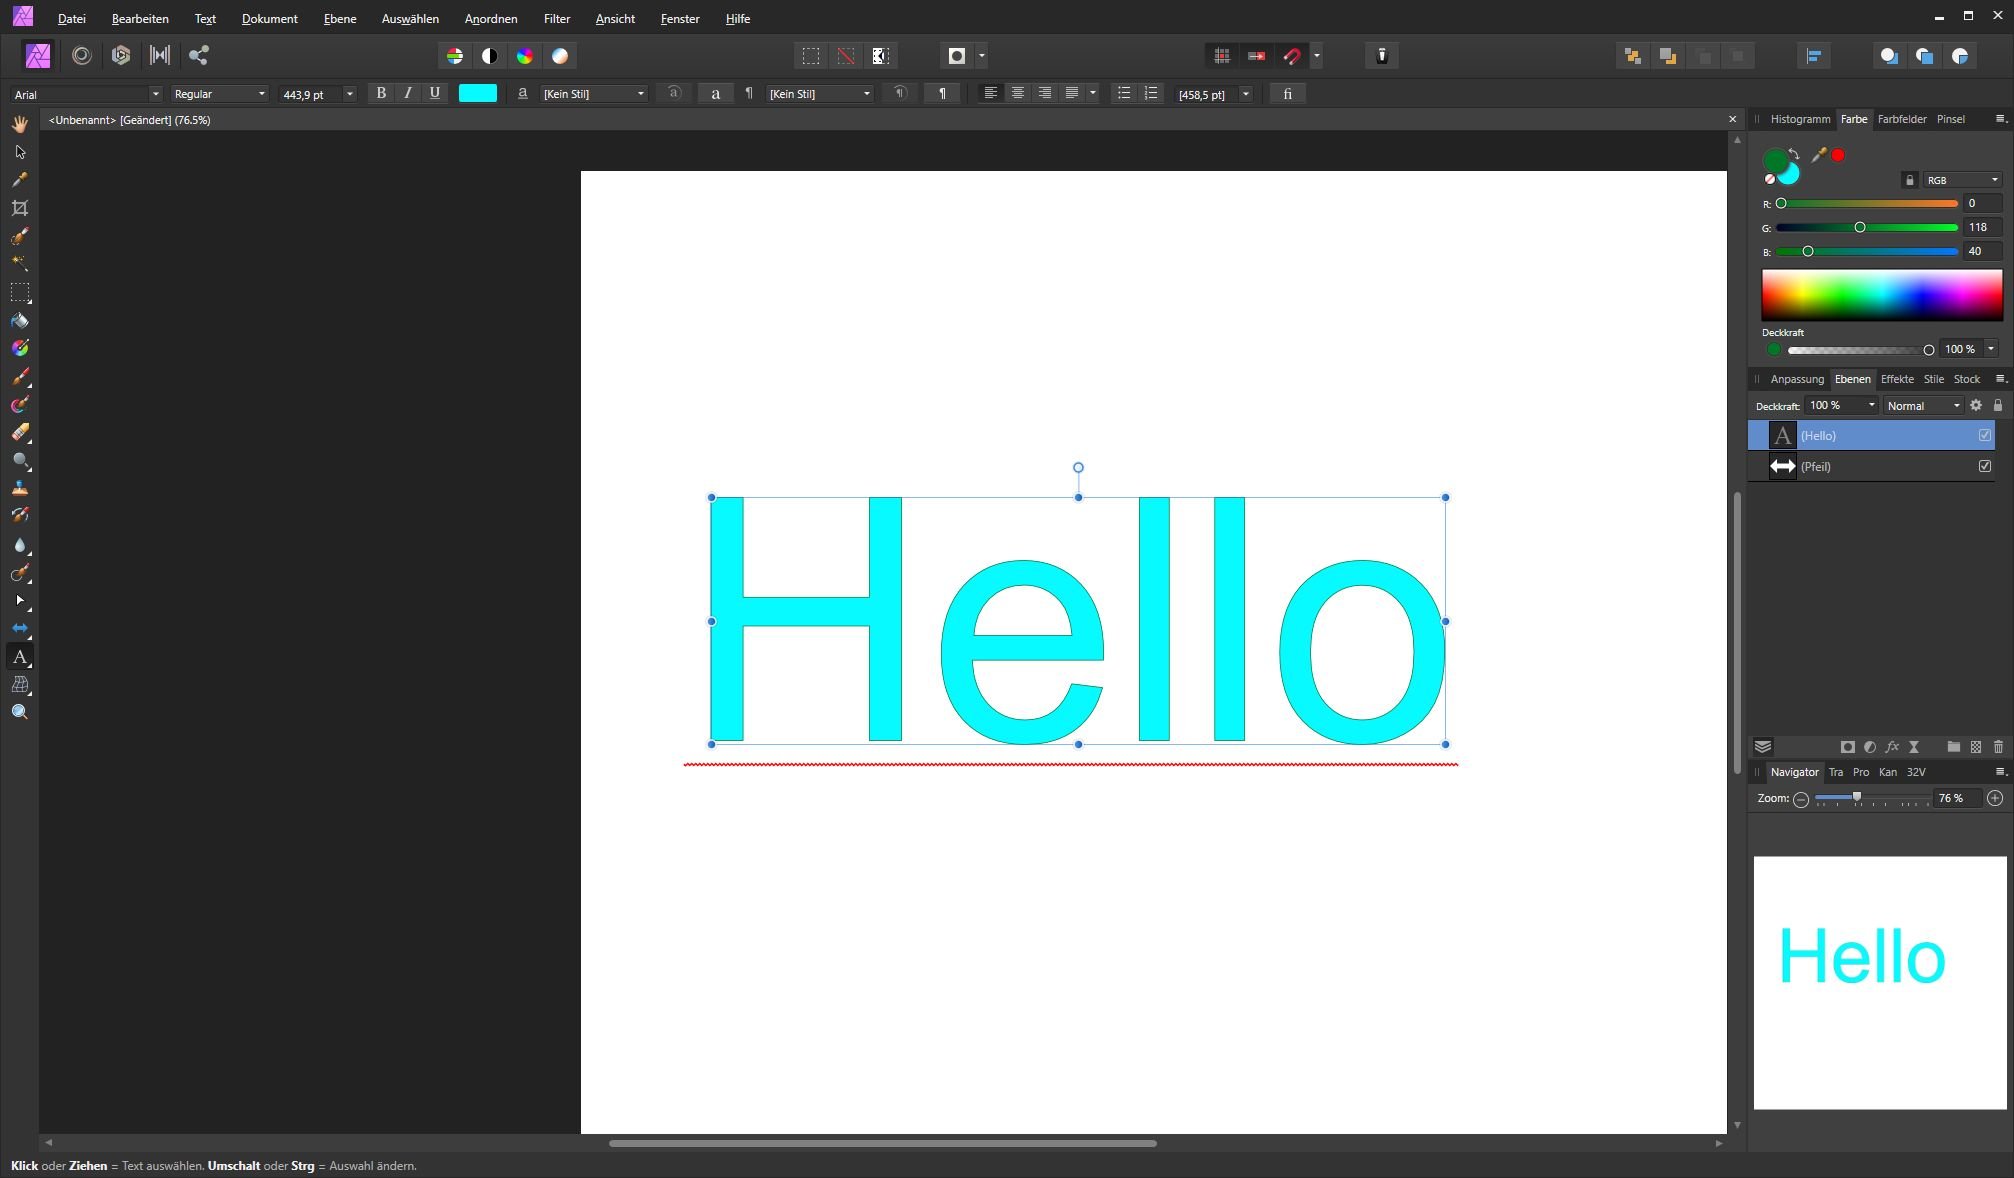
 Hey there, the context toolbar of the artistic text function in Affinity Photo is suddenly lacking the stroke options. I can't find an according option in the view / studio settings and there are no hidden elements on right of the context toolbar (no double arrow). Where is it gone and, even more important, how can I get it back? Kind regards
-
 I'm freelance photographer and recently bought affinity photo for editing my pictures on the go but what i found that there is no any copy paste option for develop and adjustment setting from one picture to another like photoshop raw camera and lightroom have. I'm really disappointed with that coz i cant able to make similar look on my pictures. So is there any solution for this ? Or affinity team working on this issue soon they can provide that option in update or something. Coz of that i cant able to use affinity i have to stick on lightroom only.
 -
My first art work with Affinity Photo what i want share (i do another work what i feel i dont want share). And few things what i do - background is made two gradient with multiply mode and three photos (daub watercolor paper,and few my photos which is one is modifeid another program i think in Gimp and another is convered grayscale in afffintiy photo boosting red). and paron is drawed using few build in brushes and texture for paron is made with few textural brushes form Resources area.(i like them much).
-
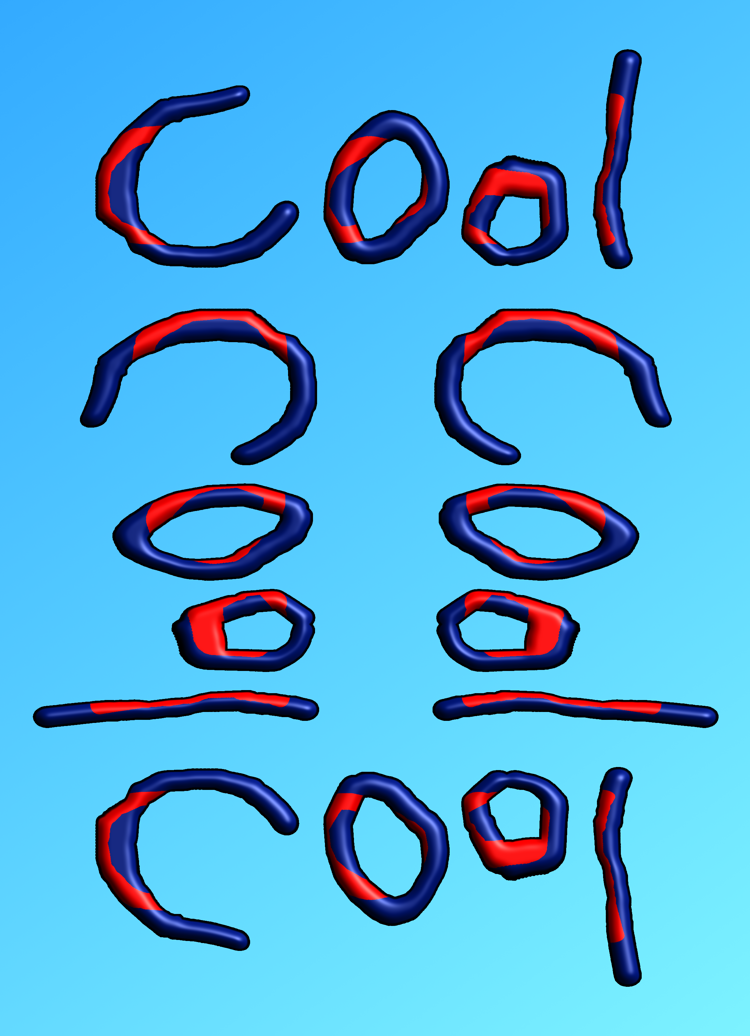
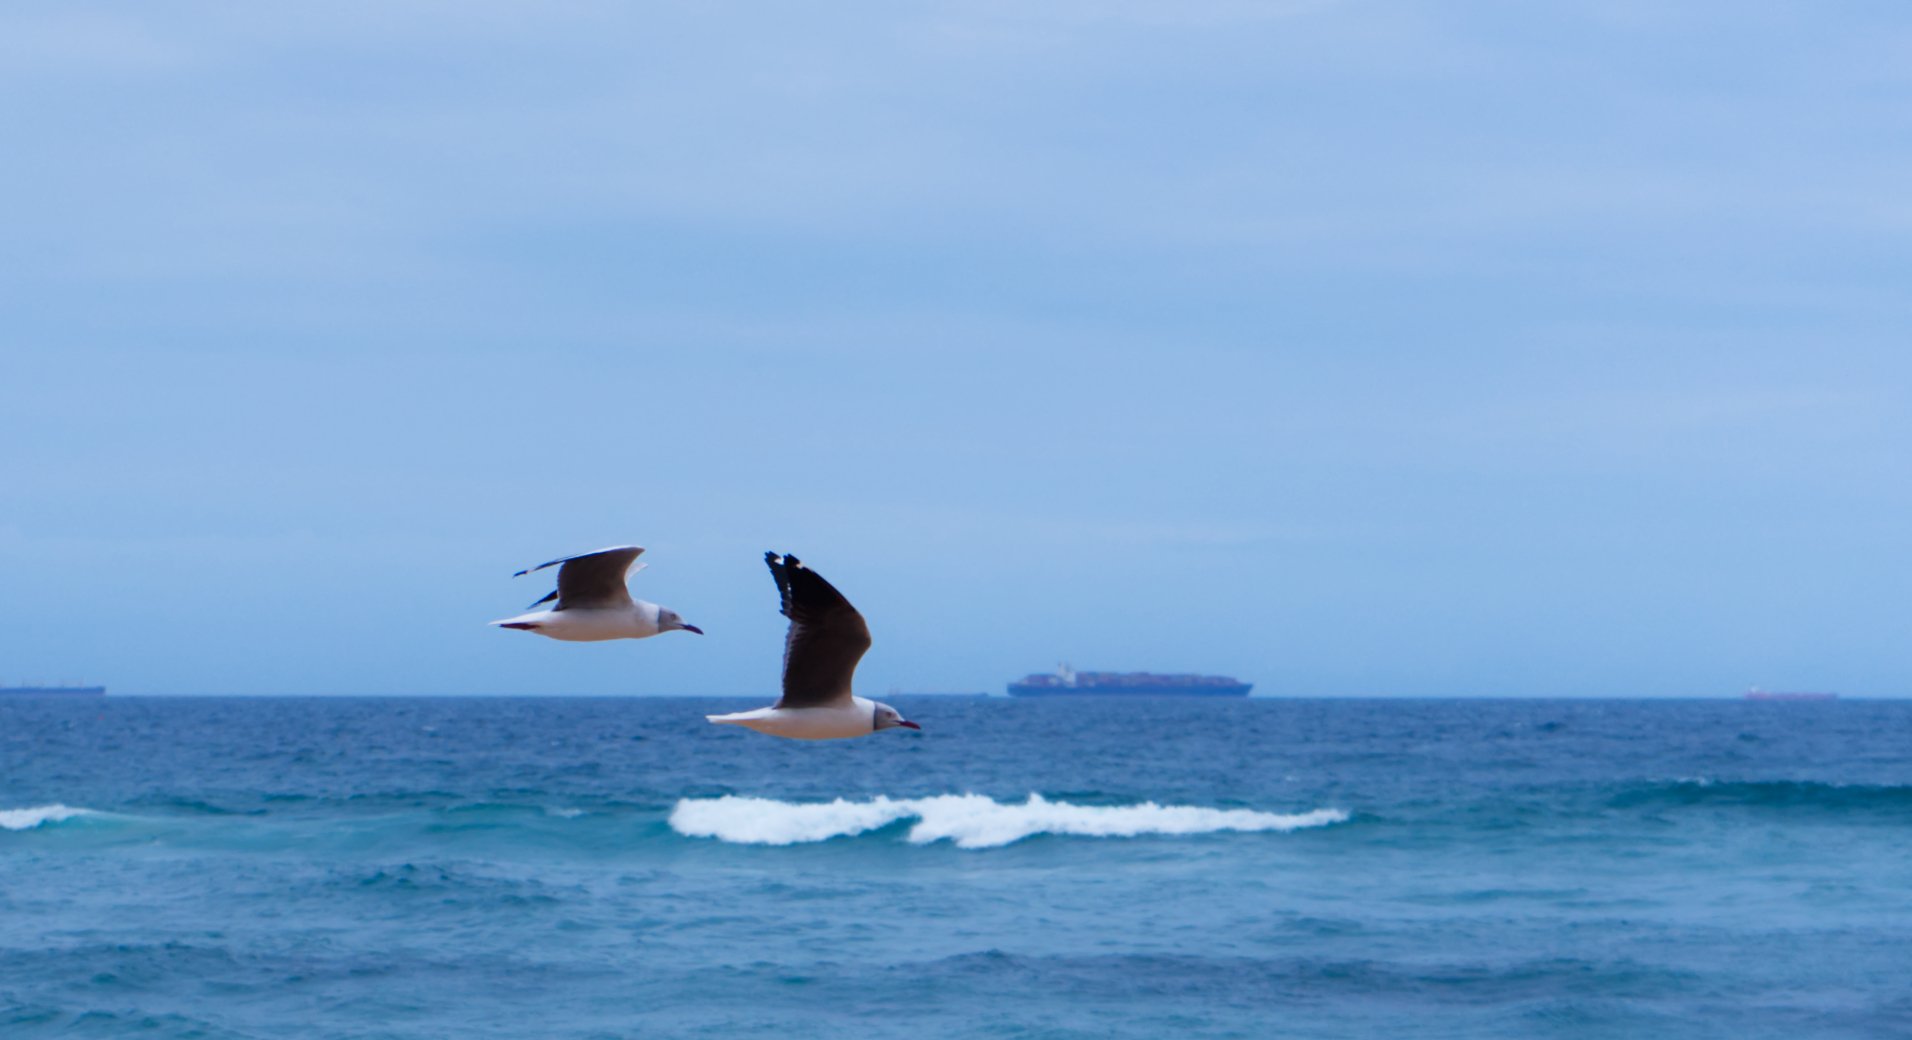
Wow As I was aligning these images perfectly in Affinity Photo, It still looked out of alignment, soon I discovered that it was an Optical Illusion, these images are actually perfectly aligned both vertical & horizontal. Cool, I even took a longer look & sure enough it's an optical illusion of uneven spaces. (Top left & right corner) (Bottom left & right corner) The 2 vertical images are actually the same size & The 2 horozontal images are actually the same size.
-
In this Challenge in will attempt to recreate the DayBreak Cover from Netflix in Affinity Photo. There are some cool effects and tricks to be found in this video, like creating a Paper Rip Effect, make the paper look old and wasted and applying a Halftone Effect to part of the image. My FREE* Skillshare Course: https://skl.sh/2MvIqDm *2 Months Free Premium for new Members. OR Buy the course and keep it forever: https://gum.co/pRxIw Awesome Deals for Affinity Photo: https://gumroad.com/sarikasat Support me on Patreon: https://www.patreon.com/sarikas Follow me on: https://www.facebook.com/sarikastutorials https://www.instagram.com/sarikasat/ Join us on Reddit: https://www.reddit.com/r/AffinityPhotoTuts/
-
 Each week I have to crop 200 photos to 1:1 size. These are a mix of portrait and landscape. The focal point is not in the same position in each image. So, I need to be able to change the crop area for each photo. To open, crop, save for each photo is slow and tedious. I'd much rather use batch that has a macro that automatically opens each photo, opens the cropping dialog, waits for me to set the crop area, then saves the photo. Is this possible with Affinity Photo? (Is it possible in Photoshop?_ Thanks
 -
 Have the same problem when using die soft proof function. Mac OS 10.13.6 High Sierra
 -
 I am trying to use Lens blur on Affinity Photo. After opening the Lens Blur Adjustment, as soon as I click on Radius Affinity Photo crashes. I tried using Depth of Field and Gaussian and they work fine. Let me know if there is any issue with the same?
- 6 replies
-
- 1
-

-
- affinity photo
- ipad
- (and 3 more)
-
I have been using Affinity Photo since late 2017 when I first got the trial version. I was so impressed with it that I went ahead and bought the full version. Took me a few weeks of trial and error learning since I was used to Photoshop, but I did eventually master Affinity Photo and found it to be superior to Photoshop in many aspects. I've been making my living as a photographic artist for over 17 years now. I recently got accepted by the Robert Harding Photography Library, a premier travel photography agency based in Britain. All of the images they accepted from me were processed using Affinity Photo. The gallery page link will only show the first 100 images they accepted from me. To see all 175 photos type the number 1311 in the search bar of the page. That will redirect to my full gallery. I am based in Arizona so I have a lot of Grand Canyon and Sedona related photos. Some of my photos are from areas that the everyday tourists either can't or won't go, which means they are of areas rarely seen by the everyday public. Some of these shots took me a whole day to hike to. My most popular photos are of lightning storms I captured in Arizona. https://www.robertharding.com/photographers/stevenlove/
-
 Hello Sir, Once again i'm sorry if somebody has requested for this feature or reported this bug... but this is too important and annoying. The use of "Esc" key in very proper way... The default use of "Esc" is "don't apply these changes and close this opened command." suppose I've opened an image, and pressed "command+m" it will open Curve Adjustment, now there is no use of "Esc" you have to manually press "close" button.. but even if i pressed close button, or clicked outside that Curves Adjustment applies.. I've to manually select that layer and delete it. and the delete button on "Curves" dialogue box is un-necessary. Secondly, if I pressed command+t it will load a big box of text, and no esc works on it and one has to close that box manually. too annoying.. "BTW try Laptops and see how difficult it becomes to move full arm from keyboard to touchpad so repeatedly. Similarly , if I used erase brush or any color brush, it pixelate image without letting me know if I really want this to happen or not. This should first ask "If i really want to pixelate it or not" And if I press "Esc" it shouldn't pixelate the image so I could do that manually (after making a backup layer). Because there is no "smart" object option in AP, so once image is "not pixelated" it is already smart object and can be scaled up or down, but once it is pixelated, all information is lost and that can't be scaled up anymore. So there should be a "confirmation" dialogue instead of "you are already killed" dialogue. And there, where escape shouldn't close the box, it is totally ruining the system. in system preferences, if I accidentally changed anything.. the press of "Esc" not only applies that, but also closes that .. OMG.. what change did I do?.. Please make "Esc" to just go to Preferences's home view and remove the "close" button and change that to "save/apply". And "close" button here and "x" button on the top are same. if some change is made, the "esc" shouldn't apply that but go to Preferences's home view. This all goes to.. "MESH TOOL", "Transform", "etc" ... "Enter/Return" to "apply" and "Esc to Cancel" I hope these changes will put some ease in life.. Thank you MacOS Catalina - 10.15 (19A602) Affinity Photo 1.7.3 Macbook Pro -mid 15, 15inch.
- 1 reply
-
- 1
-

-
- affinity photo
- esc
- (and 1 more)
-
 I'm confused about a function I accidentally activated and do not know how to switch back. My brush tool doesn't provide its usual strokes. Whenever I make a stroke the cursor shows itself as a plus sign, a red line and a blue circle. Something unfamiliar to me and it puzzles me. Would someone please tell me what this function is supposed to do? And how do I get back my regular brush? Many thanks!
 -
Stitched and processed 5 HDR images shot with default camera app on my trusty iPhone 7 (I know, vintage!) in Affinity Photo for iPad... Got much better results this way than using the iPhone's built in panorama mode, which is very hard to get a straight horizon with....
-
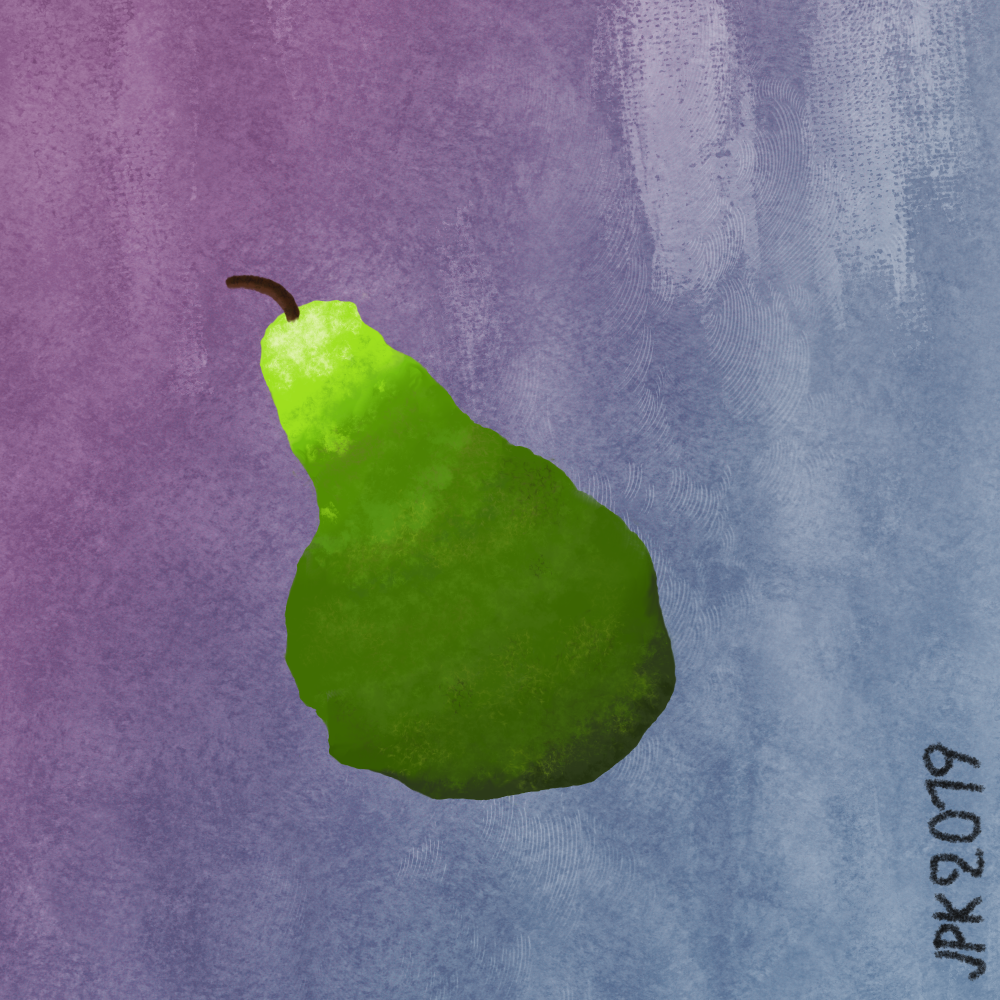
Cool, I did my 1st amazing drawing after I purchased Affinity Photo.
-
 Cool, finally purchased Affinity Photo, & it totally rocks. Now I have all 3 purchased; Affinity Designer Affinity Publisher Affinity Photo
 -
Nothing special, I took these pictures last weekend at Umhlanga Rocks in South Africa, all pictures taken with a Sony A7II, with the Sony 28-70mm, and all develop in Affinity Photo. This is my first time using Affinity Photo to develop pictures.
-
 There should be at least BASIC support of RTL languages in Affinity apps. Happy if some character formating features are blaned out while allowing me to work with RTL text at all. Currently it's simply IMPOSSIBLE to work with any RTL text al all (which is ridiculous given the amount of users that have requested this feature) as Affinity enters the characters in the wrong order. It's like reading REDRO instead of ORDER on the screen. Suggest roll out in steps, starting with basic and adding full compatibility down the road. Really appreciated.
 -
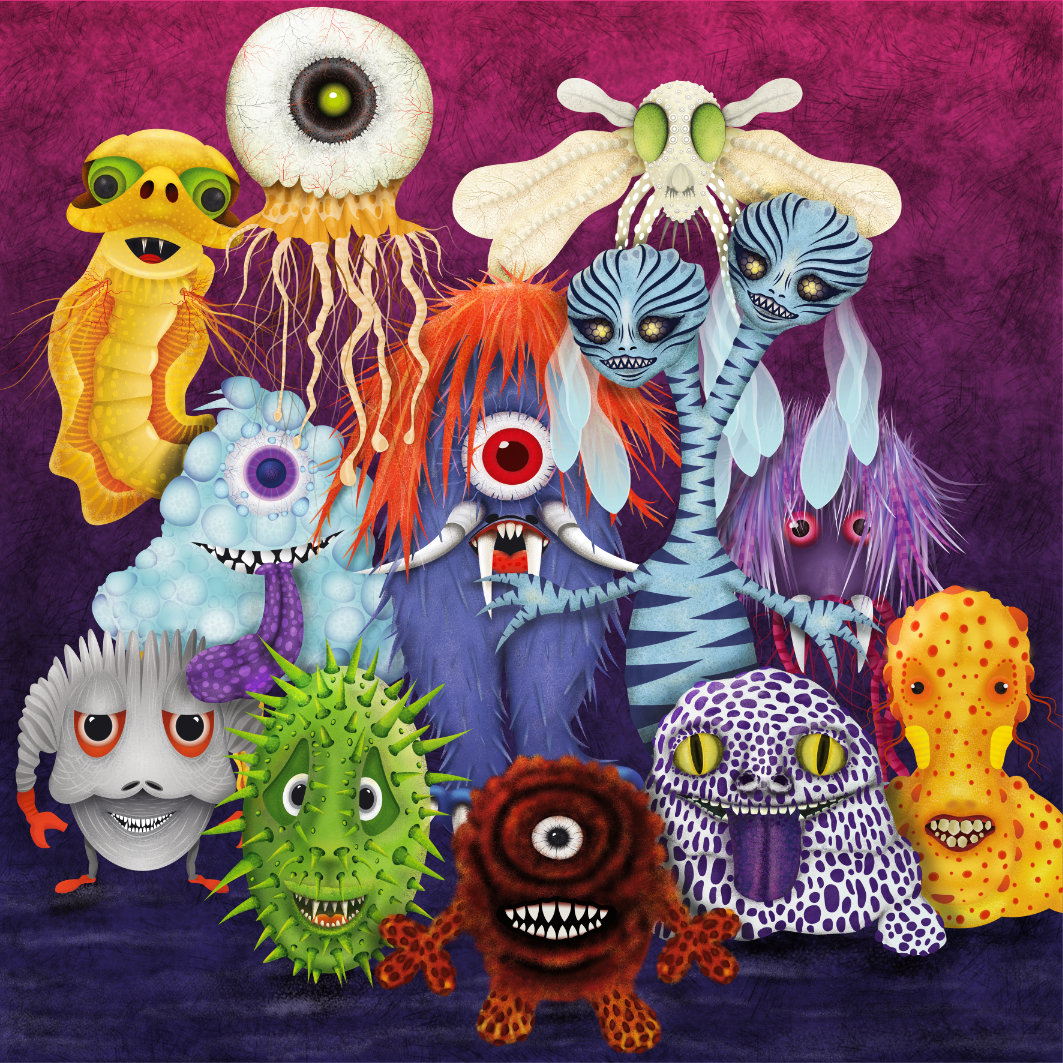
Hi All Finally! completed the first artwork originally for #INKTOBER 2016 (Twelve) and then recreated in Affinity Designer/Photo and now looking forward to the next one!. Original file size 600mm (300dpi) 12 additional 250x310mm (300dpi) for each creature
-

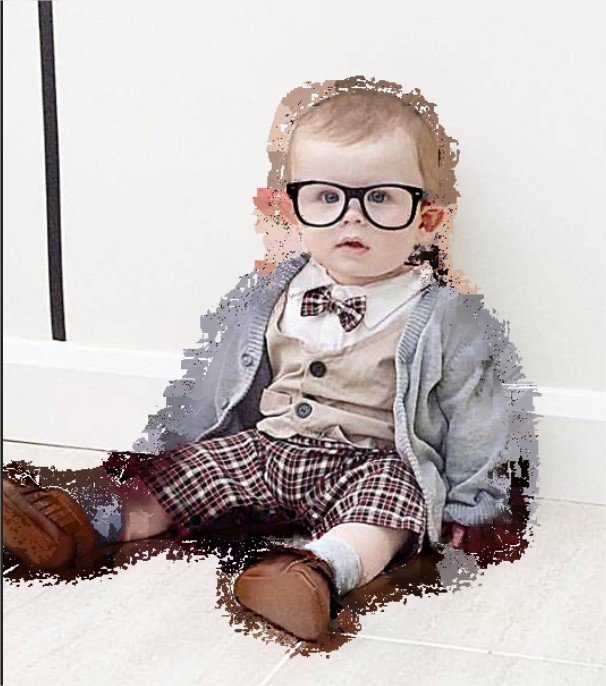
affinity photo Tattoo and ‘face furniture’ removal experiment
GarryP posted a topic in Share your work
This was far trickier than I first thought is was going to be (and the result isn't nearly as good as I hoped). I’ve only shared a low-res version as the high-res version is a mess. More experimentation with the various tools is much needed. If anyone has any tips for this kind of thing then please share them.
-
Hello Sir, Once again i'm sorry if somebody has requested for this feature or reported this bug... but this is too important and annoying. The use of "Esc" key in very proper way... The default use of "Esc" is "don't apply these changes and close this opened command." suppose I've opened an image, and pressed "command+m" it will open Curve Adjustment, now there is no use of "Esc" you have to manually press "close" button.. but even if i pressed close button, or clicked outside that Curves Adjustment applies.. I've to manually select that layer and delete it. and the delete button on "Curves" dialogue box is un-necessary. Secondly, if I pressed command+t it will load a big box of text, and no esc works on it and one has to close that box manually. too annoying.. "BTW try Laptops and see how difficult it becomes to move full arm from keyboard to touchpad so repeatedly. Similarly , if I used erase brush or any color brush, it pixelate image without letting me know if I really want this to happen or not. This should first ask "If i really want to pixelate it or not" And if I press "Esc" it shouldn't pixelate the image so I could do that manually (after making a backup layer). Because there is no "smart" object option in AP, so once image is "not pixelated" it is already smart object and can be scaled up or down, but once it is pixelated, all information is lost and that can't be scaled up anymore. So there should be a "confirmation" dialogue instead of "you are already killed" dialogue. And there, where escape shouldn't close the box, it is totally ruining the system. in system preferences, if I accidentally changed anything.. the press of "Esc" not only applies that, but also closes that .. OMG.. what change did I do?.. Please make "Esc" to just go to Preferences's home view and remove the "close" button and change that to "save/apply". And "close" button here and "x" button on the top are same. if some change is made, the "esc" shouldn't apply that but go to Preferences's home view. This all goes to.. "MESH TOOL", "Transform", "etc" ... "Enter/Return" to "apply" and "Esc to Cancel" I hope these changes will put some ease in life.. Thank you MacOS Catalina - 10.15 (19A602) Affinity Photo 1.7.3 Macbook Pro -mid 15, 15inch.
- 7 replies
-
- 1
-
-
- feature request
- esc
- (and 4 more)
-
 Photo's raw engine is doing something very unpleasant to Sony Raw Files. Please find attached a native raw file and the same file after running through adobe's DNG converter. Try to open both in Photo. The Sony native raw file as when presented for view and after developing is awful - lots of detail lost in the leaves. Photo apparently handles the DNG file what appears to be 'correctly'. So there is a work around pre process Sony Raw's with Adobe's DNG converter (which has batch option) - but it is an unwelcome extra step in the work flow. Can also use Sony's Imaging app to edit to output to jpeg but one at a time. I have also included jpeg from Sony's Editing App. Thanks in advance ... Gerry Platform: Windows 10 64bit - Photo 1.7.3.481 DSC09718.ARW DSC09718.dng DSC09718fromsonyimaging.JPG
 -
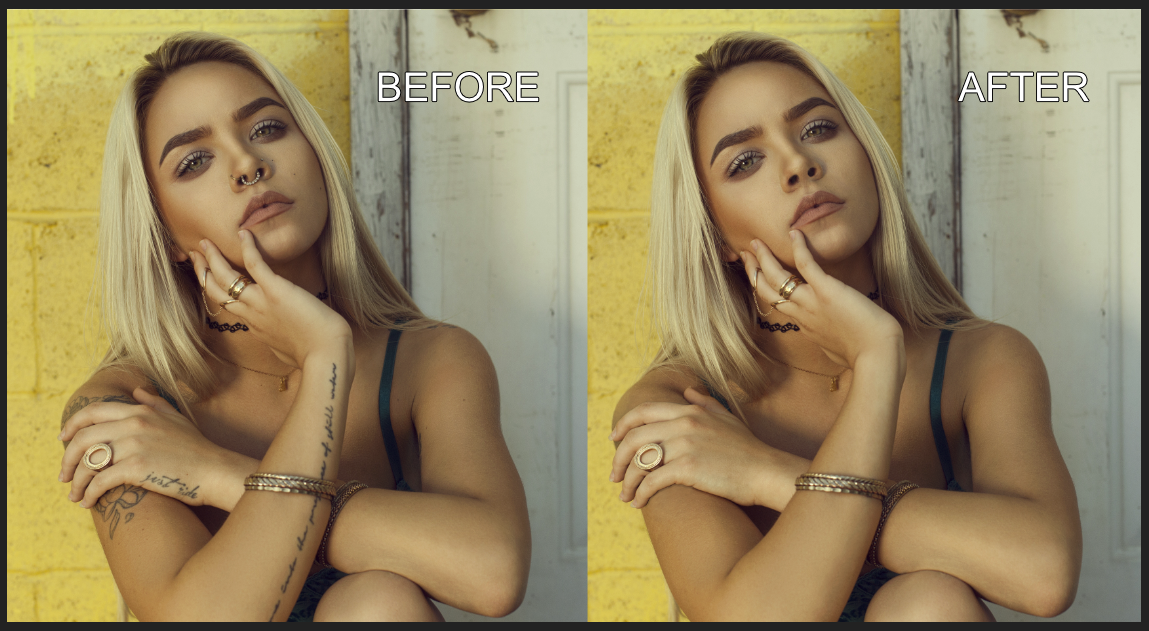
Hey! Just wanted to share with you this photo that has been enhanced with Affinity Photo. It's showing a nearby mountain with a observation tower on it. The evening sun just breaks through the clouds. What you think?


.jpg.88967d6ec69d487e37b176d774c68149.jpg)