Search the Community
Showing results for tags 'Affinity Designer'.
-
 In this beginner tutorial I'll show you how to draw a parking disk with various tools and techniques in Affinity Designer 1.6.0. Although this tutorial is only available in German, you can hopefully follow the course of the video. The detailed table of contents in English inside the video description is hopefully a good guide for the single steps. Keep on drawin' Norbert
 -

-
During the long winter nights i often look in the starry sky at the Andromeda galaxy, which can be seen through binoculars. It is so small from our Earth, but actually its a huge galaxy, and i'm wondering - maybe some kind of girl, who lives there, looks right now back at me questioning herself - is there somebody else in this huge space?.. So this is how i see this girl. Damn, i was trying to figure out someone more romantic, but my humorous mind just played a trick on me. Goodbye, Andromeda girl, from now i'm not sure if i want to believe in your existence. :-) Based on all those sci-fi fairy tales i've read in my younger years. Just a bit about the process - i suddenly realise what i want to draw, then i make few sketches on paper or digitally, or both (here Wacom Intuos Pro 2 paper edition was heavily used with its ability to convert paper drawings into digital sketches), then i make final sketch and trace it in Affinity Designer with vector brush. Colors are added after that... So like this.
-
Hi, I would love to see an option to optimise Affinity Designer’s files. What I have in mind is a way, once you have finished your composition to reduce the image size to match their use. You would need a few options to reduce the file without losing actual useful data. Depending on what you need you can define that the file images need to be downsized to 1x or 2x, that the images should be cropped to their visible portion or left to their full size, etc. I think this would be really helpful to avoid archiving huge files when you have a mostly vector file but with a few cropped images.
-
This one didn't make it to the final version:
-
 Hi Affinity By Serif, I'm using Affinity Photo and Affinity Designer. I noticed that once I have imported new brushes, I cannot re-order brush categories or sort the brush categories by name. The most recent imported brushes are at the bottom of the scroll down menu in the brushes panel. Would it be possible to add such an ordering or sorting feature so that users can actually order the brush categories according to their own preferences? < I could not find such a feature/ functionality in Photo or Designer. > Would be nice. With kind regards, Bastiaan
 -
This girl loves her cute little pet toad so much she even lets it sit on her head! Affinity designer vector image.
-
The only reason I still have Photoshop is because of 3D Capabilities, and 2D animation to Gif capabilities. I know 3D is probably a hard ballgame to play but 2D gif timeline, drawing to frames and exporting as gif would be very useful.
- 1 reply
-
- 1
-

-
- affinity photo
- affinity designer
- (and 2 more)
-
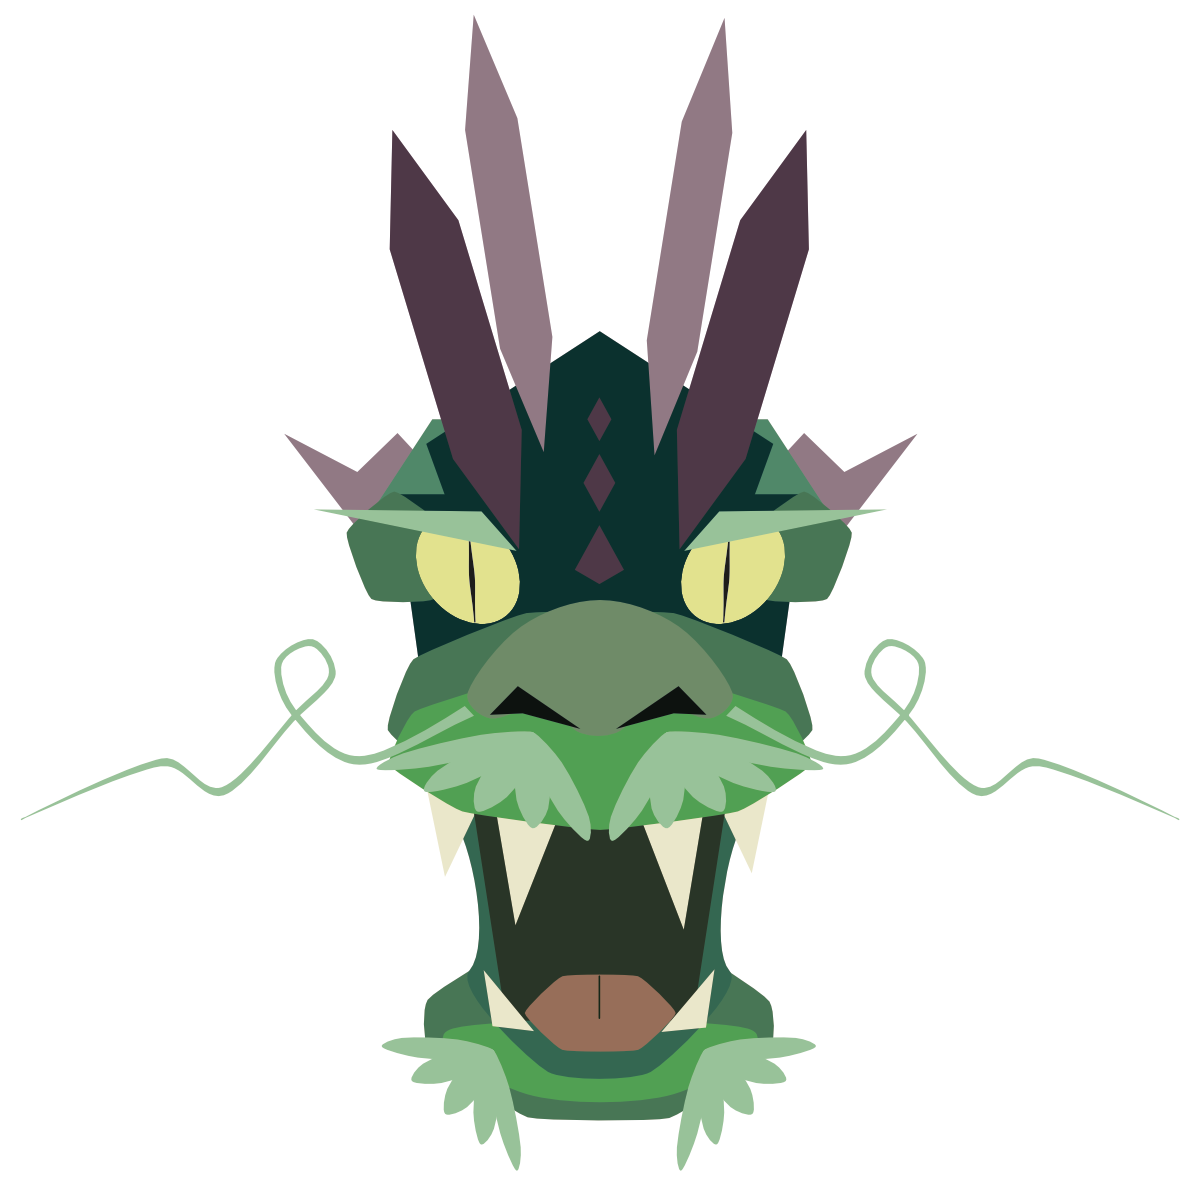
Hello, this is my second job with Affinity Designer! Oh, you can also see it on Tumblr: https://www.tumblr.com/blog/weekend-vector Yin-Yang Symbol.afdesign
-
 Hi Everyone, i'm not sure if it's a bug, but i use "insert filler text" a lot, so i decided to give it a shortcut. Usualy when i use the text menu i get classic "Lorem ipsum", but since i have created a shortcut i have what seems to me pieces of "Alice in wonderland". Is that known? Looks like an easter egg of some sort. Haven't found options to set it to "Lorem ipsum". Any idea? Thx ! Ben
- 8 replies
-
- 1
-
-
- affinity designer
- textholder
- (and 1 more)
-

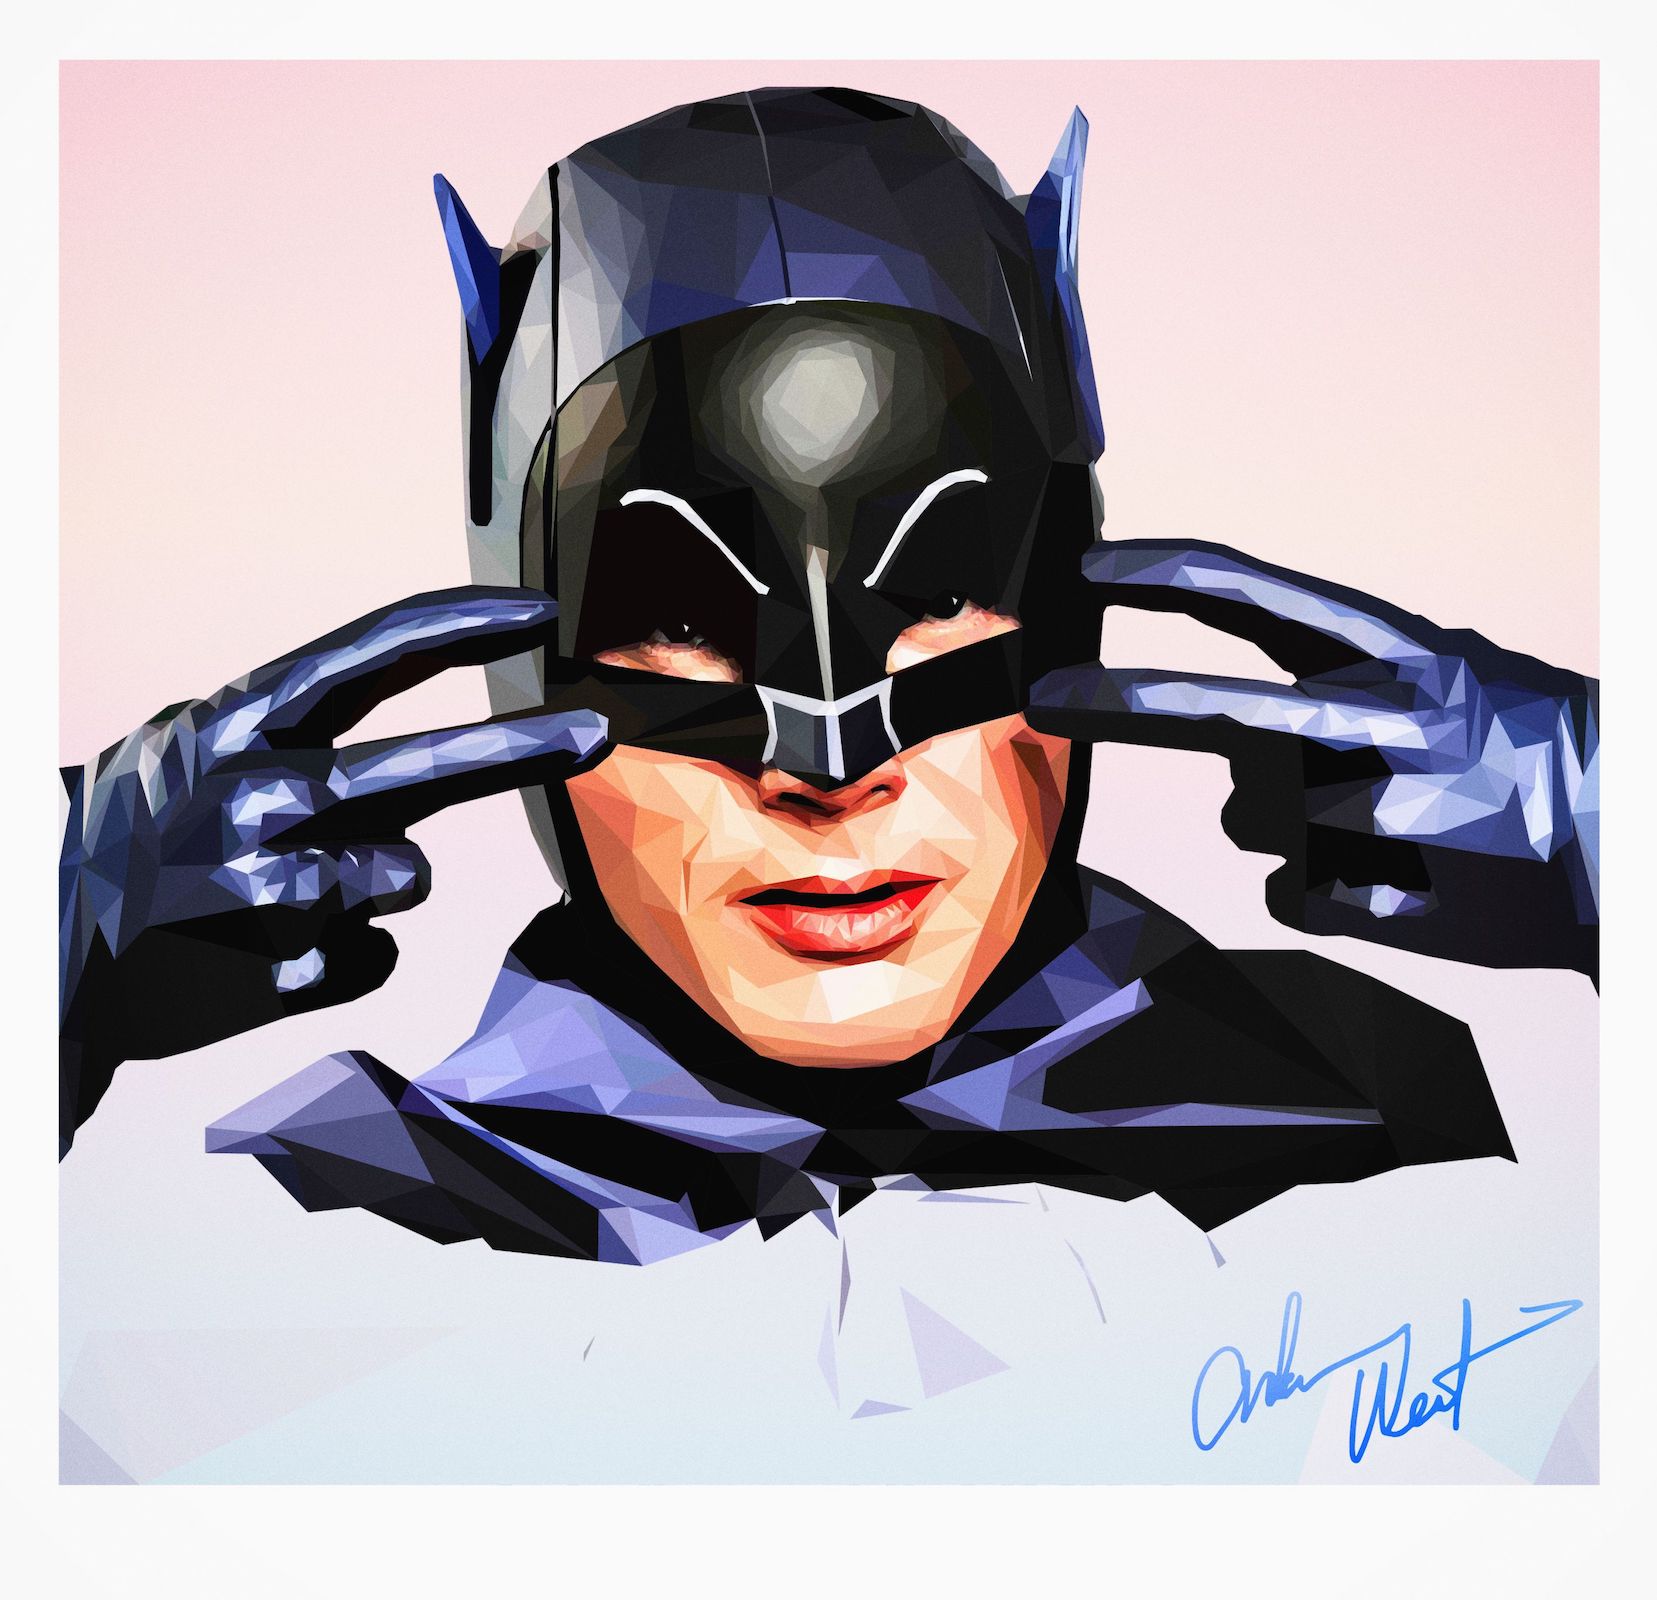
affinity designer I Never Had To Say "I'm Batman" (AD)
VectorVonDoom posted a topic in Share your work
I wasn't going to do another but I have as they seem popular, my weekend project. I picked a really horrible quality image, like someone took a 100x100 and enlarged it. But, for the most part, it turned out just about OK (that's all the time I had and would look better cropped, if I'd thought I'd probably got rid of the hands, something for next weekend). I've include the afdesign file so you can view it, expand it (there's more to the image), improve it, have a laugh or anything else. It's for personal use otherwise I'll take my normal 99.99% cut. You'll see quite a few messy snapping points but they don't show up on the export. You will need to duplicate the batman layer and add a .1px blur to get rid of the micro gaps before you do export. That is his signature, I just live traced it in AI then added a gradient and some transparency. The image I've attached just has some Color Efex Pro film grain added. But if you want to do some low poly and also have AI then use that with live paint instead. You don't then need to create triangles very often just close shapes off so less errors, less cleaning up and generally quicker. Batman.afdesign
- 5 replies
-
- 14
-
-
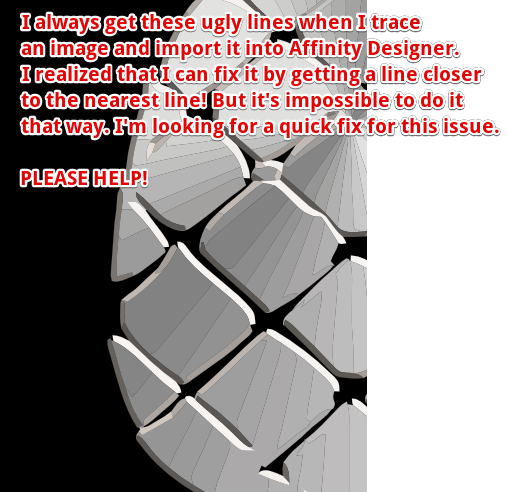
 Hi, Could someone please tell me how can I get rid of these lines that always appear when I import a traced SVG? Thanks a lot!
-
Just a bunch of icons for a telco.
-
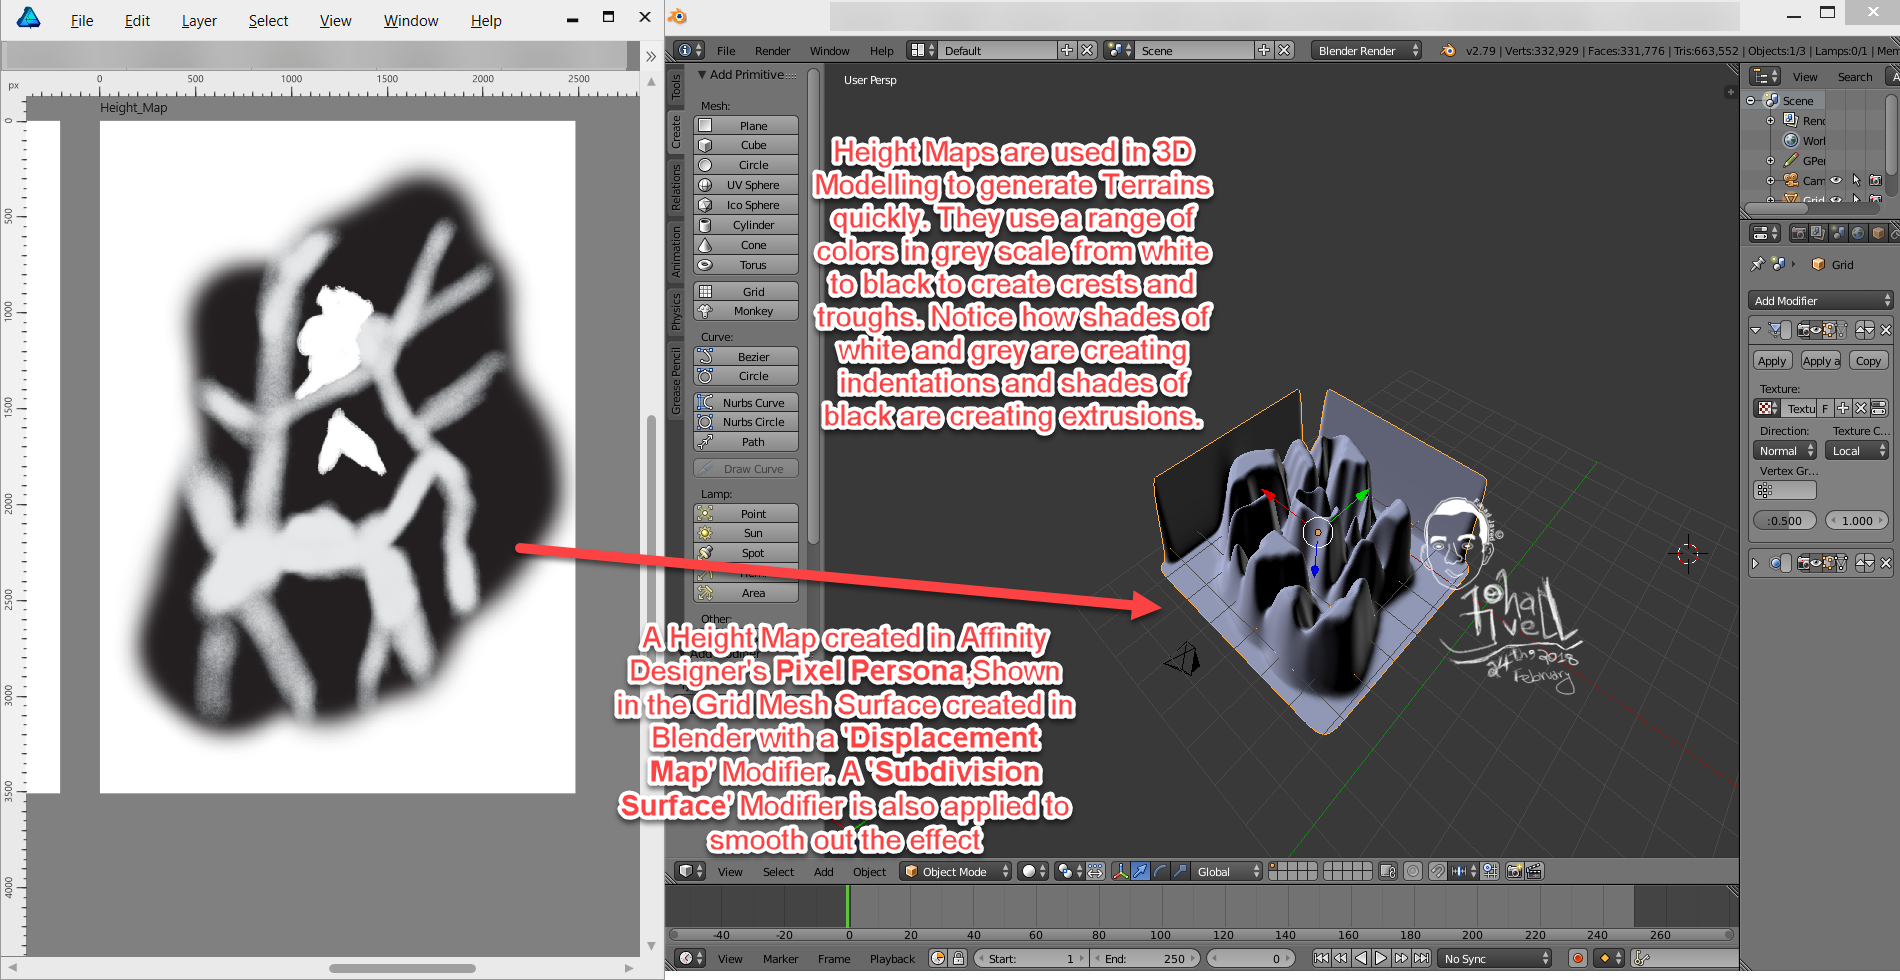
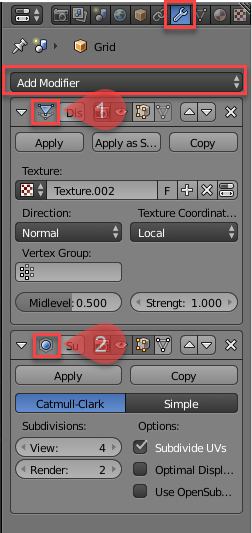
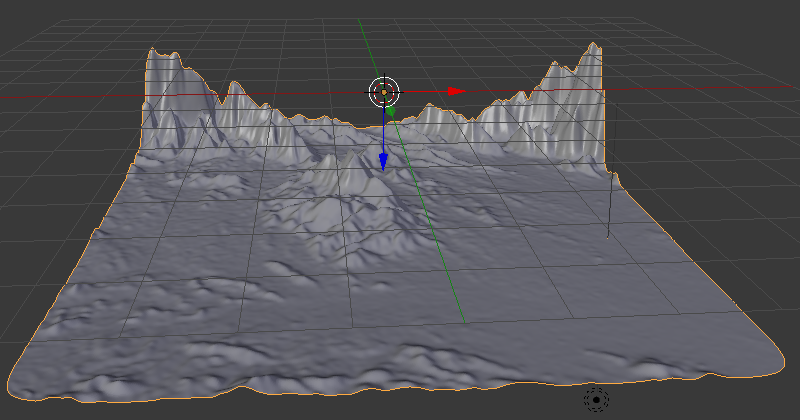
 The screen shot shows a roughly created height map in Affinity Designer's Pixel Persona[] using the Paint Brush tool[] and using grey scale values[] and how it is used in generating a 3D Terrain in Blender by applying this height map Image as a 'Displace'[] modifier on a Grid []Mesh Surface. For smoothness, i have applied a 'Subdivision Surface'[] modifier. Modifiers in 3D Modelling tools help modify an object's geometry. They can be accessed in the Tabs on the right side[] and have a 'wrench icon'[] . Just click the 'Add Modifier'[] dropdown to add the modifiers mentioned above. Notice, if you apply these modifiers by clicking the 'apply' button it will apply the effect and remove the modifier from stack of modifiers applied. If you want fine tune control over these without removing them from the stack of modifiers,don't apply them. [1] = Displace Modifier Added, [2] = Subdivision Surface Modifier Added [ >>>> [Source Files]] > The Height Map file in Affinity Designer has also been attached[File Name = Terrain_Height_Map.afdesign]. > The Blender Source File with the Height Map Applied has also been attached[File Name = Blender_File_with_Terrain_Created_Using_Height_map_from_Affinity_Designer.blend][Added on 27th February 2018] [ >>>> [Video File]] Here is a short video[around 3minutes and 26 seconds] that demonstrates the steps required:[Update: Added the Video on 26th February 2018] Blender can be downloaded from the following link: https://www.blender.org/ [ >>>> [Exercise]][Added on 27th February 2018] As an Extra Exercise,apply these concepts by making use of Real Terrain Height Maps[that contain Real World Elevation Data] generated by the following website for your own country or city: https://terrain.party/ Just search your city or country and press the Export Button[] to export a zip file that contains the height maps for the searched area. Extract the zip file and apply it to your own blender files. Notice how the grey scale values are used based on Real World Elevation data. Here is a sample of a terrain i generated using the Height Maps generated by this website: Happy Learning
- 1 reply
-
- 1
-
-
- greyscale
- fahadjaved
- (and 4 more)
-
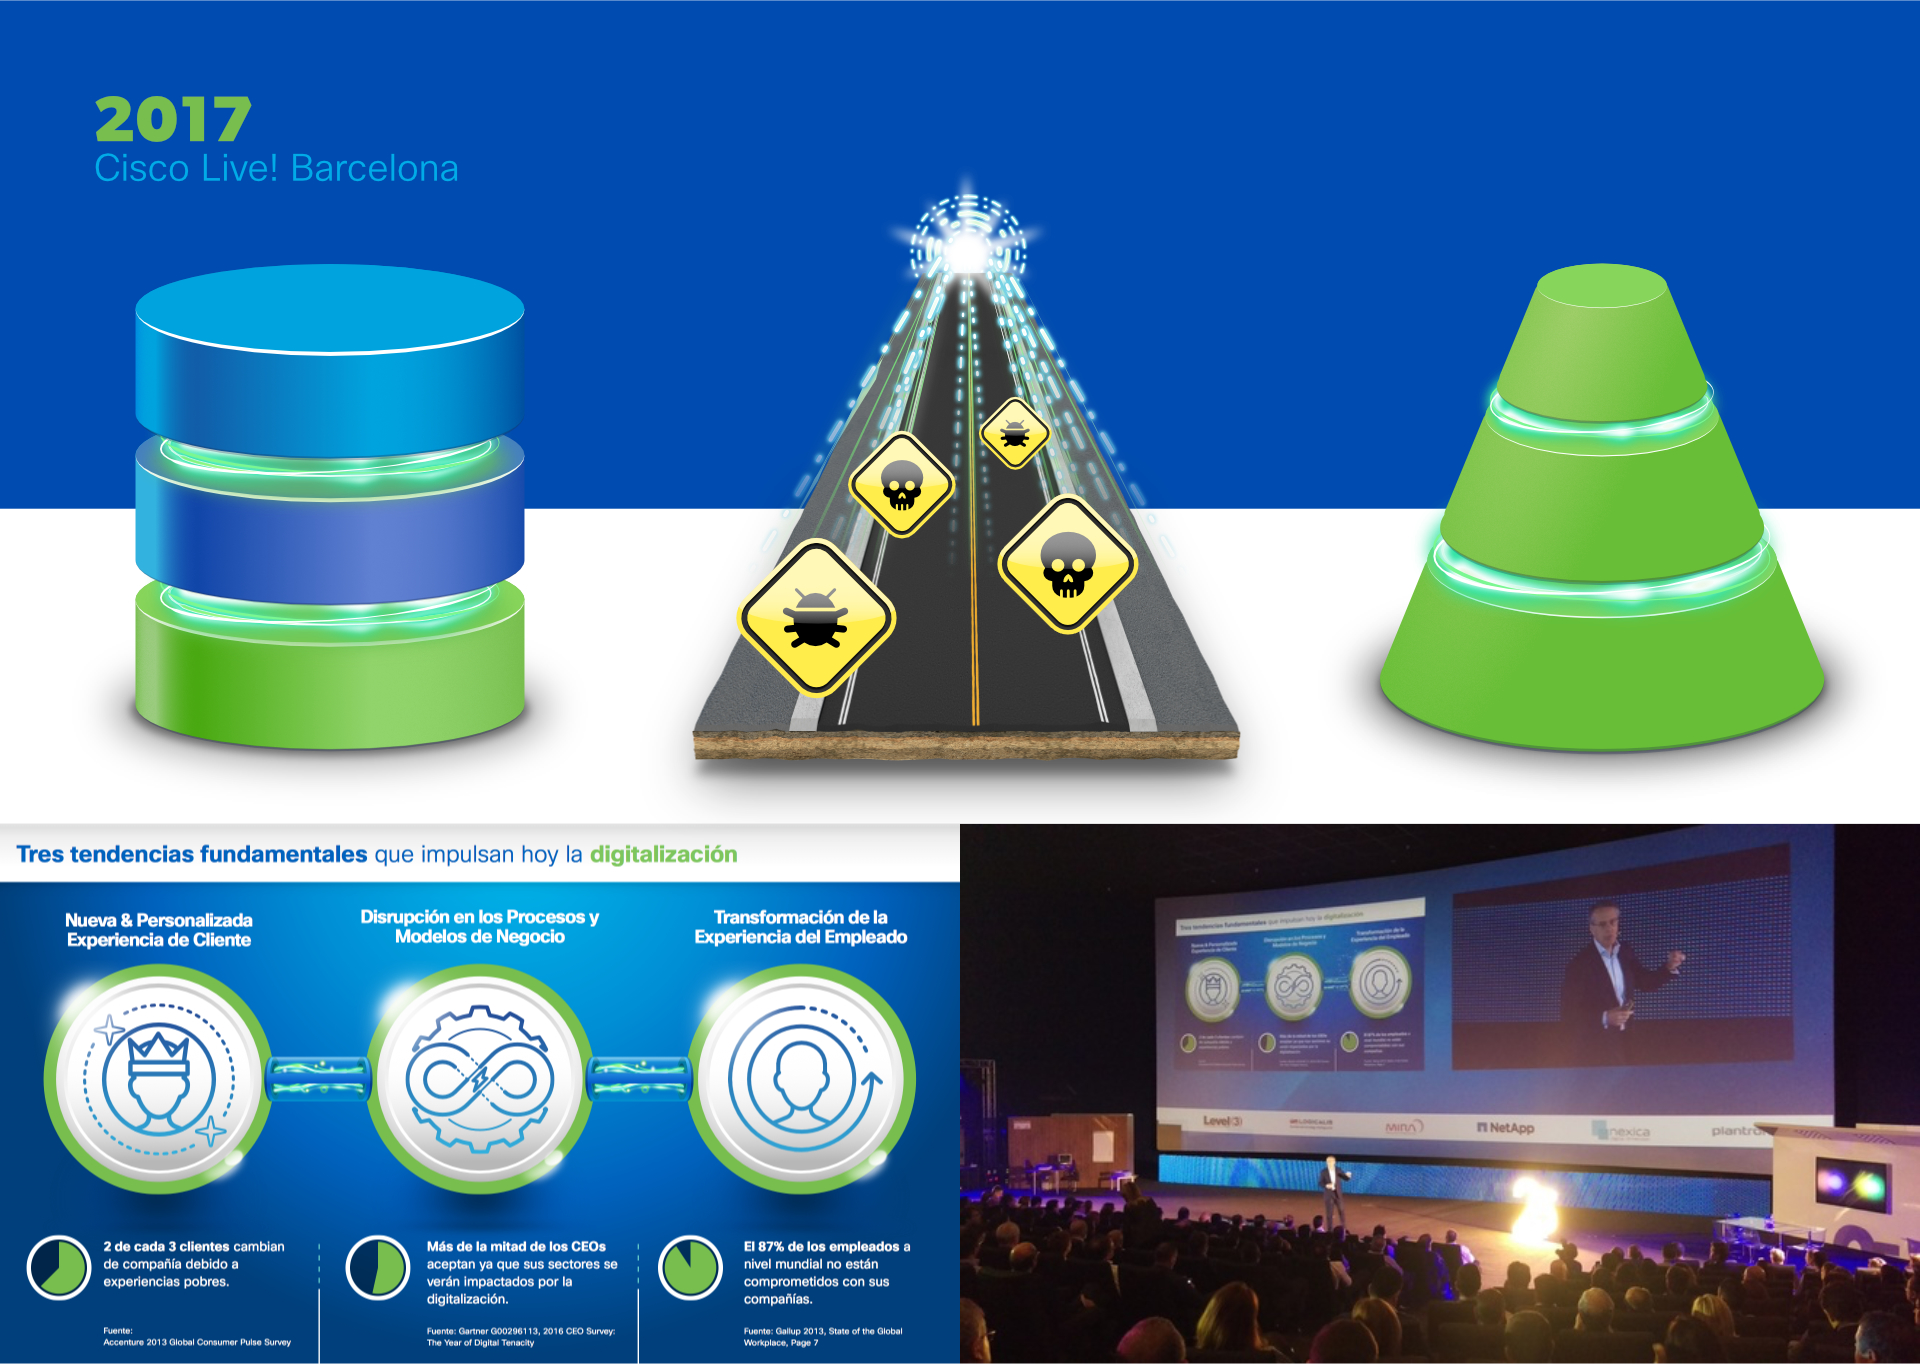
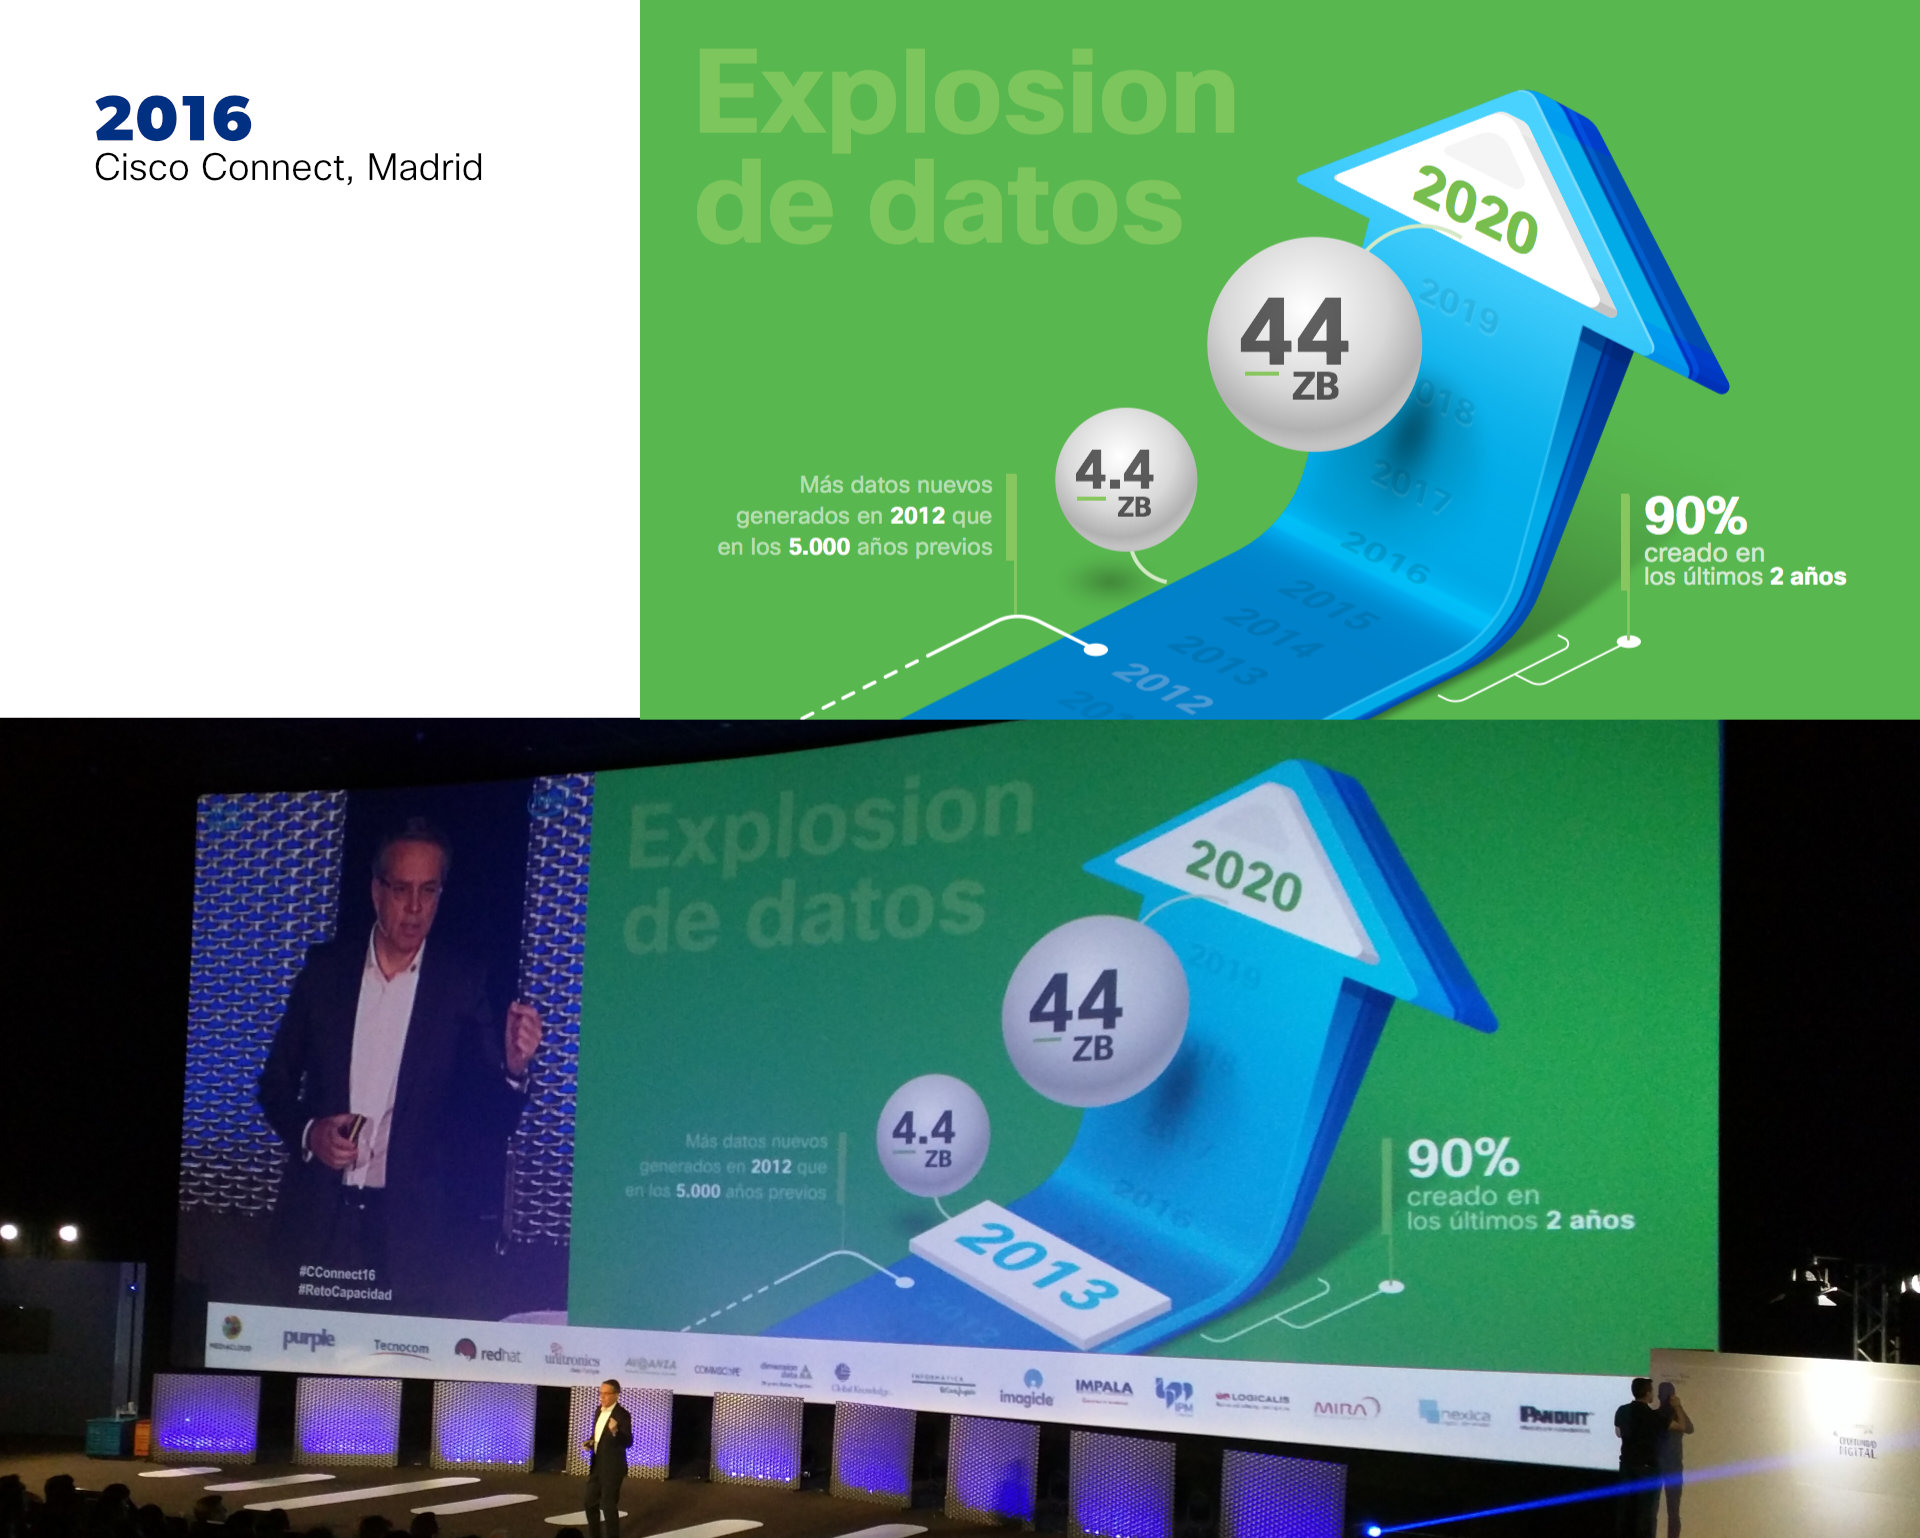
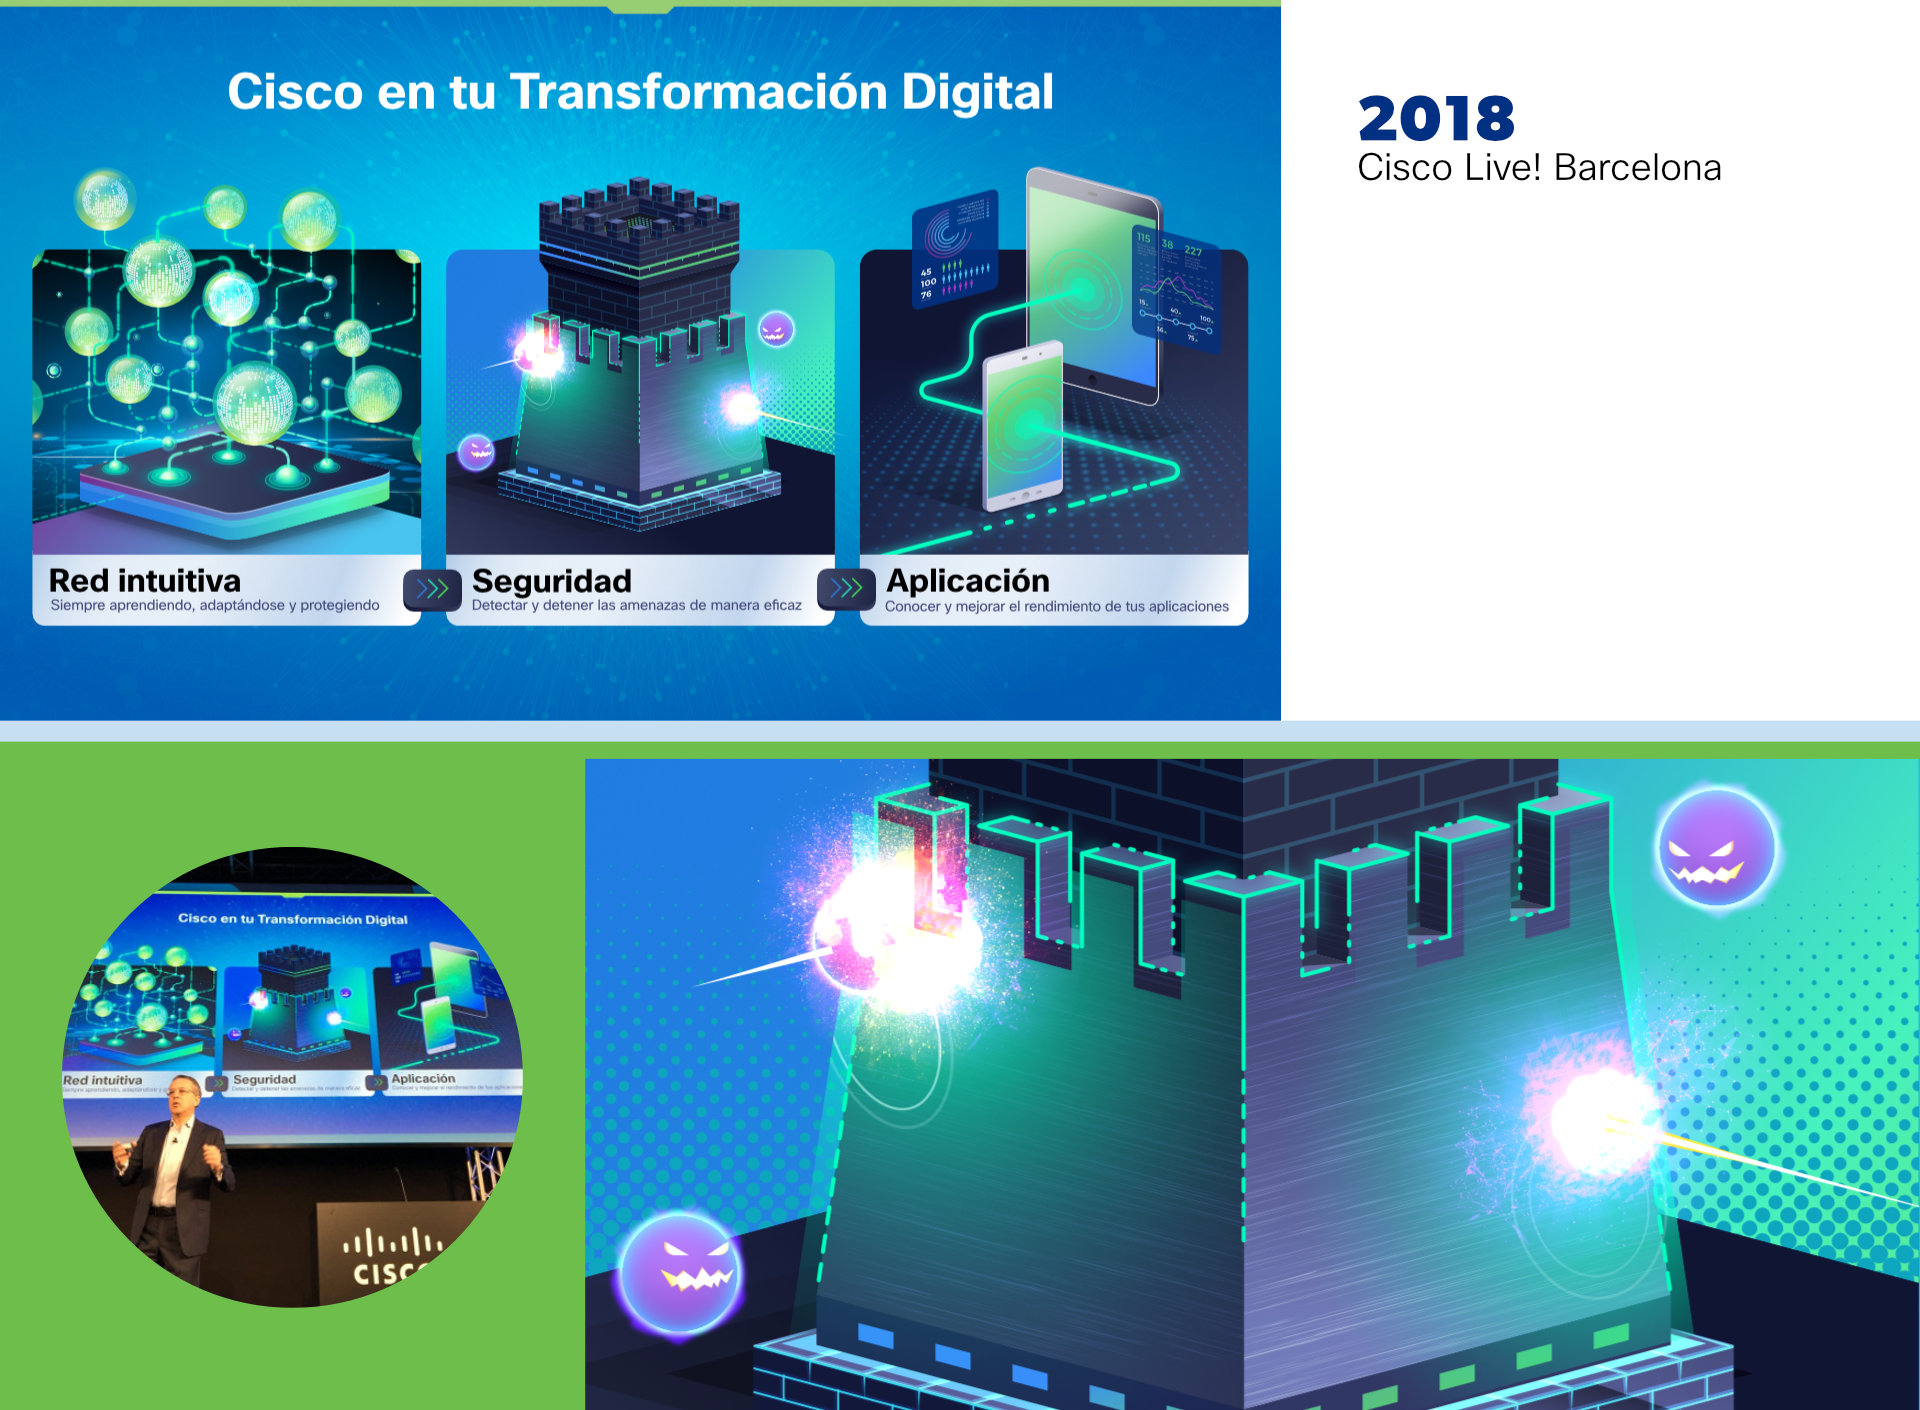
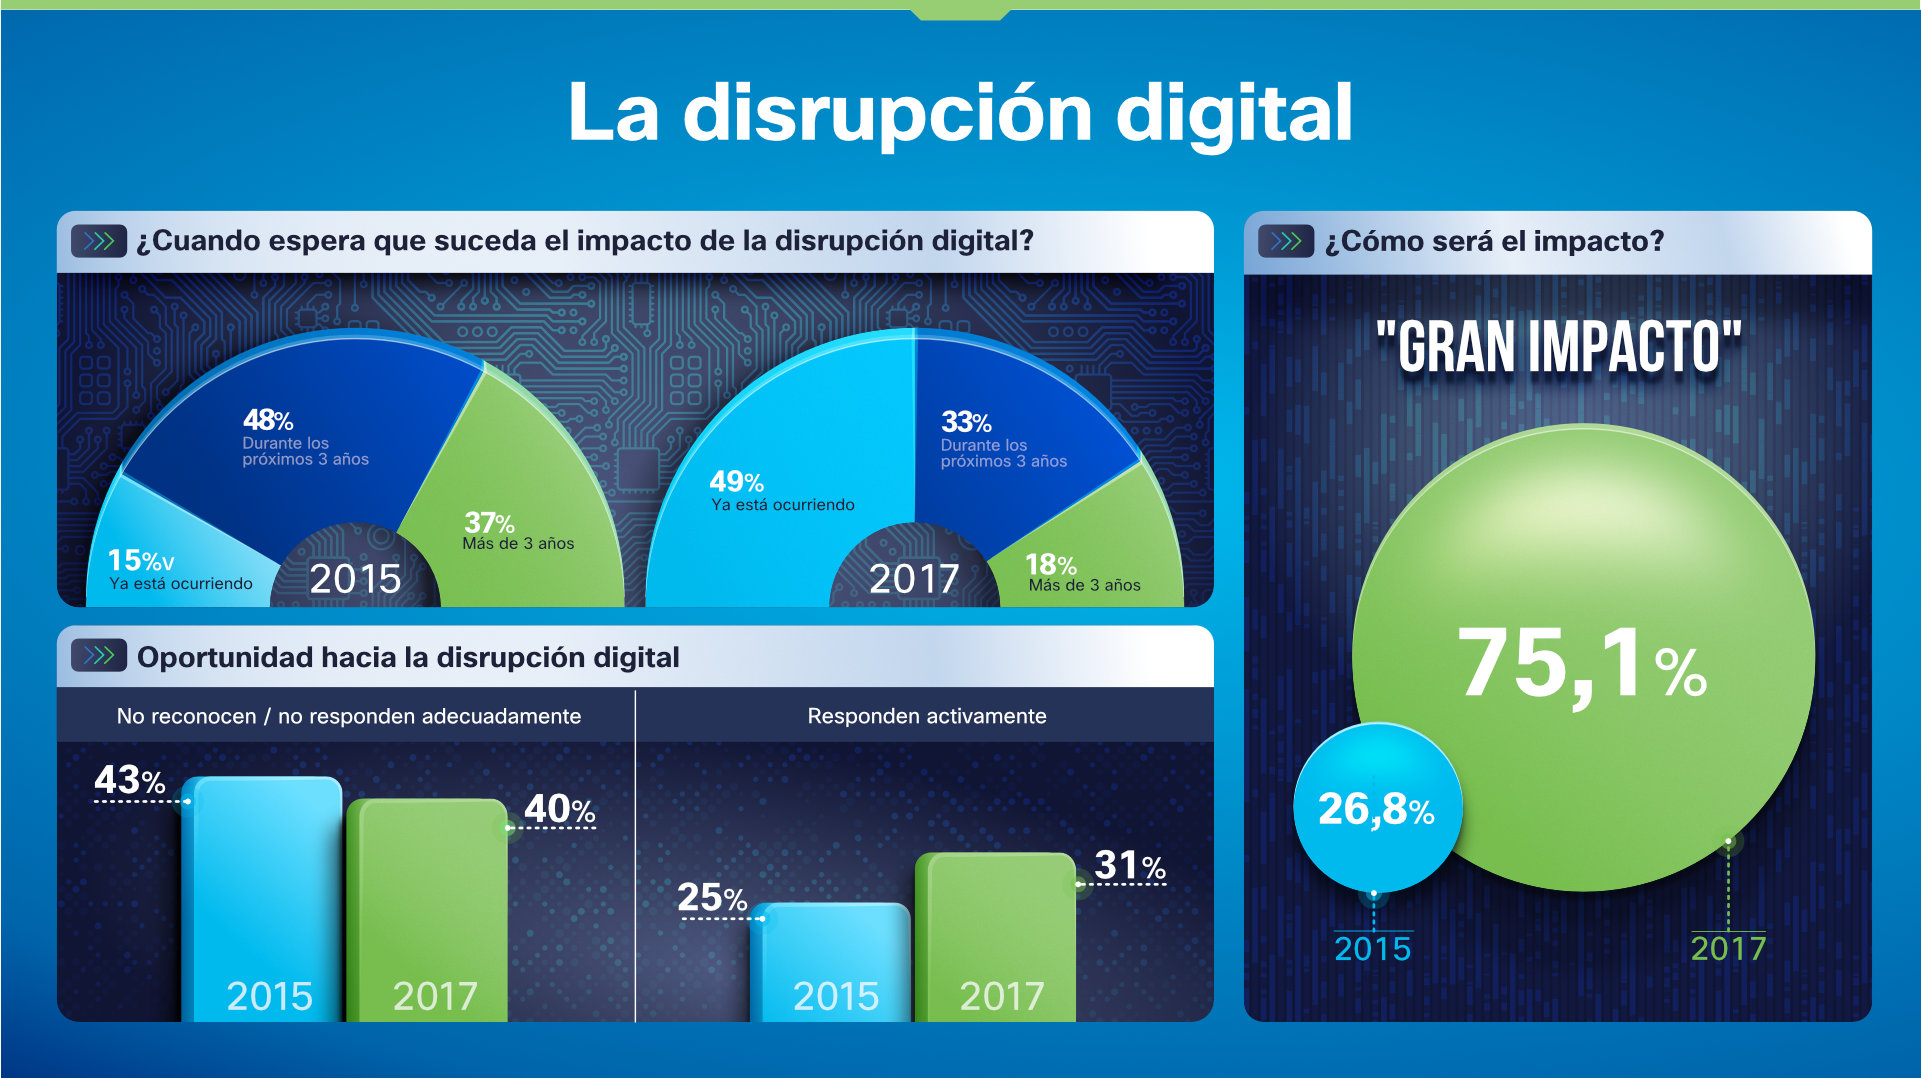
Hi, everyone! For the last 3 years I've been commissioned to design presentations for Cisco Systems general manager in Spain. I wasn't allowed to show it for a while, despite it being openly posted on their official YouTube channel (at least the speech). Now I can share some parts. Hope you guys like it. Have a great weekend. EDIT: Some of the icons are from Shutterstock with little editing (the blue outline ones).
-
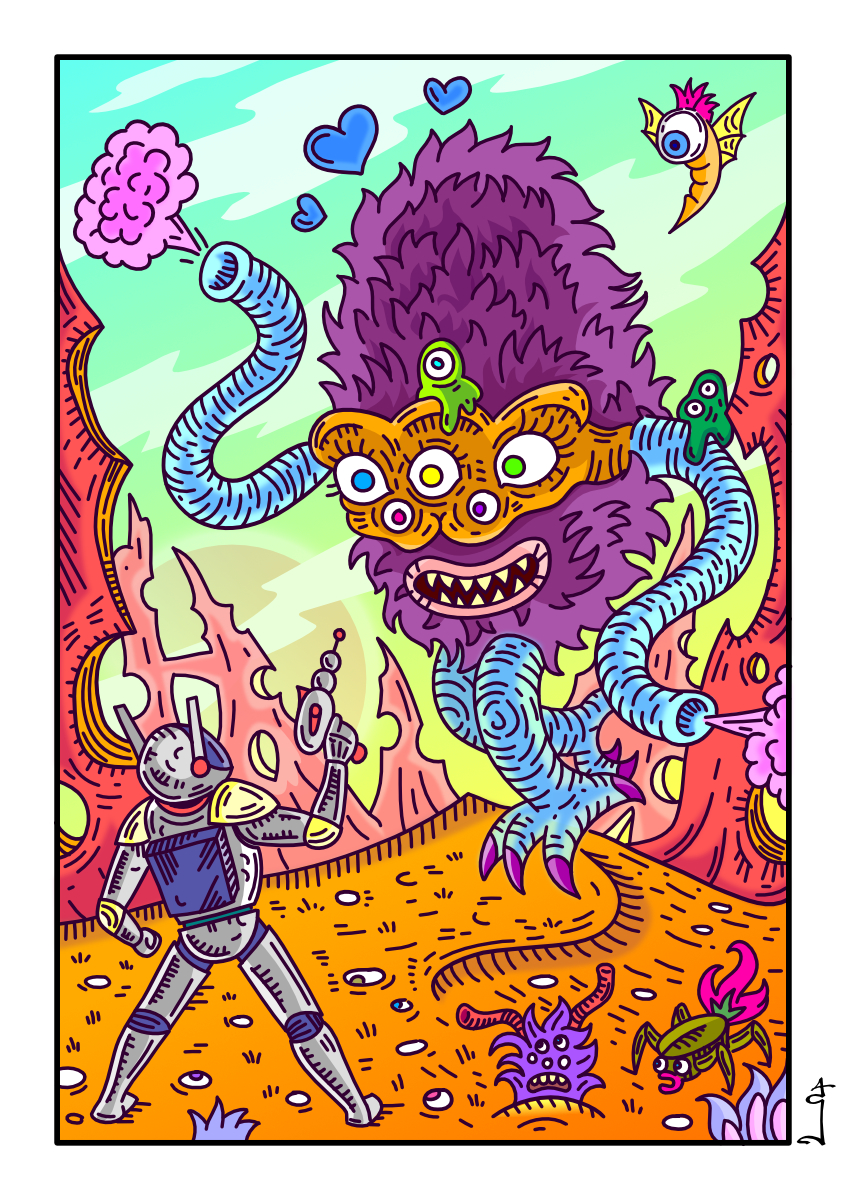
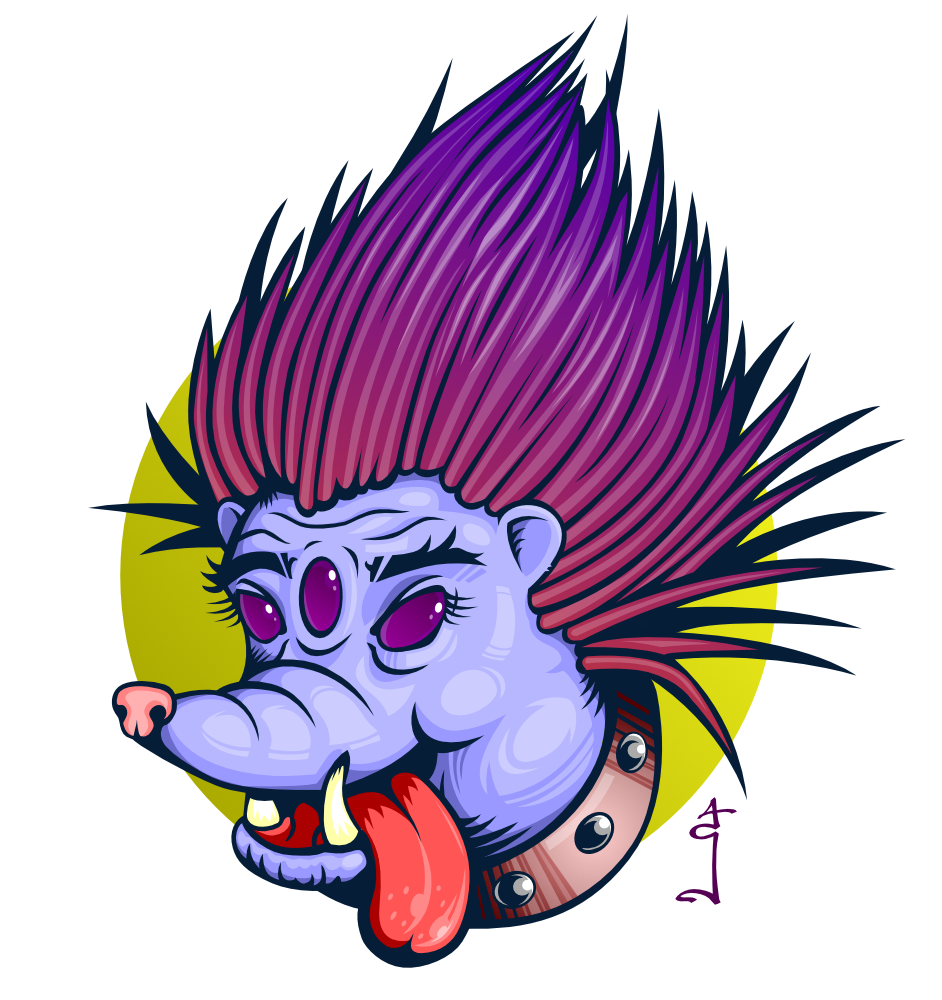
Another weird animal i've just drew. Its a hedgehog. With three eyes! AD is a joy to work with, if to talk about vectors.
-
Some Fan Art I did of Maxo Kream Instagram : CalvinCoolridge
-
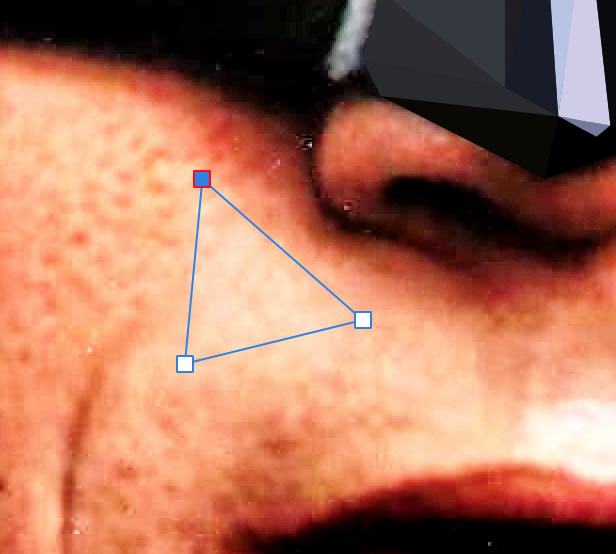
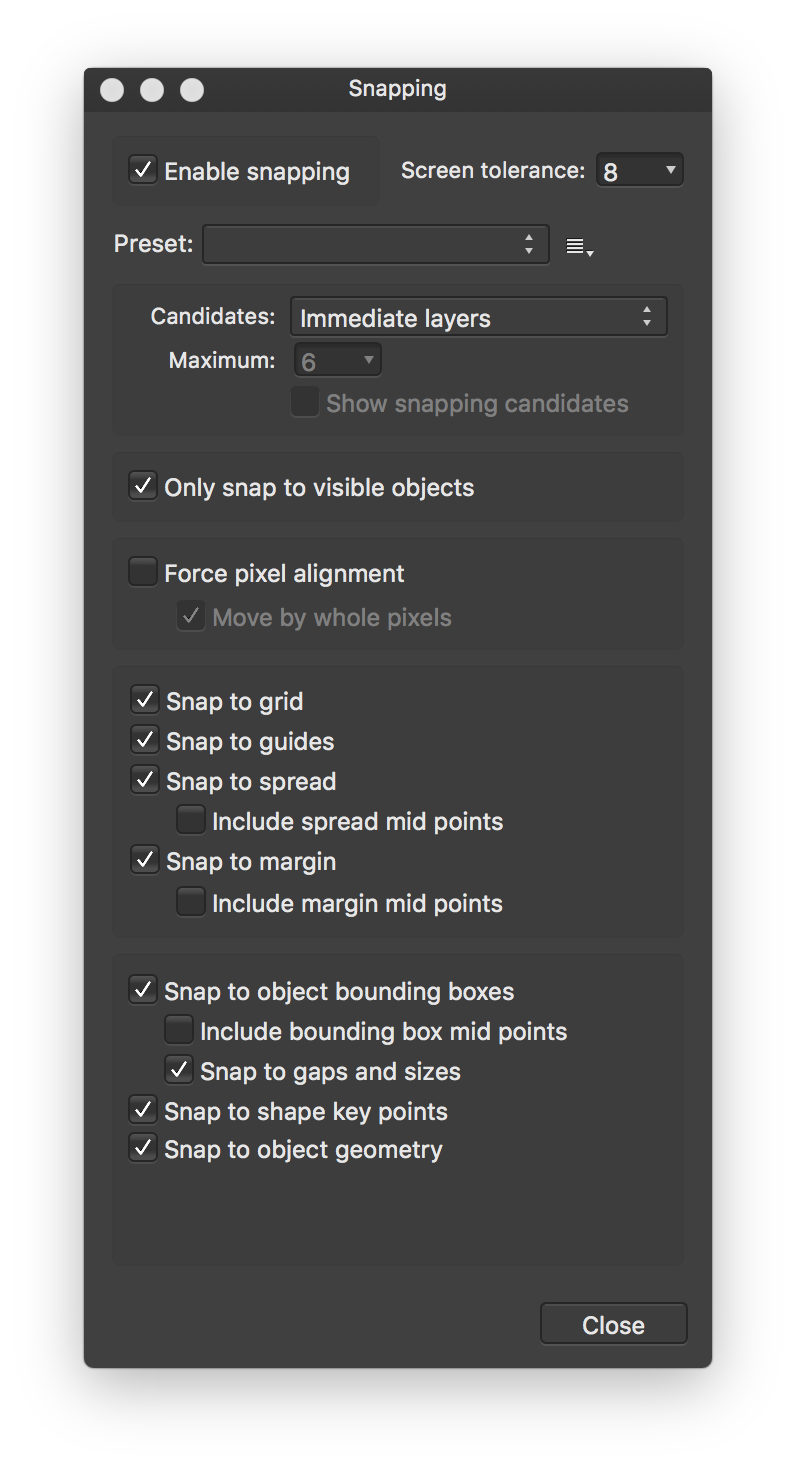
A few people have asked how to do low poly drawings in AD. So here's a very quick how to, it's not complicated to get started. Some aim for the minimum polygons and think that's the only way it should be done but there's aren't any rules, do it how want, have fun. There are variations on the theme for example using quadrilaterals and gradient fills but generally it's triangles and flat fills. Pick a image. Find one that a decent size, say 4MP+. Having well defined edges makes things easier as does it having plenty of contrast. The less contrast there is the tougher it is. Open the image in AD. The layer should be locked, if it isn't lock it. Setup AD snapping to make life a lot easier. View>Snapping Manager..., tick Enable Snapping. I don't normally use snapping in AD so not sure the optimum settings so had most things ticked. (image below) With the pen tool (keyboard shortcut P) add your first triangle with no fill, no stroke (you don't have to keep resetting to none, just the first time). The idea is to break the image down in to areas that are a pretty similar colour/brightness (image below). That's the non-technical part and you just have to get the hang of it. You can either draw one and fill it... or draw a few then pick them in the layers palette and fill them. Obviously if you've a big area of exactly the same colour, eg black in the shadows, then you can do what you want as you're not going to see any triangles. Fill the triangle using the Colour Picker tool (keyboard shortcut I) to sample the colour. Set the radius to 5x5 so you're averaging an area rather than picking a single pixel. Sometimes you'll need to make it smaller, if it's a huge image you might be able to make it larger. (image below). If you later see you need to alter the colour of a polygon just change it back to no fill so you can re-sample. Once you add the first triangle group it and put subsequent ones in to that group. It's then easy to toggle visibility, for example to compare what you've done against the original. Obviously each triangle needs to fit up against its neighbour, no gaps, hence having snapping turned on. Toggle the reference image to spot the places you've left gaps or not snapped properly, there will be some. Normally you'll use larger polygons say on large areas of skin then smaller polygons where you need details like eyes and mouth. If it's a complicated image then break things down in to a few groups. If you do that make sure you select All Layers from the Candidates drop down in the Snapping dialog. Once you're done but see horrible micro gaps between objects when you export then duplicate the poly layer and perhaps add a tiny amount of blur to the background one (normally don't need to, duplicating is enough) and they'll disappear.
-
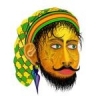
I truly could use publisher today. This is the workaround I have to do to produce a 12 Mini page booklet with printer spreads 4.5" x 6" How soon can we get Affinity Publisher.
-
 Hello I run Affinity Photo 1.6.6 and Affinity Designer 1.5.1 it used to be easy to switch from one to the other, by simply clicking on edit in Designer when I was in Photo and edit in Photo when I was in Designer. Now I can't even import a Photo file created by Affinity Photo into Designer unless I convert it into a jep. What am I missing ?
 -
Yesterday i just doodled randomly in AD's pixel persona and came to this guy. I thought it is a pelican or something like this but i now think it's more of a crow. He likes it dark'n'heavy. Made a sticker with it...
-
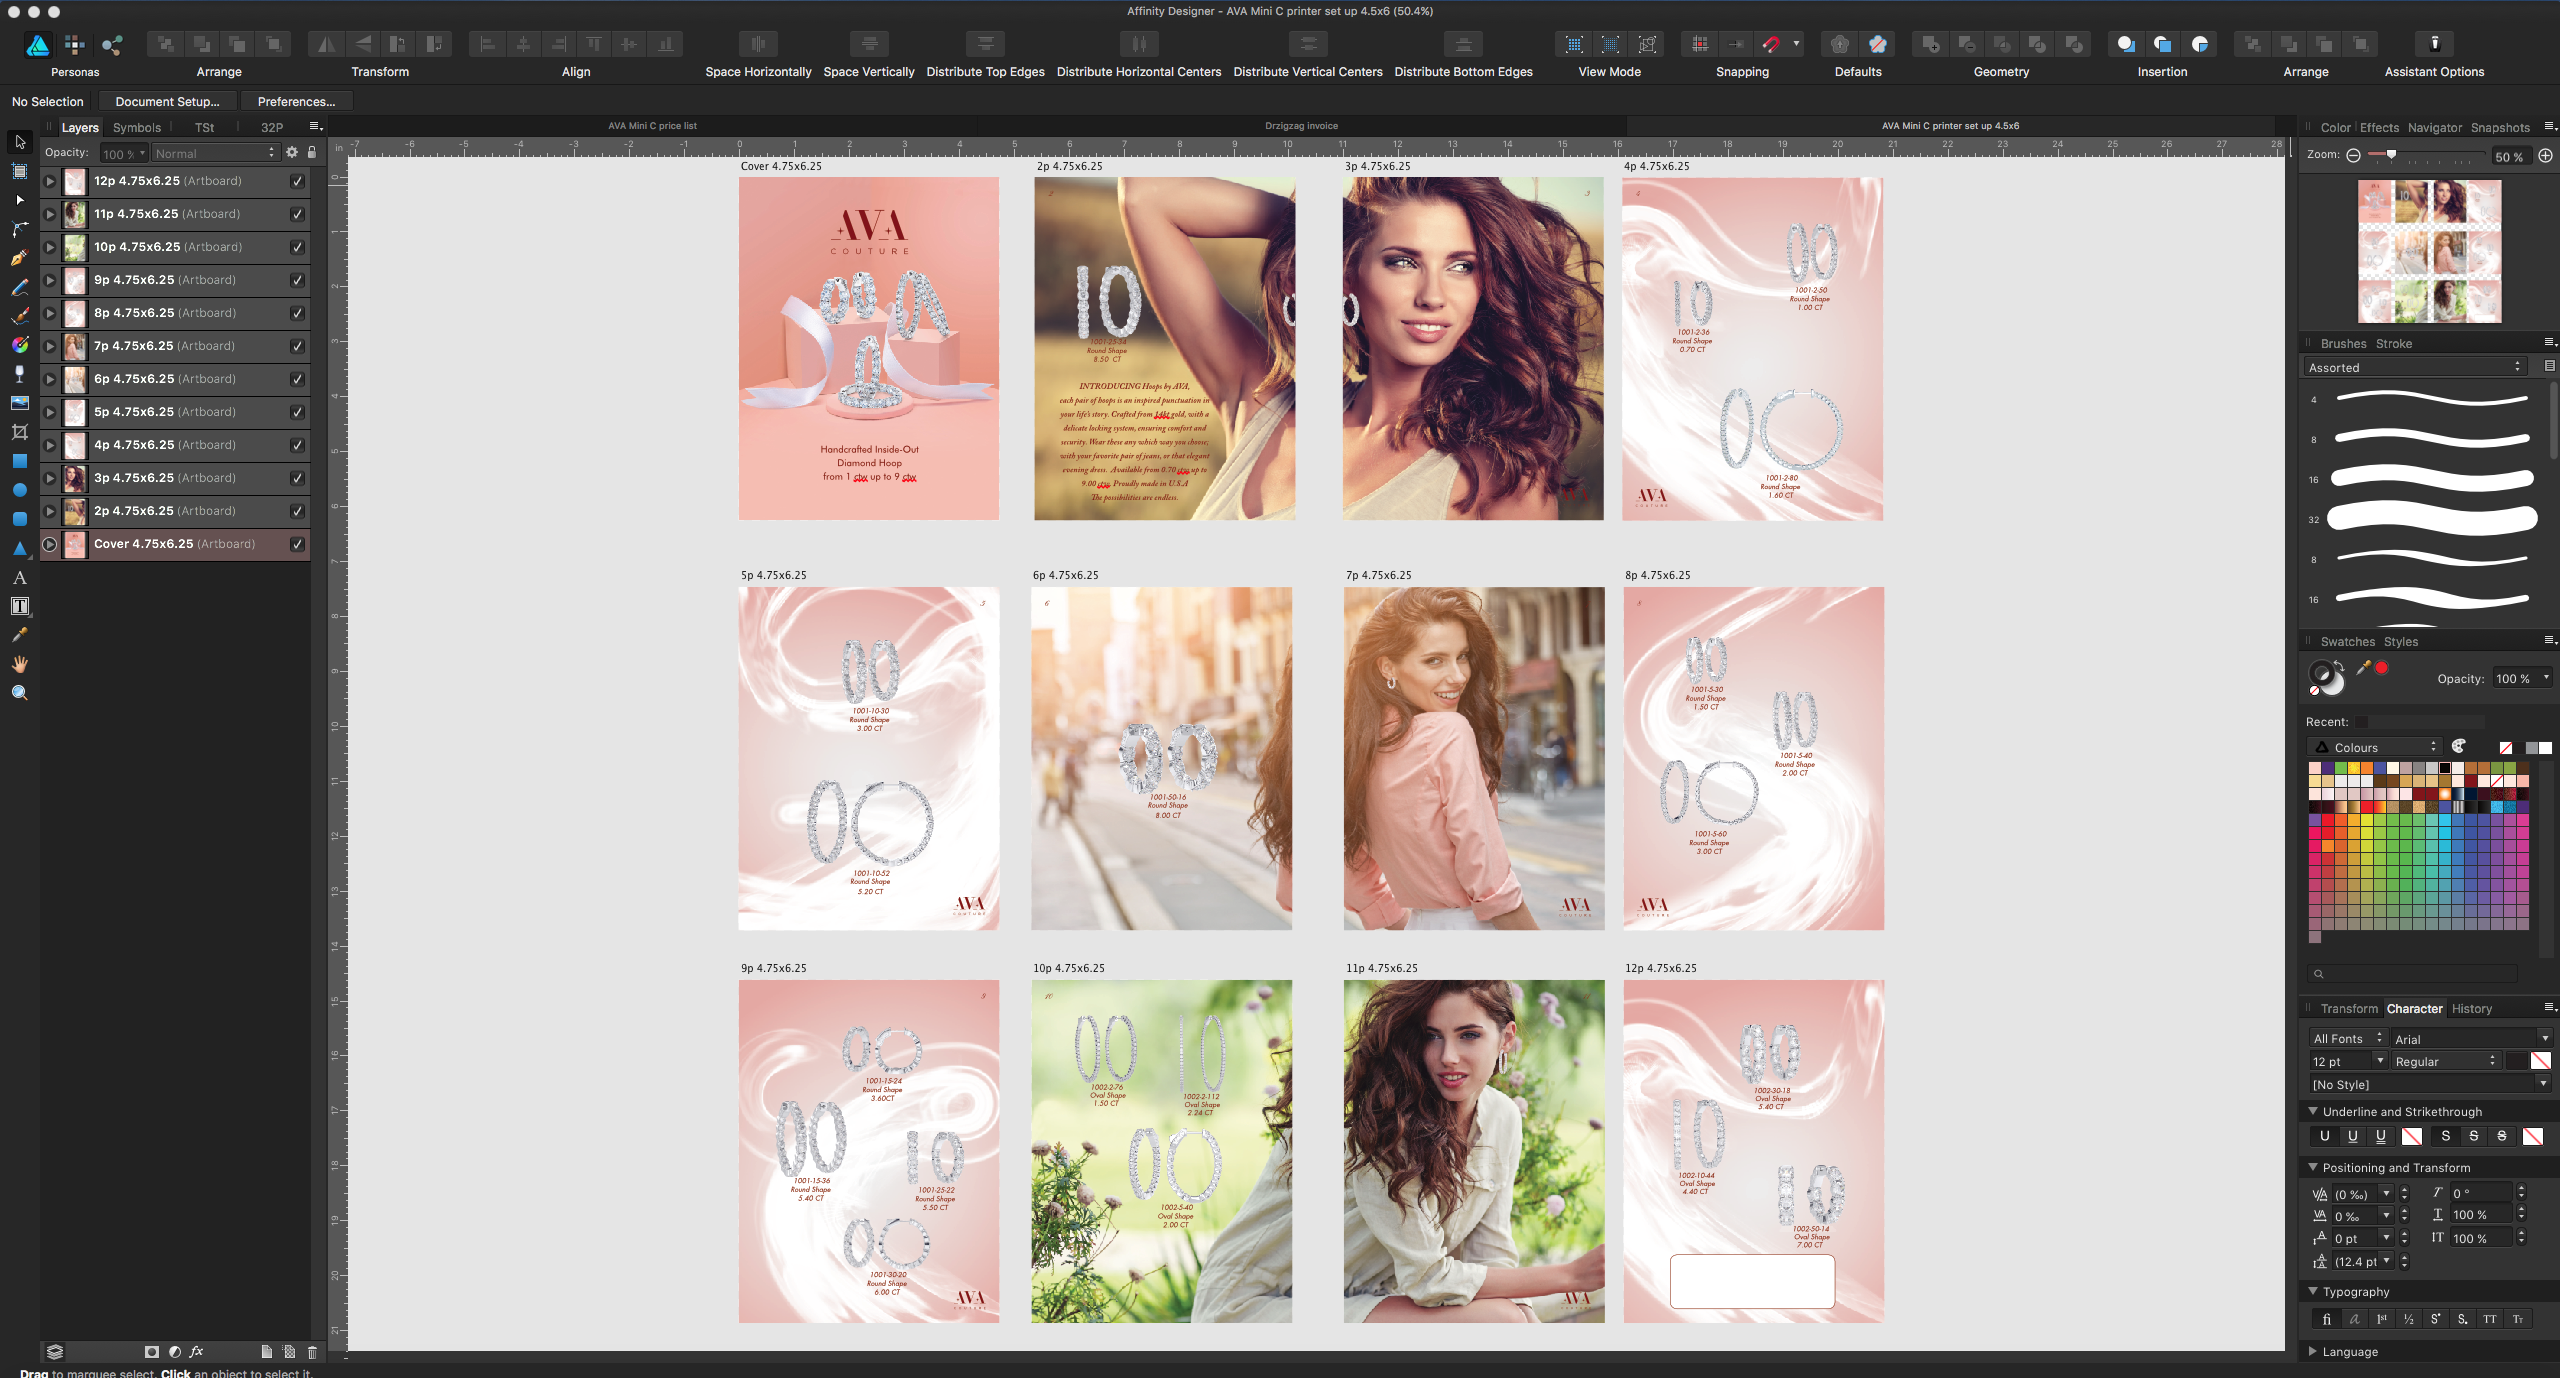
No idea why I'm posting this but I suppose it's a vector person's idea of doodling and seeing what you can do with a single conical gradient, well two because of the centre. It's good practice for creating them though. Perhaps it will become a fad (not likely). I've included the styles as you'll all want to use them in your projects. sillystuff.afstyles
-
In this short tutorial I demonstrate the Geometry operations (add, subtract, intersect, divide, combine) in Affinity Designer 1.6.0 (destructively and non-destructively) with some samples. Keep on drawin' Norbert
-
- 3
-
-
- geometry
- operations
- (and 6 more)