Search the Community
Showing results for tags 'AFP-4401'.
Found 12 results
-
 Hi. I'm new to Affinity Designer. I'm pulling my hair out as I must have done something wrong but can't work out what. I have set up a document (Press-ready) that is 242mm x 222mm. In document setup those are the dimensions that show. On screen those measurements are correct. I have a 3mm bleed on all sides. My problem is that when I print out the document the measurements have increased to 245mm x 225mm! I'm stuck. Help please.
 -
Created a Publisher file of scans of some of my daughter's artwork so that we could print 4 x A6 sized cards to an A4 sheet of fine art paper on my Epson Stylus Photo 1400 inkjet. The margins on the A4 master are set such that on selecting the borderless printing option in the Epson printer driver, the printed images 'just' overlap the edges of the sheet. Have used the 'final' version of this file several times in March this year, without problems. However, came to print some more cards recently (having allowed Publisher to upgrade to v. 1.9.2) and found that the whole A4 image was shifted 3mm towards the top of the page and 3mm to the left-hand side. This created a 3mm white (unprinted) margin at the bottom of the page and the loss of part of the left side images at the edge of the page (there is just white space on the right-hand side of these images so that the expected 'white' border at the right-hand edge of the paper will not show, though a cutting marker line has appeared). Since I knew that the only thing that had changed was the upgrade to v.1.9.2, I uninstalled that version and replaced it with v.1.9.0.932 from the website (I could not remember when v.1.9.1 has been installed) and tried borderless printing again of the same file. This printed as previously, without the shift in the image and the introduction of unwanted white margins. Compare the two scans of the printed output that are attached. I now feel that I cannot allow Publisher to upgrade until this is rectified. The Publisher file that I have provided has been reduced to just 1 page (for commercial reasons) by just deleting the remaining pages from a copy of the original 'final' file. 4xA6 Notecards (A4) - Tree Lithographs (1 page).afpub

-
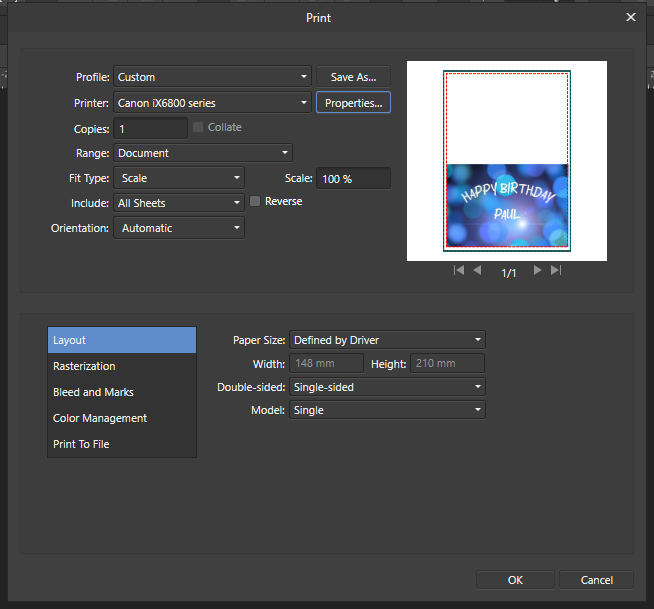
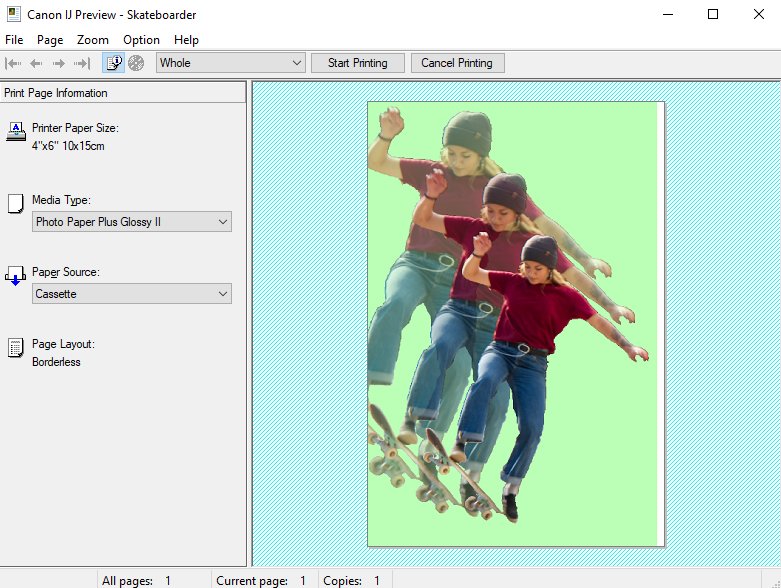
 EXAKTER randloser Druck gelingt nicht Windows 10 Affinity Photo 1.9.2, Drucker: Epson Photo XP-970 Ein Foto 4x6 Zoll (Bild 0) soll randlos exakt auf Papiergröße 4x6 Zoll gedruckt werden. Egal, welche Einstellung man wählt, es wird nie formatfüllend gedruckt. Dokumentengröße ist auf 4x6 Zoll eingestellt, im Druckerdialog die Papiergröße 4x6 Zoll ausgewählt, verschiedene Optionen für randlosen Druck probiert, div. Skalierungsmöglichkeiten probiert – die Druckvorschau (Bild (2) ist richtig, es wird aber trotzdem nicht exakt formatfüllend gedruckt – Druckvorschau des Epson-Druckers Bild (3). Verhalten ist reproduzierbar. Druck mit Affinity Publisher führt zum leider zum gleichen Ergebnis. Zum Vergleich wurden das gleiche Bild mit anderem Programm (FixFoto) auf gleichem Drucker gedruckt - Ergebnis wie gewünscht. Bild (4) A photo 4x6 inches (image 0) is to be printed borderless exactly on paper size 4x6 inches. No matter which setting is chosen, it is never printed full-size. Document size is set to 4x6 inch, paper size 4x6 inch selected in the printer dialog, various options for borderless printing tried, div. scaling options tried - the print preview (image (2) is correct, but it is still not printed exactly format-filling - print preview of the Epson printer image (3). Behavior is reproducible. Printing with Affinity Publisher leads to the same result. For comparison, the same image was printed with another program (FixFoto) on the same printer - result as desired. Picture (4) Wolfgang
-
 Affinity Designer Printing Bug After updating Affinity Designer from 1.9.1 yesterday to 1.9.2.1035 I noticed a major print scaling bug in the program. On print preview within Designer no red lines showed any overprinting errors. Long story short, items in Designer print out larger than set and thus get cropped out of print range on the right and lower edges. To be specific, I created a Letter document and populated it with an array of equally sized blocks for printing. Upon printing I noticed the right and bottom of the print were cutoff. After checking the document size settings, scaling, and any other print setting affecting items printing larger than specified, everything was at nominal values used in prior versions not suffering this bug. Workaround The workaround involved exporting the project as a PDF and print via Adobe Acrobat. Downgrading? I just tried to install the 1.9.1 version over the 1.9.2 and I get a "Setup failed" error. Is there any other way to downgrade other than uninstalling, reinstalling 1.9.1, and re-entering the registration keys? Is this bug known and being fixed? I couldn't find a similar bug for 1.9.2 on the forums so my guess is it's not been spotted yet. If the Affinity team is onto fixing this in the next day, then I may wait for the update while hobbling along on PDF exports for printing. Notes I've posted this on the 1.9.2 release thread (duplicate), but had second thoughts on the critical importance of this bug being overlooked there, so I created this topic in hopes to avoid this being overlooked.
 -
 Hi, Since the last update, when printing full page it is not printing all the way to right and leaving a white strip. I have uninstalled Affinity and tried again to no avail. It is doing the same on all 3 printers I have. Tried with other software like Photoshop and they are all printing fine. Any ideas?
 -
Borderless printing with a Canon Pro-100 and Windows 10 leaves a white band on the bottom of the print of about a quarter inch. This problem exist since version 1.92 and I still must use version 1.91 to get good print. I expected this problem would be solved by version 1.10 but it is not. I am not the only person that has reported this bug but it has still not been addressed. I wish this problem would be solved in the next update since I cant use the new version of Affinity Photo... Can a moderator please respond to this problem and tell me if it will be addressed soon. Thank you!
-
Just upgraded to V1.9.2 and can no longer print borderless. All was fine in 1.9.1. I've done a few test prints with full extension and there is now a non printed area at the edge of every print Normally when Borderless is selected in the print driver, the red dotted line around the edge of the preview disappears. This also no longer happens. Also the same bug in Photo 1.9.2 I've had to downgrade to 1.9.1 in both Designer and Photo until this is resolved
-
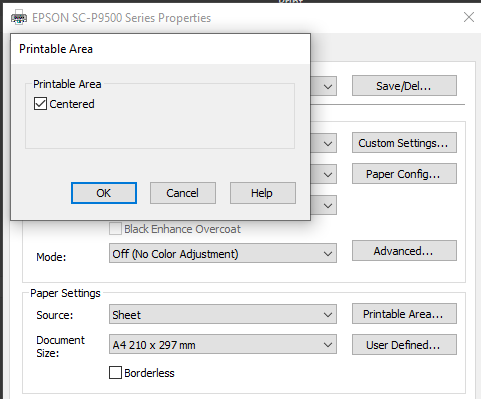
Hi. I posted this bug but on a previous version, so i'm not sure if this is the best practice but am starting a new thread. I got too busy with work to follow up on this and have just continued using photoshop in the meantime. In the process of writing this I think i've narrowed down the problem. Windows 10 Affinity Photo 1.9.2.1035 Epson surecolor SC-P9560 (aka 9500 9570 in other regions) Printing from driver Similar issues going way back posted here and here basic problem: Epson SC-P9560 has uneven minimum margins for sheet prints (roughly 14mm top and 3mm bottom). In every other software i've used (PS, LR, Qimage, Mirage) the print/preview will reflect these minimum margins, and any resizing to printable area will respect these boundaries. In order to have a centered printable area, you must check the following box in the driver: If for example I set up an image file at my exact print dimension and send it to the driver in any other software, I must check this box to get a centered print. This is expected behaviour, and in rare cases I will print with a 3mm margin on one edge for a particular image. In Affinity, it seems that checking the above box actually de-centers the print layout. I won't go into great detail showing examples (they can be seen in the previous post), but can provide more context if people don't understand this. unchecking this option seems to produce a centered print, which is opposite the expected behaviour. Confusingly, leaving it unchecked also allows printing with the factory minimum (~3mm/14mm) margins. Assuming that this behaviour is consistent, it could actually be a little more convenient for me overall (I can ignore the "centered" checkbox), but it's definitely odd behaviour, and completely threw me from adopting Affinity for the last 6 months. IMO this should at least be noted so that people don't have the same issue. I wonder if AP is doing something similar under the hood for other printers that show a similar layout problem? Thanks. Will update if I discover anything new.
-
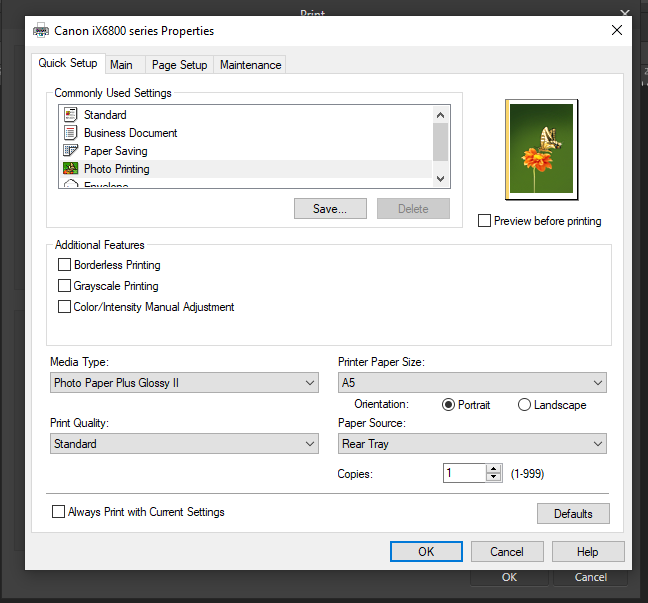
 I am having problems printing A5 300 gsm card on Canon ix6850 printer. When printing on paper everything is fine, when I switch to the card the position of the image changes and doubles the border at the bottom of the card. I thought originally it was a fault with the printer but have downloaded Gravit (free download) and created the image on that with no problems. It doesn't happen with A4 card. I have attached copy of printer settings.
-
Hi, I think there is a bug on the last update, when I print a photo on any size got a white borde on one side, I already calibrate the printer, use a another one and the white border still there, I select fit to printable, but the white border still there.
-
 print dialog window sometimes shows a landscape document in portrait mode, this then sometimes leads to a scaling problem, causing the document to oversize and crop on he printed page.
 -
I've recently upgraded to v 1.9.2.1035, and am now having issues when printing. The image looks ok to print but in print preview, the image has been cropped at the top edge and it has shifted left, leaving a white strip on the right-hand side, and this is how the image gets printed. See images attached: 1) Image to be printed in AP; 2) AP Print window - all looks ok; 3) Print Preview window. You can see how the image has shifted to the left, leaving a white stripe down the right-hand side, and this is how it gets printed. Everything was fine when printing prior to the upgrade. I have not made any changes to the printer set up. I have version 1.9.1 on another PC, and that prints the same image perfectly on the same printer.

.jpg.9f50635cba5567f841347faa1119915b.jpg)
.jpg.633dde01ed9d0389ab5c3c6a7e57302a.jpg)
_Druckvorschau_AP_4x6.jpg.3ac9c24ff3cb3032aa6f0f1310b3f658.jpg)
_Druckervorschau_Epson_4x6.jpg.227474391660b6f02ed1e9b199e35bb8.jpg)
_Druckervorschau_Epson_4x6.jpg.dd78c4570333a79703a04a9345022b70.jpg)
_original.jpg.0bef849512ee1b1072b147521ee168e8.jpg)