Search the Community
Showing results for tags ' v2.0.3'.
Found 3 results
-
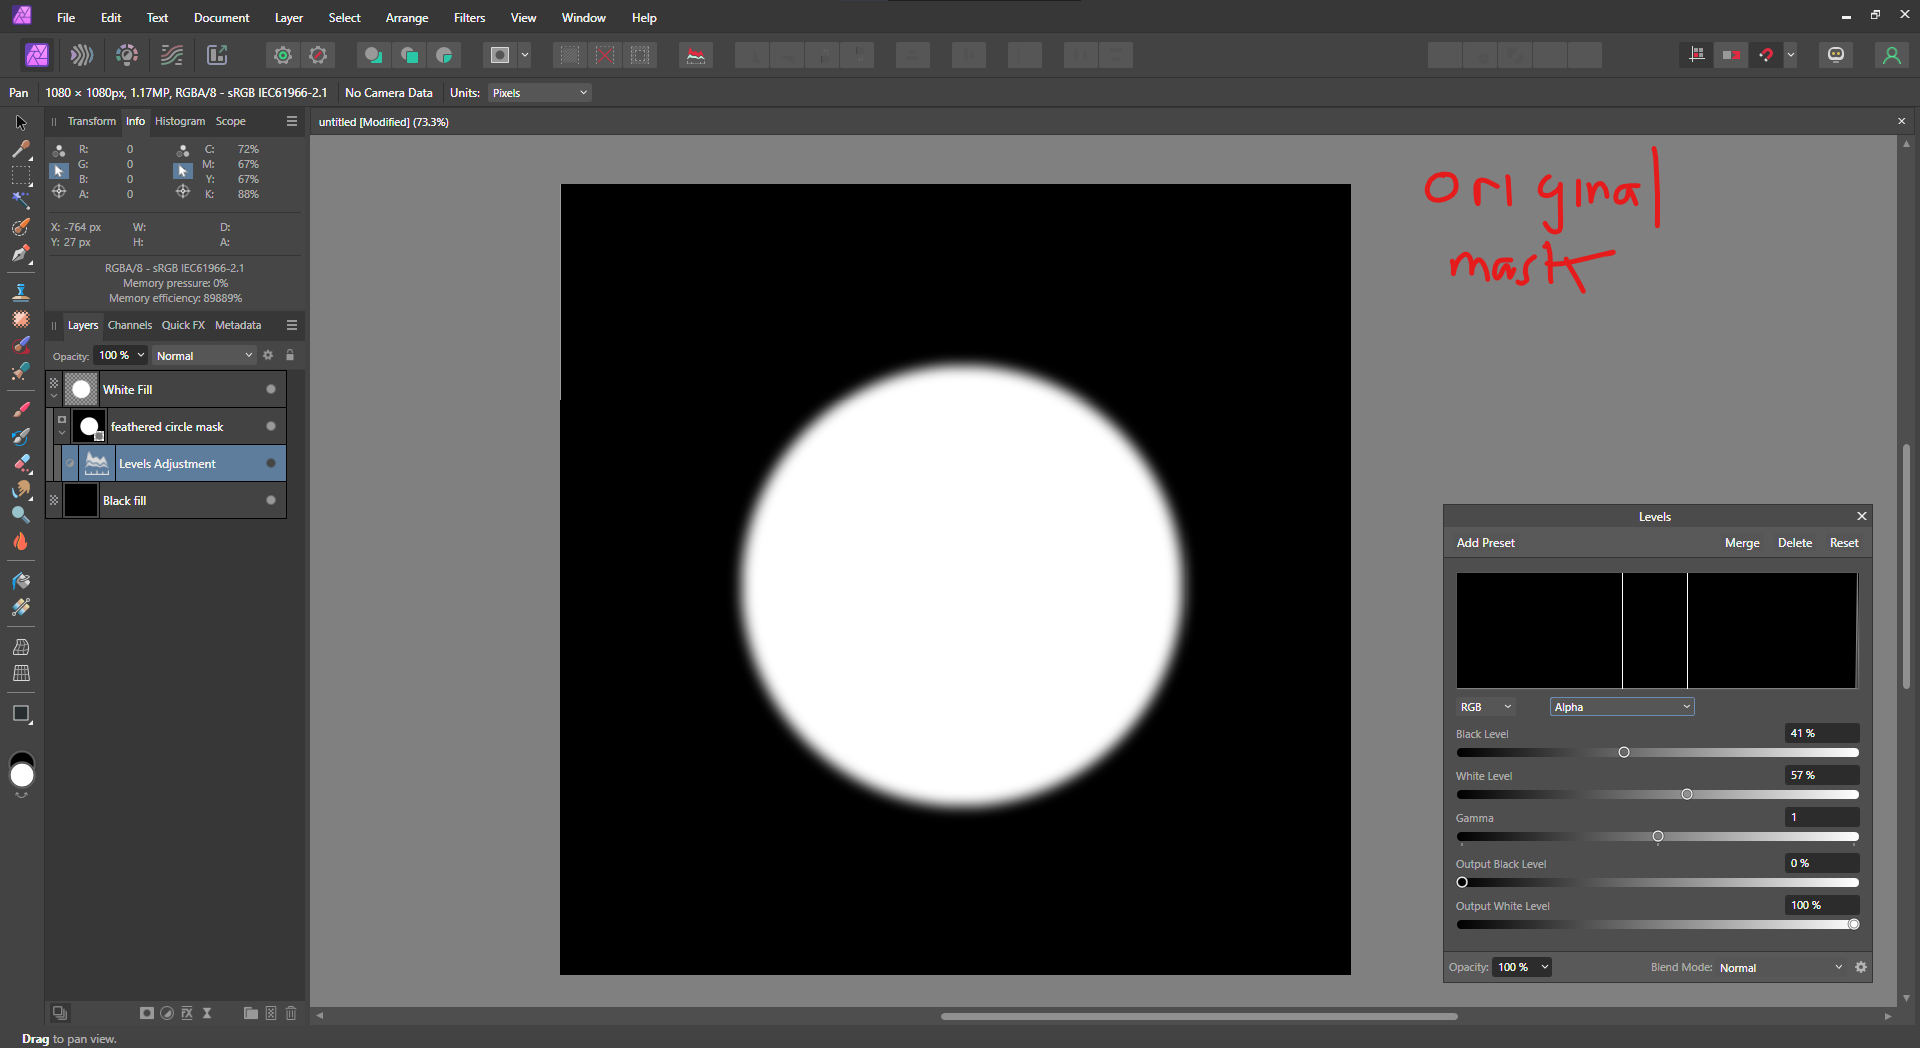
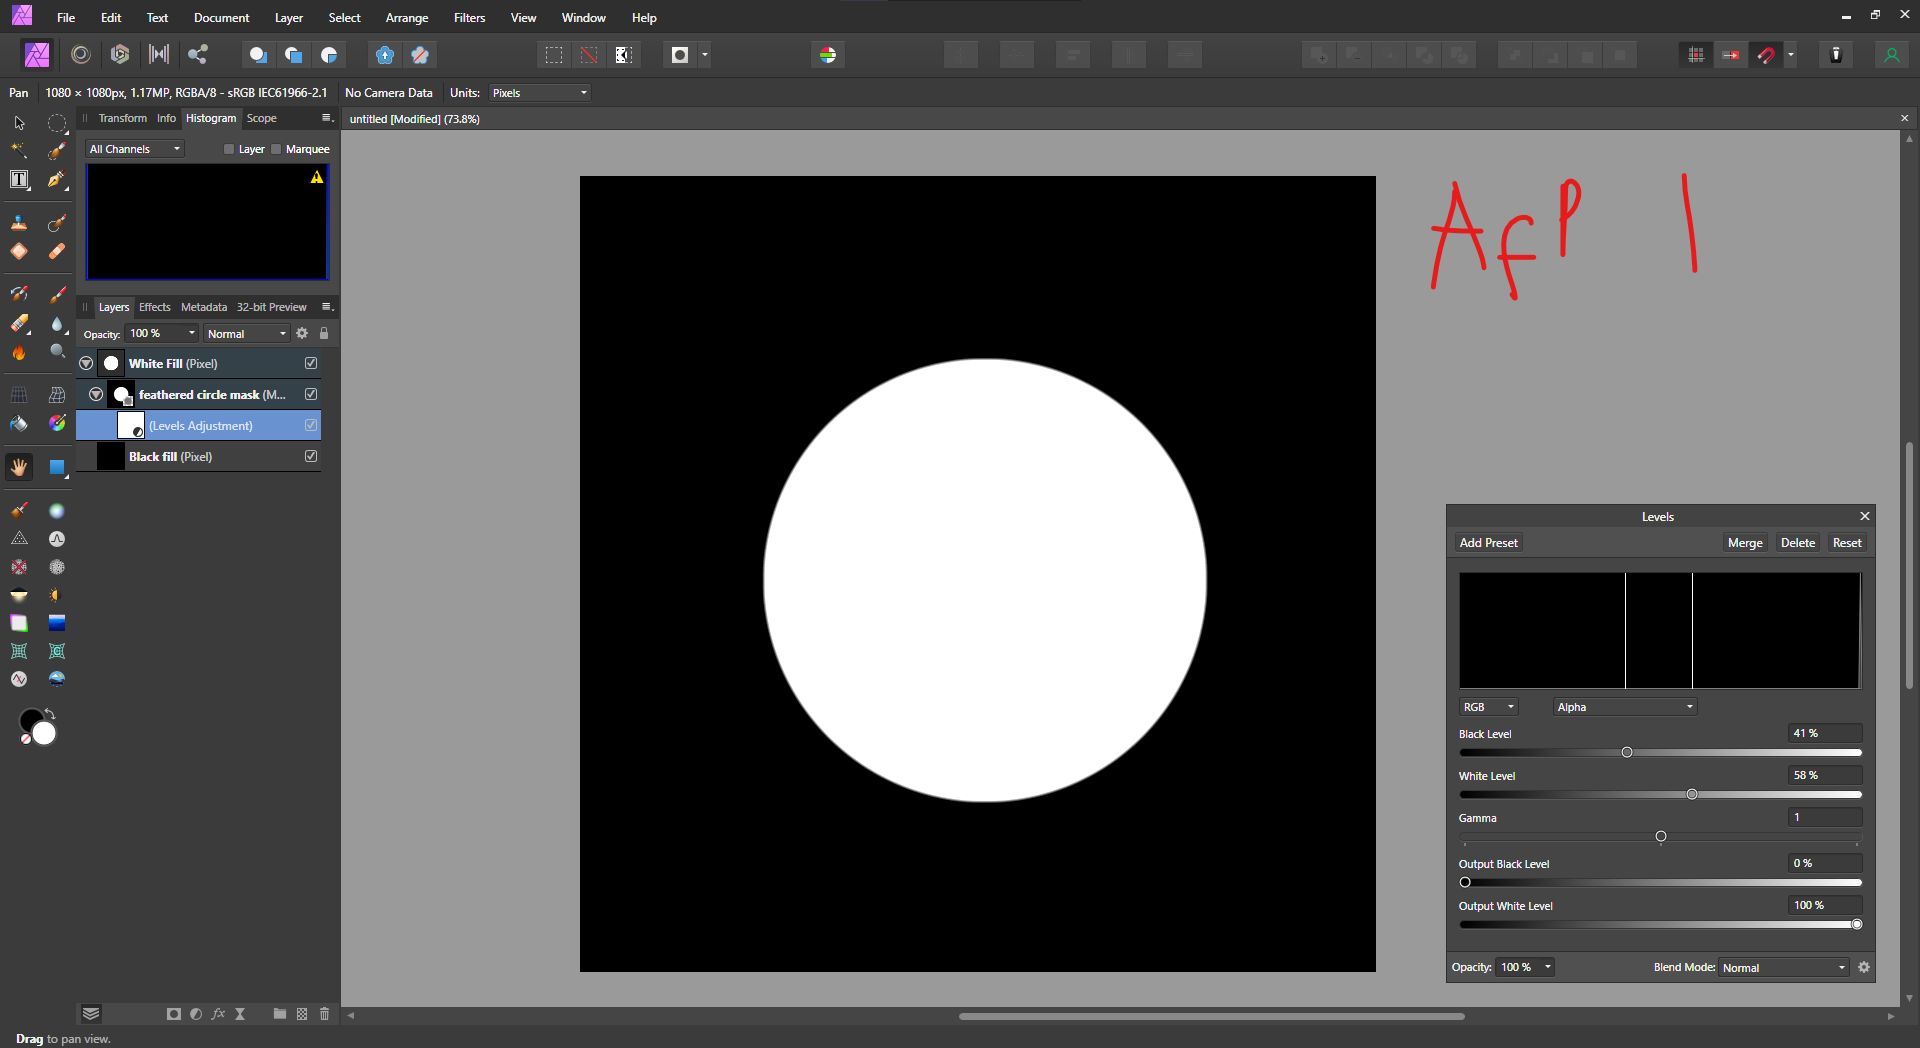
 This is a simple example of the bugs, i'm using this setup a lot for my photo editing/compositing masking works in v1, and now all of them is broken in when loaded in v2. Original mask: Results in v1: Results in v2: As you can see in the example, the mask layer is disappear/inactive when adding adjustment layer (or live filter, eg. adding minimum blur to shrink the mask) to a mask. Disabling the adjustment layer/live filter reveals the mask again. And this is the sample document in case anyone want to test it in v1 or v2. mask_bugs.afphoto
-
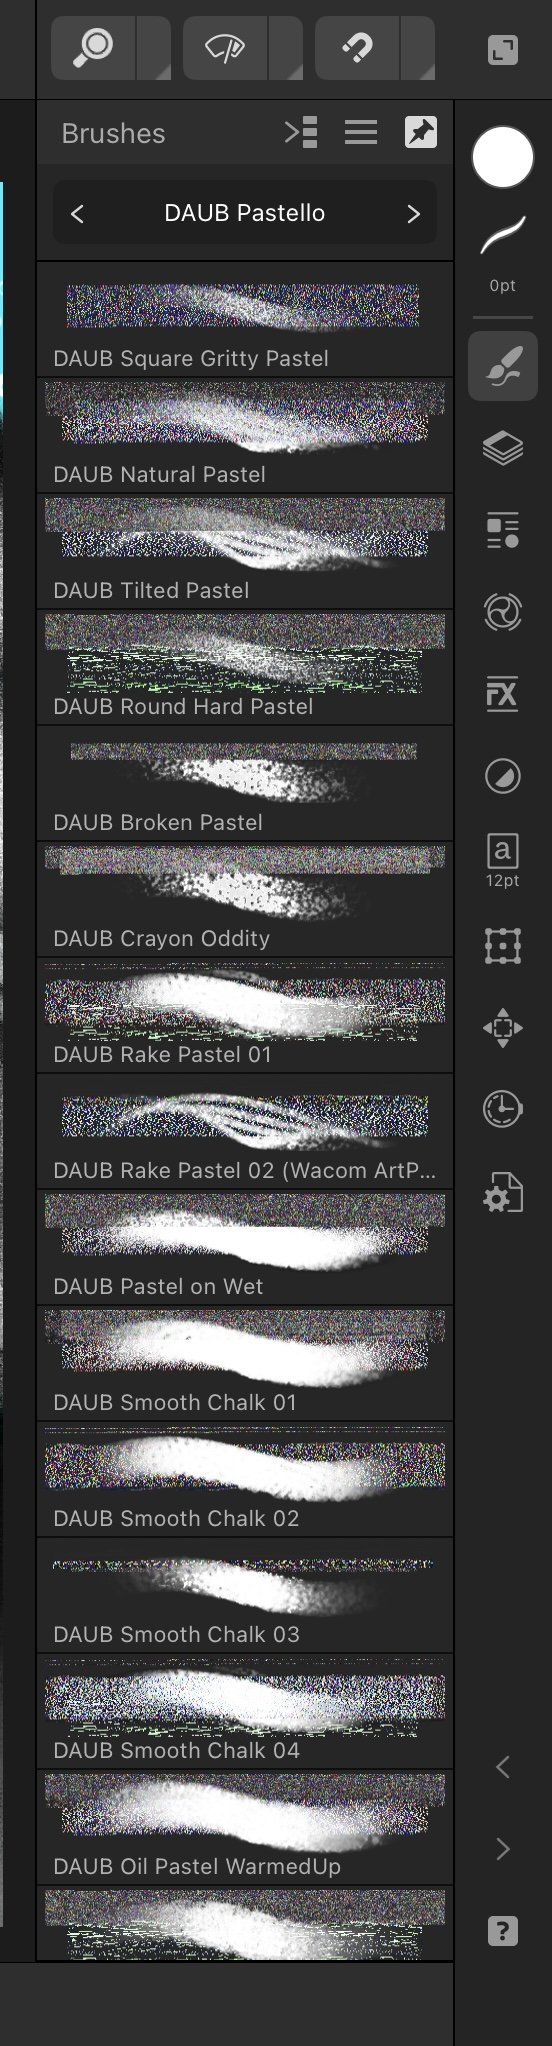
 Hi all! Following suggestions, I'm reposting about this particular issue that is still present with the latest Designer release V 2.0.3 on iPad. The brushes panel is very blurred and pixelated. Brushes are difficult to see. I experience this particular issue on a daily basis. Upon restarting the app, it can be fine but then the brushes become pixelated again. It has been ongoing for me since installing Designer V2. This happens for both add-on/custom and designer brushes. Thanks!
-
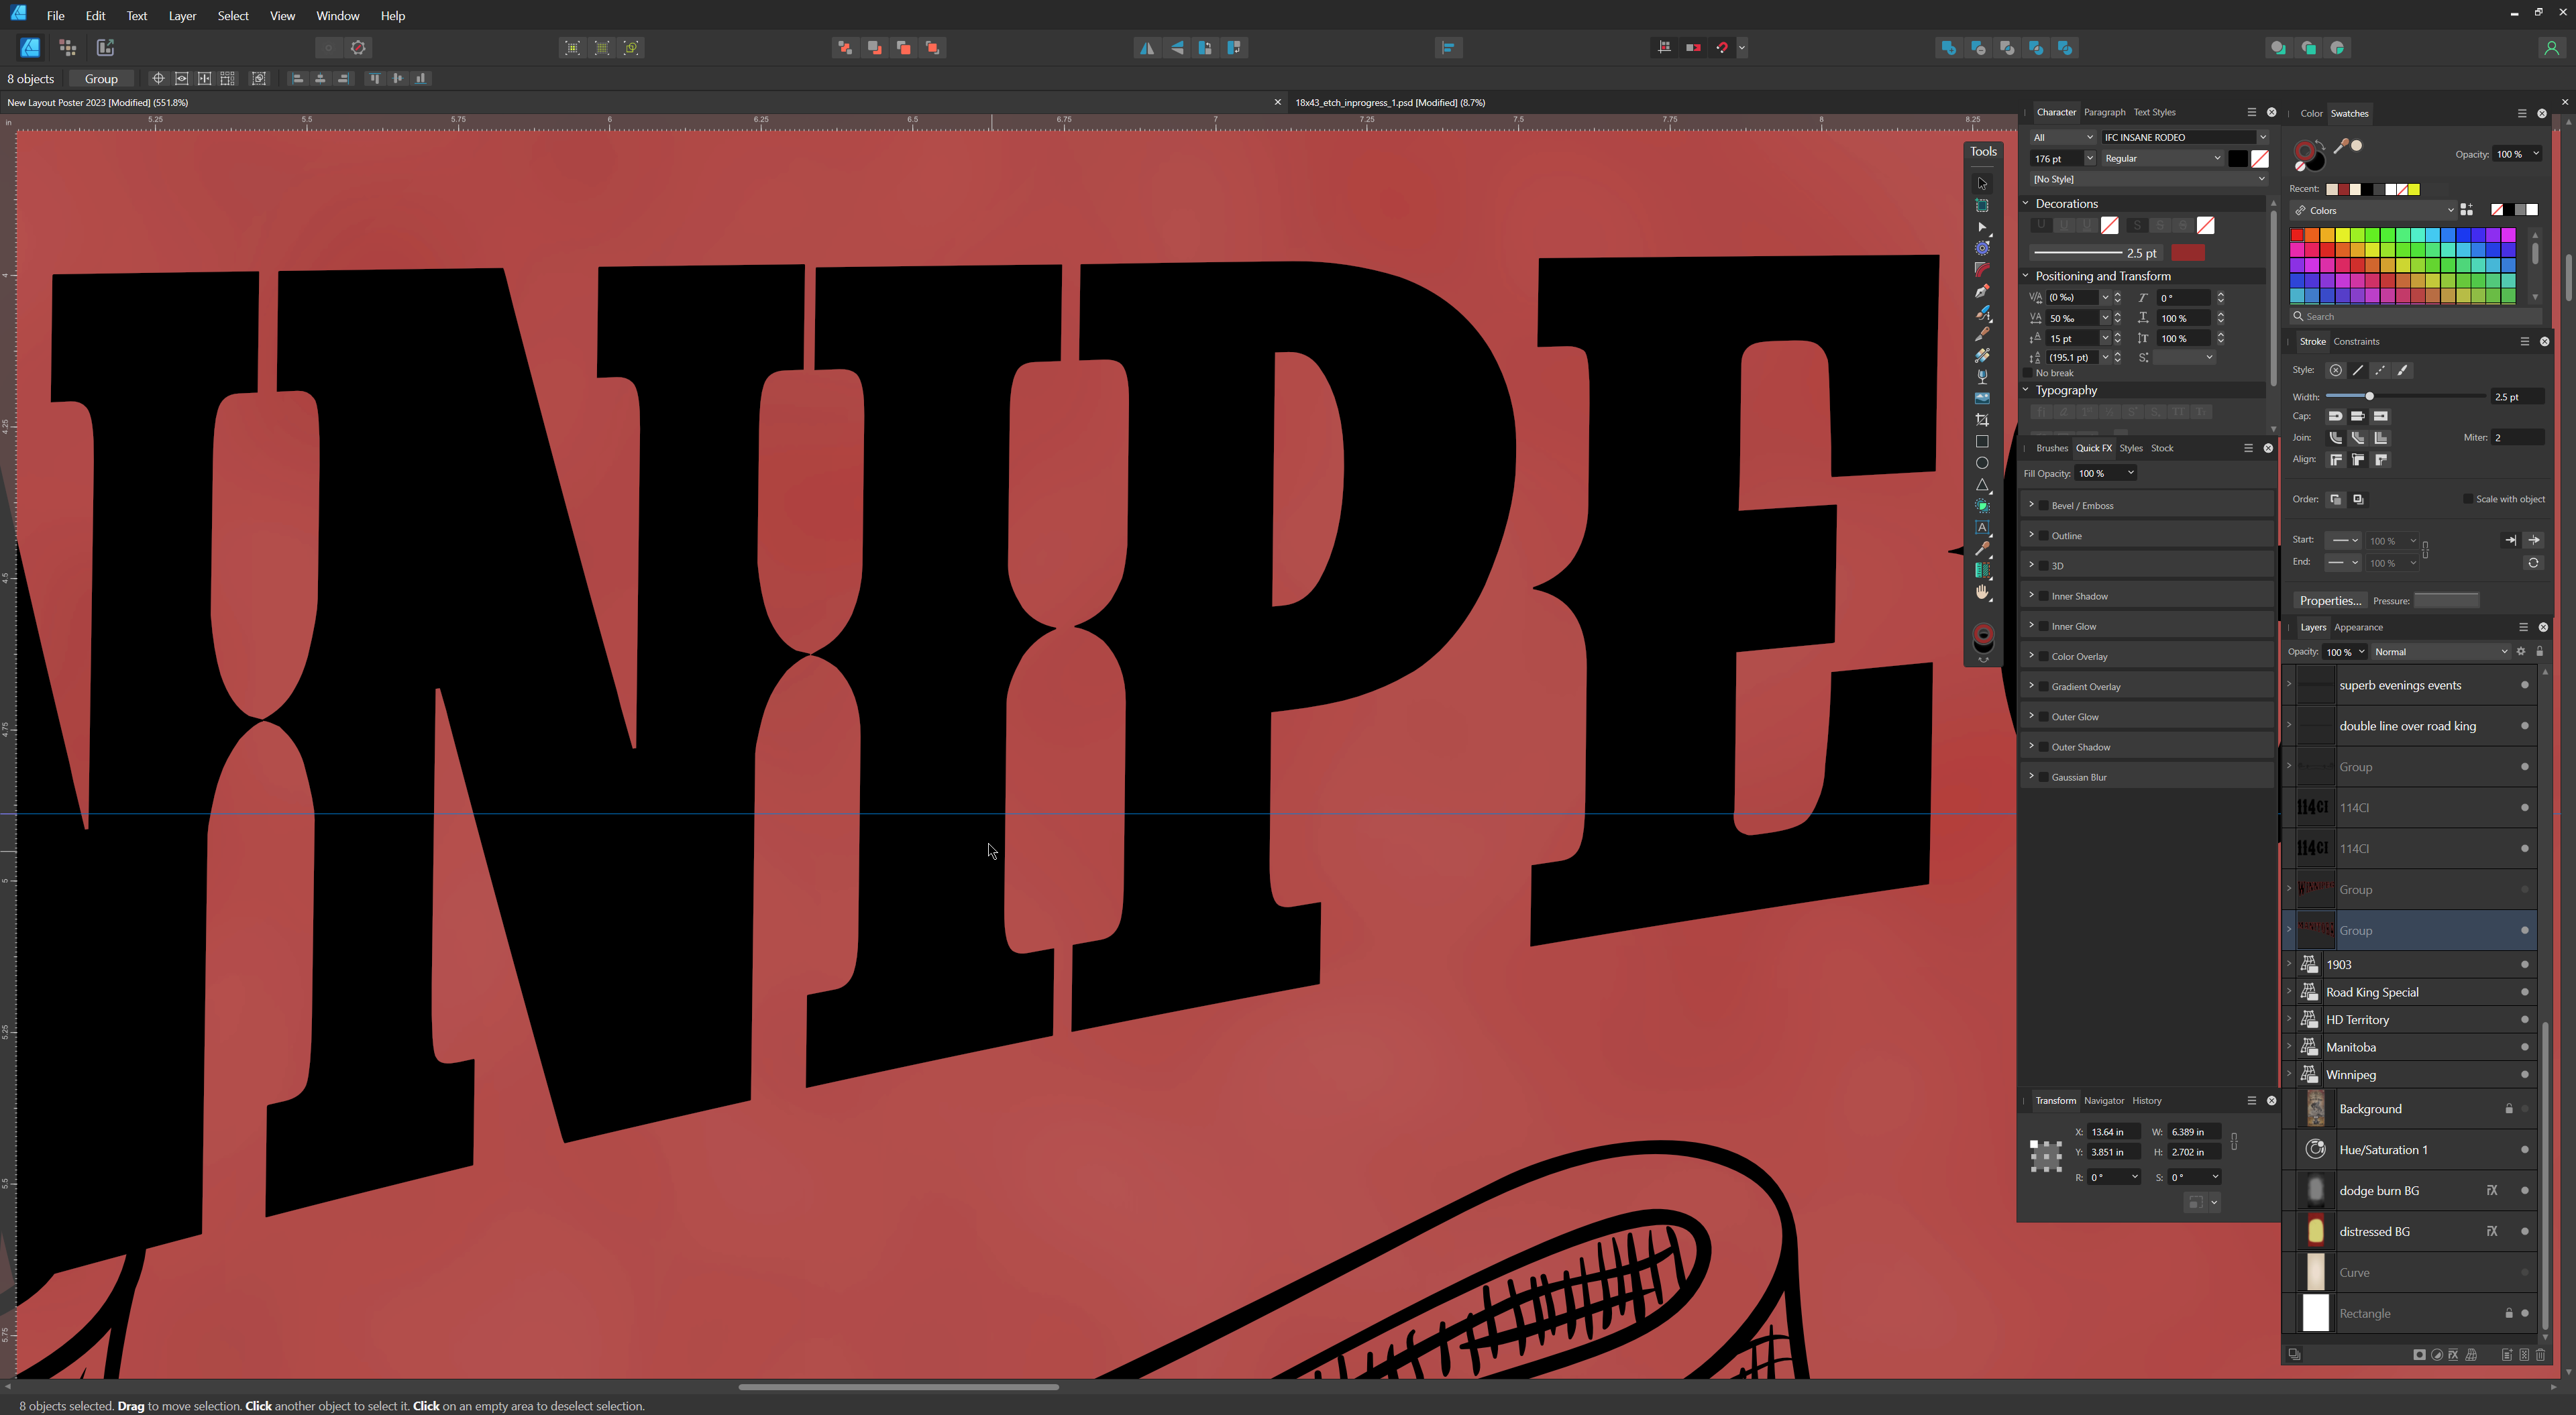
Hello, Two images attached. First one shows black warped text. layer was duplicated and converted to curves. Then outline added. The outline doesn't conform to what the warped text was in Black. Gary