Ray S.
-
Posts
282 -
Joined
-
Last visited
Everything posted by Ray S.
-
Sounds to me like you have "Show snapping candidates" in the Snapping-Options turned on. Disable snapping temporarily to see if this helps.
-
Maybe this tutorial might be of interest for you guys:
-
Scan using photo
Ray S. replied to Desh Deepak's topic in Pre-V2 Archive of Affinity on Desktop Questions (macOS and Windows)
Hi Desh, unfortunatly you can't scan with Photo, you need to use an "external" software. -
You can use it on both configurations, or e.g. on a laptop and a desktop-pc without purchasing another license.
-
Hi Chris_Wing, is it possible you have created this document with the beta-version of Apub?
-
The sad answer is that Affinty Software doesen't make use of GPU-Acceleration on windows, at this time. But I think the good people at Serif working on it.
-
Brush opacity issue
Ray S. replied to KiLa's topic in Pre-V2 Archive of Affinity on Desktop Questions (macOS and Windows)
Yes it is like Carl123 mentioned, Brush 1 is setting "Wet edges" on and this is transfered to Brush 2. -
Hi, You will see your adjustment-presets in the adjustment-tab. To view the tab go to View/Studio/Adjustments. If you then go to the category of the adjustment you've saved you should see it with a small preview-icon.
-
You don't need to copy an adjustment layer, usually you put the adjustment layer on top in the layerstack, so all layers below are affected. If you want to affect only the "bits"-layers and not the background you should pur them in a group except the background.
-
I assuming you are on windows and use a wacom tablet. If so then go to the preferences and turn of "use windows ink for tablet input". It could be that the pressure sensitivity don't work. I'am not sure why that is but it shouldn't be.
-
Also so wie in PShop (Aiswahl zu Pfad) geht das leider nicht, aber du kannst eine Maske erstellen und exportierst das Bild als png, dann sollte es in InDesign freigestellt zu sehen sein.
-
Hi Joe, you have put the grid on a master page. You should put it on a regular page then it should print. Or assign the master page to the page.
-
Or go to View/Guidesmanager if you prefer a numeric exact placing of the guides.
-
This is easy, every live-filter and adjustment-layer already have a mask. You can see the white rectangle in the layer-stack, this is a white mask revealing the filter/adjustment to the complete layer(s) beneath. If you take a brush and paint with black it will conceal the parts where the filter/adjustment ist not shown. This work of course also with gradients (from black to white).
-
Ok I didn't knew that the "highlights" should remain white. Then you should drag the "highlight" curves above the compound in the layerstack and make a group with them and the compound.
-
I should have read the title, sorry. So I have played in Designer, made some layers, grouped them, locked the top most group and could move layer and groups beneath and nothing moves into a group. The only thing that I've noticed is if I lock a layer that is in a nonlocked group I can move the group with the layer. But I have no idea whats going on your side, sorry. And I'm also on Win10.
-
What App are you using? I've tried a little with Photo and can't reproduce this strange behavior.
-
Hi, a quick tip could be to move the layer/group with the arrow-keys. You could also try to lock the top most layer, but this will only lock it's position. Maybe this helps.
-
I made a screenshot of what I figured out, maybe this will help you .

-
There is an "Revert defaults"-Button on the menu-bar, the fifth from left (on windows), it looks like a "cloud" with a stroke.
-
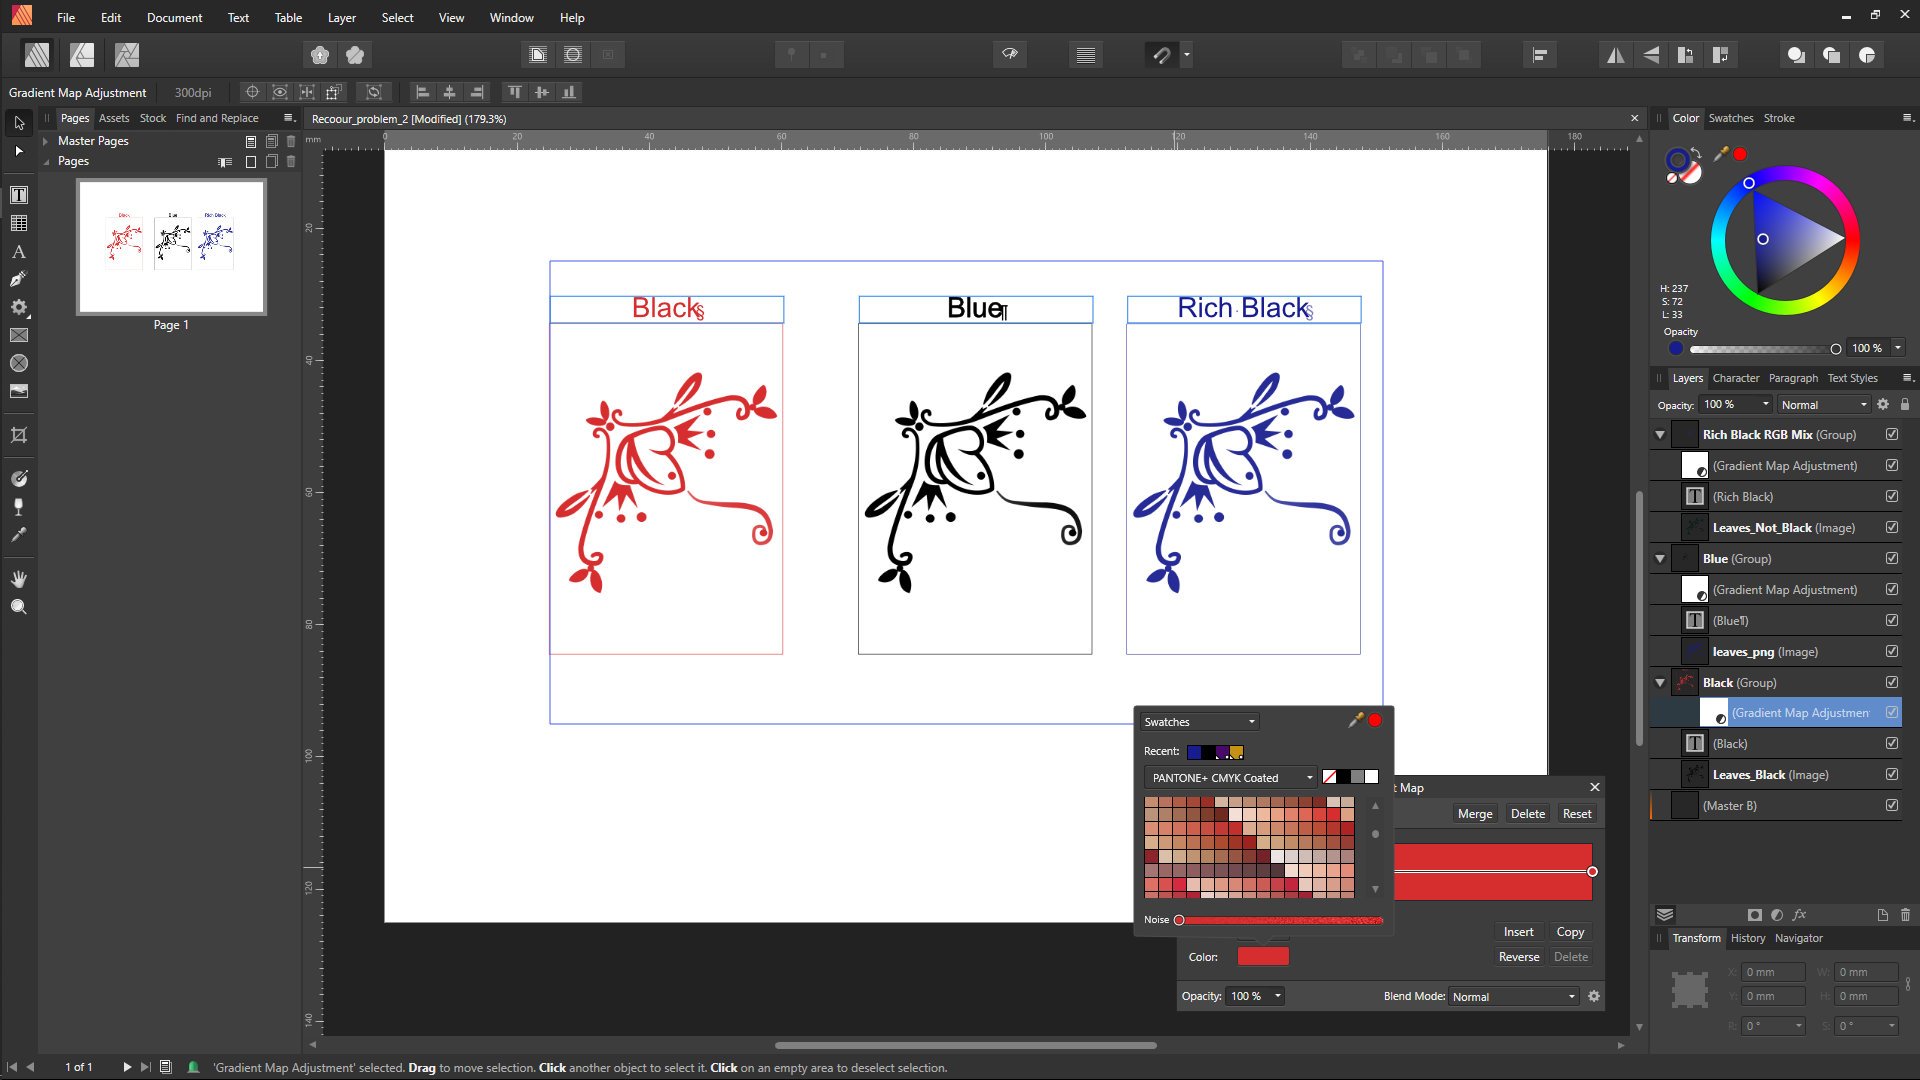
Hi Guys, just an idea, try using the "Gradient Map Adjustment" to recolor black lines.
-
Hi Elon, to avoid the curved corners not to be resized when you resizing the "hammer", you have to "bake" the corners with the corner tool. The 2. is change the boolean operation of the "highlights" in the compound from "add" to "substract".
-
Wow this is a great information (at least to me) that live filters from Photo can be used and modified in Designer. Thank you Wosven.
-
I think the main problem is, that paololimoncelli is using Photo with its live-filters that are not availible in Designer.