bndesigner
-
Posts
9 -
Joined
-
Last visited
-
 matt.baker reacted to a post in a topic:
Street Maps Etc ADe 1.7 (split)
matt.baker reacted to a post in a topic:
Street Maps Etc ADe 1.7 (split)
-
 maksimon reacted to a post in a topic:
Street Maps Etc ADe 1.7 (split)
maksimon reacted to a post in a topic:
Street Maps Etc ADe 1.7 (split)
-
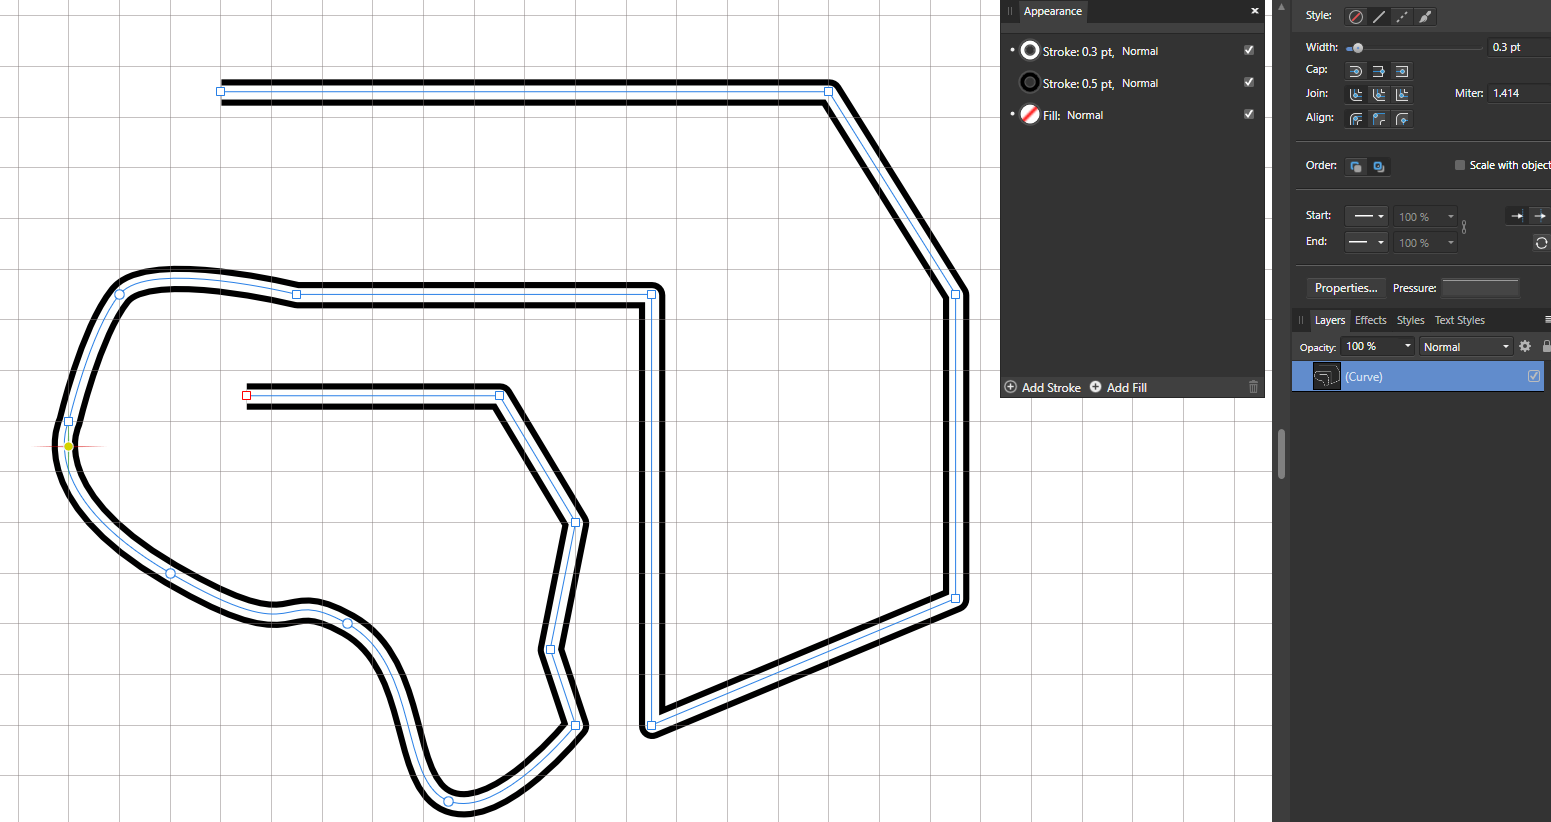
Looks good! Here is a screenshot with settings for reference on the parallel lines.

-
Thanks that was very helpful, I have finally managed to learn how stuff works somewhat: I have learned that my biggest enemy is 2 curves with the same color next to each other, they always produce some thin line due to aliasing or whatever, so I have learned to use the boolean add wherever I can or if that's not possible I can create another curve on top of the 2 to "mask" them.
-
bndesigner reacted to a post in a topic:
Remove thin line when snaping
-
I understand that I can manually change pixel values but my question is more on how to configure the snapping/grid so that it fits automatically? Its tiresome to texture this object and correct the pixel values for every little thing.
-
I have attached the file, I am guessing it has something to do with integer pixels but I don't know how to setup my document so that I can draw isometric objects without those lines. linedemo.afdesign
-
I am still having problems with these gap lines between objects. This time I am trying to draw objects with the pen tool on a triangle grid. Every time I try to draw a box there is a gap in the middle, I am using the UI Design snapping preset. Also the line appears in exported PNG files as well.
-
Thanks, that does work and I have tested it before but I was really hoping there was a solution for the snapping tool to do it better. There seems to be always that line no matter what kind of 2 shapes that im snapping like these rectangles that Iv drawn: I have verified my settings and the Pixels value is set to 1.
-
I have attached the file overlapingcircles.afdesign
-
I have bought this software yesterday so I am trying to familiarize myself. I am not sure how to check if the edges are aligned on an integer pixel value, if you mean the X/Y coordinates on the transform tab then they are integers and not decimals. Here is why I am trying to split a circle: The 1 circle sits on top of 2 and 7 but I need it to be below 2, the easiest way to do this seems to split the 1 circle into 2 halves and put 1 half below 2, but I get the annoying line: edit: I get the line on any zoom, from 50% to 200%
-
1. I made a pie and adjusted it so it forms half a circle 2. I duplicated it and flipped it and then snapped it onto the first pie so that it forms a whole circle. As you can see there is a thin line in the middle where the 2 halves join, I cant seem to get rid of it no matter what snap settings I choose.