

Ballyshannon
-
Posts
69 -
Joined
-
Last visited
Posts posted by Ballyshannon
-
-
I'm doing a flyer for a real estate company and they want to include three of their strong points in one line:
Residential Property Management Commercial
and I want to use a bullet point type of dot between each one to separate them. I once knew the keyboard shortcut but haven't used Affinity Designer in a long time, forgot what it is and can't locate it. In InDesign, it's Alt+8. Any help appreciated.
-
I was getting pretty good with Affinity Designer prior to the pandemic, but since the pandemic began, I haven't used it at all. I now have some new design jobs but have forgotten a lot of what I learned! I distinctly remember being able to toggle the red spellcheck underlines on/off with a keyboard shortcut, but can't for the life of me remember what it is or locate that shortcut in the shortcut list. Since I'm not a great typist, I like to type with the spellcheck on, but prefer to quickly view the documents without the red underlines and not have to continually go to Text/Spelling/Check spelling while typing. Any help is appreciated.
UPDATE: Did more searching online and found the shortcut! It's "h". Simply press the "h" key to toggle the red spellcheck underlines on and off.
-
Same issue here. I have a golden opportunity to pick up some freelance work with a print company that has a router, cnc, etc, and the standard file type is DXF. And there's no way I can currently afford Illustrator, which is why I went with Affinity Designer....but can't export files as DXF. Catch-22.
-
-
Thanks, Patrick. I'll wait! And thanks for the link.
-
I haven't used Designer for a while and see there is an update 1.7.0.380. Before loading it, what exactly was updated, and is it stable? Is there a thread/discussion applicable to this update? A search didn't find anything.
-
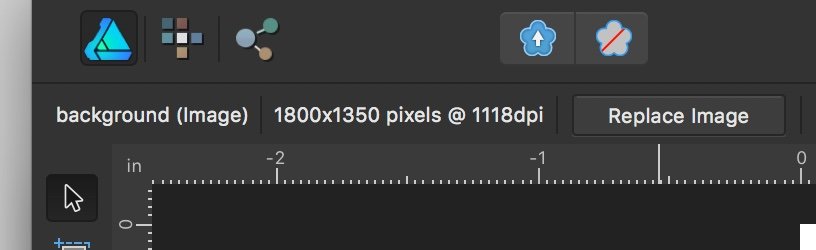
48 minutes ago, Old Bruce said:
In designer use the the Move tool and select the placed jpg photo and then in the upper right of the toolbar you should see the Replace Image button. just click on that and choose the 'new' jpg photo. the scaling will be honoured.

Great....thanks!
-
After printing a trifold job in Designer, I need to update the skin tones on a couple jpg photos and just wondering... after updating in Photoshop, do I have to remove the original photos from the project, place the updated images and re-crop/resize them all over again? I'm not finding any other way.
-
This has all been extremely helpful. Reading through the suggestions and starting with the basic stroke outline, I increased the width to how far apart I want the individual lines with Align set to Inside, expanded stroke with no fill, set line width to .6 pt Black, and done. No need to duplicate original line or Divide. Takes just a few seconds. Many, many thanks!
-
Thank you both so much for taking your time to help. The detailed process and explanation is exactly what I needed.
-
20 minutes ago, firstdefence said:
You would still do the add stroke and expand stroke
As mentioned, I did that and doesn't work. I'm obviously missing something. I've included the original outline stroke in .afdesign format with line width at .6 pt. If it wouldn't be too much trouble and when you have time, would you mind sharing the steps to create the double line from this file? Appreciate it.
-
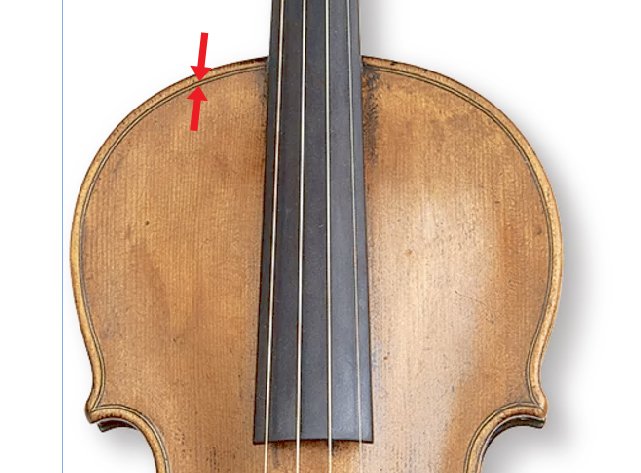
Thank you for the suggestions, but I guess I wasn't clear enough in what I'm trying to do. I've already created the wood binding trim around the outside. That's no problem. What I want to do is create the black thin double lines to the inside of the wood binding (see image with arrows pointing to the lines I'm referring to), which is simply an aesthetic touch to this particular violin. I've created the first thin line, which is the stroke outline submitted in my initial post. I just don't know how to duplicate that same line at the same stroke weight (.4 pt), but separated from the first line so it follows the contours of the first line exactly to create the double line effect. Creating the first line to the outside and duplicating the line to the inside doesn't work, and as mentioned, Designer has no offset path option. I could go the time-consuming route and copy the first line, use Transform to set it at the basic distance I want from the first line, then tweak a lot of nodes to make it follow the contours of the first line, but I'm hoping there's a quicker, easier, and more accurate work-around.
-
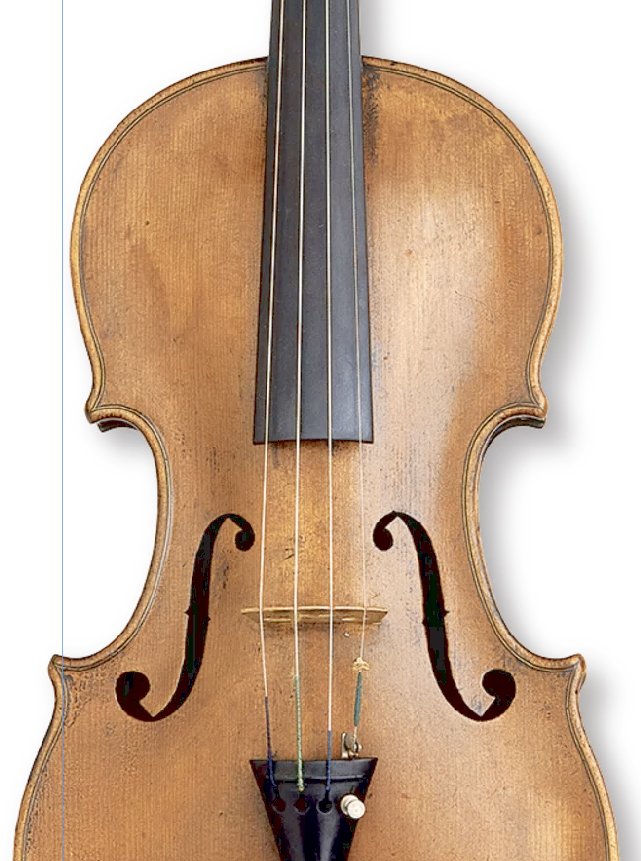
I'm working on a violin project in Designer and trying to create a black double line trim that follows the outline of the instrument top. I have a stroke outline of the trim outline and want to duplicate the line and place the duplicate just far enough to the inside to create a double line with the duplicate line following the contours of the original line precisely at a given distance. Copying and using the Transform function with aspect ratio locked doesn't work. Any help would be appreciated. I've included an image I'm working from to show the double trim effect I'm trying to duplicate.
-
1 hour ago, v_kyr said:
@R C-R That was slightly irritating to understand (at least for me), first I thought he might got an AD related indication for the actual color space usage. But it seems he himself named the files this way instead and thus those were shown up like that. - However, I hope he get's things sorted out right now.
I understand how that was confusing. I admitted yesterday that I had mistakenly thought the readout was showing the color space type, when it was my own naming process. Sorry for the confusion. I'm still learning about Designer. And yes, I got my concerns sorted out and mentioned it in a post yesterday that when creating an occasional ad at a different size in RGB that was originally CMYK, I'll simply open each component CMYK file in Photoshop, convert to RGB, re-save with 'RGB' in the file name, and use the Replace Image/Document option.
-
11 hours ago, >|< said:
Double-clicking (in the document view, not the Layers panel) an Embedded Document does open it in a new tab on my Mac. Alternatively, the context toolbar of Move Tool has an Edit Document button that does the same.
Does the same on my Windows system, and not useful. Certain fx can be added, but that can be done directly on the working page without opening in a new tab. Also, as @v_kyr mentioned, opening in a new tab still doesn't provide image color space or file type. The only info I see is dpi and that it's a pixel layer.
-
The images I used in the project are all JPG or transparent background PSD. Upon further inspection, I see that each object listed as "Embedded document" is a transparent background PSD. The other objects are JPG images. (see below). So, Walt is correct.
Add to future Designer updates wish list: Readout to visually determine file and color type when selecting images.
-
Yes, I mean images and photos that I saved in CMYK color format for the CMYK project. A couple images have embedded profiles, but others don't. No matter, all still look like CMYK color after trying to convert. When an embedded file is listed in the upper left corner when clicking on the image/photo, it says "(Embedded document)".
Embarrassingly, I have to clarify that when I said each file still says "CMYK" in the file name in the upper left corner when selecting, that's because it's how I named the file. My bad.
So no matter what happens in the conversion, that file will always say "CMYK" since it's included in the file name. However, when selecting an image, I can't find any display/readout in Designer to quickly indicate if an image is CMYK or RGB. If there's a way, please let me know!
Thank you @walt.farrell but without jumping through hoops of crating slices, exporting, etc, it's actually quicker for me to simply open each file in Photoshop, re-save and use the Replace option. Thankfully, having to convert a CMYK project to RGB for a client isn't a common occurrence.
-
I had already tried using the Doc Setup/Color Format/Convert to RGB, as well as checking the Convert opened files to working space option, and I've been doing layout long enough to see that the images are still CMYK, and verified by clicking on an image and seeing the CMYK file name still in the upper left corner. It was obvious that when I clicked Convert, nothing happened. So it wasn't converted to RGB. Also, with a CMYK project open, when I click on RGB/8, both the Assign and Convert options are greyed out. I must be missing something here. I've already created the RGB project by opening each image in Photoshop and re-saving each as RGB and using the Replace Image option in Designer since I'm on a time crunch. I was just hoping there was a quicker way directly from Designer.
For those who have responded, have you actually done this and been able to convert CMYK to RGB?
-
I designed an ad for a client in Designer in CMYK color format for print and the client wants to use the same basic ad at a different size and in RGB for web. Redoing the size is no problem, but once the images and text are copied from the CMYK project into the new project, is there a way to convert them to RGB on the page or do I have to open each image in Photoshop and re-save as RGB and basically rebuild the whole thing?
-
When adding an Outer Shadow in Designer and rotating the angle control line within the circle using the mouse pointer, it snaps only to specific angles...0, 45, 90, 135, 180, 225, 270, and 315. There have been many times I want a different angle and I realize I can click on the angle readout and type in any angle, but that's a pain to get the angle I want, and counterproductive . Is there any way to turn the snap function off and allow the user to drag the line and move the shadow smoothly without snapping to the predetermined angles?
-
@R C-R: I'm pretty new to Designer and wasn't aware of the arrow tool, but found it. That's perfect for my needs. Appreciate it.
@gdenby: Thanks! That was one of the first projects attempted after getting Designer three months ago. Interesting that your info indicates you're in the Michiana area, which is my neck of the woods. I'm originally from Elkhart, IN and still have family there and South Bend.
-
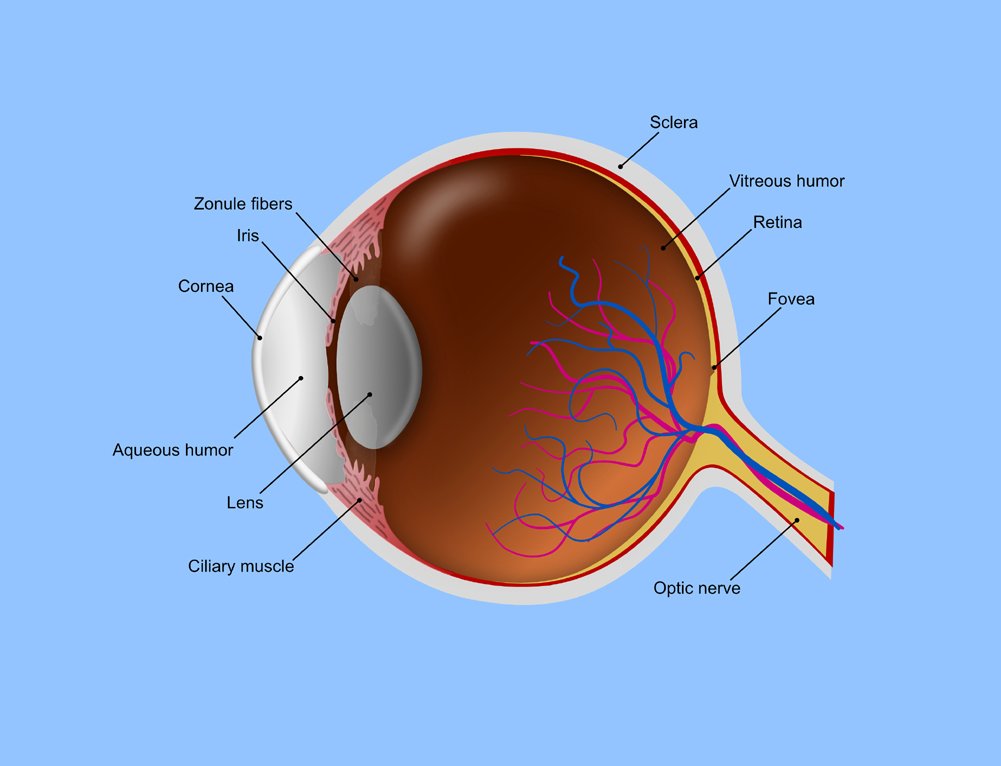
It would also be nice to have lines with dot ends in Designer when identifying specific parts/areas of technical and medical diagrams. In the image below, I had to individually place dots at the end of each line, which is tedious and counterproductive for something that should be simple.
-
46 minutes ago, v_kyr said:
Well it's easy, just drag or place the image file inside so that on it's layer name it reads (image) instead of (pixel) here, then it should work!
Exactly. Shouldn't be a problem. All I did is copy and paste the original image into Designer (Draw Persona) which created an "IMG" layer, and duplicated (Ctrl-J) that layer. In order to create the 'hole' in the duplicated layer using Subtract after drawing the rectangle around the icon, the image must be converted to curves. It doesn't matter if you convert the top IMG layer to curves before or after drawing the rectangle. Below is what the layers look like after drawing the rectangle around the icon on the top IMG layer. With the top IMG layer converted to curves, select both the top IMG layer and the (Rectangle) layer, click on Subtract and add a Gaussian blur to the top layer. Quick and easy.
-
Here's another possibility without using pixel persona and is pretty simple.
1. Duplicate the image layer and make sure it's on top of the original image layer
2. Convert the duplicated top image layer to curves
3. Use the Square Rectangle tool to draw around the icon that you want to remain clear, including the text (same as shown in @firstdefence's illustration, but using the Square Rectangle tool).
4. Making sure the Rectangle layer is the top layer, select both the Rectangle layer and top image layer that you converted to curves, and click on Subtract. This will cut the 'hole' for the selected icon in the top image layer.
5. With the top image layer selected, apply a Gaussian Blur as desired and you will see the face blur, leaving the selected icon clear. In the image below, I used a 17px Gaussian Blur.


Keyboard shortcut to add dot to separate text in Affinity Designer?
in Pre-V2 Archive of Affinity on Desktop Questions (macOS and Windows)
Posted
Thanks for all the input. I'm using Windows, so Alt+7 works perfectly using the numeric keypad as #carl123 suggested.