zenmom
-
Posts
26 -
Joined
-
Last visited
-
 zenmom reacted to a post in a topic:
set inches as the default unit
zenmom reacted to a post in a topic:
set inches as the default unit
-
Affinity Photo perspective tool not working
zenmom replied to mjongsma's topic in V2 Bugs found on macOS
Thank you for your various advice. The need to rasterize something that had originally come from Affinity Photo wasn't clear to me, and in my case was the solution to the Perspective option being grayed out. So, thanks! -
Ah! Well, I expect to catch up with v2 shortly after Christmas, so that will eliminate this kind of mismatch. Thanks for letting me know. M.
-
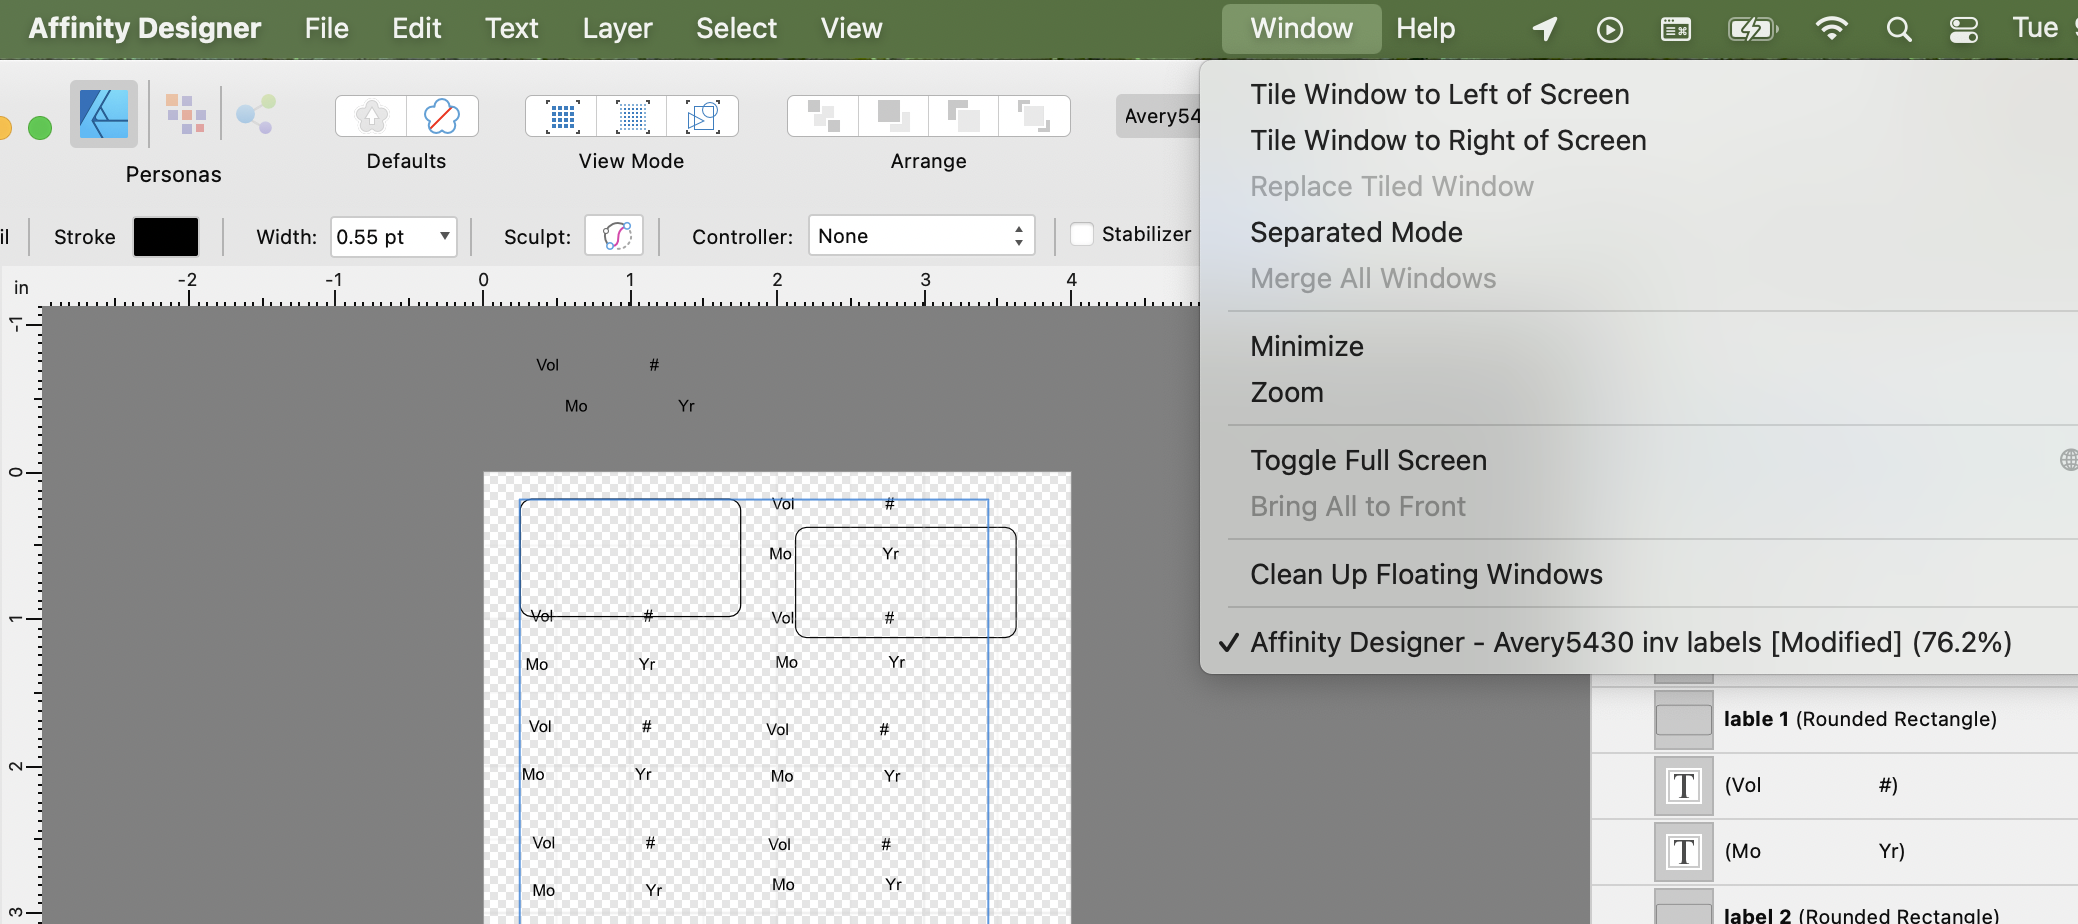
Dear R C-R and Mark L, Thanks for your replies. I don't think Document Setup is what I'm looking for in this case. I used the Document Setup screen to set the basic parameters for my project, but I'm not sure how that affects editing one specific object (and not the document as a whole). The Transform panel looks like exactly what I'd been seeking, but when I pop down the Window menu, I don't see an item called Transform. I've attached a screen shot below for reference. However, some rummaging through the area to the right of the document window revealed it as one of those tabs (panels?). So, Yay! Huge help to be able to specify size & position exactly! I'll be back when I trip over the next thing I don't understand. Much thanks, M.

-
Dear Collective Wisdom, here's my next question: I've got an object. It's just a smidge too short. So I looked up resizing. This is what I found: "From the Document menu, select Resize Document. Ensure the Resample option is switched on. Enter your new document dimensions in the Size boxes—left box for width, right box for height. To resize the width and height independently, click the lock icon (to unlock) between the Size boxes." Seems straightforward enough, but I don't see the Document menu. That word isn't on the basic Mac menu bar across the top of the screen. I don't see it as one of the formatting panels to the right of my document. Another article mentioned some controls in the lower right corner. I don't see them either. (The various formatting panels go all the way to the bottom of the window.) I can grab a corner of my object and drag (constrained or unconstrained), but sometimes, as in this case, I'd like to see a box where I can type in an exact measurement, and that's the part I haven't been able to find yet. I'll add that although the discussions on different types of "resizing" are interesting (resampling etc), in this particular case I need a real-world dimension to match some labels I'll be printing, once I get this Affinity Design document tweaked. So right now scalability isn't a concern for me - being able to enter a specific real-world measurement is. Looking forward to your reply, Marcia Morrison in Salem, Massachusetts
-
v_kyr reacted to a post in a topic:
Affinity Designer - duplicating objects
-
Affinity Designer - duplicating objects
zenmom replied to zenmom's topic in Affinity on Desktop Questions (macOS and Windows)
Thanks! I checked each aspect. The layers were all enabled. They were all within the visible canvas area. BUT! The stroke line was set to 0. Ah HA! Set it to something greater than zero, and the rounded rectangles appeared! On to the next challenge. Will post again when I come to the inevitable next puzzlement. M. -
zenmom reacted to a post in a topic:
Affinity Designer - duplicating objects
-
Dear Collective Wisdom, Affinity Photo has served me well for several years. Today I decided to try what I thought would be a simple project in Affinity Designer, but I've run into a very basic problem. I want to create a 6" x 4" document that contains 14 rounded rectangles, arranged in 2 rows of 7 each. So... I created the document in the specified size - check. Discovered how to set margins, did that - check. Created a rounded rectangle in the specified size - check. Tried to duplicate the rounded rectangle... hm. The document appears to recognize the additional rounded rectangles. To my surprise each one is on a different layer. I can get used to that. But the crucial problem is that I can't see them all at the same time. I watched the following tutorial, which seems clear enough. I can go through the steps, but I still can't see the additional copies of my object. What am I missing here? Regards, Marcia Morrison in Salem, Massachusetts
-
I had the same problem. Going to View > Show Toolbar (in the Affinity Photo menu bar) did the trick! Thanks.
-
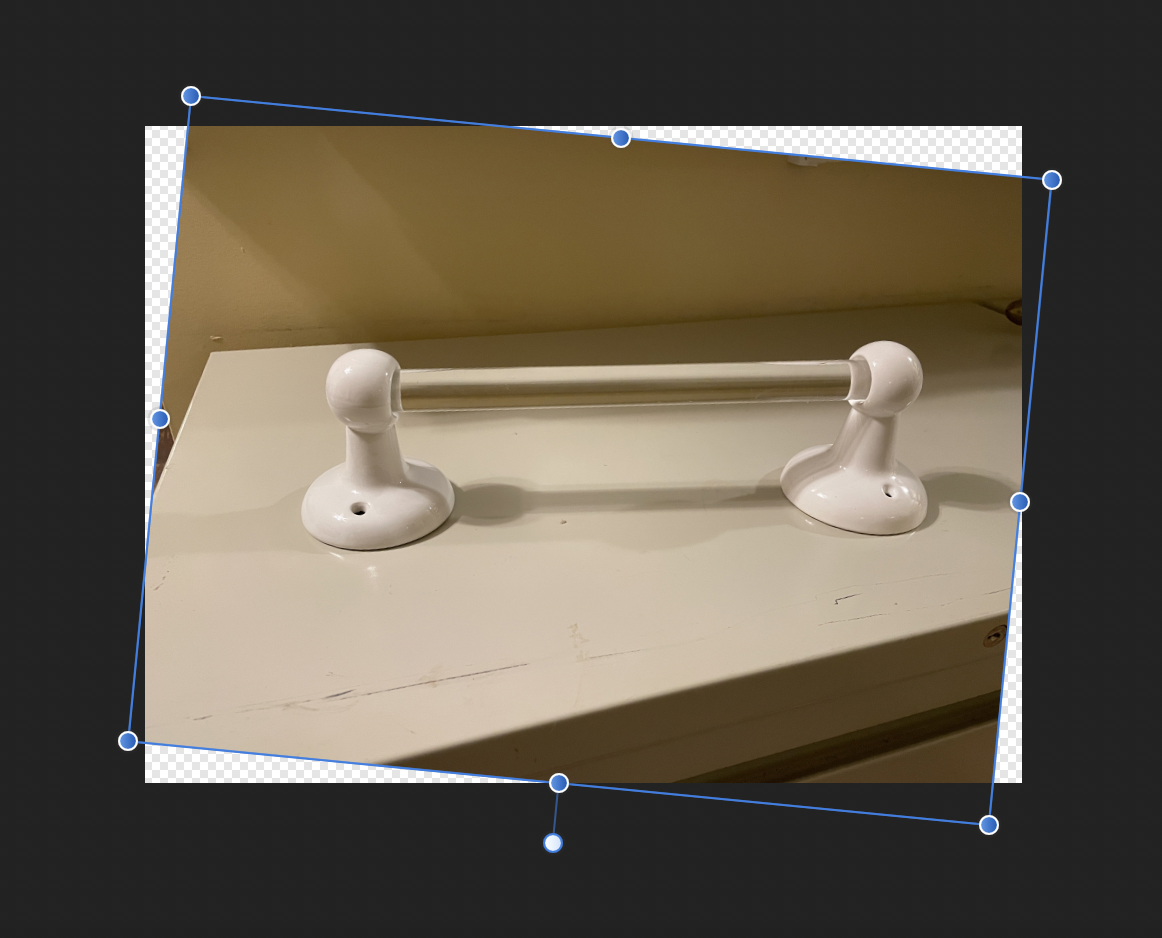
Dear Collective Wisdom, I'm back with another cropping question. I've got an image (of a towel rod, this time) that I've rotated so the bar is horizontal. I might even apply a little perspective correction. Looks good so far! Then I want to crop the image... and the bounding box for cropping has rotated along with the image. I wish to crop it so the edges are parallel (or at right angles to) the now-straightened image. I searched the forum archives, but I didn't see anything that was an obvious answer to this problem. Granted, I might have missed something, but also some of the questions & answers were from several years ago, and Affinity Photo might have had a few changes since then. Thanks in advance for any advice on how to solve this quandry.
-
Jowday reacted to a post in a topic:
The "frame" is for the pre-cropped image
-
Thank you! Exactly what I needed to know!
-
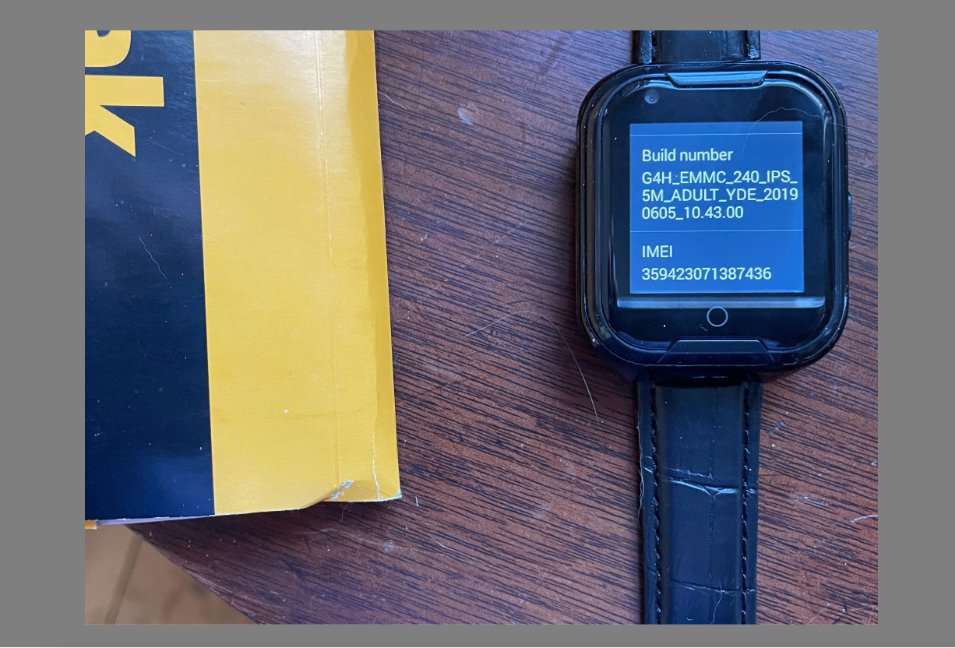
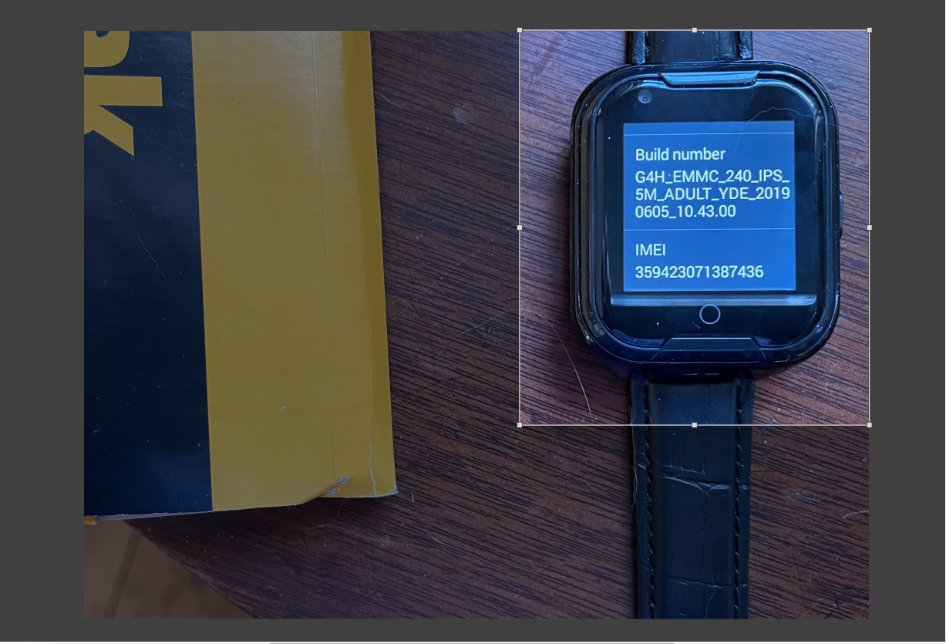
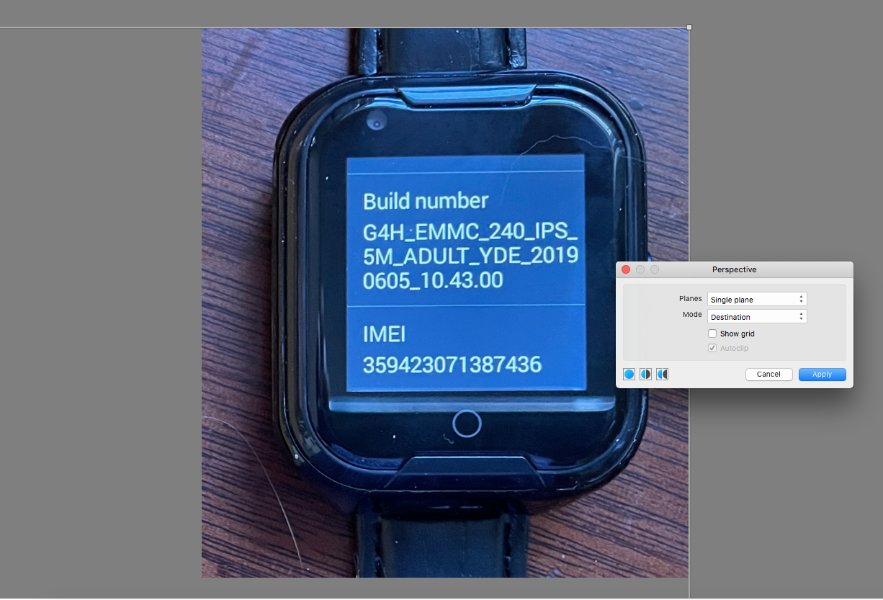
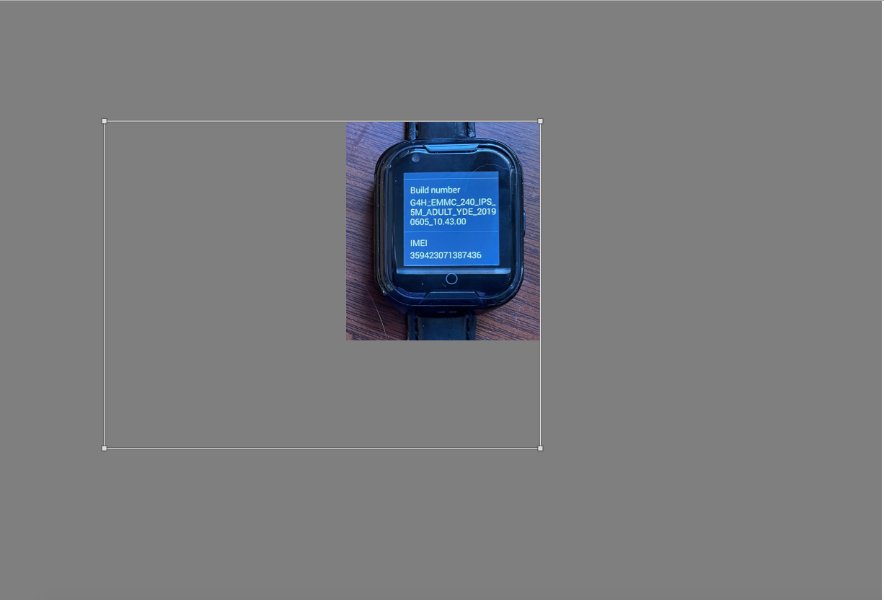
I'm not even sure what to call this. I'm not a beginner with Affinity Photo, but I'm not an expert. I transfer my iPhone photos to my desktop Mac, crop them, use the photograpic distortion filter, resize them with no trouble. But if I crop the photo before I use the photographic distortion tool, the rectangle with the handles is sized for the photo *before* it was cropped. I then have to zoom out, and out, until I can see all the handles. If I save the Affinity file, close it, and then re-open it, the problem goes away. But is there a way to re-set that distortion filter frame (or whatever you call it) without closing & re-opening the file? My screenshots: #1 - I've got a file, xfer'd from my iPhone. #2 - I rotate the file, no problem. #3 - I only want the watch face, so I crop the file. #4 - Then I want to adjust the perspective (Filters > Distort > Perspective). But where did the handles to the left go? #5 - I zoom out several times until I can see all the handles. Then I can adjust perspective to my heart's content. But my question is... why does it do this? (And what do you call that thing with the handles, anyway?) TIA for any advice.
-
I'm glad to find this thread, b/c I also have this question. My need isn't as critical as Miss Daisy's, but I still would like to be able to change the default to inches instead of pixels. I grew up with inches in the U.S., and even though I know centimeters or pixels or cubits are better choices for objects or images or arks, I still don't have the same feel for how big "x" number of pixels is vs. "x" number of inches. I want to make inches the default, and then switch to pixels if necessary, instead of the other way around. Now that I know how to display the Context toolbar, that's an easy way to change units of measurement. P.S. I know it'd be a good idea to get a better "feel" for pixels, but I'm not a graphic designer so am not working with these things every day. So the task of training myself on that is on the list, but below the dotted line where my time runs out.
-
Thanks! It worked! Thank you, MEB, for your post from 2017. I'm using Affinity Photo on my desktop iMac, but the advice quoted below worked perfectly. It was exactly what I needed to know to get a clean file without all the extra canvas around the edges. "Select all layers directly from the Layers panel, then copy to the clipboard, finally use the command File ▸ New From Clipboard command to create a new document retaining the original layer's hierarchy."
-
I see that the last post was in 2018. I'm hoping that eventually I'll be able to re-set the default value to inches for *every* document I open in Affinity Photo. Any progress on this?
-
Thanks Toltec, solved my problem!
-
zenmom reacted to a post in a topic:
How do you adjust kerning in Designer?
-
Thank you. MEB! It's 3 years later, but I just came across your post b/c I had a similar Affinity Photo question. It worked! I went to Filters > Colors > Erase White Paper, and it worked! Thank you for solving my question, and it's so easy! I'm going to make a note of this one; I'm sure I'll be using it again.