

Dean Reardon
-
Posts
43 -
Joined
-
Last visited
Posts posted by Dean Reardon
-
-
On 3/22/2021 at 12:22 PM, loukash said:
It would be very helpful if such essential functions were available upfront, not just by some obscure key combos and clicking targets that need to be memorized without actually knowing how to look it up later.
I, for one, knew that something like that is possible, having read it on the forums months ago and used it a few times since, but in the meantime I forgot which key combo and couldn't figure it out again, until reading your post.
Please tell the devs to follow the Human Interface Guidelines and put any such command in a menu as well.
Or, for a start, at least add tooltips. (Something that Schmadobe's Photoshop got right decades ago…)Thanks
If you look under the Help menu or press F1 and do a search for "luminosity Mask" you will find the Ctrl+Alt+thumbnail command.
-
On 3/22/2021 at 12:22 PM, loukash said:
It would be very helpful if such essential functions were available upfront, not just by some obscure key combos and clicking targets that need to be memorized without actually knowing how to look it up later.
I, for one, knew that something like that is possible, having read it on the forums months ago and used it a few times since, but in the meantime I forgot which key combo and couldn't figure it out again, until reading your post.
Please tell the devs to follow the Human Interface Guidelines and put any such command in a menu as well.
Or, for a start, at least add tooltips. (Something that Schmadobe's Photoshop got right decades ago…)Thanks
LOL....photoshop and illustrator had a plethora of those hidden keystrokes. That's one reason why I gave up on it. I find affinity very easy to use in comparison. Not because it is a simpler program but it just seems more intuitive to me.
-
18 hours ago, JokerMartini said:
Does Affinity Photo have a Smart Objects like feature yet? Where I can import a afphoto document one or more times into another afphoto document, and scale/move/rotate it around the doc. Then when i make changes to the original reference document, those changes propagate into my main doc?
Yes you can and it's a great way to work with mockups (live filter perspective mockups especially).
- Open your mockup template
- Add a standard rectangle to the approximate size needed for the mockup
- Use the rectangular dimensions and open a new document with those specific dimensions
- Add your picture to the new document and save it (ie: picInsert)
- Go back to mockup template and place "picInsert"
- Then just add the perspective live filter to the placed picInsert and set your perspective for your mockup
- You can then just double click the placed "picInsert" layer to open up the document in a new tab and then just replace the picture or add in a vector or whatever without having to deal with perspective issues
-
This likely can be implemented in Designer, Photo, and Publisher.
- I love the new Studio Preset availability in the latest upgrades for the three desktop affinity products. I think if a dropdown of available studio presets can be added as something users could implement in the toolbar it would be fantastic. It would just make it a bit quicker.
-
Also, perhaps a tool button to hid/show studio in the toolbar would be great too.....as I can only hold so many quick keys in my head and forget Ctrl+Shft+H
")
Anyway, just two ideas I thought I would suggest -
When I attempt to move an image from Unsplash to the document the program suddenly crashes. Does not occur with Pixelbay or Pexels. Occurs in both Designer and Photo - did not test but likely to occur in Publisher since all three programs share the same engine.
Oh, upgraded the other day to latest....1.9.1xxx for all three programs. I get a checkbox request from both Pixelbay and Pexels the first time I used them about licensing.......I didn't get it for Unsplash.Running Windows 10
Just reporting the issue.
BTW, if you double click on the image you want in unsplash, it does open up your browser where you can download the image you want. So that is a workaround until they get it fixed
-
OK, thanks....did not see this. My bad.
-
Win 10, Affinity Photo 1.90
Small issue in interface - when I export to a jpg and the win directory comes up, the save file type is indicated at "Affinity file", not as "JPG". The file is still saved as a jpg but the "Affinity File" indicator makes it a bit confusing. Does not happen with I attempt to export as a png or gif (haven't checked others). Again, the image is still exported as a jpg so there is no problem with the export, just the save as indicator.
Below is a screenshot -- File>EXPORT>jpg
-
6 minutes ago, h_d said:
Publisher's data merge needs a structured/delimited data file such as .csv, .tsv, .xsxl. It doesn't read tagged text. You would need to construct a structured data file from the documents that people send to you before you can import it as a data merge into Affinity Publisher.
Thanks!
Well, I guess it's not that hard. Like I said, a simple Google Form or MS Form would work. People can enter the info into the form which then automatically saves it to an online spreadsheet which can then be saved/downloaded as a CSV file.
Nonetheless, I think the addition of Data Merge is a fantastic addition. It makes simple things like a fancy mailing list a breeze. But also allows almost complete automation of a product catalog if you have all that info in a database already. Plus, you can actually do collaboration documents like magazines, newpapers, newsletters, cookbooks, etc with multiple authors from all over the world if you wish....they just enter their byline, their story into a database or form and an editor can put it all together with basically the click of a button!
-
I'm extremely happy that Affinity has implemented the Data Merge feature. I think it is still early days and they have to clean up a few things. I agree with others that having one panel for data merge and another panel for fields is kind of a strange way to do things......having them on the same panel under different tabs might be better.
I also think it would be extremely useful if you could simply put some type of tag or identifying for the individual fields straight into a textbox for example rather than having to load the database, go to field panel, select the textbox in your document and then double click the associated field in the fields panel to link them. I haven't played around with it but what happens if you change to a different database but with the exact same fields....do you have to repeat the double click process? or can you just save the publisher doc like a template file the you can reopen (let's say you are doing monthly reports) month after month, open the new monthly database with the same fields and then just click "generate" to populate the fields in the document. -
I've been looking around but unable to find the answer. Can 'Data Merge' in Publisher read a text document with field names (title of the field) set as a tag (like <tagged field name>) with the underlying text on the next line(s) being the actual field data? Such that different people/business department/etc can all send in the same information (in multiple field) as a text only document. Sort of like (a complete hypothetical example):
<Persons name>
John Smith
<Previous year overview>
Paragraph(s) with information
<Current year goals as a list>
goal1
goal2
goal3
<Description of your favorite hobby>
Paragraph of hobby and description
_________________________-
And then just have people send that in as a text document I can append to each other as one long text doc that Publisher Data Merge can understand. Or would I have to develop something like a Google Form or Microsoft Form which they have to fill out and which automatically saves the info into a spreadsheet which I can then download as a CVS file
-
I am having similar issue also....with mouse as well as with pen.
With the mouse: I click Alt+right mouse button and I get a little double circle for hardness and width but I actually have to also click the left mouse button at the same time to get width or hardness to changeWith Pen: I click Alt+right mouse button and I get a little double circle for hardness and width. Moving left/right/up/down does nothing and if I touch the pen tip to the tablet my computer gives off a bell tone and my double circle disappears and changes to a single circle. I have a "New Huion 1060 Plus" from 2016 so that might be the issue but I have updated to the latest driver that works with my tablet. I have absolutely no problem for zooming if I set a button to "z", I can touch the tablet and move back and forth to zoom in or out.
I only wish there was a way to reset the brush width/hardness key shortcut. And using the [ or ] makes such small incremental changes to brush size. Why would the "Alt+right button" be hard coded into the product while there are many others that users can change?Kinda Frustrating.
-
Version: Win 1.8.2.62
1) Pexels is not working..."connection failure". It didn't work in 1.8, then upgraded and it did work, upgraded to newest version 1.8.2.62 and not working again
2. Unsplash - If I have the stock panel on the left side of my screen in a panel container (not a floating panel) where it runs the full length of the screen , I don't have any scroll bars for the Unsplash stock panel (even though I know there are many more images available than what is shown). But if I do a search on Pixabay, I do have scrollbars. If I make the stock panel a floating panel or put it into a smaller panel container on the right side of my screen, then I do get scroll bars with the Unsplash stock viewer.
Neither are a major issue but are kind of an annoyance. Although I do wish I could have Pexels search working again.
-
Wow, the Canon M50 shooting in RAW CR3 format has been out about 2 years and still no support for the format! Please!
I understand you are busy but the M50 is a very popular camera and thus the CR3 format is out there and used.
-
YES!!!!!!!!!!!!!!!!!!!!!!!!!!!!!!!!!!!!!!!!!!!!!!!!!!!!!!!!!!!!!!!!!!!!!!!!!!
It was an issue when using filler text!!!!!
************DOES NOT HAPPEN WITH YOU USE OTHER TEXT*******************
I just copied some text from a website/news story, pasted into notepad (to remove any formatting) and then copied and pasted into a new text frame, added picture and it works just fine!!!!
Problem solved!
-
-
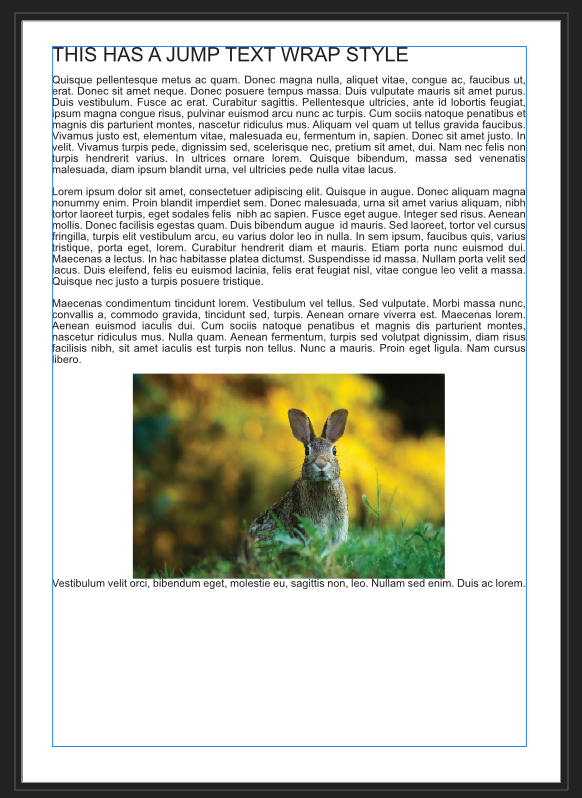
Noticed there was a new build out this morning so downloaded and installed. Still having the same issue. So I have included the actual Affinity file. It is a 2 page file with each page having a single textbox with filler text (I did not copy from one page to the other...I set up each page separately). I then added a picture to each page and set the text wrap to "Jump". Depending on where in the page I locate the picture I either get a good wrap (page 1) or I end up with just a single line of text below the picture (page 2).
I haven't added a "Character" or "Paragraph" style to the text but I tested it last night - on the .376 build - and it didn't matter whether I there was a style or not. Still the same issue.
-
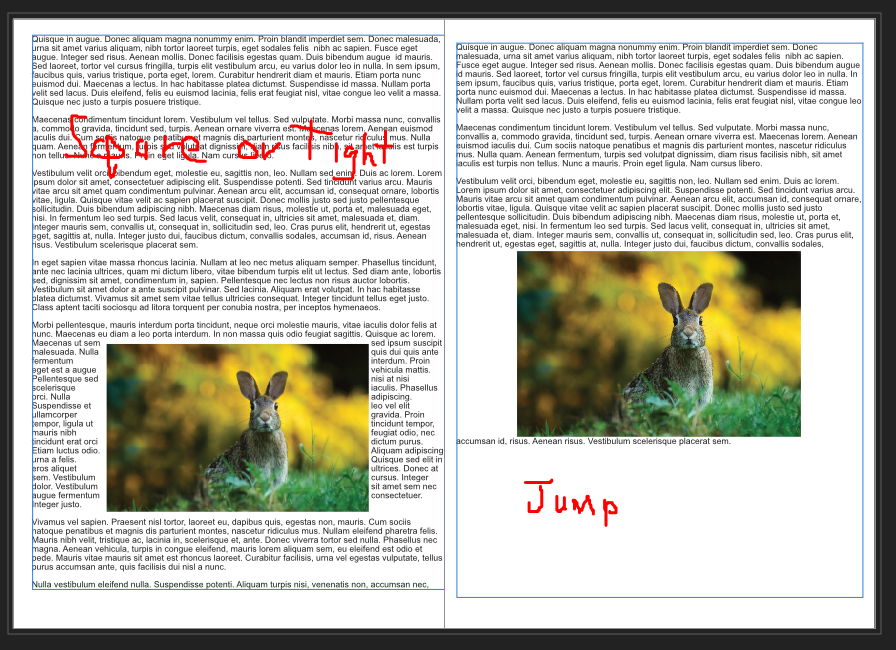
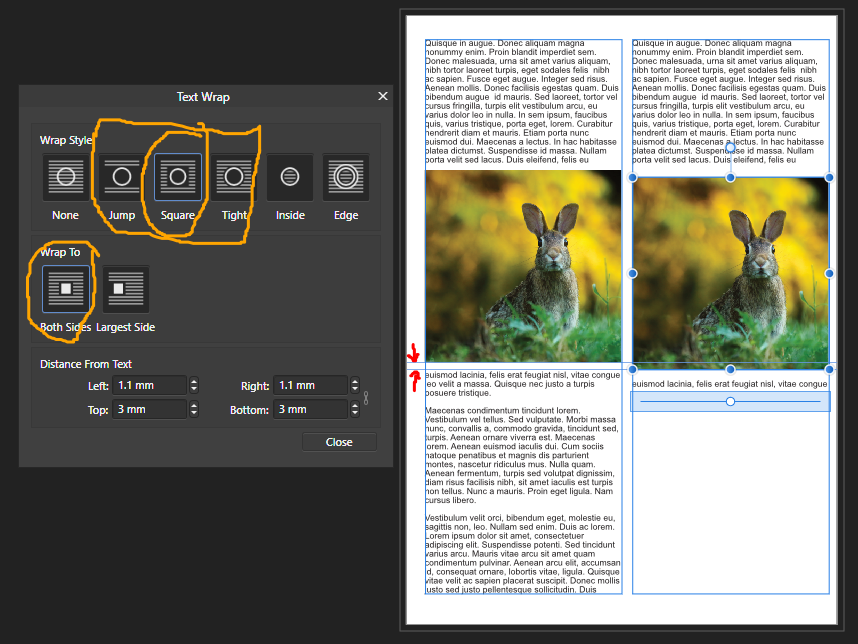
Ok, I tried something else. A full page text box with a picture added. When I move the picture around with text wrap as "Square" or "Tight" it works fine (picture smaller than text box width). But when I choose "Jump" and move the picture down below a certain point, I lose all text except for a single line.
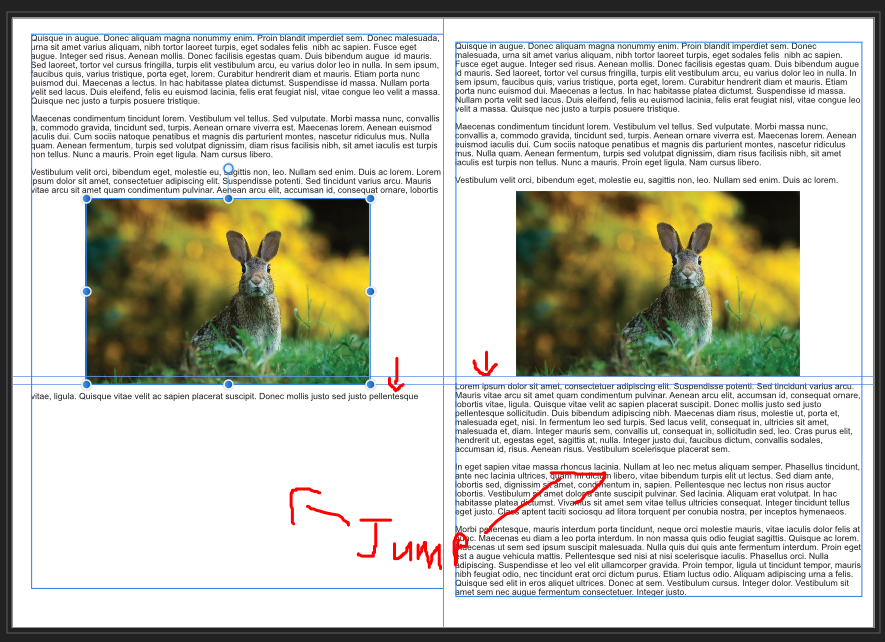
As with the picture in my first post above, when I use "Jump", there is a point when the full page has text and if I move it down slightly, I lose the text (see guidelines). The location of where I lose the text is dependent on the "Distance From Text" setting in the "Text Wrap" dialog box. If I input a 'bottom' distance of 10 mm for example, I lose the text below earlier as I move the image from top to bottom. In the image shown below, the 'bottom' distance is set to 0 mm.
See images below:
-
***** ISSUE SOLVED - WAS AN ISSUE WITH THE USE OF THE "FILLER TEXT". IF YOU TYPE IN OR COPY/PASTE TEXT FROM ANOTHER SOURCE, THEN YOU DO NOT GET THE FORMATTING ISSUE DESCRIBED BELOW. JUST SOMETHING TO BE AWARE OF IF YOU ARE TESTING THINGS OUT ******
----------------------------------------
Has anyone come across this issue (see image attached): I have a page with two long text boxes side by side (not one textbox split into two columns. I place a Picture Frame in each and then add an image to the frame. (I've also done it with just adding an image without a "Picture Frame" and get the same result)
Text wrap for both large columns is exactly the same, "Square" -- although the same happens if "Jump" or "Tight" is selected.
If I move the right picture frame down just slightly (you can see the guideline with red arrow indicators), I lose all the text below the picture except for a single line of text.. I can move the picture further down and only a single line of text below the picture shows. But if I move the picture up, equal with the picture on the left, all the text fills in below the picture.
Moving either picture up works fine. Just moving it down below a certain point results in problems.
What is going on????
- Running Windows 10 and latest build of Publisher.
-
4 hours ago, John Rostron said:
Another gorgeous panorama. However, the bottom right quadrant looks to be all dark shadow with no detail visible. It looks like a candidate for a combination of HDR and Panorama. Ideally you take your bracketed images for each segment at the same time. However, as you took Raw images, then you may be able to develop the images first to extract the detail from the lower parts, using the same procedure for each photo. You would then need to save as developed images before applying the Panorama stage.
I also like your second image. We do not have mountains like this in the UK. The best I have been able to manage are the High Atlas in Morocco.
John
I agree, it is dark compared to the right side. If you click the image to enlarge it, you do see more detail. I was thinking about adding some overlays to lighten that region up but chose not to. To be honest, I think the field of view is a bit too large (greater than 180 degrees) for it to be a good panorama. But because of the distance of the mountains you don't see a huge amount of visible image warp.
I remember taking these images over two years ago and thinking the view was just amazing. These mountains are about 2000 miles west from where I live. For two summers I took a month off each year and traveled out west and spent the time camping throughout the region...from arid deserts to mountain vistas. I have tons of amazing photographs.
I actually hosteled throughout England and Scotland back in the late 1980s traveling from London all the way to Orkney islands off of John O'Groats. There is some fantastic diverse landscape on that trip as well.
-
Here is another image (single Raw image from atop the Rocky Mountains) edited in AP
-
Here is a pano from atop the Rocky Mountains in Colorado at about 14,000 feet above sea level. It consists of 10 raw images all stitched together in AP and then edited. It is probably greater than 180 degree view so there is a bit of image warp that I didn't do much with. But it does give you a really beautiful view of the Rocky Mountains and what you would see as you look around.
- A_B_C and John Rostron
-
 2
2
-
4 hours ago, John Rostron said:
A great panorama. I always find the main problem with panoramas is maintaining good horizontal control. You have done this well
It is good to see results from Photo in this forum. Most postings are from Designer. Perhaps the sub-tile of the forum (Post your fantastic designs for all to see) does not help!
John
Thanks! I appreciate the feedback. Because it is a landscape and everything is in the distance (rather than close up like buildings and so forth), the vertical and horizontal skew caused by panoramas doesn't really show in this photograph. I didn't make any adjustment for the vertical and horizontal offset.
The camera was a Canon 6D full frame with 24-105 mm lens set at 50mm, f10
-
While node based editing offers a lot of customization, I am not sure it will really catch on with the standard consumer. Heck, even a lot of motion graphics/video editors prefer AE over something like Davinci. Nonetheless, it's nice to see other options out there.
I would like to see Serif work with another English/England based video company like HitFilm and enable use of native Affinity files with layering straight into HitFilm. I think that would benefit both companies. Users of Hitfilm have probably opted for HitFilm over paying for the Adobe subscription and thus don't have or use Illustrator or Photoshop...but they may be more apt to use something like Affinity.
-
I'm not a coder so don't know what is involved in building a lightroom alternative with DAM. But it seems to me that Affinity Photo has most of the photo developer options in it already....plus a lot of other stuff not found in lightroom but found in a program like photoshop. I consider AP closer to something like Photoshop.
So, strip out all the extra photoshop things and add in a mysql database set for cataloging and allowing large scale groups of pictures to be edit all at once.....and you are good to go!
Yeah, I did say I wasn't a coder
The one thing I really do like about lightroom is that you can take a whole group of similar type pictures, edit one picture and then just copy all those style/edits to an entire group of pictures all in just one single click...and then make microedits to individual pics if desired. Then just save the edit information in a database catalog for those pictures in another single click. If more extensive or special type edits (sky replacement, extensive object removal, special masking, etc) are needed they can then be opened in photoshop.
Perhaps Serif is worried that a lightroom alternative would pull sales from Affinity Photo. But I see them as complementary programs/apps for each other. But, right now I do have an old Adobe 6 version of Lightroom I can use and then still pull into AP if I want to add in photoshop like edits and effects to my pictures. Plus I can using AP for other types of drawing/painting/picture development since I don't have/use photoshop. Nonetheless, having an Affinity LightRoom alternative would be a better option as all my products would be under one house so to speak.


Using constants in Transform panel
in Pre-V2 Archive of Affinity on Desktop Questions (macOS and Windows)
Posted
Hi,
I have an circle object with an inside black stroke of 10, no fill and a H & W of 60. I want another circle (concentric circles) with inside stroke of 10, no fill and a H&W of 100. Then another circle as before but with a H&W of 140........another 180.....another 220. In other words, the H&W always increase by 40 for each new circle
I can certainly do this manually using ctrl+c, ctrl+v then just +40 to H&W for each and every circle. But I would like to be able to use Ctrl+J (duplicate) to quickly add the circles with the H&W adjustment. However, when I use Ctrl+J with H&W +40, the H&W will increase great than 40 for each circle I duplicate.....it will go 40.......then 45.......then 57.3.......then 71.3 (hypothetical numbers) but it won't say at a "constant" +40.
How can I make the increase a constant 40.....or a constant number without changing each time I duplicate?
I can use ctrl+J and add 40 to the X&Y and each time I duplicate it will adjust by 40....each and every time I duplicate. It won't change. But for the H&W I can't get it to maintain a constant H&W growth of 40 each time I duplicate.
Does anyone have a solution to this issue?