Krolly
-
Posts
12 -
Joined
-
Last visited
Everything posted by Krolly
-
Thanks thatGuy. In your example, I end up with 2 'closed' shapes. Each one has an unnecessary (in your case, curved) line, joining the lines I want to superimpose over my shape. What I want to end up with (using yours as an example) is (using the right-hand brown panel) the top line, the vertical line and the bottom line. The curve that joins the top line and the bottom line will appear in my diagram. Say I draw a convoluted shape with a black outline and blue full. Then I want to (for the sake of argument) put a parallel line inside a section of the convoluted shape. Just a line which doesn't join back up to itself. With Illustrator, I copy, paste a section of the copied shape, clear any 'fill' colour, and I have a black LINE with a start and a finish (and is not a closed shape) to lay over the blue shape and which matches the section I have cut it away from. Put it this way. I want to click on the section of line between two nodes – hit delete – and have that bit of line disappear, breaking my shape into a line. Surely a clever software developer could make that happen?
-
I haven't tried any of these workarounds yet, but I thank you all for helping. I'll save this information for my next diagram. I've been drawing bird skeletons and it would help enormously to be able to copy sections of a shape to put a defining line over a coloured area. I'll never close another shape until I've copied it into a new document while it's still a line! Trick is to remember. Grey Fox's workaround looks like it cuts a shape but leaves you with two enclosed shapes, which of course is not really what I'm after because I'll be stuck with a line across my artwork that I can't easily cover up.
-
I find the only way to cut an image into two separate sections at the moment is to redraw BOTH sections. Copy paste and deleting the nodules I don't want, still leaves the half image as a compound shape and 'release compound' greyed out. Has a workaround been found please?
-
Thank you And when I save that file as an EPS the clipping path will deep etch it out of its background?
-
You've answered my question. No paths. How bizarre. Is there an equivalent for being able to activate a select area. If I draw with the pen tool, is there a way to keep that 'path' for later? This possum is going to be on the top of a Certificate of Appreciation for vet clinics who help native Australian animals. I want to have it looking real or it will be pretty dumb so I want to come to grips with this new software. Thank you for your advice. It breaks my heart the time I put into that path around the possum's fur and whiskers only to lose it all. Beggars can't be choosers.
-
I haven't located a 'paths' pallet. What are paths called and can I turn a selected area into a path and subsequently that path into a clipping path? In Photoshop I had a path which I was going to convert to a clipping path and save the file as an EPS. My Photoshop expired unexpectedly. I want the possum to overhang the edge of a piece of paper (not the curled on on one of my layers, just an edge) and hold on to it. As I can't find how to retrieve or recreate the clipping path in Affinity Photo and as a hand-drawn clipping path is way better than one generated by software, I've given up trying that. I thought I'd just have to manage some other way. My problem is I don't know what tools and pallets are called. Is there a glossary of terms so I don't have to spend so much time experimenting and asking dumb questions? I should mention that I have used Photoshop and Illustrator since they originally came out, but while I took ten years off travelling the country, they turned into Creative Cloud and left me behind. I may as well jump ship to Affinity but it's frustrating starting from scratch. baby ringtail copy 2.psd baby ringtail copy 2.afphoto
-
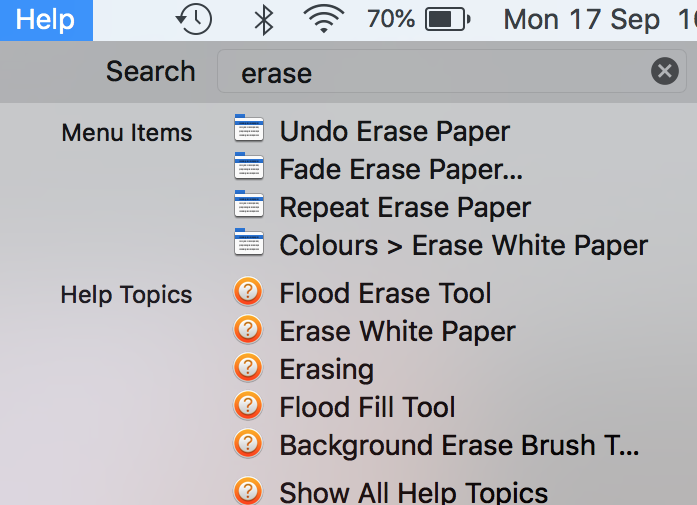
Too easy. I wonder why Help doesn't bring this up as an option, but the icon makes sense now I recognize it as the eraser on the end of a pencil. Thank you.
-
I'm sorry. I can see Background Erase Brush Tool in the Help topics. Nothing in the tools. So I went to the brush tool and it highlights areas. This is so frustrating. I have used the Adobe programmes since they were called Photoshop and Illustrator without a number following. Suddenly I know nothing! All I want is an eraser. I want to swipe across something and it disappears. If it's a big area I want a large brush tip an if it's delicate tiny stuff I want a small tip. How do I turn a brush into a normal eraser? Thank you for any plain english help you can give me.
-
Thank you for your suggestion. I tried erase and tried erase brush. Nothing likely.

-
I am used to asking Help when I am looking for a tool in new software. I couldn't find an eraser in Affinity Photo so I asked the internet. Still no joy. How do I erase something without drawing a path around it with a pen tool, selecting it and hitting delete please?
-
Thank you.
-
My Photoshop expired before I had 'saved as' an EPS and turned a complicated path I'd created into the clipping path. I've only just bought Affinity haven't started using it yet, but just looking around I see no paths' window. What should I be looking for?