HuniSenpai
-
Posts
114 -
Joined
-
Last visited
Everything posted by HuniSenpai
-
Replace Color Tool
HuniSenpai replied to HuniSenpai's topic in Feedback for Affinity Photo V1 on Desktop
Comment and reply mean the same thing. This is how you comment/reply on it: -
Center locked cropping
HuniSenpai replied to Lemons's topic in Feedback for Affinity Photo V1 on Desktop
That works, but it's extremely time consuming. Being able to hold crl while cropping to set transformation origin to center would be far better. This is what that certain overpriced AP competitor does. Once you use center-origin transformation it's hard to go back. Allowing users to hold crl / cmd to transform from center means that you only have to click and drag once to proportionally crop in from all sides. Without it, you have to click and drag four times to accomplish the same thing (and it's not even going to be accurate). It literally takes 4 times as long. -
Replace Color Tool
HuniSenpai replied to HuniSenpai's topic in Feedback for Affinity Photo V1 on Desktop
I agree. Affinity Photo doesn't seem to have this yet. Crl should make any transformation set its origin to center, but it's missing in a few tools. Namely, the crop tool and the circle/square marquee tools are missing it. I've made a post about this exact thing a few days ago. You can comment on it to bump it back to the top of recent posts so the devs see: -
You need to alt + drag to activate the eyedropper zoom-in feature and the eyedropper pointer. My entire point for this post was that alt should bring up the zoom feature and the eyedropper cursor, not alt + drag. This is how Photoshop does it and it is much faster and feels better when you give it a try.
-
I know what you mean, and I feel the same way. I do a lot of infographics and design in AP, so the whole idea of a library or a DAM that i'm forced to use is annoying. My only suggestion would be, upon dragging multiple raw files into AP, to import raw files into the same raw development persona and to show the different raw files on the left bar. Upon pressing "apply," it will open all of those raw files into separate tabs up at the top. This is a little bit funky, I know. But this is how Photoshop did it with Adobe Camera raw (that video I shared above). In the video I shared above, once you hit "done," all of the raw images will open up as separate documents in Photoshop (not as layers in the same document or anything like that). I know that, in the case of AP, it would be a little awkward because the develop persona typically works on one photo at once. Still, I think it could be a lot more powerful. I get that AP is not for batch image processing like Lightroom. However, it would be nice to have some kind of way to apply the same adjustments to multiple raw images at once. The reason why I use AP over something like Lightroom is because, with Amazon and eBay product photography, I immediately have to start isolating the background and making more complicated adjustments. The color adjustment stage is really just a quick little thing that I would not want to switch to another program for. Although I have 16gb of RAM, I imagine my 30 tabs in Chrome + Affinity Photo + Lightroom + Spotify + more could be a little much. In short, when you drag multiple raw files into AP at once, it should pop up and ask you if you want to edit them separately or together. Or, maybe we could add this into the develop assistant. Again, I know it would be a little awkward with the design of AP, but boy would this be a handy feature. A lot of people would love to see this added, myself included. And it would ultimately not interfere with the way that AP works with discrete documents.
-
No. Hold alt to bring up color picker. When you want to color pick, you left click on the spot.
-
Ah, got it. I missed that part of the program. Thank you for letting me know. Still, I've gotta ask: why on earth is it alt + drag and not just alt? It would make sense if maybe zooming in AP used alt instead of crl, but it doesn't. It makes no sense and the dragging part of the process is an unnecessary step. And, in fact, this extra step can be to the program's detriment, because as soon as I let go, it color picks. What if I decide I don't want to color pick after all? What if I accidentally got into this color picking mode? What if, after initiating this picker, I realize I should probably zoom out and look at another area of my photo? I guess I just need to let go and accept that my foreground color is going to change. I know I will be color picking again, but this just feels clunky. This is compared to if alt merely brought up this indicator. If I decide I don't want to color pick, I release alt. If I want to go through with it, I aim it and click. Who knows, maybe I just want to view my image on a pixel level real quick. As I said in my other response, I don't expect this change to be made immediately. But, if you have a list of small tweaks, I really think this should be added to it. The behavior of the color picker for the brush tool really needs improvement in my opinion. Even if this small tweak is made years down the line, I will be happy.
-
I legitimately believe that this kind of change would take maybe 10 to 20 minutes. Now, to be fair, I have never taken on a project of this size before, and I recognize that it may be more difficult than I am assuming. I've done some programming before (Java) with GUI and I know that something seemingly simple can be quite time consuming. However, if it's not too difficult for the devs, I don't see why they can't. They are making small tweaks in the latest beta version anyways. Things like missing tooltips, improved embedded document bounding boxes, fixed "8/1s" exposure time string, etc. What i'm saying doesn't need to be changed urgently -- it's alright if it takes a year or two. But I hope that it makes it into a list somewhere of small changes that the AP team will eventually get to after the big problems have been worked out. To be honest, it sounds to me like this tweak will not be taken note of and will never be made. Do you guys have a list somewhere of small tweaks? Unless you can explain why this tweak should not be made, I don't see why it can't make it on to that list.
-
Yes, but is there a point to having it work this way? Why not have the simple act of holding alt be the activator for this, rather than clicking and dragging? I imagine it would be a relatively simple change in the code. It took me months of using the program to realize that you needed to click and drag to pull up this indicator and magnifying glass. Before I realized this, I just assumed that there wasn't any indicator. The system would be a lot more intuitive if a simple button press and hold activated it. I really can't understand why it's implemented in this way.
-
Your Affinity 2020 wishlist
HuniSenpai replied to AITCH's topic in Feedback for Affinity Photo V1 on Desktop
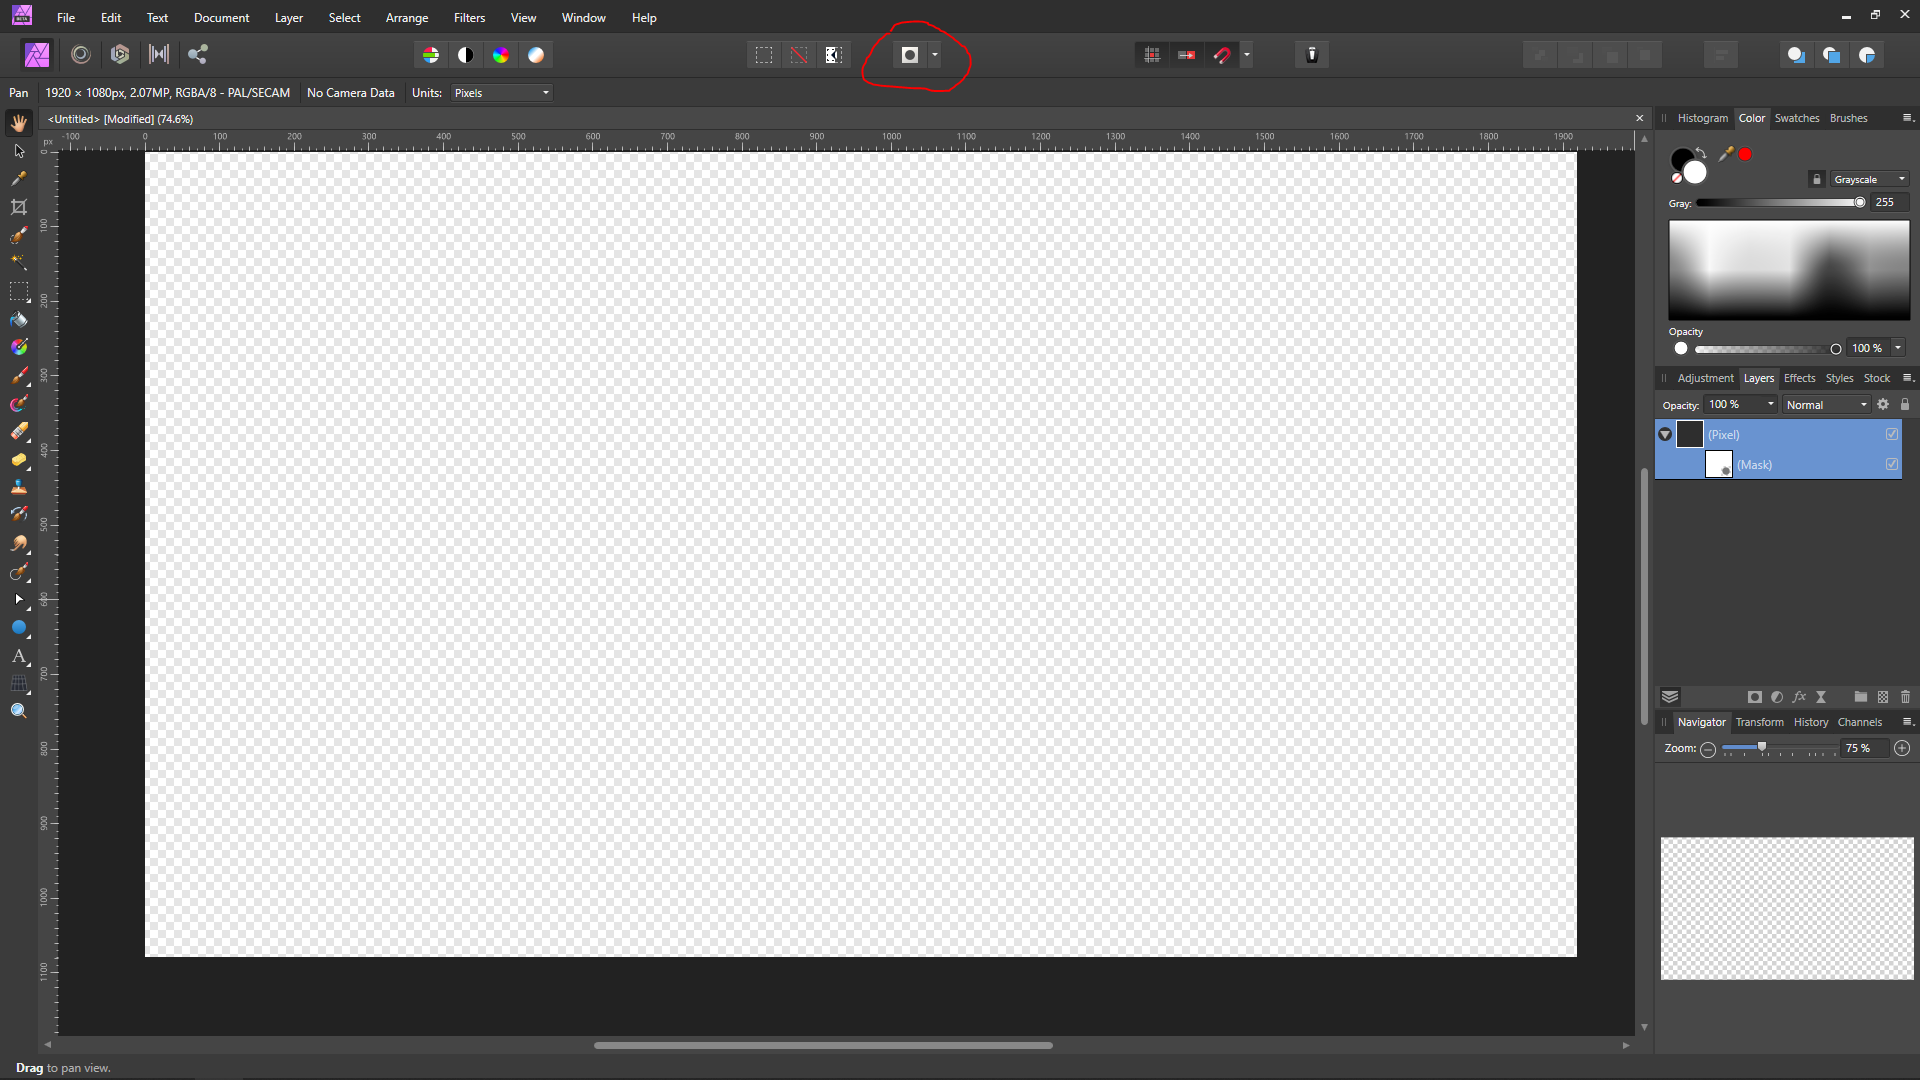
Hold alt and click on the mask's thumbnail in the layers panel. You can always view with what ever kind of overlay you want by clicking the button I've circled: Of course AP doesn't really let you edit in this mode -- it's just for preview So yeah, for now, just stick to alt clicking the layer. As for a transparent red overlay while editing, I think it'd be somewhat handy for some people, but really not a necessity most of the time. To be honest, i'm just happy with clicking and seeing my results and painting with black when I need to erase. If I need to see exactly what my mask looks like, I just alt click it and I can edit in that mode if I need to. However, I do recognize that there are times where this is absolutely imperative. Say, for example, you need to see your mask in-detail (for instance, you want to make sure it's nice and sharp and accurate) while also trying to follow some shape in the image. A workaround would be to make a new layer with red and drop the opacity of that layer some. Then make a mask of that layer and paint away on that mask. Then, you can crl + click on the thumbnail of that mask to grab a selection of it. You can use that selection however you want, including making a mask on something like a curves adjustment. You would delete the red layer and its mask afterwards.
-
I'm really not sure why crl doesn't have the ellipse marquee start growing from center instead of corner. It does this with the circle polygon tool, why not this selection tool? Also, I would like to do crl + shift in order to both expand from center and to lock it to circular. Same thing applies to the rectangle marquee. Same thing also applies to the crop tool, which (in unconstrained mode) is missing both shift and crl.
-
I think this should start happening as soon as you hit alt. It should stop happening as soon as you let go of alt. This is how Photoshop did it, and they did it for a reason. The large circle of the brush makes it hard to aim at what you're trying to color pick. This is especially prevalent in AP, where there's no reticle inside of the brush circle. So, if you want to quickly grab a color (without clicking and dragging), you have to try to aim the circle and try to make the center of it approximately line up with the thing you're trying to pick. My point is that this color picker preview should show up as soon as you start holding alt. Or, at the very least, the brush circle should change to a pointer (i.e. an eyedropper icon) to make it easier to aim. I also think this is important for the visual language of the program. As it is, there's no visual indication of what it's doing as soon as you press alt, and it just feels wrong. You need to click and drag before you get that visual indication, which takes longer. These little inconveniences add up and make the program feel less comfortable. (To be clear, AP still feels more comfortable and more streamlined than Photoshop in my opinion , this is just one of my few gripes with AP)
-
Lock brush strokes to Isometric angles
HuniSenpai replied to gleake's topic in Feedback for Affinity Photo V1 on Desktop
I think 45 degree increments should be turned on by default (I believe that this would an incredibly useful feature :)! ), and then it should change to the degree of the grid when the grid is enabled. This changing over to 30/other degree should be able to be disabled in the settings: "Snap to custom grid angle on: ☑" Adding a "lock brush to grid angles" would be cool, although the brush panel is just about out of space as it is. So this'll have to be added in settings. -
I know that, if you alt + click when you have the brush selected, you color pick. I would like to see some kind of preview you, like what the color picker usually does. You know, with the zoom-in thing and the special eye-dropper icon to help you pick the exact color you want. Right now, when I hold alt, it has no visual indicator.
-
Lock brush strokes to Isometric angles
HuniSenpai replied to gleake's topic in Feedback for Affinity Photo V1 on Desktop
To be clear, what you're asking for is that the shift key doesn't only lock to horizontal or vertical, but also can lock to 45 degree increments, correct? Meaning that, after you start moving your mouse, you cannot exit out of the determined initial direction. If this is what you're suggesting, then I think this is a great idea. Also, I will add that there should be a preview line when you hold shift before clicking in order to make a line. -
Artistic Filters?
HuniSenpai replied to timmi2sheds's topic in Feedback for Affinity Photo V1 on Desktop
Affinity Photo doesn't have the artistic filters. They're not really used much anymore to be honest. They just remain in Photoshop as remnants from the past, where those effects weren't considered tacky a few decades ago. Photoshop has a way of leaving things in no matter how little they are used. They never remove features, they're always adding things (which, to be fair, is quite important). Nonetheless, there are still some people who use it I suppose. So maybe they will add these, we'll see. To be clear, though, you can mimic the effects of some of them just by mixing and matching the available effects. May I ask, what artistic filter in particular are you trying to achieve? Maybe there's a workaround. Also, Affinity Photo doesn't have a library because, as fde101 said, this is a document-based editor. People use Affinity Photo not just for adjusting the color of photographs, but also for graphic design and even painting. If Affinity Photo forced you to use a Library system, it would be annoying to a lot of users, myself included. I personally hate Library systems because they're always laggy and I just want to jump right into a a new canvas. Photoshop doesn't do any fancy library system, either. Still, I think Affinity Photo should maybe try to create a hybrid between document-based editing and library editing to satisfy both types of people. Maybe there could be an option in the settings to turn off the library, idk. -
It would be nice if I could drag multiple raw files into AF Photo and then, when AF photo opens them in RAW Develop, there is a panel on the left showing the imported photos. I can click "select all" to edit all of them at once. Or I can click "apply to all" or "apply to selected." If I want to only edit one at once, then I just start editing without clicking either of those buttons. When i'm done, I just click onto the next photo in the panel. This is how Photoshop Adobe Camera RAW does it. Here's a video: This is kind of important because, a lot of times, I need to match all of my photos for a project. I do Amazon product photography, so I need to ensure that all photos on a project have the same colors. Right now, I need to either memorize my settings or save a new preset for every single panel (basic, details, and tones). The problem with the preset is that I do a lot of projects. I'm starting to get too many presets saved.
-
Replace Color Tool
HuniSenpai replied to HuniSenpai's topic in Feedback for Affinity Photo V1 on Desktop
The crl + u menu does essentially the same thing now for most people. They've added this feature in response to user feedback. Is there something with the Photoshop replace color tool that you use? Main two advantages of Photoshop replace color are the preview window and the fact that you can enter the exact hexadecimal of the intended result color. Aside from that though they achieve the same thing. -
Is the file extension actually .afdesign, or is it still .svg? If it's remaining as .svg, nothing has actually changed. Windows just changes the icon to reflect what program you have set up to open that particular file type. To view extensions, go into the file explorer, click on "view" in top bar, and check "file name extensions." Tell me if the file in question ends with .afdesign, or if it ends in something else.
-
I'm not experiencing the same behavior. My guess is that, under the layers panel, you have an adjustment layer selected. An adjustment layer, by default, has a mask that is all white. Thus, the flood selecting is going to select everything. Go to layers (look at the right; change the tab from "Adjustments" to "layers") and select the background layer and try again.
-
Replace Color Tool
HuniSenpai replied to HuniSenpai's topic in Feedback for Affinity Photo V1 on Desktop
Indeed. Fortunately, Affinity Photo has since added a tool that somewhat fills the need for this tool: Still, i'm missing the target color field, as in "tweak the settings so that this color matches this target color precisely". It's the big colored box next to "Color: " in Photoshop. This wouldn't be all that hard to program. All Affinity photo needs to do is take the average color of what the HSL tool is selecting (after the user has used the picker tool and whatnot), and find what hue, saturation, and lightness tweaks are needed to have the average color match the target. I'm not sure if that's how Photoshop implemented it, but whatever the case, this method should work. (This is just a workaround the fact that, if you were to force all lightness values to perfectly match the target lightness value, you wouldn't have an image left. So, instead, you have the average lightness value of what's selected equal the target lightness value) Anyways, i'm 80% satisfied now that they've added this I would love if they'd continue working on this tool, though. It has great potential. -
Flip selection?
HuniSenpai replied to waltl's topic in Pre-V2 Archive of Affinity on Desktop Questions (macOS and Windows)
Just make your selection, crl + j to put it on a new layer, go to the move tool (v), right click on the selection area, transform -> flip horizontal. Crl + d, then select the new layer and the old layer (hold crl to select more than one) and then crl + shift + e to merge them. This is how I used to do it in Photoshop, I never felt the need for a "flip selection" option. Maybe there was a tool to do this back when I used Photoshop, I just never looked for one. Oh, and if you don't want the flip to go outside your original selection constraints,do crl + j twice, deselect (crl + d), flip the second duplicate layer, crl + left mouse click on the first duplicate layer's thumbnail, select the second duplicate layer, click the mask button, delete the first duplicate layer, and then merge the second duplicate layer with the original layer with crl + shift + e. I know this sounds complicated in writing, but, at least to me, it feels pretty natural when i'm doing it in the program, and it takes me maybe 2-5 seconds to do each time. Don't memorize your steps, just understand what each of the steps do any it'll come naturally. If I had to do this constantly then maybe i'd be wanting a specific tool for this, but i've never felt the need. -
Use filter -> distort -> affine and set the x offset and y offset both to 50%. Then, using clone brush, inpainting tool, and (my favorite) patch tool, smooth out the seams and make them hard to see. Then do filter -> distort -> affine yet again, but set the offsets to -50%. This can be used to make any texture tilable, not just procedural ones. I don't believe perlin noise, for example, has an option to make it tile, so you're going to have to make it tile on your own. I'd say that, if you don't wanna go through this hassle, look at the software you're using to create the procedural textures. That's where you'll spend time to make the textures be generated as tilable. Unless of course you are somehow generating procedural textures in Affinity Photo (in which case, I didn't know that was possible)
-
I'm using the same files as you with the same version of Affinity Photo (but the non-trial version) and i'm not able to recreate the problem. Affinity Photo definitely doesn't like something about your particular computer setup. Or maybe there is a problem with the trial version that doesn't exist in the regular edition, for some reason (I doubt that, though). What are your computer specifications? Be sure to include your graphics card model number. Is your computer monitor HDR, by chance? I'm testing your images on my non-HDR display. Do you have software for monitor calibration on your computer? Try this in a program called RawTherapee. Let me know if the issue persists (i.e. your image is really dark when you import) One thing i'm noticing is that, for some reason, the exposure seems to be correct in the navigator window at the bottom right, and it's just incorrect in the main preview window that's odd for sure
-
Method 1: Time consuming but high quality result Here's a time consuming yet highly effective fix that I came up with. But it takes time and requires you to rasterize the layer (annoying if you need to change the text later): Method 2: Quicker but far lower quality If you want a quick fix then you can duplicate the rasterized beveled text, and then apply a blur to that. Then, with the blurred layer selected, click the gear icon at the top right of the layer panel. This will pop up a window. Place a point on the "underlying composition ranges" graph that is equal to the lightness value of your text color (my text was 33%, for example. Double click on color bubble and look at "L" in HSL section). Then drag that point down all the way. Then bring everything else back up on the graph. Then bring white down all the way (this only works on a white background btw). Graph should have a valley at pure white and at the lightness of your actual text face. Should look something like this: The problem is that the first blur step that you do is accidentally getting some of the front face (since you're not doing any selecting) and it makes the effect not quite as sharp: Here's how it looks if you use method 1: And here's how it looks if you don't do anything: