unni
-
Posts
155 -
Joined
-
Last visited
Everything posted by unni
-
 This seems to explain what is happening in AP. So in the case of ADD and INTERSECT, no visual difference as A=B for every pixel. For SUBTRACT, the (1-B) term makes the difference even if A=B for every pixel.
 -
@αℓƒяє∂ A new document is made from FILE>NEW>OK. I selected web type, 1280x800, RGB/8,ROMM RGB profile. Go to LAYER>NEW LAYER. Select paint brush OPACITY=HARDNESS=FLOW=100 Click on the two overlapping circle color chooser on right top under color tab. The color chooser rectangle box pops up. I see Hue inside the selectable tab. Enter same value for R,G,B. I entered 0, 64, etc to creat a greyscale brush of this desired value. So, the value thus selected is for the brush greyscale.
-
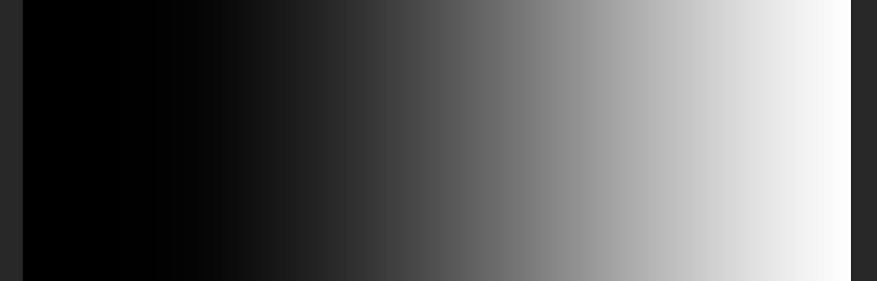
AP Original Gradient layer AP output after adding original with itself AP output after intersecting with itself AP output after subtracting with itself

-
PS Original gradient layer PS output after adding original with itself PS output after intersecting with itself PS output after subtracting with itself
-
I hope the details below will bring more clarity to what I have done. I tested with two methods. First by creating a white layer and painting hard circle patches with the input values of 0,64 etc. The color selector on the right top has to be used for selecting the exact value before creating the circle. The second test was done on a gradient layer which linearly increases from 0 to 255. Picking out values from gradient layer output is difficult but gradient result gives a nice visual clue on what is happening with these operations. The circle method gives the clue on the maths side of it, regressively.
-
I am trying to understand how the maths is done for selections. Looks like it is done differently in AP, PS, GIMP etc. This difference is to be fully understood to have a predictable result when channel operations like add/subtract/intersect with pixel selections are done. Why this difference, I am unable to guess. Probably, some of it are for avoiding overflow errors or tackling it in different ways. Subtraction of a selection from itself: Result: For pixels between 0 to 127, nothing is done.Which means that the input and output pixels are same. For pixels from 128 to 255, output pixel is 255 minus input pixel. Addition and Intersection of a selection with itself: There is no change in pixels. This means no action is done. For intersection, I expected multiplication and for addition, increase in pixel values. A suggested method to verify the above: 1.Create a layer with circle patches of value 64, 127,128,129,192,255. 2.Cntrl+Shift+left click the layer.This selects pixels with marching ants on 50% or more bright area. 3.In the channels tab, keep cursor on pixel selection icon and right click to see create spare channel. 4.Create a spare channel. 5.Now keep cursor on the icon of this newly created spare channel and right click.From sub menu, select subtract from pixel selection. 6.Now do the subtraction. 7.The pixel selection now holds the subtracted result. 8.Go to layer tab and press on the white square with black circle icon to create a mask from this selection. 9.This mask now holds the result of the subtraction. 10.Create a pixel layer from this mask. 11.Using the info panel cursor, check the values of the circle patches to find out the change after the operation. 12.Do the above for addition and intersection at step 6. Any additional inputs on how the selection maths is done are welcome.
-
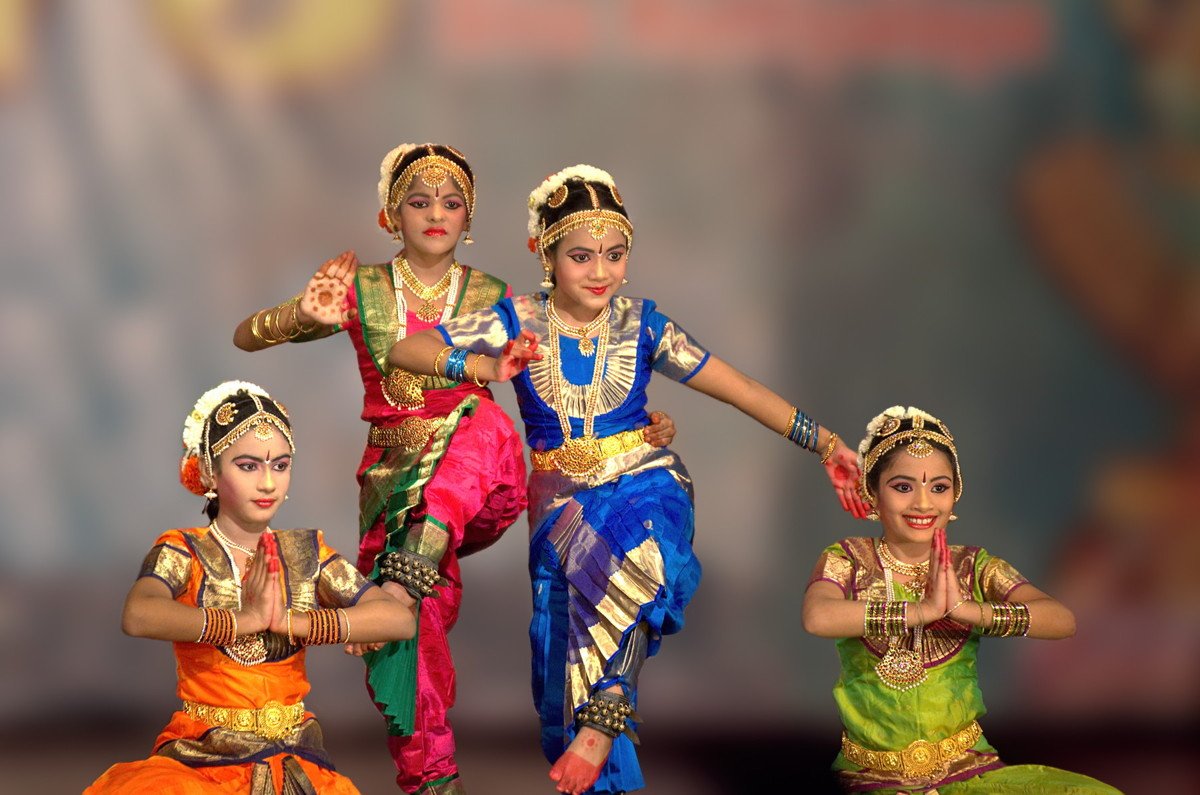
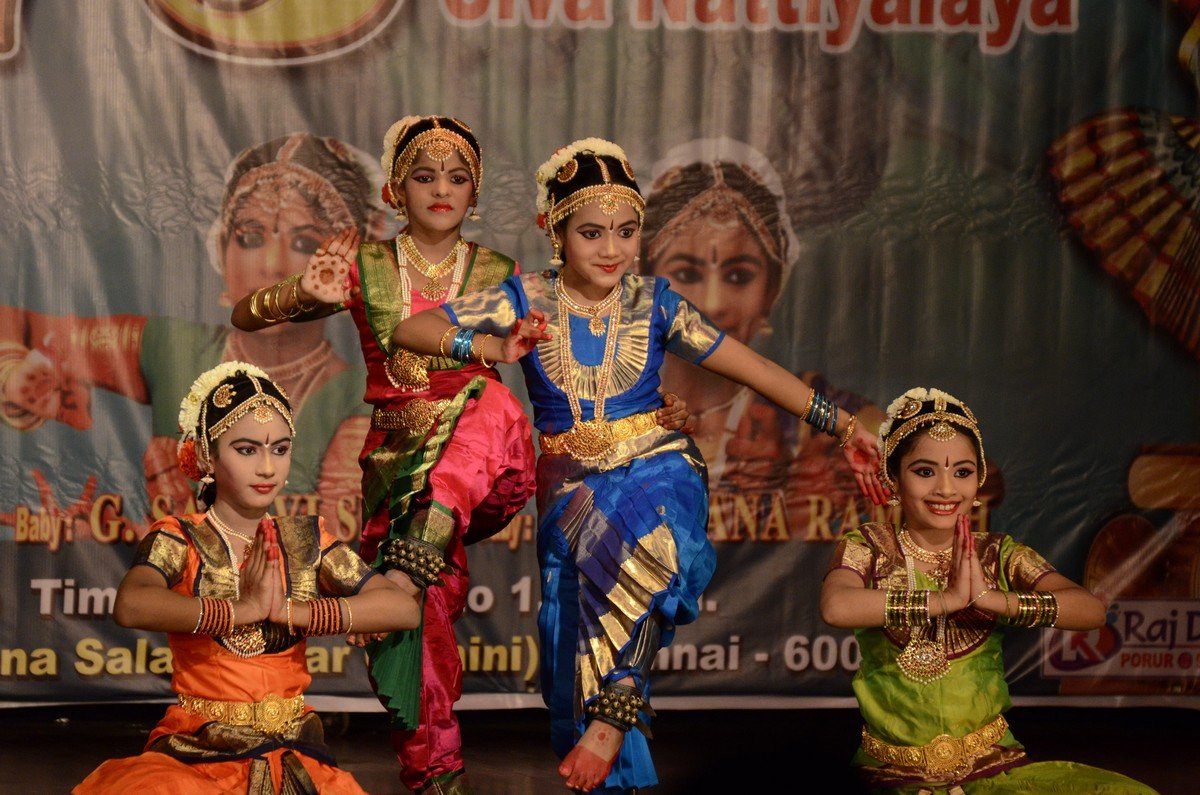
This is an example showing the excellent capability of selection brush, refine edge, inpainting brush, lens blur, usm sharpen,clarity and denoise tools of AP. Approximately 20 minutes work on the image. I was invited to the first classical performance of my neighbor's daughter. This is something like a graduation for the performer , done under the careful guidance of the master and other seniors in the same field. The invitees are mostly elders and their role is basically blessing the participants. These children are around 10 to 12 years old and have been learning the south Indian dance called Bharathanatyam for the last five years.The highly refined classical fine art has a traceability of more than 2500 years. I had casually taken my Nikon D7000 and 70-300 lens. The seat was about 150 feet from the stage, so I expected only average shots with the slow lens. Settings: ISO 1600, f5.3, 1/640,@220mm,hand held,no flash. Two layers of image were made. The children were selected using the selection brush and refined. Then the "children mask" made. In the lower most layer, the same selection is applied and then a grow selection was done by 15 pixels. Then from Edit>Fill>Inpainting. This will remove the children and fill with the surrounding background data. This layer is then lens blurred twice. Now background is ready. The top most layer is the original. Due to the children mask, the background is masked out of this layer. The unsharp and clarity layers are fully black . White painted only in selected areas like ornaments, eyes,some parts of dress. There are many tutorials available in internet on background blurring. It gives more details. I find this image good, considering the high ISO, slow lens, DX format and other limitations during the shooting. Best regards, Unni First shot - Edited, Second one - original, Third one - AP layer details
-
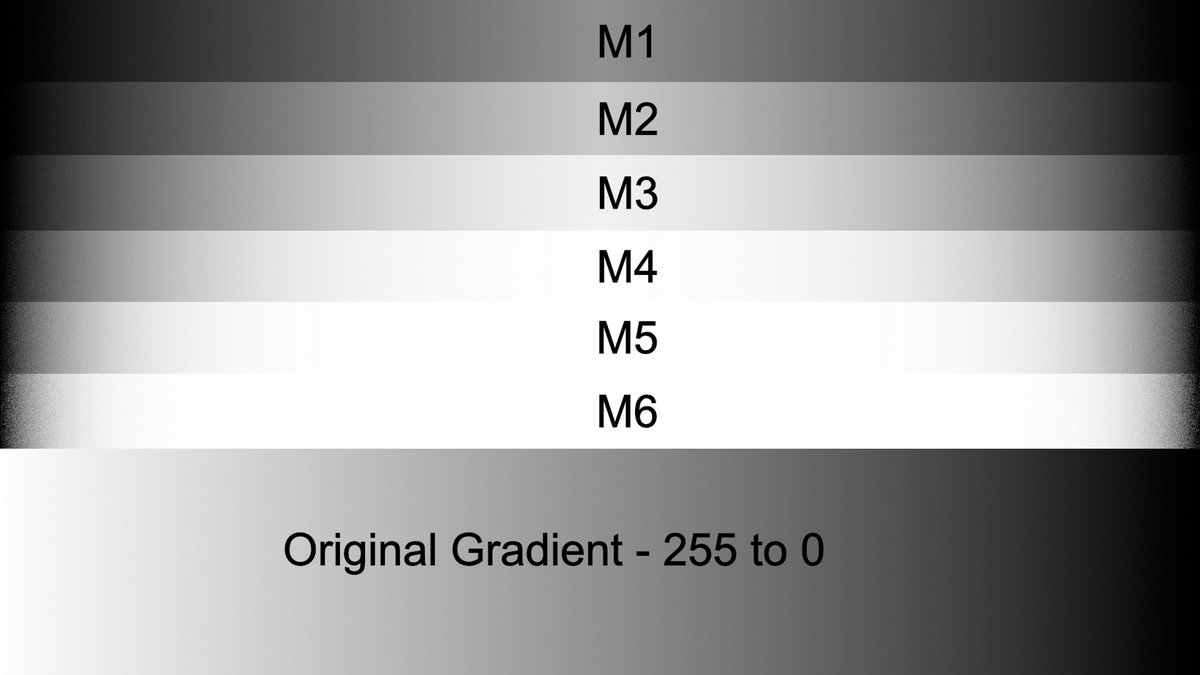
@Max P I have used channels method to make these masks based on : 1. http://goodlight.us/writing/luminositymasks/luminositymasks-1.html 2. https://tonykuyper.wordpress.com/2015/02/28/how-to-make-16-bit-luminosity-masks/ The lights and darks are created by multiplying each mask with itself. The midtone masks are made by subtracting one Light and one Dark mask from the image. There are many articles in the internet describing this. Its a bit confusing to understand but after reading multiple articles on the same subject, I could understand the concept. You can also step through the macro in edit macro mode .First uncheck all steps. Then tick one and run. Then tick two and run. This way, what each step is doing can be seen. However, each time you have to delete the layers made in previous step and start. In this method, the calculations happen on a pixel by pixel basis between the two selections. In blend mode , we add points on the curve . I think there is a difference in results between the two methods. In photoshop, various panels/plugins are available and each uses different methods but photoshop plugins developers have access to a lower level of photoshop software. I think they call it scripts or something. In Affinity Photo, I dont think such a facility is available. So third party will not be able to make plugins with precision. When we use macros, we have to be within the bounds of user interface and there is no access to internals of AP. Macro just automate user steps. So plugins/panels similar to that available for PS will not be available for AP.
-
Beautiful image. If the aim is not to convey environmental details alongwith main subject, I would process this way: 1.isolate big brown material along with all the whites and blur the background a little. 2. Sharpen whites with unsharp/hpf. 3. Use clarity filter for whites and brown main subject to bring out larger radius local contrast. Also can try detail extractor from Nik colour effex pro instead of clarity. I may use some mask to selectively apply the larger structure details. This third step is to finely bring out larger radius details without affecting fine details in step 1. Step 3 can be done one more time with a further larger radius to get still larger details. 4. So in the end I am presuming to have an image with softer blurred background, fine and coarse details in the main subject. This sharpening is generally termed as multi scale sharpening. Topaz plugin has this. Rawtherapee also can be utilized. Easiest is using clarity but I think clarity is more of local contrast enhancement. 5. Basically each effect is done on separate layers to targeted areas and blended together. Just thoughts from learning point of view!
-
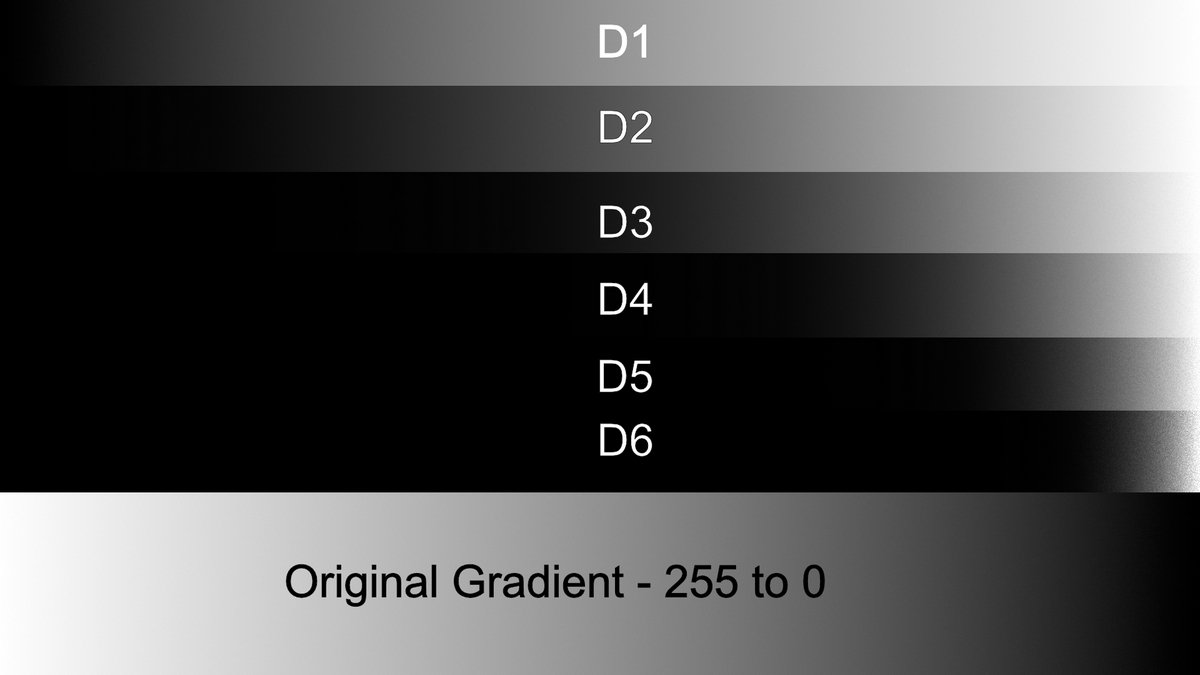
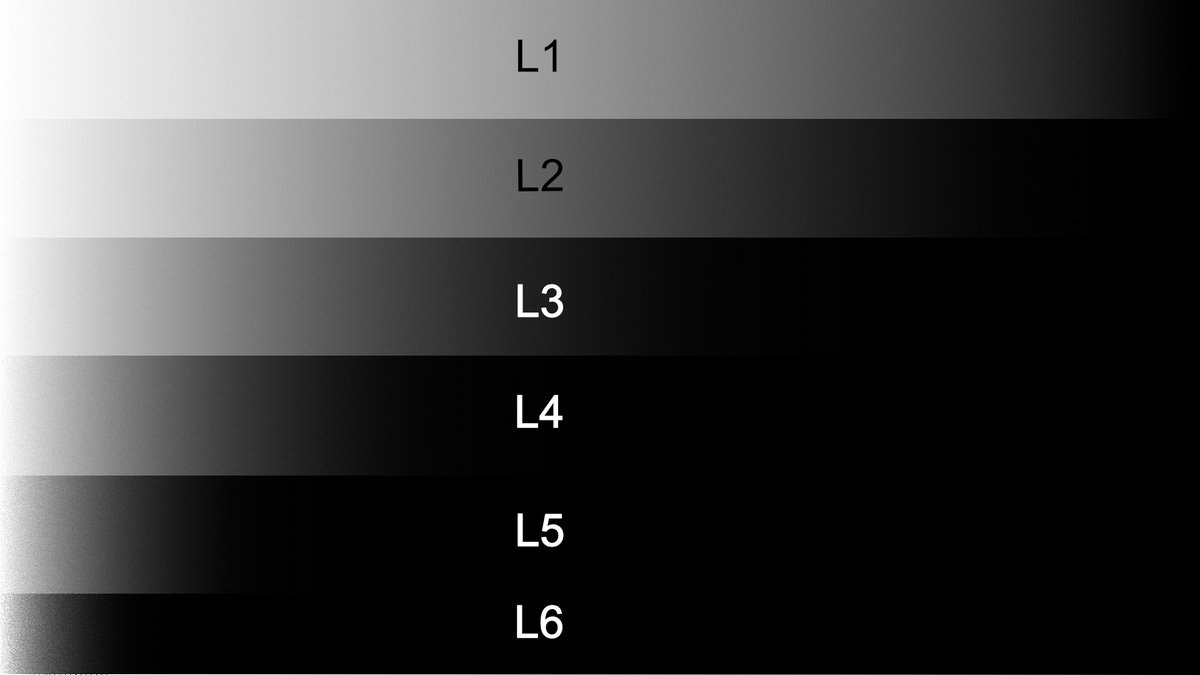
Edited today: added three images showing the application of the masks on a gradient from white to black.Please see first post as the image is added there.
-
Edited 2-oct-2018: Gradient from white(255) to black(0) processed with all the Masks are added for better visual understanding. Original first post below: As part of my learning process, a macro is made to create luminosity masks which are required for exposure blending and other masking requirements where seamless effect is required. The same is enclosed and basic details are in the text file of the zip. This can create six pixel layers each in the Lights, Darks and Mid tones. Conventional method of mask creation using channels is used . Best regards, Unni UN1-Luminosity Mask.zip
-
Basically, its all about manipulating the RGB pixel values and its relationship with neighboring pixels, using software. I found this very useful and I think the same calculations applies to AP also. https://photoblogstop.com/photoshop/photoshop-blend-modes-explained If we understand the algorithm and the maths behind the tool/filters/function etc, things become clear but always, the maths or algorithm details are not available. Then we have to guess from results. Open source softwares and forums give out may such details. AP has more than enough tools and functions for working professionally on images but there could be different opinions when it comes to productivity, time, printing, etc, especially when comparing with adobe packages. I plan to use Rawtherapee if the need arises to work heavily on raw image stage. NIK collection can be used to create additional effects (detail extractor of color effex pro is very useful). To work around the color problem, NIK can be used in standalone mode with the intermediate image saved as TIF in any colour space and after working on it, the TIF can be imported back to AP. A slightly long route but its okay I think. @ianrb
-
@ianrb : Personas are probably a different way of expressing , to keep up with change, otherwise its just switching between stages in the workflow. If you learn to use the develop persona( similar to camera raw) where the RAW file is processed, then it will be useful because from the photo persona(similar to photoshop), you can go back to develop persona. For people who are well familiar with LR and PS, there will be some frustration and resistance to change but in the long run, it will be better to explore and find out the equivalents in AP if its being considered as the primary platform. I am basically a hobbyist, so these differences don't matter. Its about three months since I bought AP and I have been able to get a reasonably good grip now. The videos are very helpful. Its a bit confusing to learn the application of masking, channel loading, etc and hardly any elaborate printed material explaining the details of various tools and options, when compared to PS. But by experimenting, searching the forum topics, most of the doubts gets cleared.
-
Simple and effective idea. Wonder why lr5 was required in the workflow.
-
Panoramas are stitched very nicely in Affinity photo. Here is another one which was made from 7 images. Pictures were taken in portrait mode 50mm 1.8D prime at f2.8, 1/400sec, ISO 100 with a nikon d7000. Handheld. Clarity and sharpening filter is used with inverted mask and painted with white brush to reveal only the letters , window and the front grill like structure of the building. The stitched size is 11000W X 5000H. Inpainting brush used around the borders to fill the transparent pixels. No warping or such transformation touchups done. Two layers of B&W was used. One layer was kept without adjusting sliders. In other layer, color sliders were adjusted and black brush used to mask out the effect in some areas. So color was bleeding in those brushed areas. To make it B&W again, the 2nd layer is used. Slight border trimming and straightening applied.
-
I am learning to make small and simple macros. Felt the need for a clipping indicator and made one after browsing the internet. There is nothing original from my side other than implementing in AP the ideas already available in public domain. Two layers were made, blend options of underlying layer input box were set to 0.1% for shadows clip indicator and 99.9% for highlight clip indicator. Then both were put in a group. While running this macro, the top most layer should be selected. Otherwise, it will get created in-between other layers. If it happens, after creation, the group can be dragged to the top. It is better to keep the indicator group deselected always and tick it to select only when required (to check clipping) . In the process, I found out that the input % setting accepts and responds even to three digits after the decimal though the display shows only one digit. For example, you can input 0.001, 0.002 etc . The software differentiates these values. I found this out by zooming the layers and observing the blend colour. It responds when inputting to three digit precision. You can see pixels coming up little by little when inputting such small values. Since the input box shows only percentages instead of 0 to 255, I dont know how the percentage maps to the 8 bit values. Practically, I found 0.1% for shadows and 99.9% for highlight clipping is okay. That is : Any pixel of the underlying layer with value less than 0.1% will show up in BLUE and above 99.9% will show up in RED. For further precision, macro can be re-adjusted to 0.01 and 99.99 or any such, as desired. If there is any mistake in the above, please give feedback so that I can correct myself. The macro got saved as .afmacro. The letter 's' in the end is missing. I am yet to figure out how to save as .afmacros. So to import my file, one has to go to the Macro tab and not library tab. From the macro tab, click on the last icon "import". Then locate my file in the download location or wherever and proceed. Once it appears on the screen, go to "add to library" button which is the second one. Clipping Indicator.afmacro
-
The scene is good. After watching for a couple of minutes,i felt : going closer, lowering view angle some more vertically, using larger aperture f2.8 or so, using 50 to 100 mm focal length . This is to get more details of fungus, more background blur. Decreasing ratio of subject foreground to background distance increases background blur more than obtained from aperture. In processing, I would have sharpened with unsharp / high pass for small details and then clarity filter also for emphasis of larger details on the fungus, reduce green color. some stone or wooden log ,I would use to support camera. Would have also attempted to use on camera flash by covering it with paper or so for fill below the fungus. Well, this is just one of many view points . I have noted with myself that many ideas do not come to mind when in the field due to lack of time but as I take more and more pictures, the judgement at field is improving. I take lesser shots of a scene now but think more on how the end result will be, what processing flow will be used, etc. Earlier,i used to click just like that with the scene over attracting the mind but after coming home the picture looks ordinary and editing was not able to bring the desired effect. Being a hobbyist with poor artistic sense and more technical interest, my ideas and suggestions will lack correctness and efficiency !
-
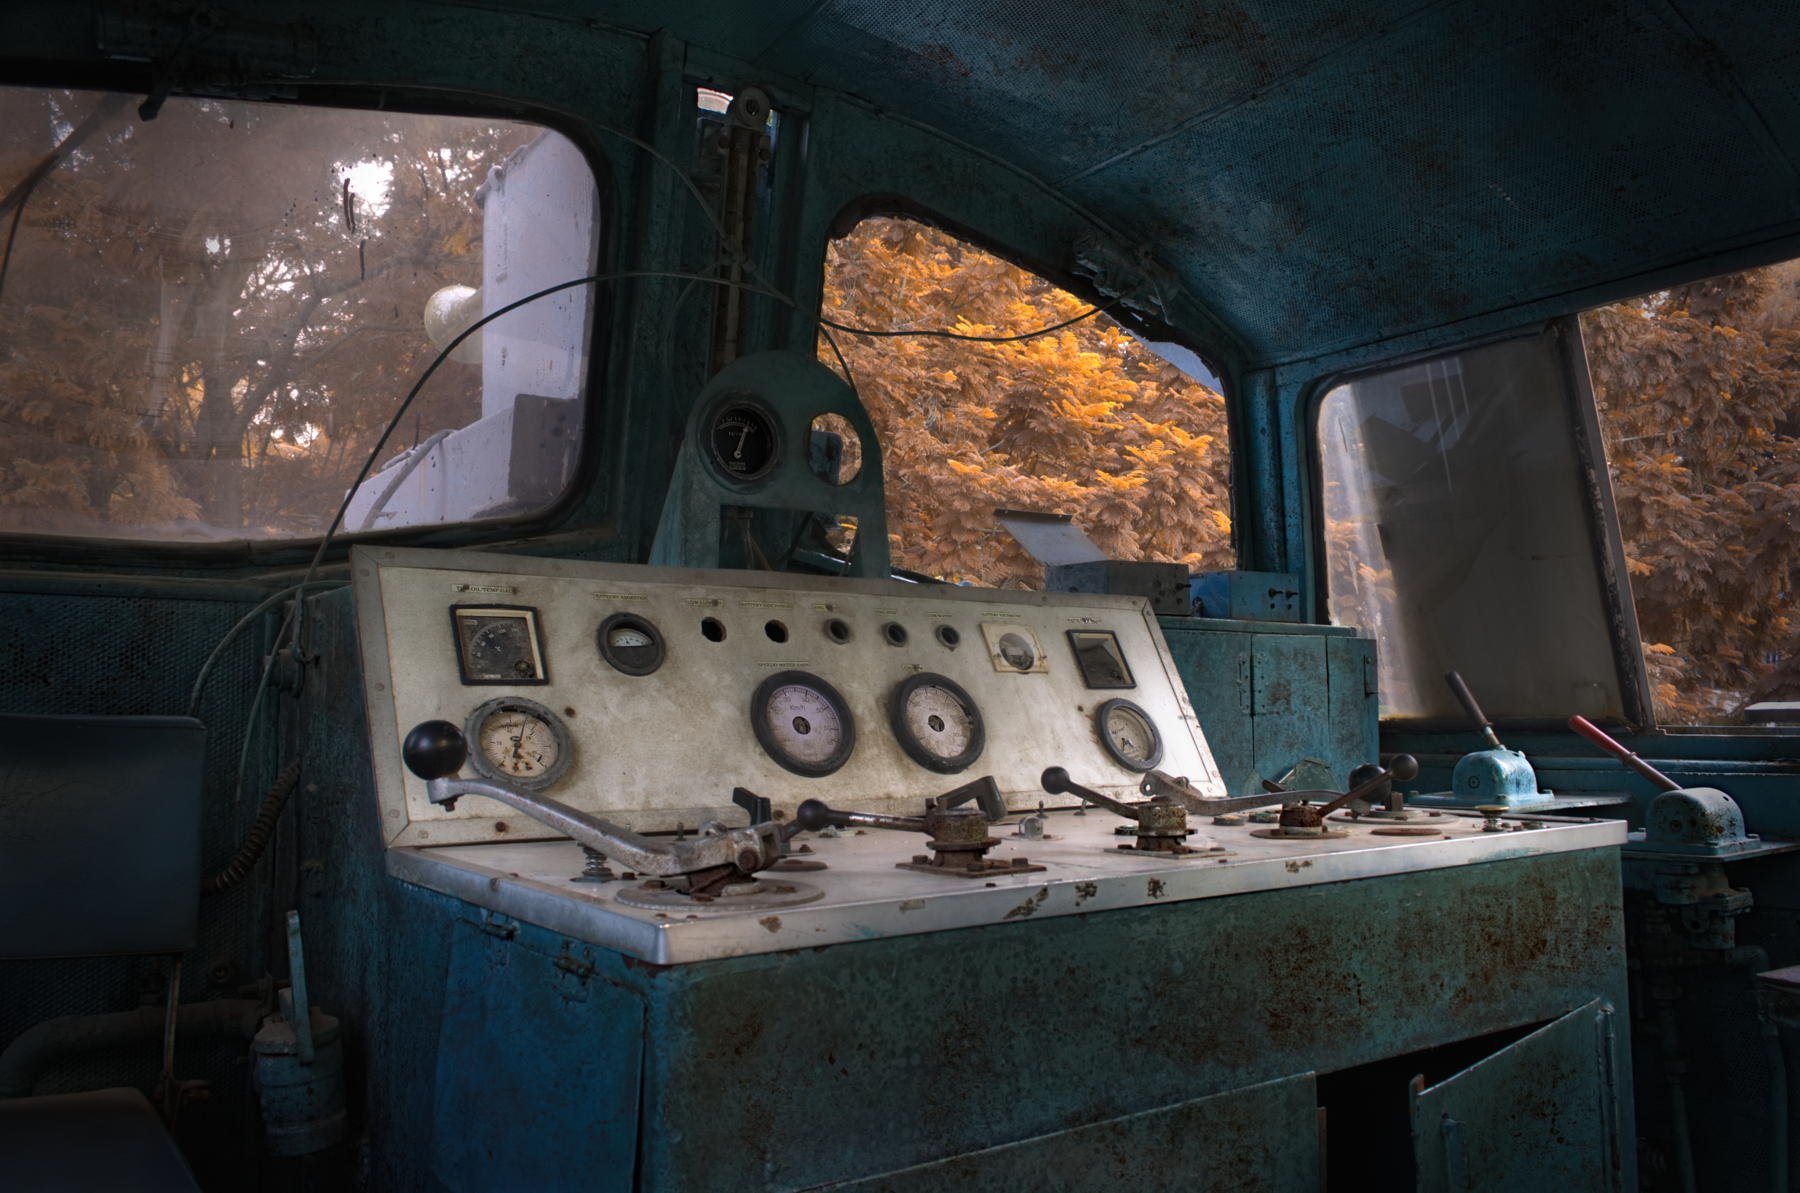
thank you @AffinityJules. i felt that the warm color for leaves would give a better match for the vintage look.
-
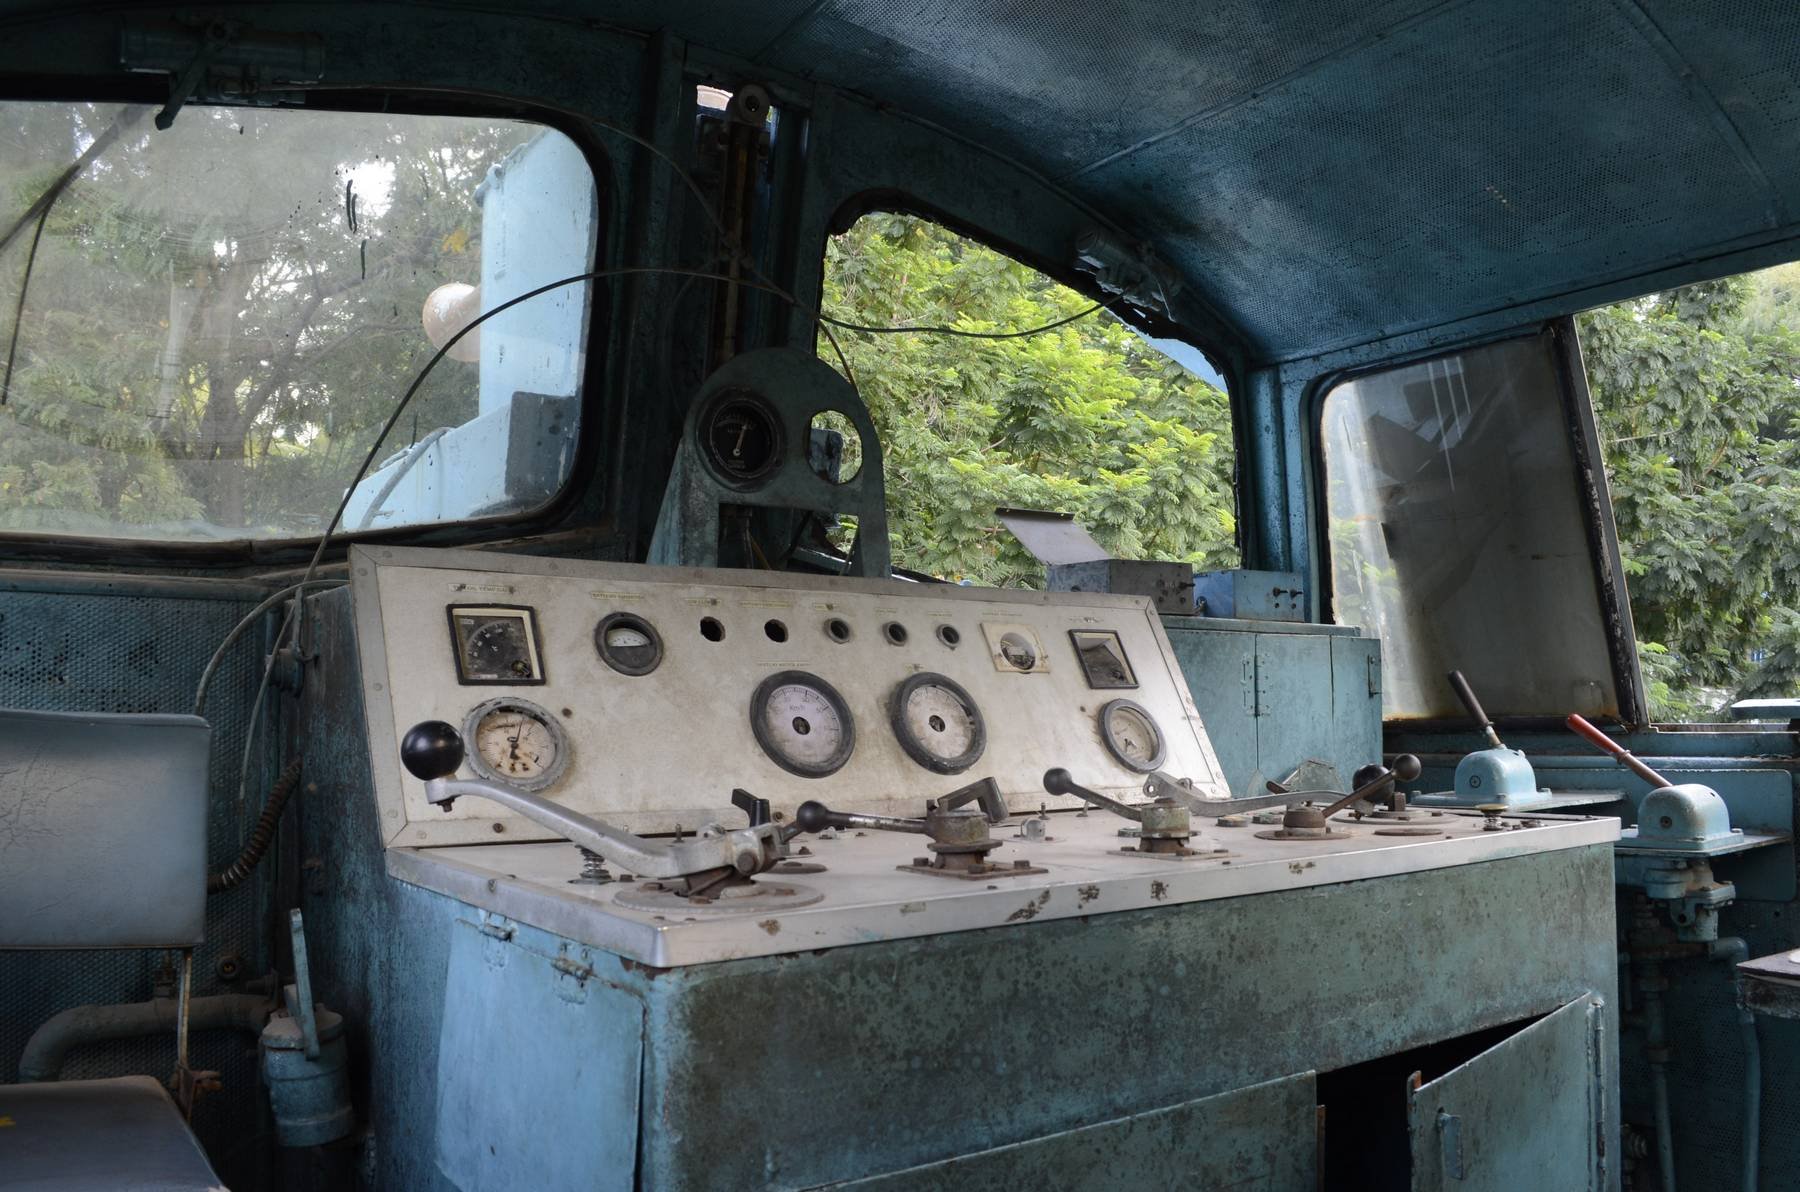
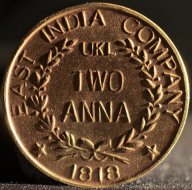
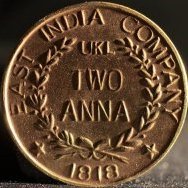
This is an old scrap diesel electric engine. To give a vintage look, the color and texture were modified selectively. A layer (overlay blend mode) with stampings of a grunge brush was used to bring patches of rust. The patches were selectively revealed through a black mask. Channel mixer adjustment layer is used with its output channel red selected and green slider to +200, red and blue slider around -30. This changes leaves from green to red-yellowish. Again, revealed selectively by painting white on the inverted adjustment layer mask. Similarly, levels, curves, unsharp mask, clarity were applied selectively by inverting each of the masks and painting on it with white brush. Finally, a vignette was applied. ABR brushes were downloaded from internet (Grunge_Brushes_by_Aramisdream) The goal was to lead the viewer to the instrument panel, give a rusted , abandoned and vintage look. The exhibit is actually inside Chennai railway museum, India. First image is processed to achieve the goal. This image below is unprocessed original.
-
Thank you , @BrianHermelijn. I browsed my repository to check for ants and there was one small stack. This is a small common red ant seen around the house. It could be about 2 or 3mm long and head may be 1mm or less. The angle of the shot is not proper. This was taken sometime in early 2015. Same 10X objective and 30 shots in the stack.
-
Many thanks for the appreciation and nice words, @TheEarnestBunbury. I had put macro work with scope objectives at the back seat due to long processing methods. Nowthat AP is available, I can do more macro work.
-
Many thanks @Roger C ! The above moth images were taken 3.5 years back. I was trying various software to make the composite. Combine ZP was the only free one available. Did not want to go for commercial ones as I do photography as a hobby and experimentation. Then I came across ImageJ which is free and used for medical work. I now forgot the workflow with those different softwares ! ImageJ needed some readings and trials because documentation is different. Affinity Photo output is excellent and fast. None of the other options processed RAW files. Had to convert to 8 bit TIF before inputting to the align and stack software. 16 bit TIF would work in ImageJ but takes time . Dont know how AP works under the hood but from RAW to final edit which includes aligning, merging and editing is a great feature of AP. I will be posting this image in photomacrography.net mainly to give exposure Affinity Photo software .
-
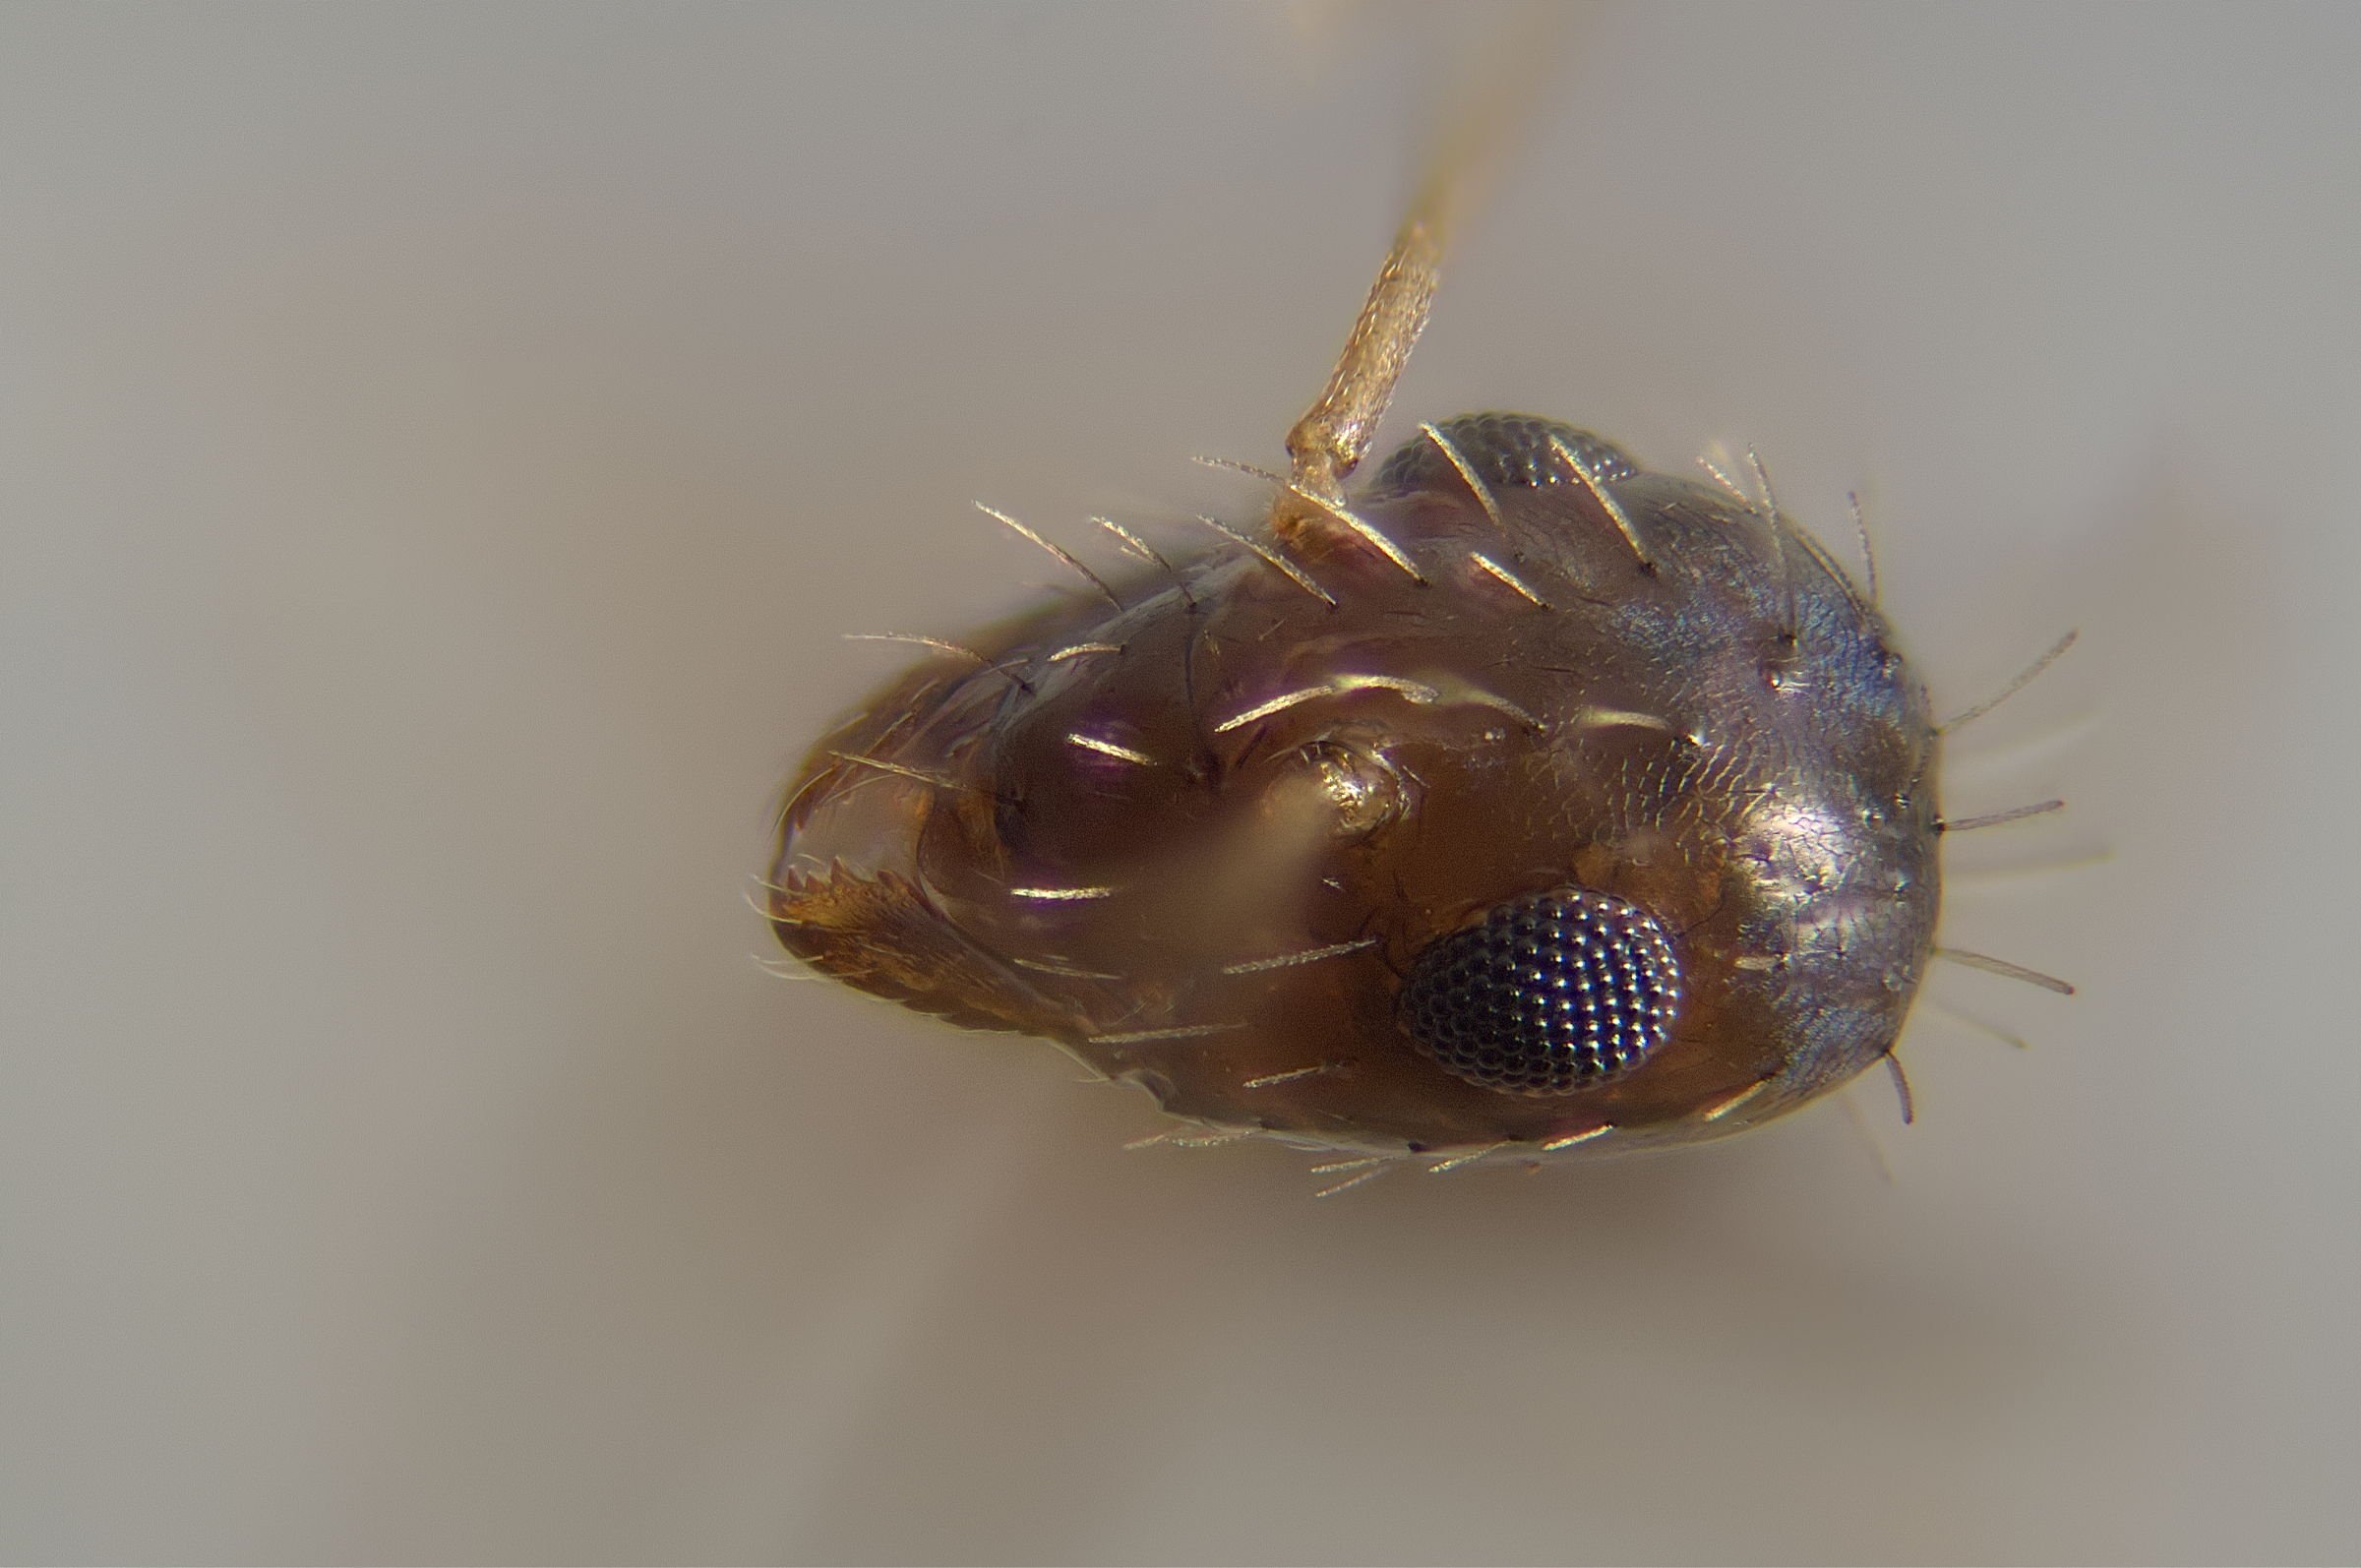
The front view stacked from 150 frames. The image is not cropped and uploaded at downsized longer side 3200 pixels instead of the original 4608 pixels. It took 12 minutes for the "Align merge sources" to complete and 38 minutes for the next step "Focus merge". Total 50 minutes for completing the stack.
-
@Roger C : The original sensor resolution of Nikon D3100 is 4608x3072 pixels. To keep the upload file size low, I reduced it to 1800 on the longer side. So what is on forum is about 40% of original. The proboscis has come out well. There is a light golden feature inside the dark brown boundary of the coil. Probably the hollow section of the coil. I think the smallest recognizable feature is about 2 or 3 microns.
-
Thank you @Roger C for the appreciation. I have added a comment in blue, as suggested in your above post. I never knew that it is possible to view 1:1 in the posts !