

ffca
-
Posts
66 -
Joined
-
Last visited
Posts posted by ffca
-
-
I'm sure this has been asked already but I figured I would give it a bump because it's so important. I have left Adobe behind for a bright Affinity future, but I sorely miss the Transformation Panel that Illustrator had—it's so much more useful than the current iteration of Power Duplicate because it allows the user to preview how the duplications look before locking them in. For generating symmetrical designs this is vital.
Also missing the simple functionality to duplicate and ADD vs being limited to duplicate and MULTIPLY. For example if I want to make concentric circles that increase at 5pts diameter with every iteration, I have to do this manually because power duplicate progressively increases the diameter changes with every iteration.
-
-
-
-
1 hour ago, fde101 said:
While that is clearly something that needs to be fixed, as a band-aid in the meantime, you might want to check out Spectacle and see if that will help resolve this:
I've found that useful from time to time in similar situations.
Hmm interesting, thanks for the link!
-
-
-
When I try to open a new studio (panel), the panel opens in the center of my screen and so tall that I can't see the top of it. I can't grab it to reposition it anywhere.
I've only tried this with Character and Isometric panels, they both do the same thing.
I'm on a Mac, 10.13.6

-
-
-
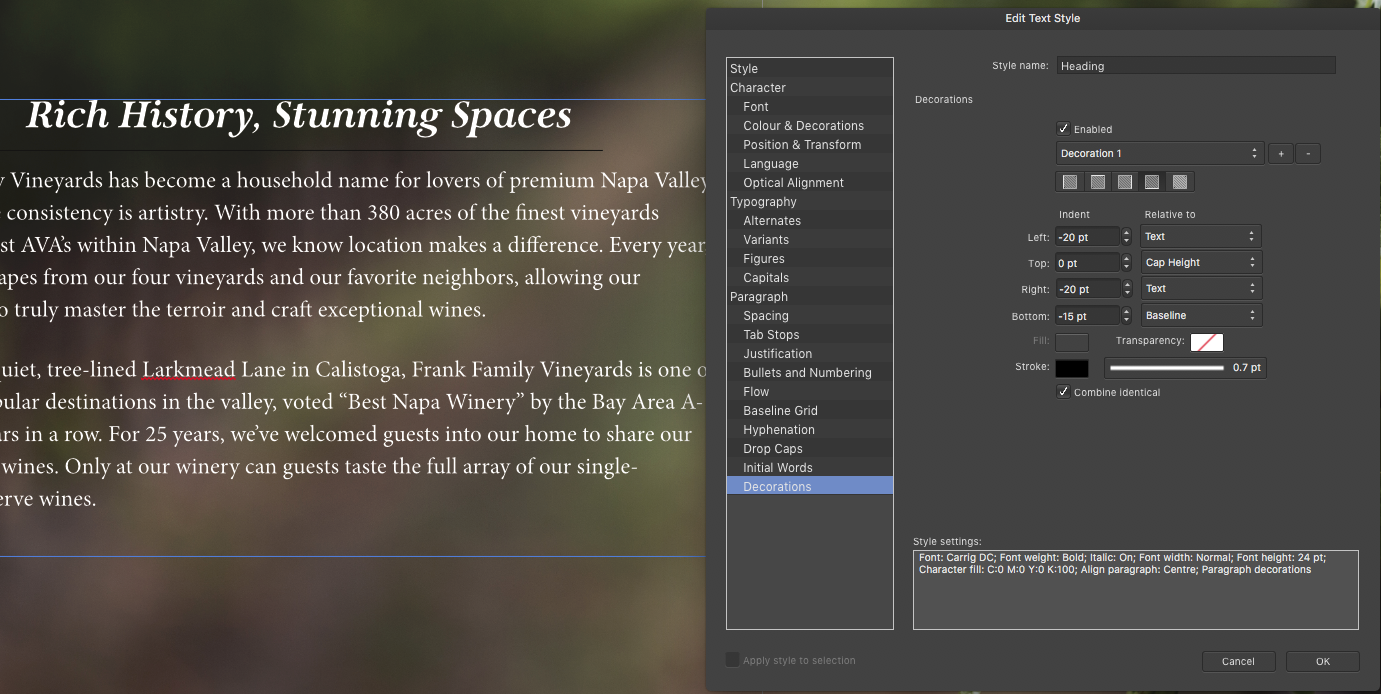
I often work on multi-page documents that require text blocks to reverse from black to white depending on the image underneath the text on that particular page. I may also employ subheads that use Paragraph Rules (a line beneath the subhead and the subsequent body copy).
In InDesign, I would set up a Paragraph Style defining the text as Black, and make sure the Paragraph Rule is set to "Text Color". Then on the pages where I need to override that with White, I simply use a Character Style. When the text turns white due to the character style, the paragraph rule updates to white accordingly.
In APub, I see that instead of Paragraph Rules we use Decorations. However there is no way I can see to set the Decoration to inherit the Text Color. This is forcing me to create two sets of Paragraph Styles just to control that single line.
Is there a way to make a check box that tells APub to color the decoration according to the text color?
-
3 minutes ago, MikeW said:
Should that be the normal way? Should negative numbers be possible?
Personally I prefer the way InDesign handles this part of things, but that's probably because that's what I'm used to. I find the [No Change] indicators somewhat confusing as Jim_A described. I was just saying there is a way to get back to the No Change setting. Maybe I misunderstood that part of your response
-
47 minutes ago, MikeW said:
The fact No Change cannot be attained again but presents a zero
I think if you alter a field that is initially set to [No Change], you can bring it back by highlighting the content and hitting Delete
-
I hope this works for you. I've included a duplicated version of the problematic file, along with the fonts. In case something goes awry, I've made a little screen recording of the behavior so you can see what is happening.
Base font is Baskerville Regular (the Serif font you see in the screen cap)
It's meant to change the initial words to Baskerville Bold, and make them all small caps.
Unexpectedly, it changes the font to URW Dock (the Sans Serif you see in the screen cap)
-
Are you saying that this is intended behavior, or that it's currently a known bug?
-
I have a long document going. I've created a Paragraph Style called "Initial Paragraph" that utilizes the Initial Words feature. That section identifies the first 5 words of the paragraph to take on the formatting of a Character Style that has two simple formats applied: font weight Bold and All Small Caps.
However, when I apply "Initial Paragraph", the first 5 words are correctly made Bold, correctly take on All Small Caps, but incorrectly changes the font even though "No Change" is selected in the font section of the Character Style. The font it is changing to happens to be a font that was selected when I first created the document.
Restarting does not fix the issue.
The only way to I could get it to work was to specifically select the same Body font of the Paragraph style within the Character style, and then select the desired weight from the "Font Trait" dropdown, as "Font Weight" became greyed out after selecting a Font Family.
I feel like the issue has to do with the confusing fact that a font's weight can be specified in two locations: Font Weight and Font Trait.
When I selected "No Change" in Font Family, I had options under Font Weight (such as Extra Bold) that didn't exist in the body font I was using. But when I selected a Font Family (redundantly, since Font Family was already specified at the Paragraph level), its Weight variants appeared under Font Traits.
-
I created a new 28 page document. My initial Margin settings were far too small, so I updated the Margins on the Master page to the correct size. Then I applied the Master to all pages. Margins all updated accordingly.
However after saving and restarting, all the Margins on the working pages are back to their initial dimensions. The Margins on the Master page are the new, correct size.
I'm not sure whether this is a problem with Margins, or whether it's a problem with Publisher remembering that I have applied Master pages.
-
-
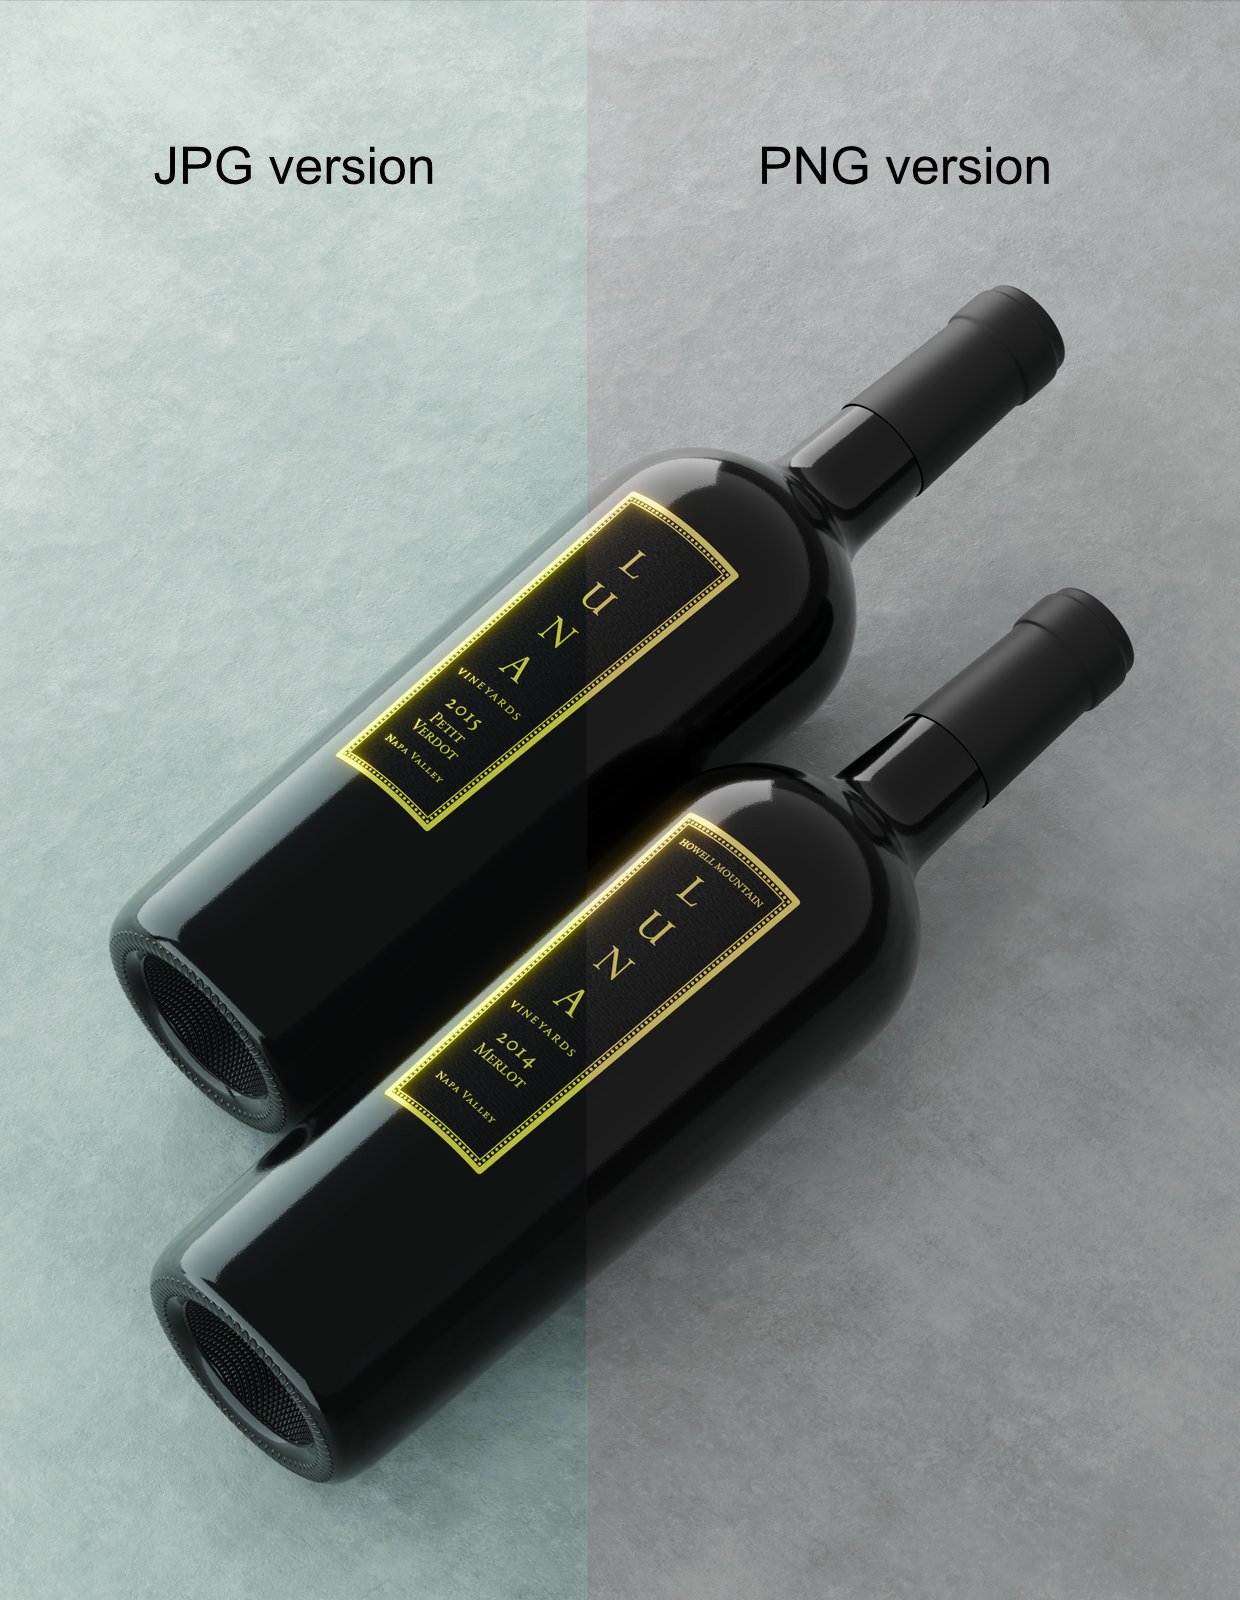
It seems that when you try to Place a PNG with no color profile in APub, the software does not respect the "Convert opened file to working space" setting.
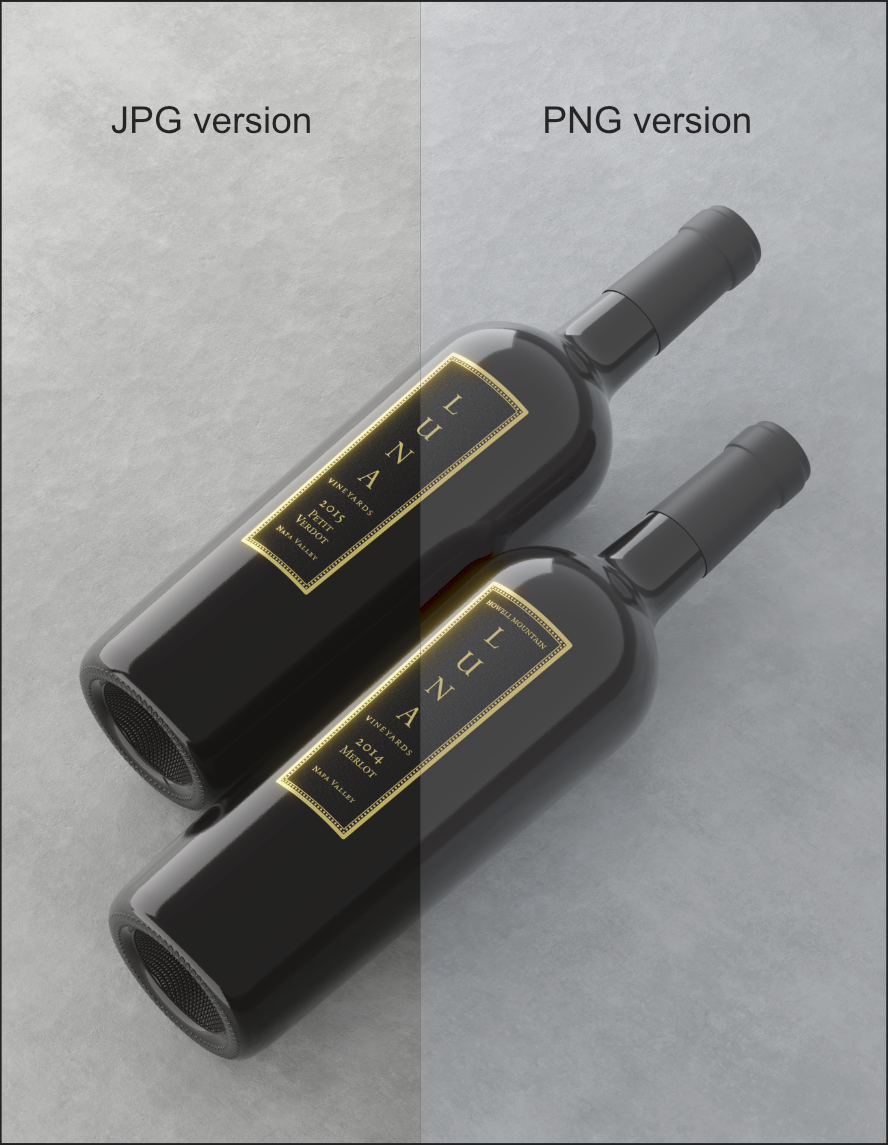
Attached are two unprofiled versions of the same 3D render. One is a JPG and one is a PNG. In a CMYK APub document, when I place the JPG it looks correct. However when I place the PNG the contrast is too low and there's a color shift.
In contrast, when I try opening the unprofiled PNG directly into a new APub document, the profile was automatically assigned (expected behavior).
See initial post here for more info:
-
MikeW,
Thanks for the response. I use Blender for 3D, and it does not assign profiles on export.
When I open the PNG in APhoto and then change the color space to CMYK, I see what I expected to see in the other programs—a slight shift in values but nothing extreme. After poking around in Designer and Publisher, I think I found the reason. It's because Photo automatically assigns a profile when the image is placed, whereas the other two Serif programs do not because of my preference settings. I had "Convert opened file to working space" disabled in Designer and Publisher.
Now that I understand this, it looks like Publisher does not honor the "Convert opened files to working space" setting when placing an image.
I enabled that option, and placed the PNG with the same washed out results, even after restarting Publisher. However when I tried opening the PNG into a new document, the profile was automatically assigned. When I then switched that new document to CMYK space, the conversion was as expected—just a slight shift in colors.
Do you agree that this is unexpected behavior, and should I make a new post about it?
-
4 minutes ago, MikeW said:
It might be helpful to ZIP up these images as exported from your renderer and attached them to a post.
Done. ZIP file can be found on the original post, and attached here for your convenience
-
1 hour ago, walt.farrell said:
It may be relevant that the PNG image format does not support CMYK. But I'm not precisely sure how that should affect your file.
Hmm maybe that has something to do with it. I never have this problem in InDesign though or other CMYK spaces like Illustrator.
Your comment prompted me to check the behavior of Affinity Designer, and it shows the same odd rendering. So this is either a bug in code shared by both programs, or it's simply the way Serif intended PNGs to look. But if I didn't know, I would think there's something wrong with my render and make a new version overcompensating for a problem that never existed. So to me that makes it a bug.
-
EDIT 2: See updated topic here
I saved out two versions of the same 3D render. One JPG and one PNG. The scene shows 2 wine bottles on a gray surface.
I create a new document in AP, in CMYK color space.
When I place the files into AP, the JPG looks correct but the PNG looks wildly off. Very low contrast and some odd color shifts. If I switch the document to RGB color space, both the JPG and the PNG look the same.
Linked PNGs seem to be rendering incorrectly in CMYK space, unless there is some hidden setting that is causing the issue.
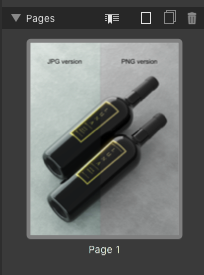
Curiously, the preview thumbnail for the page has the opposite problem. It represents the PNG correctly, but gives the JPG a very blue cast. Again the problem is solved when switching the document to RBG space.
I've attached both images.
EDIT: After I uploaded both images into the browser, I saw that the version I exported as a JPG (file name PNG_bug.jpg) appears bluish green just like the Thumbnail. Yet on my computer the exported JPG looks neutral gray. So I took a screengrab of what I see in AP, which shows the pretty neutral gray on both the JPG and PNG. Neutral gray is what the scene is supposed to look like. This may shed light on the matter to someone familiar with the color management pipeline.
-
On 9/22/2018 at 4:06 AM, michaelokraj said:
this one goes again for motivation purposes: THANK YOU and AGAIN: GREAT JOB! this tool is all I wanted and needed after 2 decaeds of adobe "enslavent".
Agreed! Now if we can just get the ability to import IDML or even INDD, I can delete InDesign!


Span Columns
in Feedback for the Affinity V2 Suite of Products
Posted
Really need this! Please include it!