Father ODD Creations
-
Posts
14 -
Joined
-
Last visited
Recent Profile Visitors
1,458 profile views


-
 Father ODD Creations reacted to a post in a topic:
Shut up and take my money!
Father ODD Creations reacted to a post in a topic:
Shut up and take my money!
-
Father ODD Creations reacted to a post in a topic:
Shut up and take my money!
-
Father ODD Creations reacted to a post in a topic:
Shut up and take my money!
-
Father ODD Creations reacted to a post in a topic:
Is there a "donation" button?
-
Father ODD Creations reacted to a post in a topic:
Is there a "donation" button?
-
JPT0908 reacted to a post in a topic:
HOW TO: NODES + PERFECT CURVES Made EASY......by accident😂
-
 So I was searching around for any and every video on YouTube to give me a better understanding of how to use the pen/node tool. I stumbled across a video on YT: "AFFINITY DESIGNER CURVES FROM SINGLE STROKE. This tutorial helped me solve one issue (finding the easiest way to trace an image with a lot of curvy lines BUT with each curve flowing smoothly together from one to the next). I had created a logo (i can't show the whole logo) but as you can see some of the curves i created originally APPEARED smooth when i zoomed in close but some noticeable errors when i zoomed out/away from it. Once I zoomed out the logo had these subtle curves that made the logo look like it was starting to form corners. As I followed the tutorial, I got to where I was only using the SMART MODE tool, with these options selected: - ALIGN TO NODES OF SELECTED CURVES - SNAP TO GEOMETRY OF SELECTED CURVES - ALIGN HANDLE POSITIONS USING SNAPPING OPTIONS - MOVE BY WHOLE PIXELS - SNAPPING while I was working through, I was going by what I would always hear from the pros and amateurs "move the node handles around until you get as close as you can to the images/shapes. so that's what I did! Still wasn't perfect though. A-HA!!! THERES A PATTERN ("not sure if I'm just late to the party lol") Once you put your first node, you get the CURVE option after putting the second node which is your first line. You then go and make that line fit as perfect to the curve as you can which is the easy part. Then comes the hard part as soon as you add a 3rd node and however many more you want, trying to make that second curve fit PERFECTLY with the first curve usually doesn't match the way you want it to because at the same time you're also trying to make it fit with the 4th node. It then becomes this tug of war between the nodes LOL. node A. node B. = line/curve a-b node B. node C. = line/curve b-c node C. node D. = line/curve c-d node D. node E. = line/curve d-e **USING THE SHIFT KEY EVERYTIME (USUALLY)** **USING THE SHIFT KEY EVERYTIME (USUALLY)** **USING THE SHIFT KEY EVERYTIME (USUALLY)** Once you have the first curve (line/curve a-b) set to your liking , before adjusting the second curve (line/curve b-c) YOU WANT TO SELECT THE NODE (node C.) AND USE THE HANDLES ON IT TO START BUILDING THE END OF THE SECOND CURVE (line/curve b-c)...…..THENNNNNNN...…GO BACK TO THE PREVIOUS NODE (node B.) AND ADJUST THAT ONE TO MAKE THE SECOND CURVE (line/curve b-c) FIT and FLOW SMOOTHLY WITH THE FIRST CURVE (line/curve a-b). so therefore once you move onto the third curve (line/curve c-d) start by adjusting the handles of node D. FIRST then jump back to ex. node A. node B. node C. node D. node E. etc. line/curve a-b, line/curve b-c, line/curve c-d, line/curve d-e after the curve between node A. & node B. has been made (line/curve a-b), jump to node C. and using the handles to adjust the curve (line/curve b-c) to your liking THEN start adjusting the handles on node B. creating line/curve b-c which flows perfectly with the previous curve line/curve a-b AFD - nodes.mp4 HOPEFULLY I HELPED SOMEONE!
-
Father ODD Creations reacted to a post in a topic:
Subtracting Curves Not Working
-
Father ODD Creations reacted to a post in a topic:
Subtracting Curves Not Working
-
Gabe reacted to a post in a topic:
Keeps switching to the eraser tool
-
 Father ODD Creations reacted to a post in a topic:
Keeps switching to the eraser tool
Father ODD Creations reacted to a post in a topic:
Keeps switching to the eraser tool
-
Keeps switching to the eraser tool
Father ODD Creations replied to Nixart's topic in V1 Bugs found on Windows
@Gabe I cant believe I didn't think about the obvious . I rarely use the buttons on my stylus pen and forgot that the driver automatically has the SWITCH BRUSH option activated on the stylus pen. Needless to say "problem solved". Thanks for triggering my brain to think properly. -
Keeps switching to the eraser tool
Father ODD Creations replied to Nixart's topic in V1 Bugs found on Windows
I'm having the same issue. Very annoying, Im also using HUION GT-221 Pro Monitor on WINDOWS 10 as well. My stylus doesnt have an eraser on the end that I'm aware of. -
Father ODD Creations reacted to a post in a topic:
Keeps switching to the eraser tool
-
Father ODD Creations reacted to a post in a topic:
Font stopped working
-
@LibreTraining As far as any issues with the beta version, I wouldnt know as it crashes before ever fulling running AD. since my full version is working I havent set time to experiment with the issues of the beta version
-
@GaryLearnTech YOU ARE AEWSOME....THAT WORKED!!!!!!!!!! I thought I was gonna have to tell my client that the fonts would have to be changed THANK YOU THANK YOU THANK YOU
-
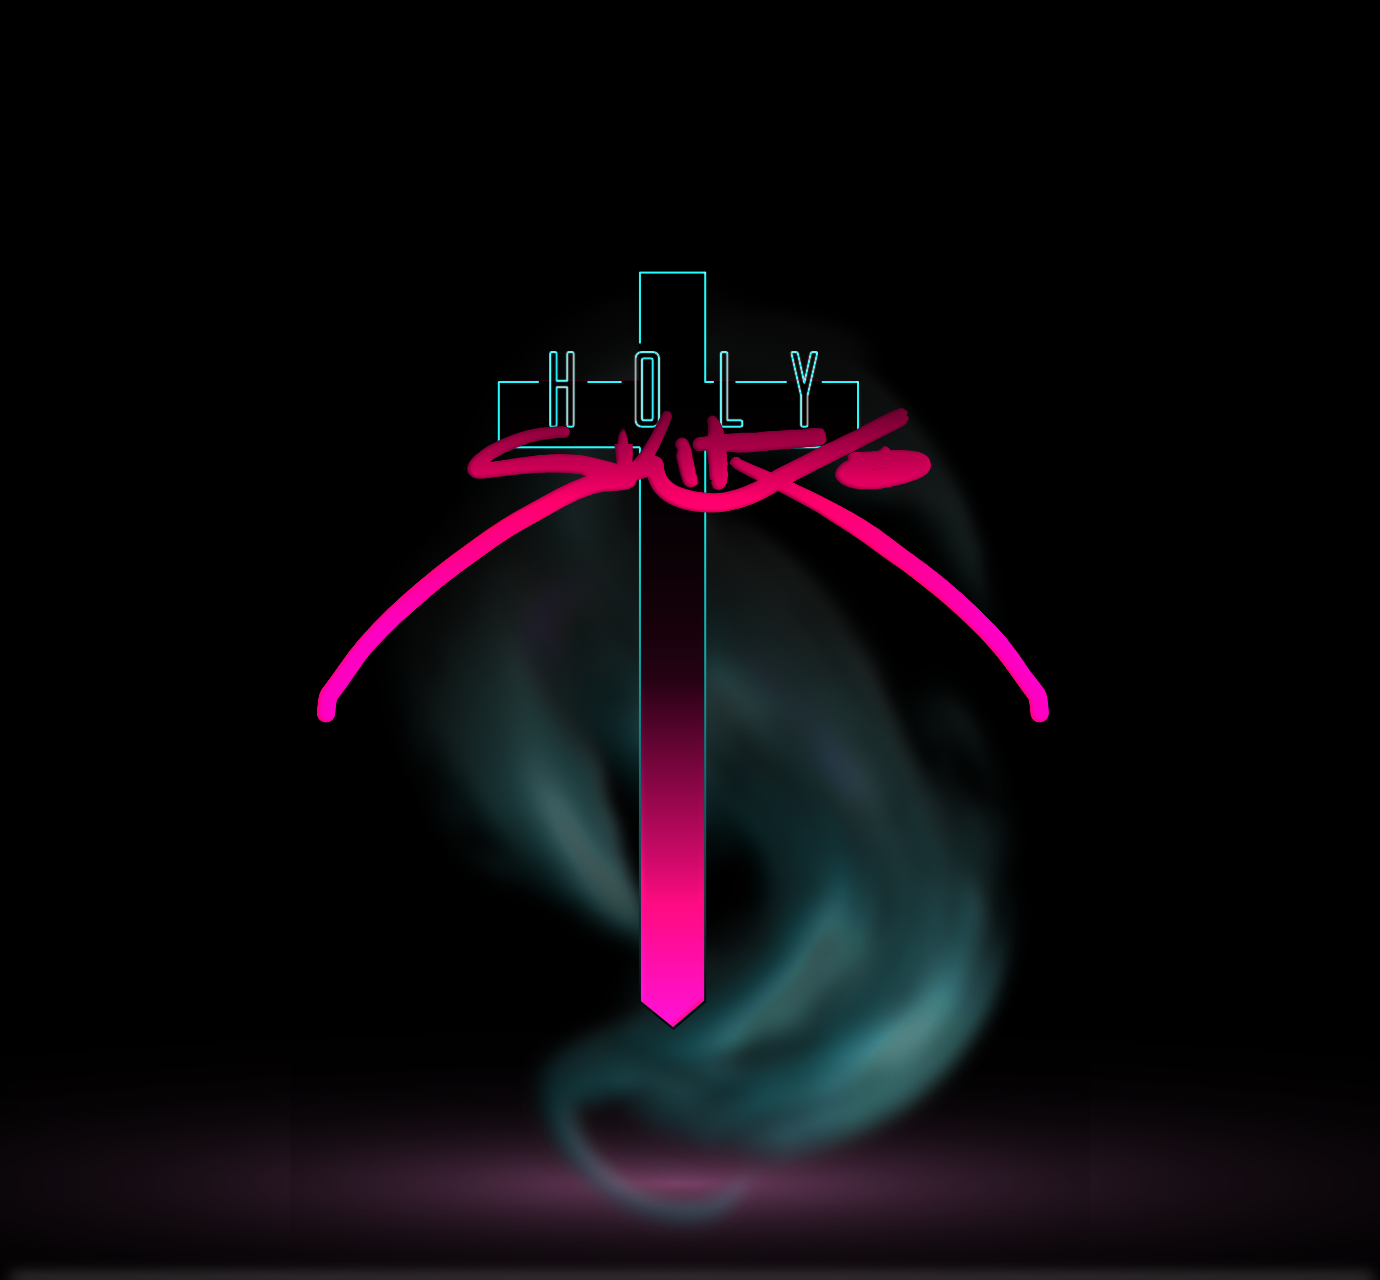
affinity designer Holy SKITXO's World (80s Theme)
Father ODD Creations replied to Father ODD Creations's topic in Share your work
@VectorWhiz Thank you very much mate. -
Father ODD Creations changed their profile photo
-
VectorWhiz reacted to a post in a topic:
Holy SKITXO's World (80s Theme)
-
affinity designer Holy SKITXO's World (80s Theme)
Father ODD Creations replied to Father ODD Creations's topic in Share your work
@GarryP Thanks for the critique, yes he is going for a more calmed down energy with his future productions. the first one I created also so thanks for the compliment. As far as the smoke goes, its to bring depth and a dark mysterious vibe as hes and fantasy/scifi/horror fan. The smoke is a symbol for fog over graveyards, ghost, and for symbolizing mysteriousness. I tried just a plain black background at first but it was just boring on the eyes, as you can see I've purposely left out the Tron grid (since most logos referring to the 80s usually have it their art...trying to make it a little different i guess). Thats a great point on the length of the logo, and its safe to say that I actually have it covered, as when I created this logo, 'though it looks as one,' there is actually 3 versions of it in this set (I probably shouldve uploaded all 3 lol): The full version (Holy, Skitxo, and the Crucifix) The secondary version (Holy, Skitxo w/o the crucifix) Third Version (Skitxo, and the Crucifix): as the the crucifix on average universally stands for Holy and then skitxo across the crucifix. and the smoke in the background is only for this display, he will have the logo itself alone with future projects or however he decides to add it to his future projects. Im a really a huge fan of symbols, so I try to go for more logos that are memorable versus being politically correct. For instance the "Novant Health" logo, most people dont realize its negative space that creates the N and H but when explained, people finally understand (including myself, i didn't understand it at first until i stared at it LOL. I really appreciate the feedback mate. Thank you -
affinity designer Holy SKITXO's World (80s Theme)
Father ODD Creations posted a topic in Share your work
Re-designed my Clients Music Artist's logo for a stronger and yet simple feel. The old logo might still be here (www.soundcloud.com/HolySKITXO) Critiques and Compliments appreciated.
-
Baseline grid bugs
Father ODD Creations replied to Ggordge's topic in [ARCHIVE] Publisher beta on macOS threads
THANK YOU @A_B_C...I thought I was going crazy lol. now i have my visible baseline -
Thanks for the update everything is working fine so far (Win 10 system)
-
tranmautritam reacted to a post in a topic:
Zero - My first illustration in Affinity Designer for iPad
-
This is fantastic. Those colors, textures, and movement work well together.
.jpg.7691567c4f251b5af498d40143519916.jpg)