.jpeg.1b727463d44a0d52bc3499597e28d11c.jpeg)
James Ritson
-
Posts
855 -
Joined
-
Last visited
Everything posted by James Ritson
-
.thumb.jpeg.6f143e8223547aba974205ef53397036.jpeg) Hi @Sonny Sonny, as I mentioned above it's not an issue. Possibly Photopea does not interpret unassociated alpha?
Hi @Sonny Sonny, as I mentioned above it's not an issue. Possibly Photopea does not interpret unassociated alpha? -
Hi @DaQuizz and @Sonny Sonny, this isn't actually a bug but rather an intentional behaviour: the TIFF metadata from Blender will be written as having unassociated alpha. Previously, Photo was ignoring this metadata and associating the alpha channel, which was actually undesirable for certain workflows. For example, when you save a final beauty pass from vRay without a separate alpha pass layer, it will write unassociated alpha data into the TIFF. This allows the user to optionally remove the background detail using the alpha channel, but they may not wish to: instead, they may just want to use that alpha data for other types of masking such as affecting just the sky or foreground with adjustments. I did a tutorial on the process here: Hope that makes sense and helps?
- 10 replies
-
- 3
-

-

-
- photo v2 bug
- tif file
- (and 1 more)
-
OpenColourIO (OCIO) v2 Support
James Ritson replied to Ash's topic in [ARCHIVE] 2.4, 2.3, 2.2 & 2.1 Features and Improvements
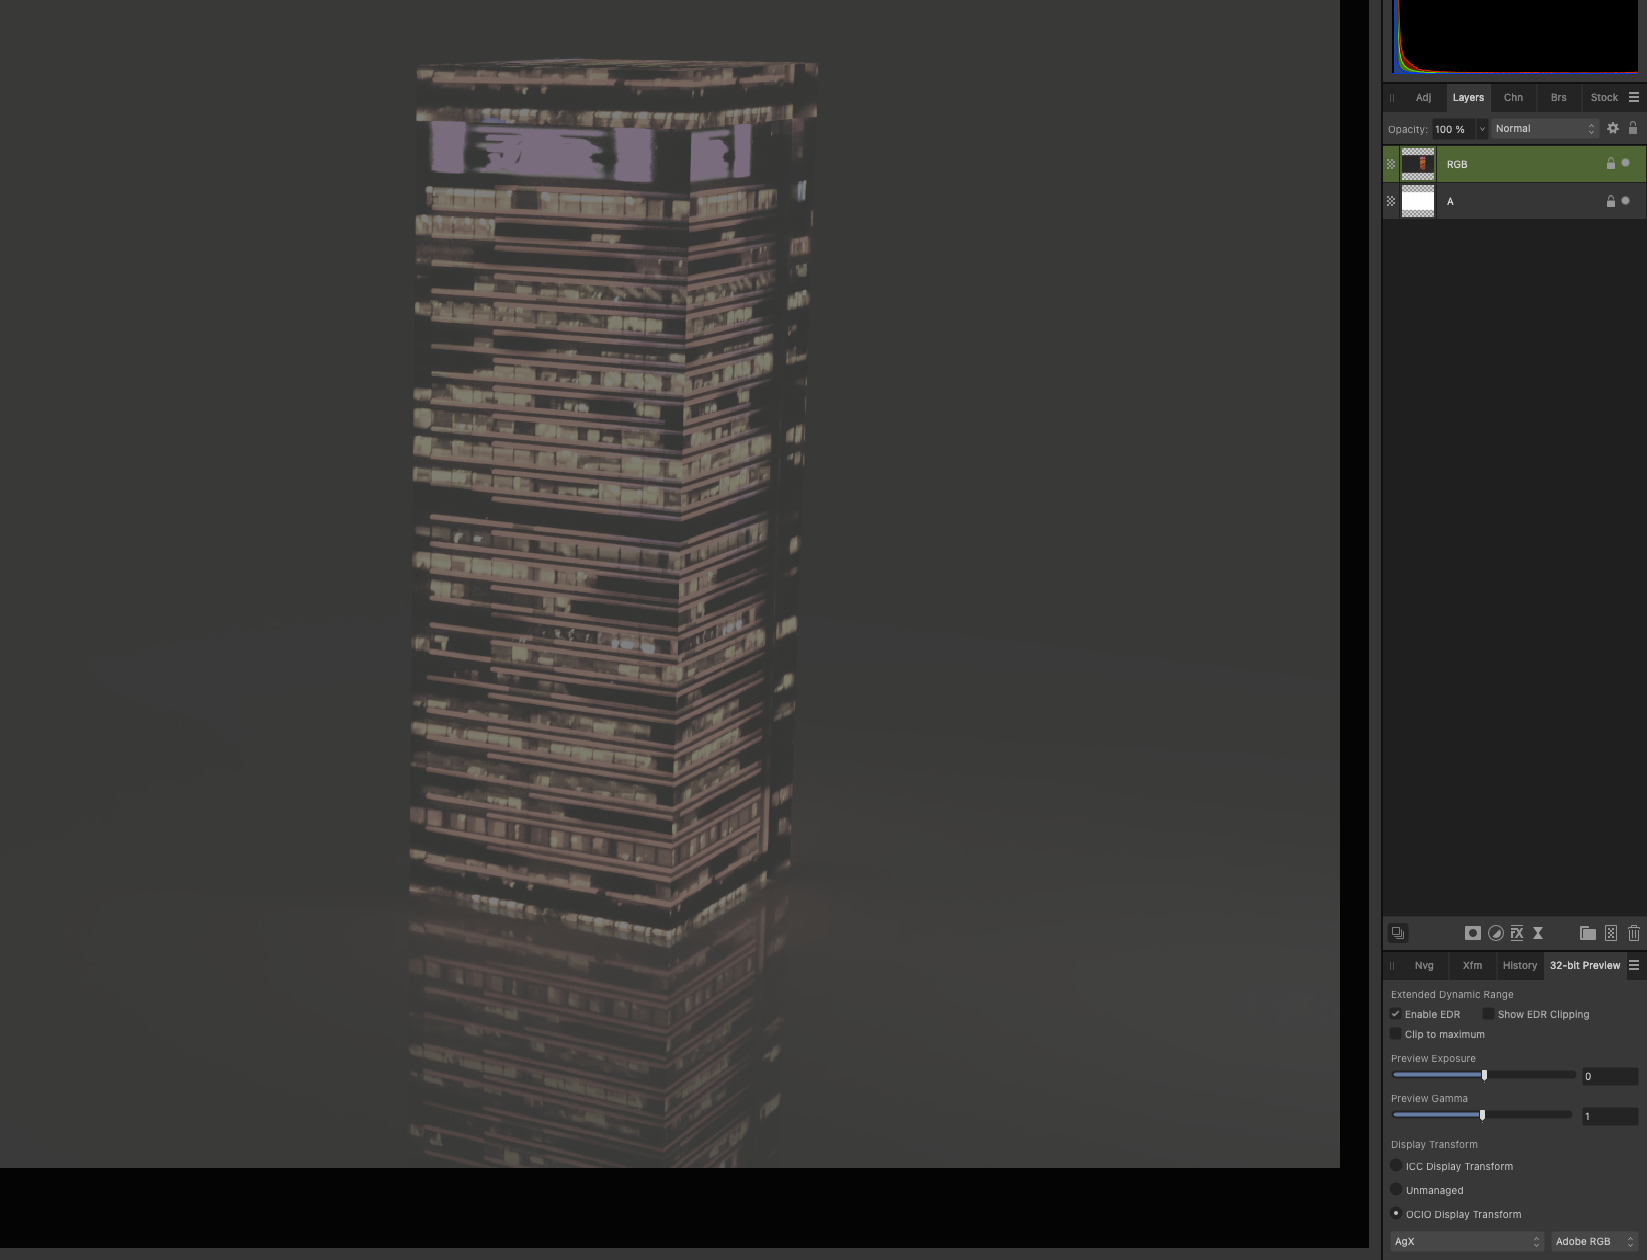
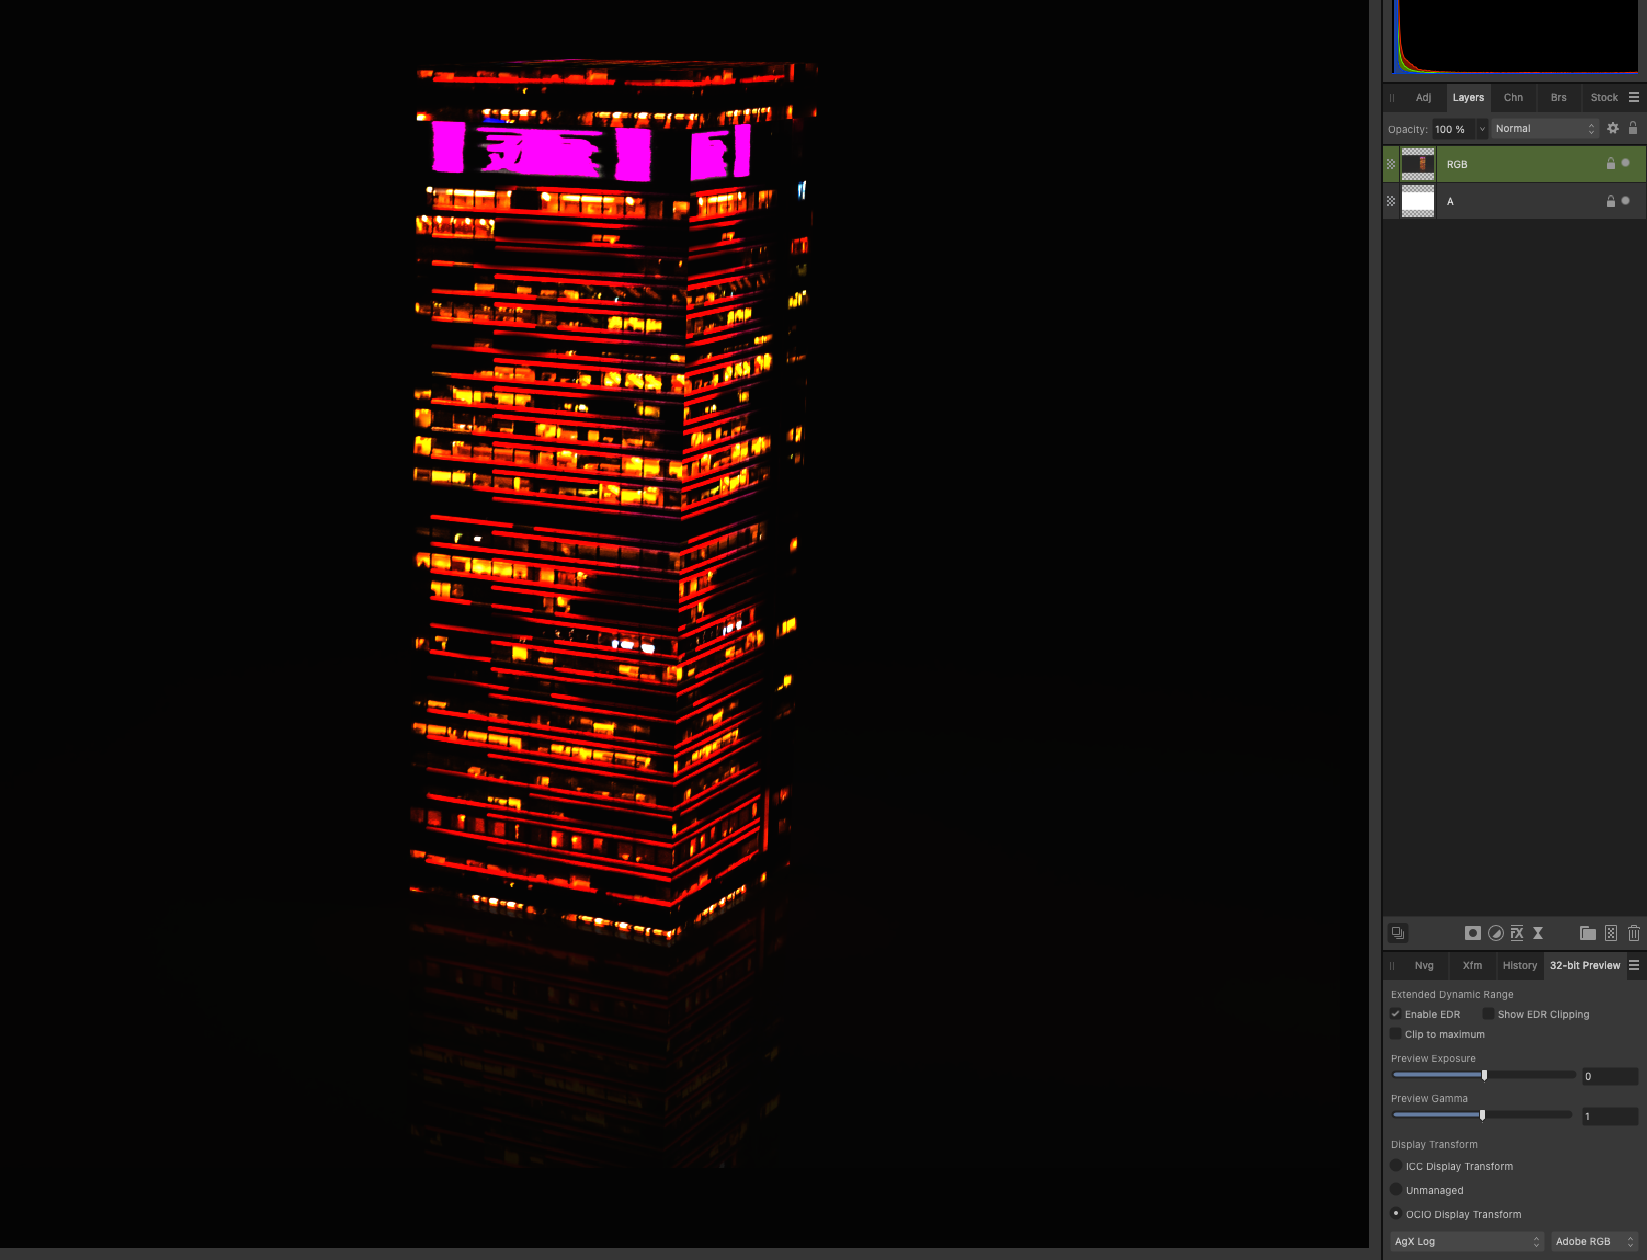
Thanks again @playername, I'll do some more digging then will hopefully be able to discuss with the developers early next week. Just to clarify, the Filmic/AgX macros are meant explicitly for use with EXR/HDR formats—they're essentially an alternative to setting up OpenColorIO. Instead, you stick with the ICC display transform method and apply these macros above all your layer compositing work that wants to be done in linear space (e.g. blending multiple render passes together with Add such as mist, volumetrics etc). Then you apply the macros to do the required transform and get the linear values into bounded gamma-corrected space. At this point you would treat the editing as if you were working with a gamma-encoded bitmap like JPEG/TIFF, e.g. using adjustment layers, live filters and so on for further retouching. Hope that makes sense—it just sounded from your post like you were trying to use the macros with gamma-encoded output from Blender, but they already have the OCIO transforms applied. The main reason I made the macros is because it's notoriously difficult to export from Photo to a gamma-encoded format when using the OCIO view transform. Using File>Export and going to a format such as JPEG doesn't actually use OCIO at all, it uses ICC display transform instead—so people will be working in OCIO, then find their exported result looks very different. The macros allow you to work with ICC display transform instead and then get a consistent File>Export result. OCIO's implementation in Photo was more meant for VFX workflows where the app would be an intermediary, not an endpoint/delivery. For example: User would bring in an EXR document tagged with an appropriate colour space (which is then converted to scene linear) Alternatively, they would develop straight from photographic RAW using Photo's 32-bit HDR output option (which remains in scene linear) The user would then perform matte painting and any other retouching work required, perhaps using the OCIO adjustment layer to 'move' between colour spaces if they are compositing layers from different source colour spaces They would then File>Export back to EXR. appending the file name with the colour space they want to convert back to The EXR would then be brought into the VFX/NLE software Being able to 'match' what is seen with the OCIO view transform when exporting to a gamma-encoded format is still an ongoing discussion internally for now... If you're working with gamma-encoded TIFFs, I believe Blender writes them out untagged, so Photo will assume sRGB primaries when importing them. You can change this in Settings>Colour by modifying the first "RGB Colour Profile" dropdown to your input space (e.g. Adobe RGB). Hope the above helps! -
OpenColourIO (OCIO) v2 Support
James Ritson replied to Ash's topic in [ARCHIVE] 2.4, 2.3, 2.2 & 2.1 Features and Improvements
Hi @playername, thanks for the information, it's very useful. I had a look at Eary's configuration and it looks very comprehensive. It doesn't appear to have any file rules defined however—therefore I'm unsure of what Photo will be converting from into scene linear. I'm hoping it just looks at the 'default' role which is Linear Rec.709, but if your source colour space was something else then it would need a custom file rule adding into the configuration file. I haven't really experimented with other colour spaces when using Blender, can you actually set it up to use something like ACES or Adobe RGB for all its internal compositing? I'll have to take a look and see if Eary's AgX transforms and output differ to Troy's, as I based my macros off Troy's version... (I've developed some macros so that users can easily apply AgX/Filmic transforms without requiring OCIO at all, which makes it far easier to just export as a gamma-encoded image format straight from Photo)
-
H @irandar, I'm assuming the files are all OSC since they're from a Nikon camera, in which case I wouldn't try and artificially split them into mono channel data straight away. What you could do is stack portions of the light frames and use the same calibration frames each time, e.g. stacking the light frames in groups of 0-100, 101-200, 201-300, 301-400. You could use file groups for each set if you wanted to do this. However, I'm unsure if it would actually offer any speed benefit over just stacking all 400 frames in one file group, to be honest. If you did take this approach, you would end up with multiple data layers once you apply the stack. You can select these layers, then go to Arrange>Live Stack Group and change the operator to Mean. This will average the layers and reduce overall noise further. Then you could either flatten (Document>Flatten) or Merge Visible (Layer>Merge Visible) to create a new pixel layer from this result. At this point, you could try using the "Extract OSC Layer to Mono RGB" macro in the Data Setups category, then try either "Mono Stretch (RGB)" or "Mono Log Stretch (RGB)", the latter of which will be more aggressive. Finally, you could then colour map using "RGB Composition Setup". There isn't actually a macro to synthesise a luminance layer, but I could actually add this in an upcoming version. Hope that helps!
-
OpenColourIO (OCIO) v2 Support
James Ritson replied to Ash's topic in [ARCHIVE] 2.4, 2.3, 2.2 & 2.1 Features and Improvements
Hi @playername, there's something else that may be causing your issue: as per the OCIO v2 spec, Photo will now always convert from the document colour space to scene linear (in V1 this was optionally ignored if the EXR filename didn't contain a valid colourspace name appended to it). In the AgX config file (at least with Troy's main Git repo), we have the following: ocio_profile_version: 2 environment: {} search_path: LUTs strictparsing: true luma: [0.2126, 0.7152, 0.0722] roles: color_picking: sRGB color_timing: sRGB compositing_log: sRGB data: Generic Data default: sRGB default_byte: sRGB default_float: Linear BT.709 default_sequencer: sRGB matte_paint: sRGB reference: Linear BT.709 scene_linear: Linear BT.709 texture_paint: sRGB file_rules: - !<Rule> {name: Default, colorspace: default} Photo will be using the Default rule—you should see a toast in the top right every time you open an EXR file saying it has converted from 'default' to scene linear. The 'default' role, however, is defined as sRGB (see roles above), so Photo will be converting from non-linear sRGB primaries to scene linear, which will look very wrong. If you change the rule section to: file_rules: - !<Rule> {name: Default, colorspace: default_float} This will then convert from Linear BT.709 (Blender's default internal colour space) to scene linear, which should look correct. Does that fix it for you? Alternatively, you can go to Settings>Preferences>Colour and disable Perform OCIO conversions based on file name, and that will stop the conversion entirely and assume the EXR primaries are already in scene linear. I'm not sure what the correct approach is here—according to the OCIO documentation (https://opencolorio.readthedocs.io/en/main/guides/authoring/rules.html), rules are now a requirement for V2 configs as a default colour space must be mandated. I'm not sure why the AgX configuration has defined the default colour space as non-linear sRGB, I suspect there must be a reason. Perhaps adding some additional file rules may help make the configuration more flexible, e.g.: file_rules: - !<Rule> {name: OpenEXR, extension: "exr", pattern: "*", colorspace: default_float} - !<Rule> {name: Default, colorspace: default} This would at least convert from Rec.709 linear (or whatever default_float is in another configuration) if an EXR file is loaded. There is another separate issue where the colour space transform appears to be bounded 😬 (this is already logged). This issue won't help matters, but it doesn't account for the radically different results you're seeing, which I suspect is a result of the configuration file causing Photo to convert from the wrong colour space. I'll discuss with the Photo developer next week when he's back off holiday—we may need to do some more investigating... -
Major bug: can't work with AP offline
James Ritson replied to km.au's topic in V2 Bugs found on macOS
Hi @Andreas Wilkens, this is likely related to the brightness of the EDR panel in the MacBook constantly changing: there is an issue with V1 where many brightness change notifications are sent to Photo (which uses them to calculate dynamic range on the 32-bit preview panel). You can mitigate this by turning off automatic brightness adjustment in System Preferences. Please see this video for more detail: This issue is fixed entirely in V2 (and all future versions of the Affinity apps). It primarily only affects Photo V1 because Publisher and Designer still use an OpenGL view (whereas Photo uses Metal). Please don't follow any advice that suggests disabling Metal Compute to fix this issue, as it will noticeably reduce performance. -
Hi @WB1, the Photo video tutorial on placing images is about five minutes in length, and only because it goes through all the various options you have. If you're not bothered with them, simply drag-dropping images onto the document will place them (or you can use File>Place). None of the official video tutorials are as long as thirty minutes to my knowledge, perhaps you are watching third party videos? I believe the longest video on the Affinity Photo channel is around 18 minutes long, and only because it is an in-depth workflow video on HDR editing and exporting. Most tool-based videos are on average three to five minutes in length. Nevertheless, the Affinity apps shouldn't be any more particularly complicated than other similar software (or indeed, the previous Plus range)—have you checked the in-app help? It's rather "old school" in its approach, giving you a searchable list of books and topics that provide straightforward instructions on using a tool or feature.
-
Hey @RTSullins, I came here to copy-paste my reply on Reddit but you've already found it! Glad to hear using File>New Stack works for you. For the benefit of anyone else with a similar issue, here's the reply I wrote:
-
Hi @Stuart444, I shoot with an OM-1 and Affinity Photo V2 has supported it since its initial release in November of last year (V1 is unlikely to receive new RAW file support, only maintenance patches now). I'm not sure why you would have to purchase a universal license if you don't need to use Designer or Publisher, you can purchase Photo individually: https://affinity.serif.com/photo/#buy Hope that helps, James
-
Hello, hopefully the following will help. I wrote this functionality a few years ago when we were developing the Windows versions of the Affinity apps. It's actually behaviour for the in-app help viewers which has been ported across to the web version. It detects the operating system and sets an appropriate stylesheet with the OS modifier keys. Therefore you may blame me! As has been mentioned above, the typical user experience is to be browsing the help with the same OS that they are using the Affinity apps on, so this is generally a sensible behaviour. If you need to see the modifier keys for the other OS, however, you can use Alt/Option and the left and right arrow keys to toggle between the two. Make sure you are focused on the topic window and not the TOC (a single click over the topic area will suffice). The above modifier is not advertised publicly since it was implemented as a development tool, but there is no harm in exposing this I believe. Having a web version-only toggle for macOS/Windows would be a sensible approach. Another would be to simply list both modifiers side by side with platform clarification, which would likely serve to frustrate both sets of users and create additional 'noise' in the topics—we receive enough criticism about this with the video tutorials where both modifier variants are always mentioned. Any decision would however be up to the documentation team.
-
Hey @David in Mississippi, this is more of a workaround than a solution, but you can double-click an asset in the Assets panel to 'load' it into the Place Image tool—you can then click-drag and place it at any size you want, using modifiers such as CMD/Ctrl to use a centre origin and Shift to toggle aspect-correct scaling. Assets are just pointers to layer content (if you drag images directly onto the Assets panel, they are instanced as Image layers)—I don't think the asset creation process should necessarily manipulate these in any way, such as resampling them to a resolution based on the current document, but you raise a good point that perhaps the asset could be optionally constrained to the current document bounds. Hope the above solution helps for now!
-
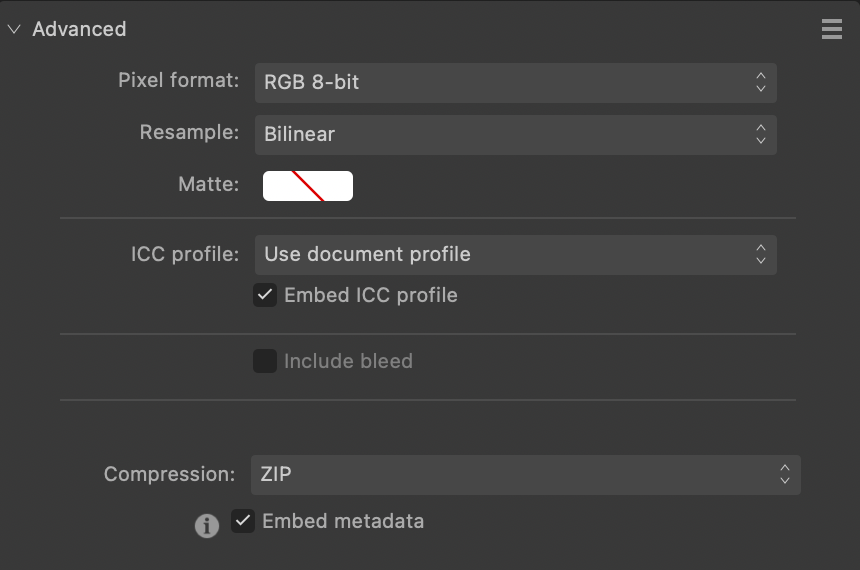
Hi @grunnvms, the difference in file size is likely due to Affinity Photo applying lossless ZIP compression by default. You can change the compression method or disable it entirely when using File>Export by scrolling down to the Advanced section: it's at the bottom of the settings. It certainly sounds like Capture One isn't applying any form of compression, as you've observed that its output file sizes are all consistent. Rest assured, you're not losing any information. You may gain a slight increase in encoding speed by not using compression when exporting from Photo—it's up to you whether the increased file size is an acceptable trade off. Here's the export dialog with the compression option:
-
Do you have "Enable HDR" checked on the 32-bit preview panel? On Windows, this will result in no visible difference between ICC Display Transform and Unmanaged view modes. I'm not able to access the files you submitted, but I believe that you're seeing the HDR image within Affinity Photo's document view (i.e. the extended brightness values are being mapped to your display). In order to retain these values, you need to export to a format that supports them, such as JPEG XL, EXR or HDR (JPEG XL would be the preferred format here). Exporting to a bounded SDR format—such as 16-bit TIFF, 8-bit TIFF, 8-bit JPEG etc—will clip the extended brightness values, resulting in the image output that you are seeing. If you are going to export to a bounded format, you will want to tone map your HDR pixel values first so they are remapped to within standard dynamic range. You can do this with the Tone Mapping persona, a combination of adjustments and live filters, or various available macros. To summarise: if you want your image to remain in genuine high dynamic range, you will need to export to a suitable interchange format that supports unbounded floats (e.g. JPEG-XL). If Capture One does not support JPEG-XL (I'm not actually sure if it supports HDR compositing and viewing yet? I know Lightroom does now), you will have to tone map your HDR image to SDR before exporting to a bounded integer format such as 8-bit JPEG/16-bit TIFF. I don't think Photomatix Pro supports an actual HDR view, where HDR values are passed to the monitor. It tone maps to SDR, and this is the result you are seeing on screen which will then match a typical export to a bounded image format. As Lee has mentioned above, do also make sure that your Exposure and Gamma sliders on the 32-bit preview panel are set to 0 and 1 respectively: these only control the document view transform and do not affect pixel values in your document, so can skew the image representation. I couldn't find a suitable point at which to mention this above, but it sounds like your expectations are based around taking an HDR document created via merging of bracketed images and seeing the final tone mapped result in SDR. In addition to HDR editing in 32-bit, Affinity Photo also supports an HDR view, which works in conjunction with Windows HDR compositing (or EDR compositing on macOS) to allow the user to see these extended brightness values. Think of HDR televisions and how you consume HDR content on them—you get to see those incredibly bright values. This can cause an issue if a user works on their document with this HDR view, then goes to export to a bounded SDR format (as mentioned above). Unless the user explicitly tone maps the HDR values to within standard dynamic range, they will be clipped, resulting in the disappointing export that you're experiencing. Looping back to what I said above, it sounds like you may need to make a choice: whether to edit in 'proper' HDR then deal with the workflow requirements that imposes, such as using a suitable format like JPEG-XL, or uncheck "Enable HDR" and work in standard dynamic range, tone mapping your image using the options you have available. If you are introducing other software into your workflow that doesn't support HDR imagery, your hand may be forced in this regard anyway! By the way, if you go to Edit>Preferences>Colour, you can ensure that "Enable HDR by default in 32-bit RGB views" is unchecked—this will stop HDR view compositing from being used, so you will always be working in SDR. The other option is of course to disable HDR within Windows itself under Display Settings. This tutorial on HDR workflows in Affinity Photo may also be of interest to you (don't forget to watch in HDR 😉 ) Hope that helps!
-
Affine Extend Mode Is Not Working
James Ritson replied to Hephaestus's topic in V2 Bugs found on Windows
Have you done any cropping, e.g. to create a square ratio document? Try right-clicking your layer and choosing Rasterise & Trim before running the Affine filter—does that solve it? -
Hey @JeffGar2000, I essentially just loaded in your FIT files into the file list and clicked Stack, that’s it. Toggling between the stacked result in the bottom right and the individual files, there is a clear difference in SNR (most obvious if you zoom in). I wouldn’t expect to see any other difference apart from the amount of noise…
-
Hi @JeffGar2000, I've tried stacking the FIT files and I'm seeing the expected result: it won't look dramatically different in terms of tonality, but zooming in reveals a much cleaner stacked result with higher SNR. Once you've stacked the images, if you click between one of the FIT files in the files list and Stacked Image 1 in the bottom right, are you able to see a difference in noise?
-
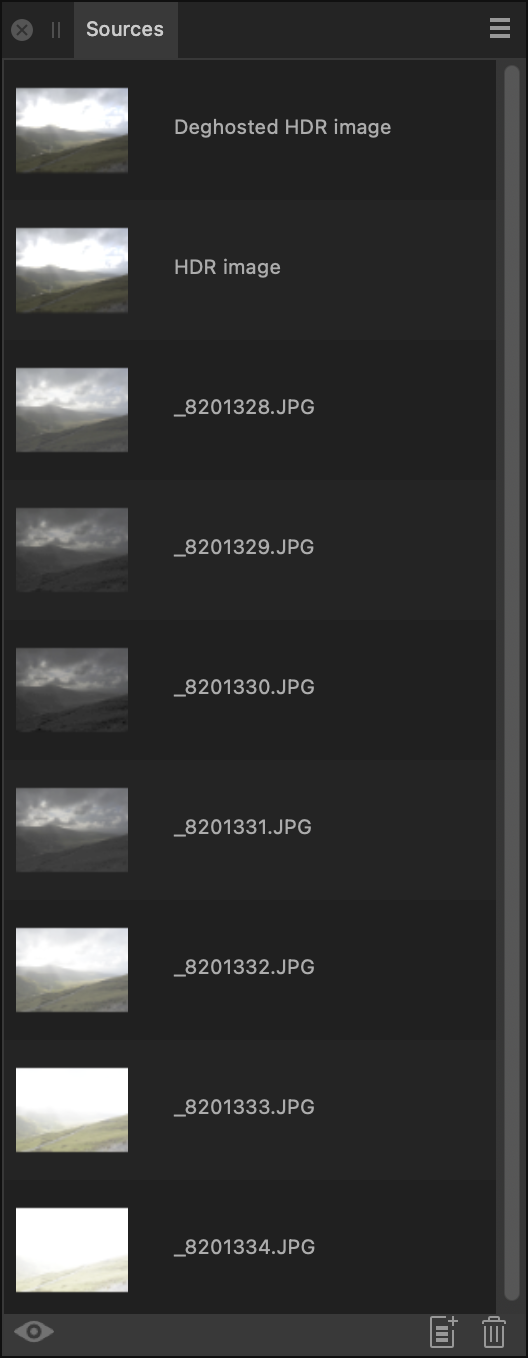
Hey @mexitographer, once the merge completes you'll have the option of cloning from each source image (plus an automatic deghosted result if you enable "Automatically remove ghosts") via the Sources panel. This panel is not typically shown because Photo launches into the tone mapping process straight away. You can either cancel out of tone mapping, or on the HDR Merge dialog you can uncheck "Tone map HDR image". When the merge completes, you will instead start with the Clone Brush Tool selected and the Sources panel open. From the Sources panel, you can select an image to clone from: all images will be exposure equalised, so you can clone from any of them without the final result looking uneven. The eye icon on the Sources panel lets you preview each individual image, so you can pick out the one where you want to clone the water from. Then you would disable the eye icon and simply paint into the main image with that source image selected. Don't forget to reduce your brush hardness to 0% before painting, as a soft brush edge will generally give you a better result. Hope that helps! !
-
Hi @Hatrantator, I think you're the poster from Reddit—sounds like disabling OpenCL fixed it for you, and looks like we still have some investigation of AMD Navi GPUs to do!
-
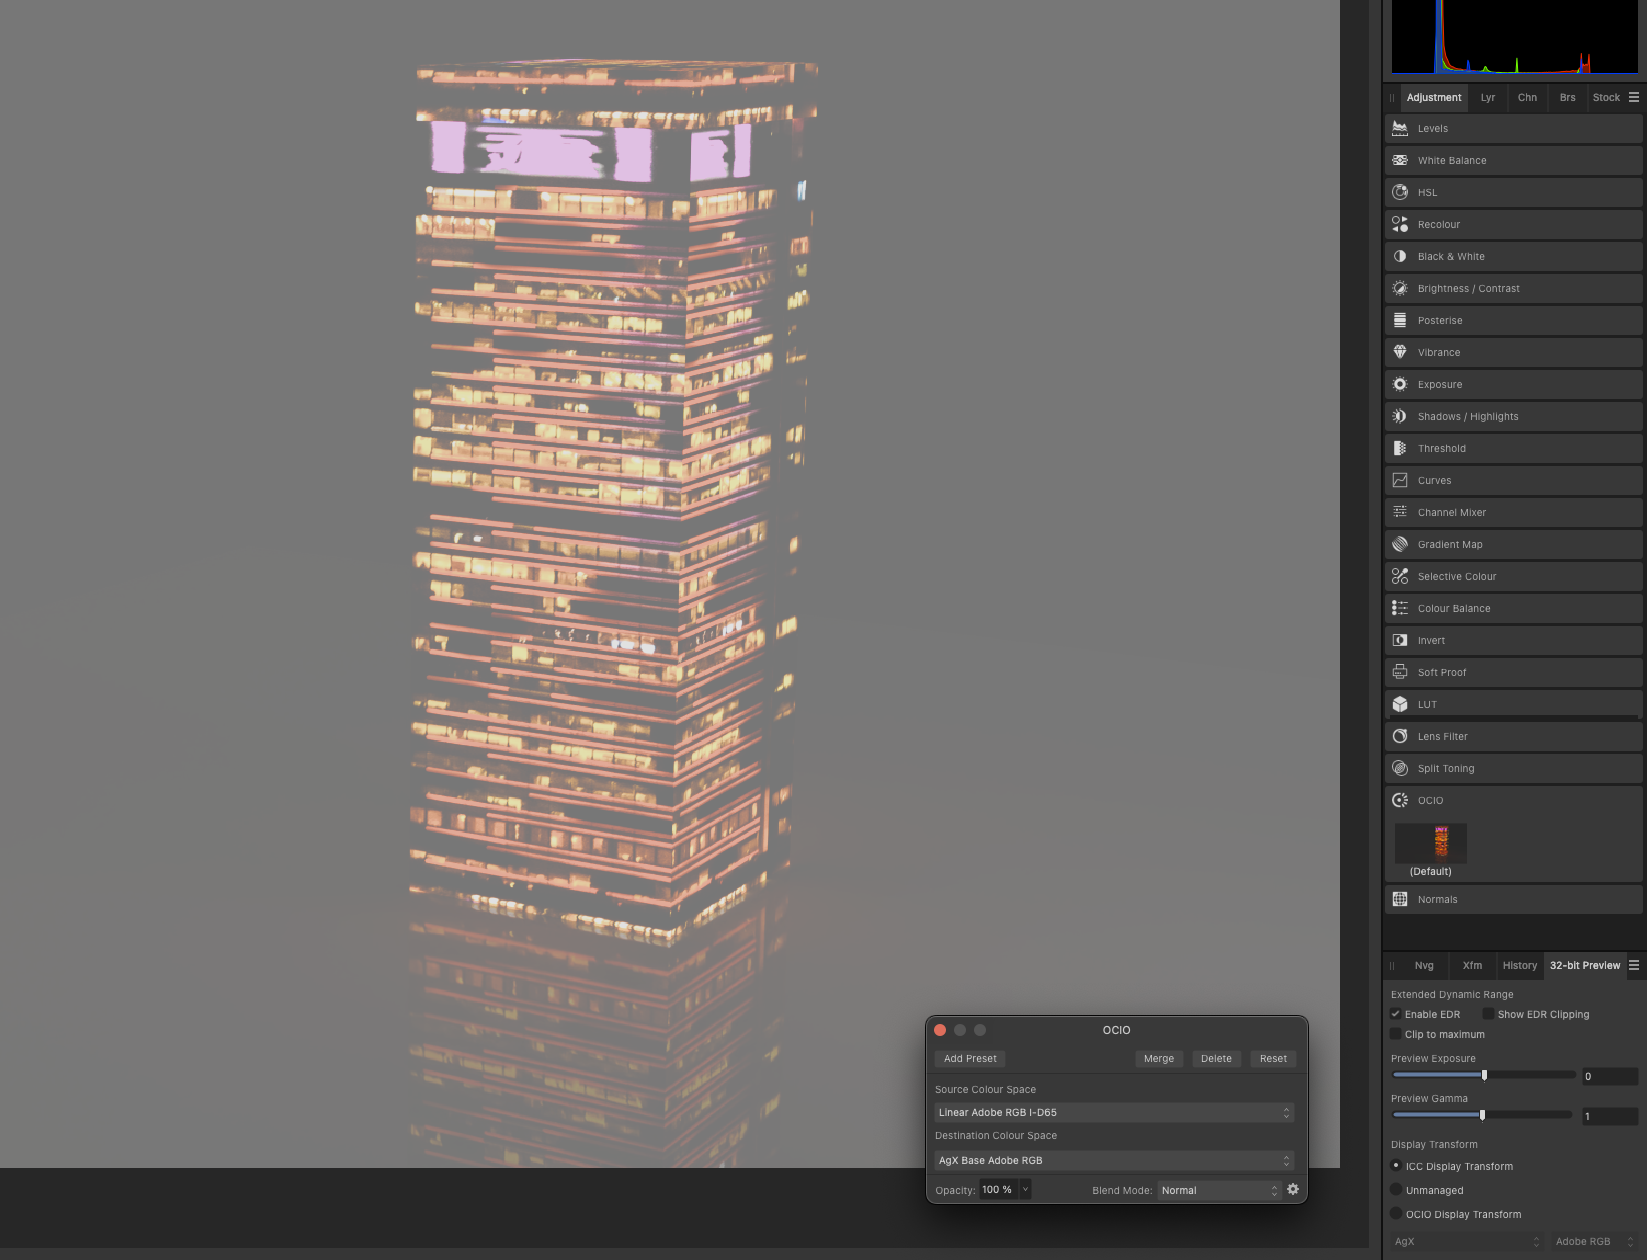
Hi @stger, to expand on this: OCIO display transform is primarily meant to be used for a VFX pipeline where Photo is used to ingest an EXR document, perform some edits in linear space, then export back to EXR using colour space conversion if applicable. Using File>Export for any gamma-encoded format (JPEG, 8-bit or 16-bit TIFF etc) will use the ICC Display Transform result, since this mimics the gamma encoded view you would see in those formats. OCIO display transform employs a non-destructive device and view transform on top of the linear data you're working with, effectively allowing you to preview it in various colour space and device configurations. You can of course move between colour spaces using the OCIO adjustment layer—this is primarily for compositing material together with different source colour spaces. For example, you might bring in a composite layer that's actually in Rec.709 whereas you might be working in ACES. So you would use an OCIO adjustment layer to go from ACES to Rec.709, place that layer above this, then use another OCIO adjustment to go back from Rec.709 to ACES. Finally, the export process would involve going back to EXR so that all the colour values remain linear. To add another layer of complexity, you can control the input and output colour space for EXR by appending the colour space to the file name. For example, if you have an EXR document whose primaries are in linear ACES, you could name it "filename aces.exr", and Photo would convert from ACES to scene linear when importing it. When exporting, you can also convert to an output colour space—so if your export filename was "filename acescg.exr", it would convert the primaries to ACES CG. Of course, none of this is helpful when you simply want to export a colour managed bitmap from Photo 😅 As you've discovered, this approach needs to use ICC Display Transform: the issue here is that you're also battling a non-linear gamma transform that gets applied at presentation stage (and then encoded into the document profile upon export). I do have some free macros here which might be helpful: https://jamesritson.co.uk/resources.html#hdr The Blender Filmic macros allow you to apply the filmic transforms to linear EXR/HDR data without any OCIO dependencies, so you can open your EXR files, apply whichever contrast look you want, then go about your editing and finally use File>Export safe in the knowledge that everything will look consistent. The one thing you may have to be mindful of is that if you have OCIO configured, any EXR you open will switch to OCIO display transform by default, so you'll have to manually switch it to ICC Display Transform. Hope that helps!
-
Hi @Mariusz_F, within the Develop Persona you have the White Balance tool instead which can be found on the tools panel to the left. Here's an online help topic which lists it: https://affinity.help/photo2/English.lproj/pages/Tools/tools_raw.html Hope that helps!
-
Processing JWST images
James Ritson replied to Mike Cuffe's topic in Affinity on Desktop Questions (macOS and Windows)
Hey Mike, sounds like some of the data is 2x2 pixel binned? You should actually be able to select both 1x1 and 2x2 layers (pasted into one document but maintaining their respective resolutions) and use the star alignment method—it's supposed to scale and translate layers where required. Do you have a working example where this is failing? Is star detail rendered differently, e.g. are they bloated in some of the images but not others? If you have to use a manual process, I would probably change one of the layer blend modes to Difference, then scale and rotate until the blending between the layers is almost black (i.e. "no difference"). Another approach is to quickly drop the opacity of one layer down (you can use number keys, e.g. 5 for 50%, 0 for 100%) so you can see both source and destination layers. Hope that helps! -
Make a pdf out of 200 Images
James Ritson replied to Lukas.S's topic in Affinity on Desktop Questions (macOS and Windows)
You could probably use Auto Flow in Publisher: Set up a picture frame on your first page, either use File>Place or drag-drop with the Option/Alt modifier when bringing your images in, then select them all on the Place Images panel and click into the picture frame. It will then produce as many pages as required and auto fill each picture frame with an image. You could set up multiple picture frames on each page if you wanted more of a collage look as well. Finally, just use File>Export and choose PDF as the export format. Hope that helps! -
This is inadvertently having the wrong effect: I believe the way Affinity colour manages on Windows means that the profile is applied during startup, but cannot be changed or refreshed during app use. Therefore what's happening is that you're disabling colour management entirely, launching Affinity with it disabled, then when you activate the ICC profile that change doesn't refresh within Affinity (until you restart). So the reason Affinity now looks the same as your other software is because nothing is being colour managed. In your first post, the screenshot comparison with the slight difference in saturation might be because Affinity is colour managing your image correctly. I had a quick search for ImageGlass and colour management and came up with this: https://github.com/d2phap/ImageGlass/issues/43 There seems to be some confusion there between image colour profiles and display colour profiles. The software author is talking about embedded/referenced image profiles and being able to change them, but the key issue here is managing between the image profile and display profile. This is what the Affinity apps do—they will take colour values from the document or image profile (e.g. sRGB, Adobe RGB) and translate them based on the active display profile so that they display correctly when viewed on the monitor. From reading the above issue on GitHub, it looks like the author implemented the ability to change the image profile, but hasn't implemented the actual translation from image to display profile. Therefore I wouldn't expect ImageGlass to be fully colour managed (only based on that observation above though, please don't just take my word for it). As far as I'm aware, the Windows desktop composition has nothing to do with the document view in the Affinity apps, so you wouldn't have a situation where colour management is inadvertently applied twice. It may be worth doing a quick test with an image that uses a wide colour space. I've attached a TIFF of one of my images that's been edited with a ROMM RGB document profile (I've compressed it in a ZIP to prevent the forum software from mangling it!). If you open this TIFF in Affinity and ImageGlass (plus any other software you use), do you notice a big difference in rendering? Affinity should be taking that ROMM RGB profile and translating the colour values based on the custom display profile you have created. Software that isn't colour managed will simply send those colour values to the screen with no translation. You should notice a big difference between a colour-managed and non-colour-managed result with this example. I'm not really sure about this—I use DisplayCAL on both macOS and Windows and wouldn't consider anything else. It sounds like you should maybe just calibrate and profile with DisplayCAL, use its own calibration loader and then assume what you see in Affinity is correct. You can experiment with other apps as well, but do check that they perform document-to-display (or image-to-display) colour management, and don't just offer an option to override the image profile being used. A useful diagnostic "hack" you can use within Affinity Photo is to go to Document>Assign ICC Profile (not Convert) and assign your display profile to the document—for example, mine might be UP3216Q #1 2022-09-19 11-11 D6500 2.2 F-S 1xCurve+MTX. This will effectively bypass colour management and show you what the image would look like if its colour values weren't being translated. If your document is only in sRGB, you might notice a very minimal change, if anything at all—you might see a small shift in saturation like with your first landscape image example. If it's in a wider space such as Adobe RGB or ROMM RGB, however, you should see a more noticeable difference. And on that note, a general rule to observe: always use device or standardised profiles for your document (sRGB, Adobe RGB etc), never display profiles. Display profiles should only be used by the OS and software to colour manage between the image/document and display. Hope the above helps in some way! JR ROMM RGB_6030007 8-bit.tiff.zip