PLShutterbug
-
Posts
76 -
Joined
-
Last visited
Everything posted by PLShutterbug
-
Closing the loop ... I did try Lagarto's technique. Unfortunately there wasn't as much space as I hoped at the top of the image, and there was none available at the bottom. I only had a tiny area to select, and needed to stretch that selection about 3x to fill in to 5x7. The good thing is this is a portrait session of my family and it's convenient to reshoot. And it's a nice weekend. Thanks for the suggestions.
-
I see I didn’t say that is not possible. It is a family portrait and if I crop like that I’ll chop off some ears. It’s my daughter’s family and the intended recipient isn’t picky so what I want to do is plausible for this image. The 4x5 aspect is from bottom to top of the uncropped frame. It is not possible to crop further unless I crop into the subjects.
-
This is promising. I will look into it this evening.
-
You really want to know the percentage of the area below and above that needs to be stretched to get to 5x7 format from 4x5. The image itself is 46MP and I only need to crop the right and left sides to turn it vertical. I need to add maybe 10% to the top and bottom.
-
I have a great photo that is horizontal. I need it 5x7 vertical. I can crop it to fit 4x5 vertical. There is grounded below and tree branches above ... is there a feature I can use to stretch just the top and bottom to make it fit 5x7? It doesn’t have to be perfect, just “plausible.” Thanks.
-
I have a great photo that is horizontal. I need it 5x7 vertical. I can crop it to fit 4x5 vertical. There is grounded below and tree branches above ... is there a feature I can use to stretch just the top and bottom to make it fit 5x7? It doesn’t have to be perfect, just “plausible.” I did read this thread: Is that what I’m looking for? Thanks.
-
Freeze on Burn tool, Hardness selection
PLShutterbug replied to PLShutterbug's topic in V1 Bugs found on Windows
I haven’t reproduced it, no. I had been using the application for quite awhile when it happened ... I did discover that simply clicking the toolbar next to the slider closes the slider. -
My suggestion for wording: 'Our current policy for so-called "dot-release" updates, i.e.: for any 1.x to 1.y update, is that there is no charge for these updates for purchasers of the underlying major version. 'New-purchase and upgrade pricing for major version upgrades, i.e. from version 1.x to version 2.x, will be announced at the time of each major version's introduction. 'Serif reserves the right to change their pricing policies, including whether or not to charge either for dot-release or major-version upgrades, at any time.' This wording is clear and unambiguous. The fact that Serif hasn't introduced a 2.x product yet doesn't prevent you from creating and publishing a policy today about pricing. I think everyone realizes that companies review pricing frequently and occasionally change those policies. Adobe is a pertinent case in point.
-
Turns out the other image shot at the same focal length is too overexposed as well, so is not as clear. I tried various ways to get better clarity but by the time the moon gets down to actual size it is only about 100 pixels wide - not wide enough to provide much detail.
-
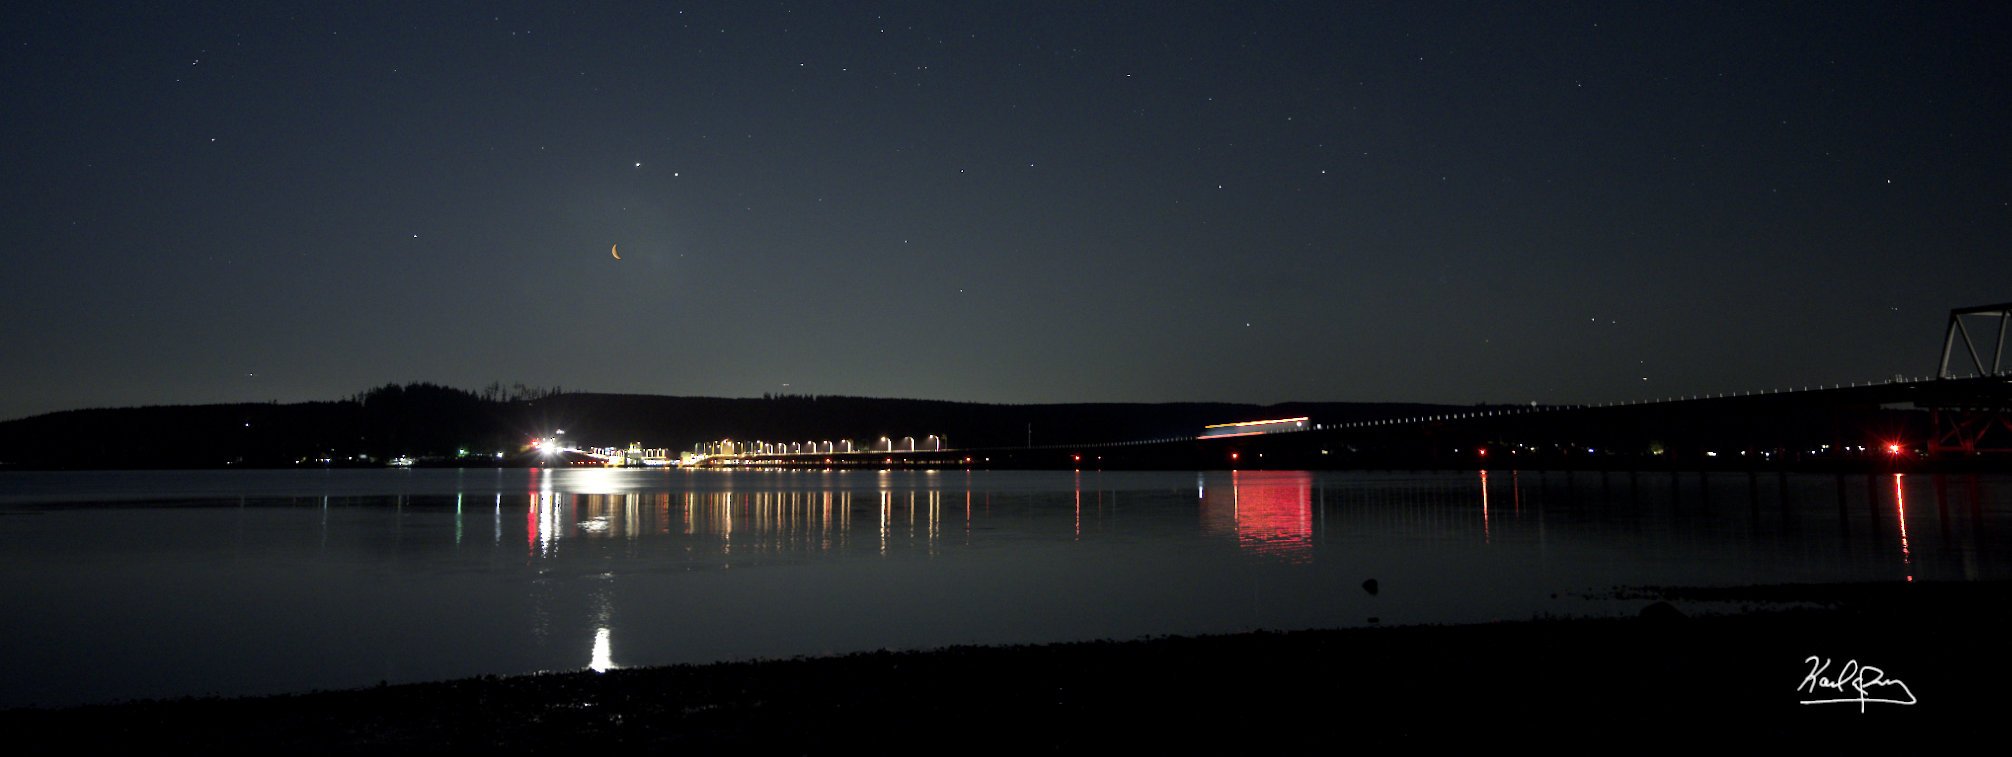
Anon2, Thank you. Your suggestions were spot on. It took me a bit to figure out how to make the healing brush trick work, so for those in future here it is: Create a new pixel layer. This is key: for Aligned Sources, set Current Layer & Below. I see you did this now, as I write this, but since your Apple version is slightly different than my Windows version I missed it before. Select the desired source area, and paint the fix. That worked very well, leaving no halo area. Since you taught me to do it on a new layer it is also non-destructive and easy to try again the several times I borked the fix. The blend mode trick was fantastic. So Much Easier! Brilliant! John, I also learned about more about selective sharpening here. Applying sharpening to the entire image including the moon simply added too many artifacts, so I moved my Unsharp Mask layer below the moon layer and got the sharpening I wanted on the scene without the moon. Then I created a second Unsharp Mask layer as a child layer of the moon and was able to add back in some detail. The moon is so small in this image - only about 100 pixels or so - that there just wasn't much information to do anything with it. I'm attaching a .jpg of my final image so you can see what your help created. Thanks again, all.

-
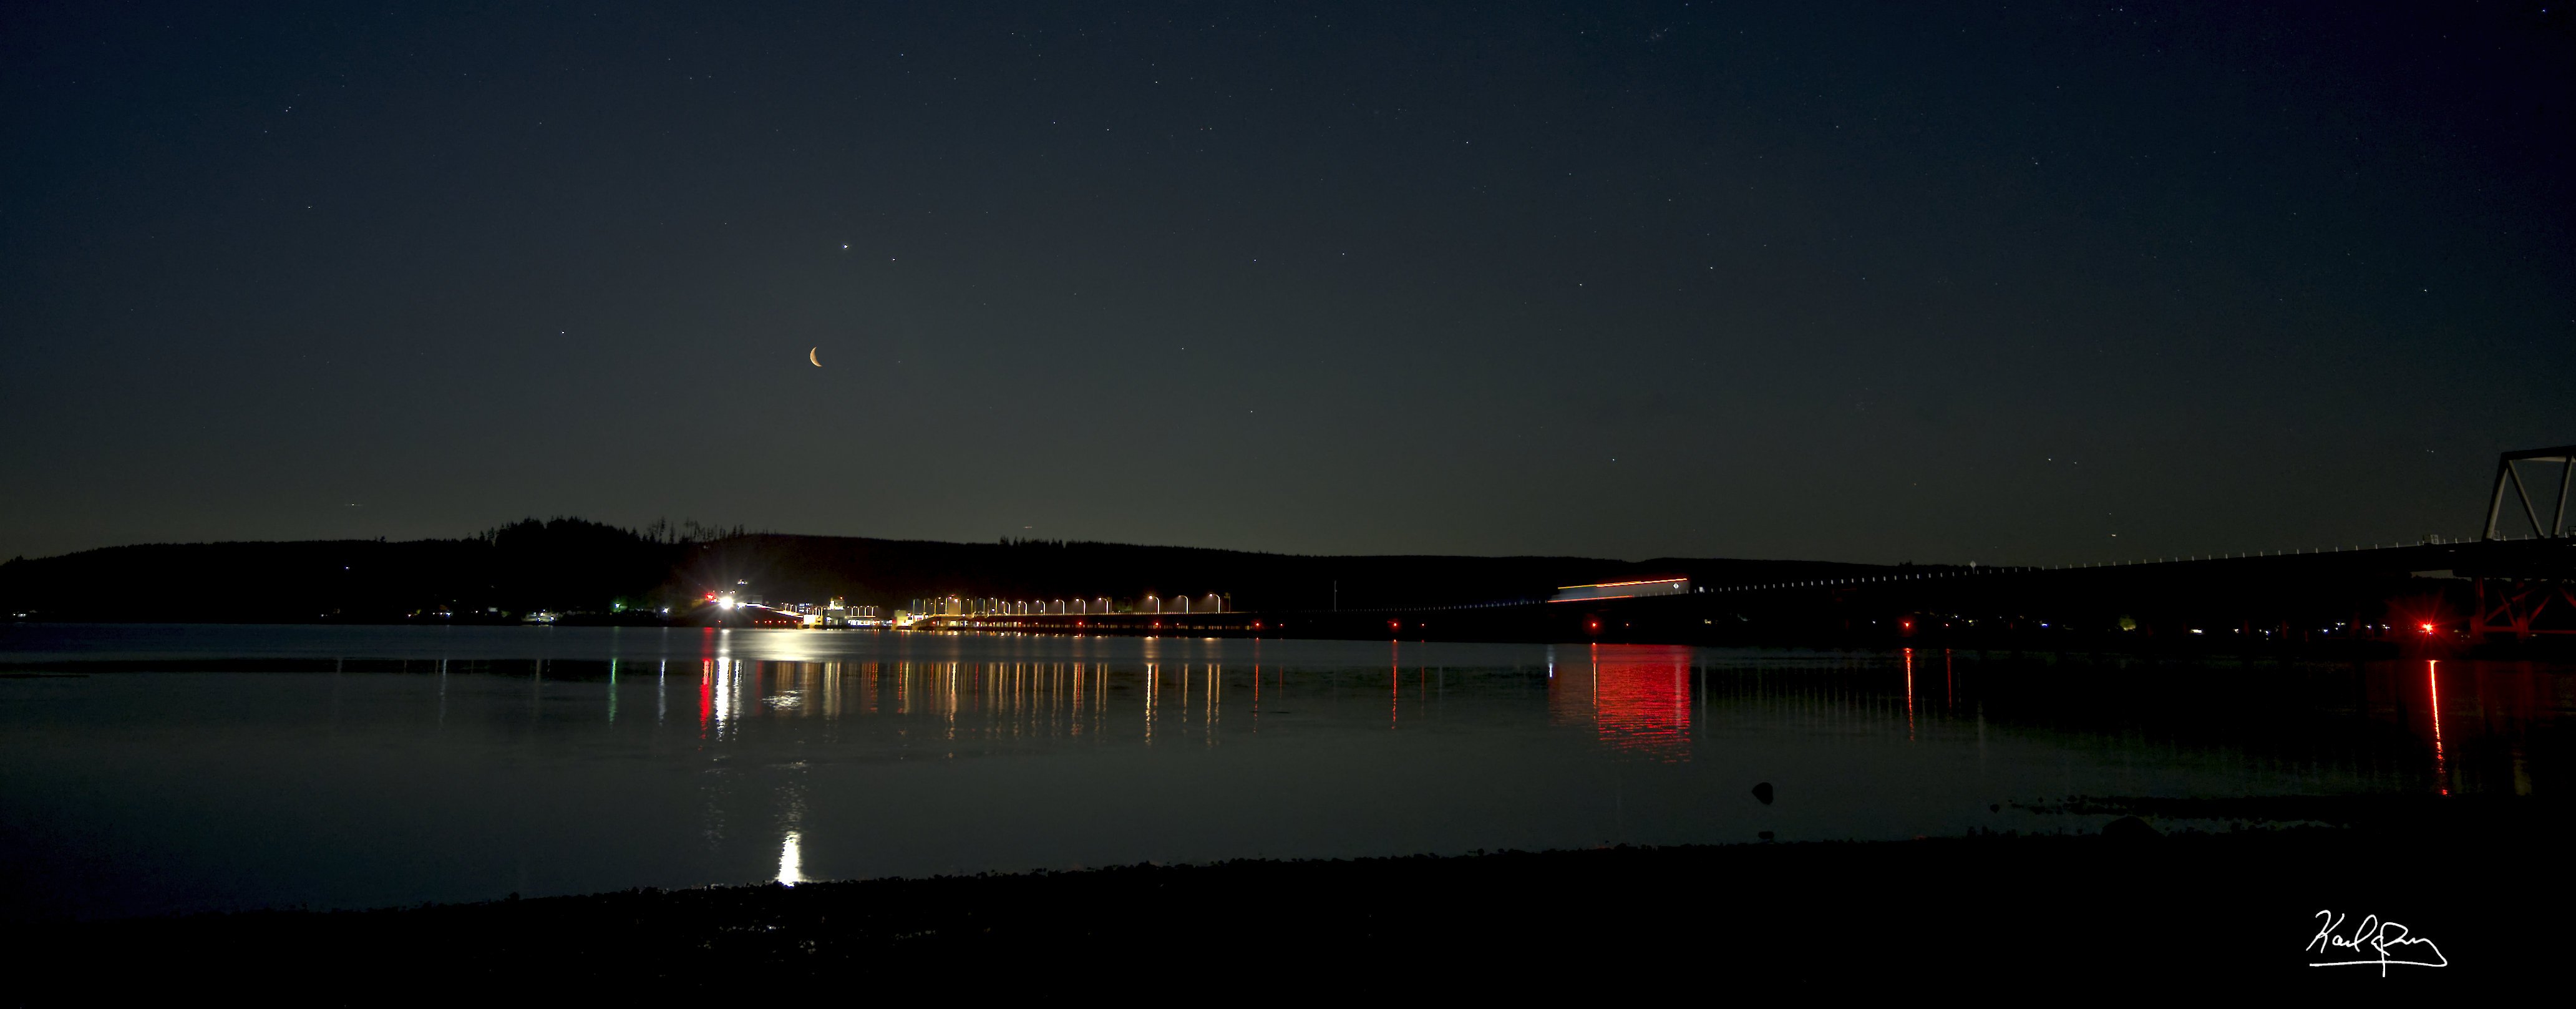
Hi John, thanks for your help on previous questions. It was taken at the same time, but with a longer lens. The panorama shot was taken with a 24mm lens and the moon was with a 200mm - I wanted to get better clarity with at least a hint of the craters etc. on the moon. I cropped everything except the moon itself from the 200mm image. As a result, the moon image pixel dimensions were smaller than the wider image but the moon took more pixels. I had to reduce size on the moon image when I Placed it, and I don't think it would work to use HDR merge in this situation - correct? Here is the full panorama of my best effort on this so far. As you can see, the sky area around the moon is still not quite right - the halo I mentioned in my original post is visible, at least to my eye. I do have another image shot of the moon at the same focal length but the moon in it is not as clear.
-
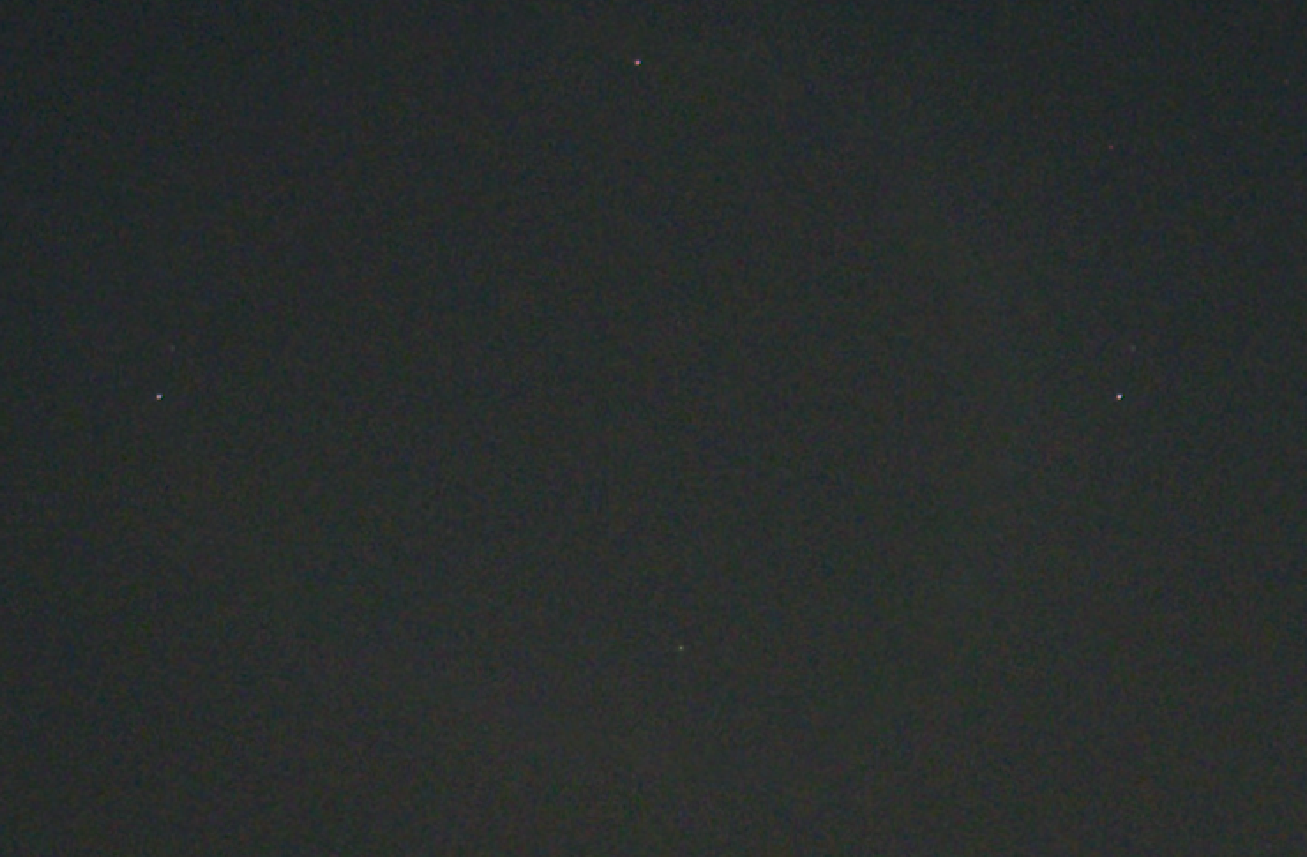
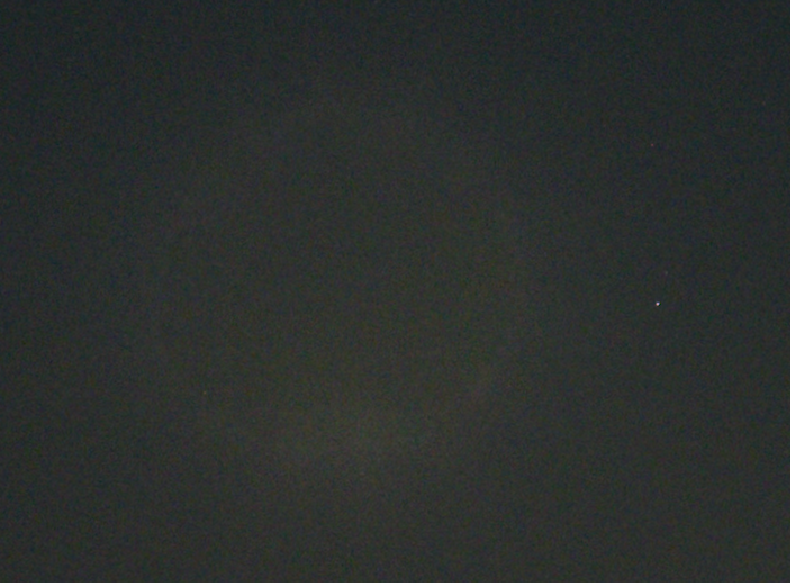
Didn't realize that PNGs would display inline. Ignore the one with several extra stars (the larger one). Note the slight "halo" effect in the smaller PNG with just one star visible at right - this is what I want to get rid of as my issue #1. Thanks.
-
I'm looking for the "best" way to combine two images where an element in one image is dramatically overexposed and the other image has a correctly exposed version of that same element. Here its the moon against a background of stars and planets, where one image is long enough to get star/planet exposure and the other correctly exposes the moon itself. Attached are five images: One is a conjunction of Saturn, Jupiter, Mars, and the moon earlier this week. This was a 2-second exposure to capture the planets and a few stars, but the moon is badly overexposed (as I expected). Second is a cropped moon that was correctly exposed. My .afphoto file after I completed edits to the best of my ability using the steps described below. The selection I made in step 7 to get rid of the moon. The result of step 7. I want to remove the over-exposed moon and replace it with the correctly-exposed moon. What is the best way to do this? The solution I've landed on so far is: Open Overexposed. Place Correct. Move Correct to be the top layer. Resize Correct to match the size of Overexposed. Move Correct to the exact position of the moon in Overexposed, then hide its layer. Select the Overexposed (Affinity has this as the Background layer) layer. Use the Inpainting tool to get rid of the overexposed moon and smooth the sky as much as possible. I set Hardness to 25%, and leave Opacity and Flow at 100%. I set the brush diameter to roughly twice the moon's diameter and painted an ovoid shape. The result left some extra stars; I decreased the brush diameter to just larger than those stars (only 20 pixels) and made them go away too. Select the Correct layer, un-hide it, add a mask to it, invert it, then set its color to white. Zoom way in, find the moon, set the brush diameter to less than the moon's size and then expose the moon. I initially set hardness to about 37% and flow to 100%. I've discovered that opacity needs to be 100%. Repeatedly set color to black or white, reset brush settings and refine until only the moon is exposed but I don't end up with any black-sky artifacts just surrounding the moon. The two issues I've seen, and for which I'm looking for help, are: In step 7, I can't seem to get back to a nice smooth sky once I get rid of the overexposed moon and halo. It's close, but there are obvious noise artifacts and I can't quite get the sky perfected. Is there some magic to this or is what I'm doing the best way, and I just have to be more patient and keep at it? It seems the more I work on smoothing, the worse the noise gets - how do I correct this? Since what I posted is a crop of a much larger image perhaps the lack of continuity between the removed moon area and the rest of the sky is less noticeable here, but in the full-size image it is very noticeable. In steps 9-10, it is really tedious. Is there a better (simpler, faster) way to do this? I think I finally got there but it took forever. Or is there just an entirely different workflow that will get me where I want to be in a more efficient manner? Thanks for any ideas. Cropped,_correctly_exposed_moon.TIF Overexposed_moon.tiff Saturn,_Jupiter,_Mars,_Moon_conjunction_composite.afphoto
-
Using the latest build of Photo (1.8.2) just updated earlier this week, on Windows 10/64 build 18362.720. I selected Burn tool, then opened the Hardness slider from the toolbar and moved it to 6%, then clicked on the filename area of the image I was editing to attempt to close the slider. Photo stopped responding. I was editing a two-image stack (I didn't use New Stack, but opened the first file, then Placed the second). Lower file in the stack, assigned by Photo as the Background, is a Nikon Z7 (firmware v3.00) NEF image. Second is a 16-bit non-compressed TIF created from a second NEF image from the same camera. I have a mask on the upper file, inverted, and I'm exposing a small area of this image to the background file below (using techniques from James's video on masking). I opened Task Manager and saw that Photo was taking about 3.2GB RAM (my PC has 16GB) and CPU utilization was around 10%. This was 10 hours ago. It was late evening so I left the machine as it was and went to bed. Now Photo still appears frozen. Task Manager now shows Photo taking 2.401GB RAM and CPU utilization is at 1%. Since starting this post I notice that memory taken by Affinity continues to drop - 10 minutes after starting the post, it has dropped to 2.319GB. I do not see "Not responding" as I typically do with frozen apps, so perhaps Affinity is just slowly clearing memory? I clicked the filename area to attempt to close the slider because I've noticed that if I click in my image to close the slider I end up with the effect applied at the place where I clicked - which is never where I want it. Last night I also first attempted to press Enter to close the slider but nothing happened. As a side question: how can I close a slider without applying the effect where I click? Prior to the "freeze" I had used the Inpainting tool to get rid of the overexposed moon in the background image, then the other tools in that set to smooth the sky around to blend it with the background sky. I was attempting to use the burn tool to further blend the sky after replacing that overexposed moon image with the better-exposed moon image from the upper file in the stack. My machine: Dell XPS 8930, Intel i7-8700 NVIDIA GeForce GTX 1050 Ti video card driving a ViewSonic VP3268-4K display via HDMI 16GB RAM 512GB SSD with 239GB free space. The file I'm editing is on this drive. Let me know what else you need to diagnose this issue, if anything. I can upload the original images if you have a private area for this.
-
Carl, that is exactly what I'm experiencing. My complaint is that the effect of this is that if a user changes the selection boundaries or refines it in any other way, now they are looking at a selection that has no bearing on the adjustments made with the layer. Either users should be prevented from changing the selection on which a layer is based, or the layer should respect any changes made and make the effect apply to the current selection boundary/refinements, not merely the original. To do anything else invites confusion, as I've experienced (and I'm sure others have as well). It reduces the usefulness of the product. I will create a post in the "suggested features" section of the forums.
-
Firstdefence, that will help as I create the selection. However the problem I am describing occurs AFTER selection is complete, and after I have created a layer based on that selection. If I apply an effect on the layer (ie, change highlights) and then change the selection, any further changes to the effects (For example I change the strength of that highlight from 150% to 100%) affect the original selected area, not the new one only.
-
I think I may have found a bug. I figured out how to get my file size down and created the small (relatively) file here. Here is what I did: Applied initial corrections in Develop persona including cropping the image. Selected the water area, including fine-tuning the selection to exclude any beach - but I forgot one area (see 5 below). Selected Layer, New Adjustment Layer, Shadows/Highlights to create a layer from my selection. Moved the Highlights slider all the way to the right (200%). Noticed that a small area near the upper right still included some beach, so again fine-tuned and used Alt-Drag to exclude that small area of beach. Changes to the Highlights slider still changes the original selection area, not the modified area. I expected that when I changed the selection on which the layer is based that Affinity would now respect the new selection area for that layer, not continue to use a selection that no longer exists. Attaching the file I used. Is this intended behavior? I note that by creating yet another new Shadows/Highlights layer from the changed selection, changes this this new area now affect only the updated selection area - apparently because that is the selection on which this new layer is based. So: I created a selection, then a layer based on that selection. I changed the layer, then changed the selection. Expected result: the layer effect is now limited to the new selection boundaries, whether those new boundaries are smaller or larger than before. Actual result: changes to the layer continue to respect the old selection boundaries, even though those boundaries no longer exist and I can no longer manipulate them. Even if this intended behavior, I submit that it is irrational and should be changed. If I see a selection for a layer, I expect that layer to work on what I see now, not some selection that may have existed earlier. The_Journey_cropped.afphoto
-
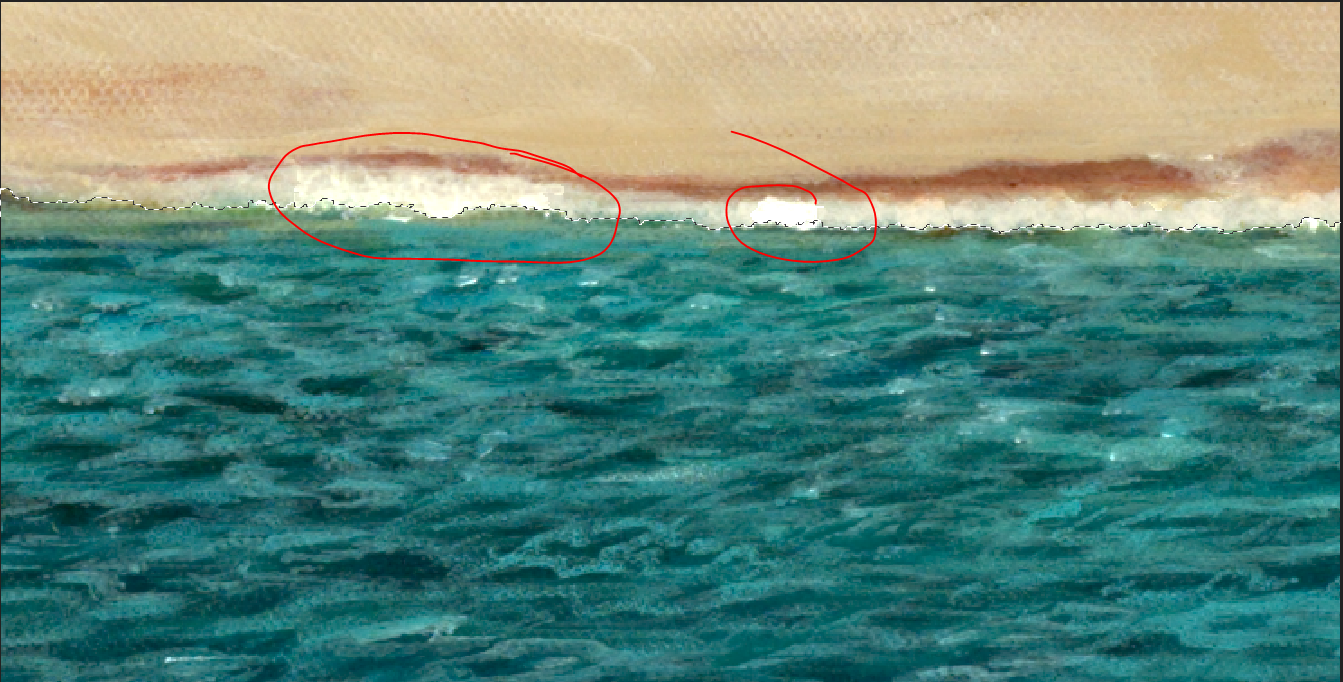
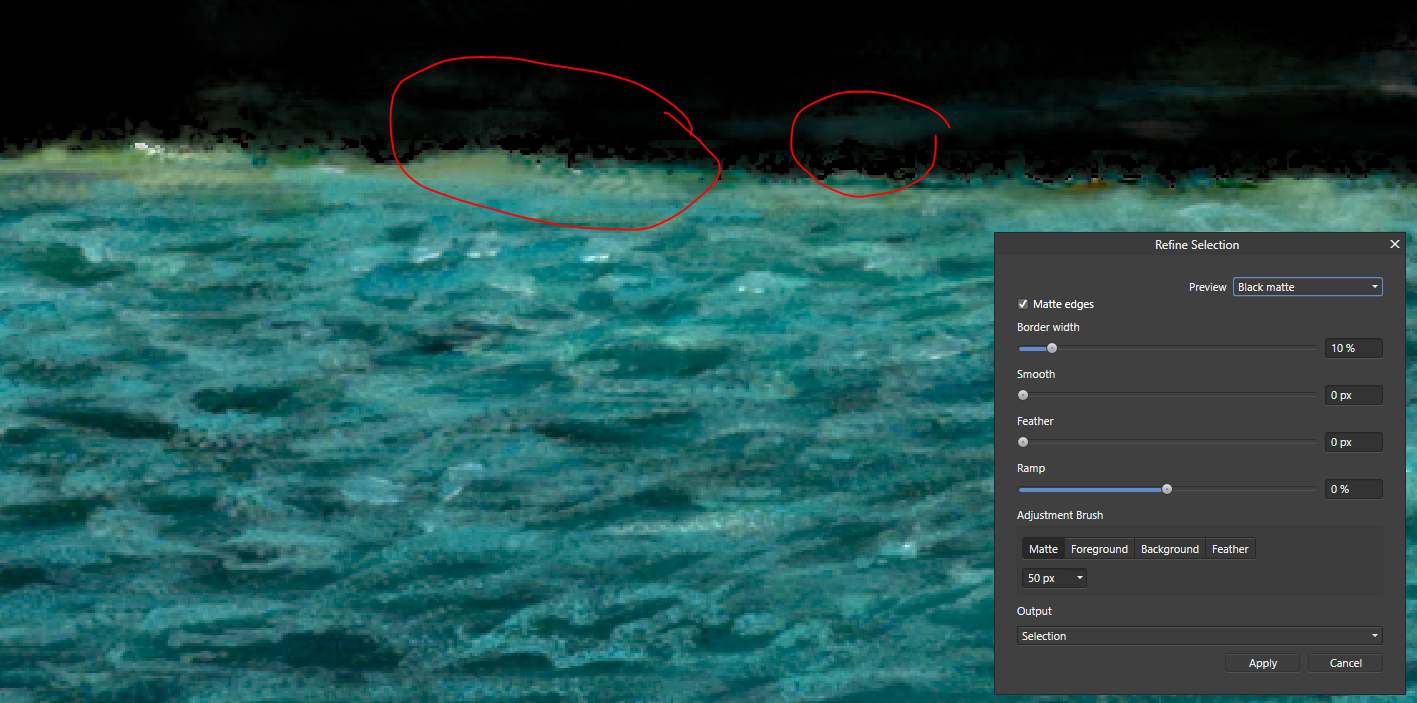
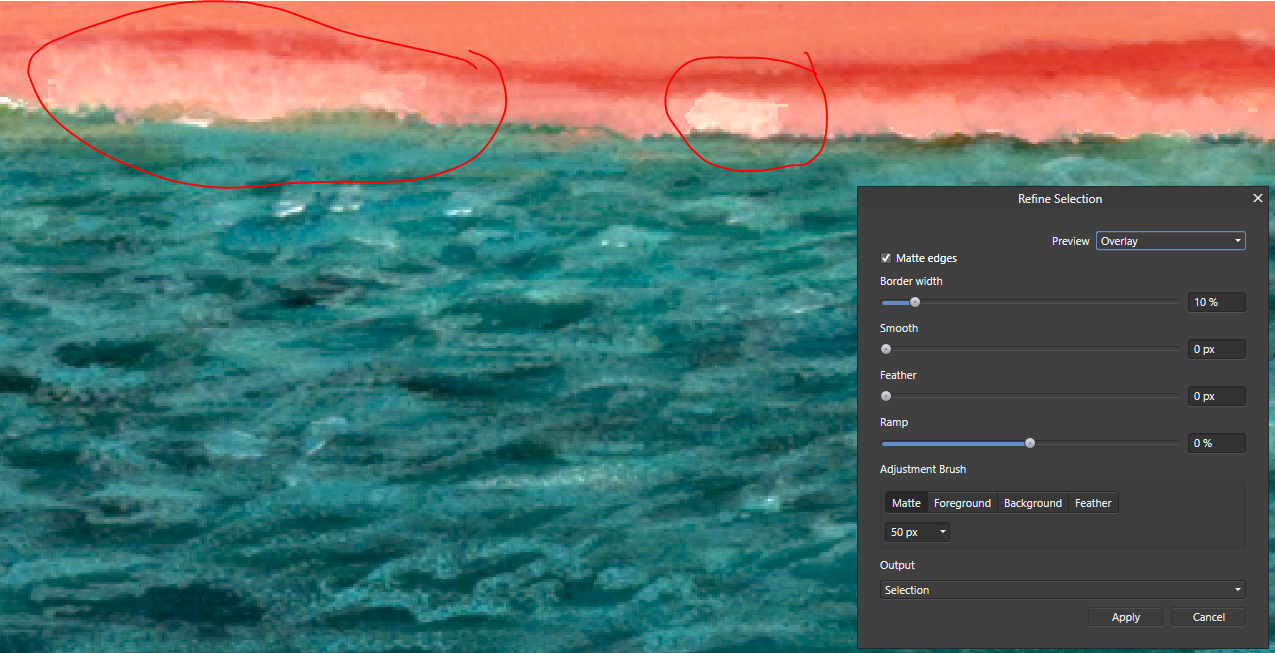
Have I found a bug in Photo? Or is it (more probably) a problem with what I'm doing? I tried cropping my 560MB file so I could include a real .afphoto file you can manipulate, but apparently that's not possible (even with "Rasterize & Trim"). So all I have are screenshots. This is an area of surf against a beach. I need to modify the surf without changing the beach, so I drew a selection on only the surf. Then I created a new Shadows/Highlights adjustment layer. When I increased the highlights I noticed that certain places near the edges of my selection were being affected as well - see the peanut-shaped white area and the light-tan area to their left. Here is the same area, magnified a bit more, in selection refinement mode with the black matte option. Looks to me like they are not part of the selection. yet when I change the shadows/highlights slider, those areas definitely change. Here is another look, using Overlay preview: I've watched the Refining Selections video and thought I was following James' advice, but nothing I do ends up with those areas outside the effect of my adjustment slider. What am I doing wrong?
-
This did it for me, FirstDefence! Since my .afphoto file already had a masked area for the water, performing that action on the masked layer created a new layer that restricted the highlight action just to the water so no need to touch up the beach or outrigger wood. Thanks.
-
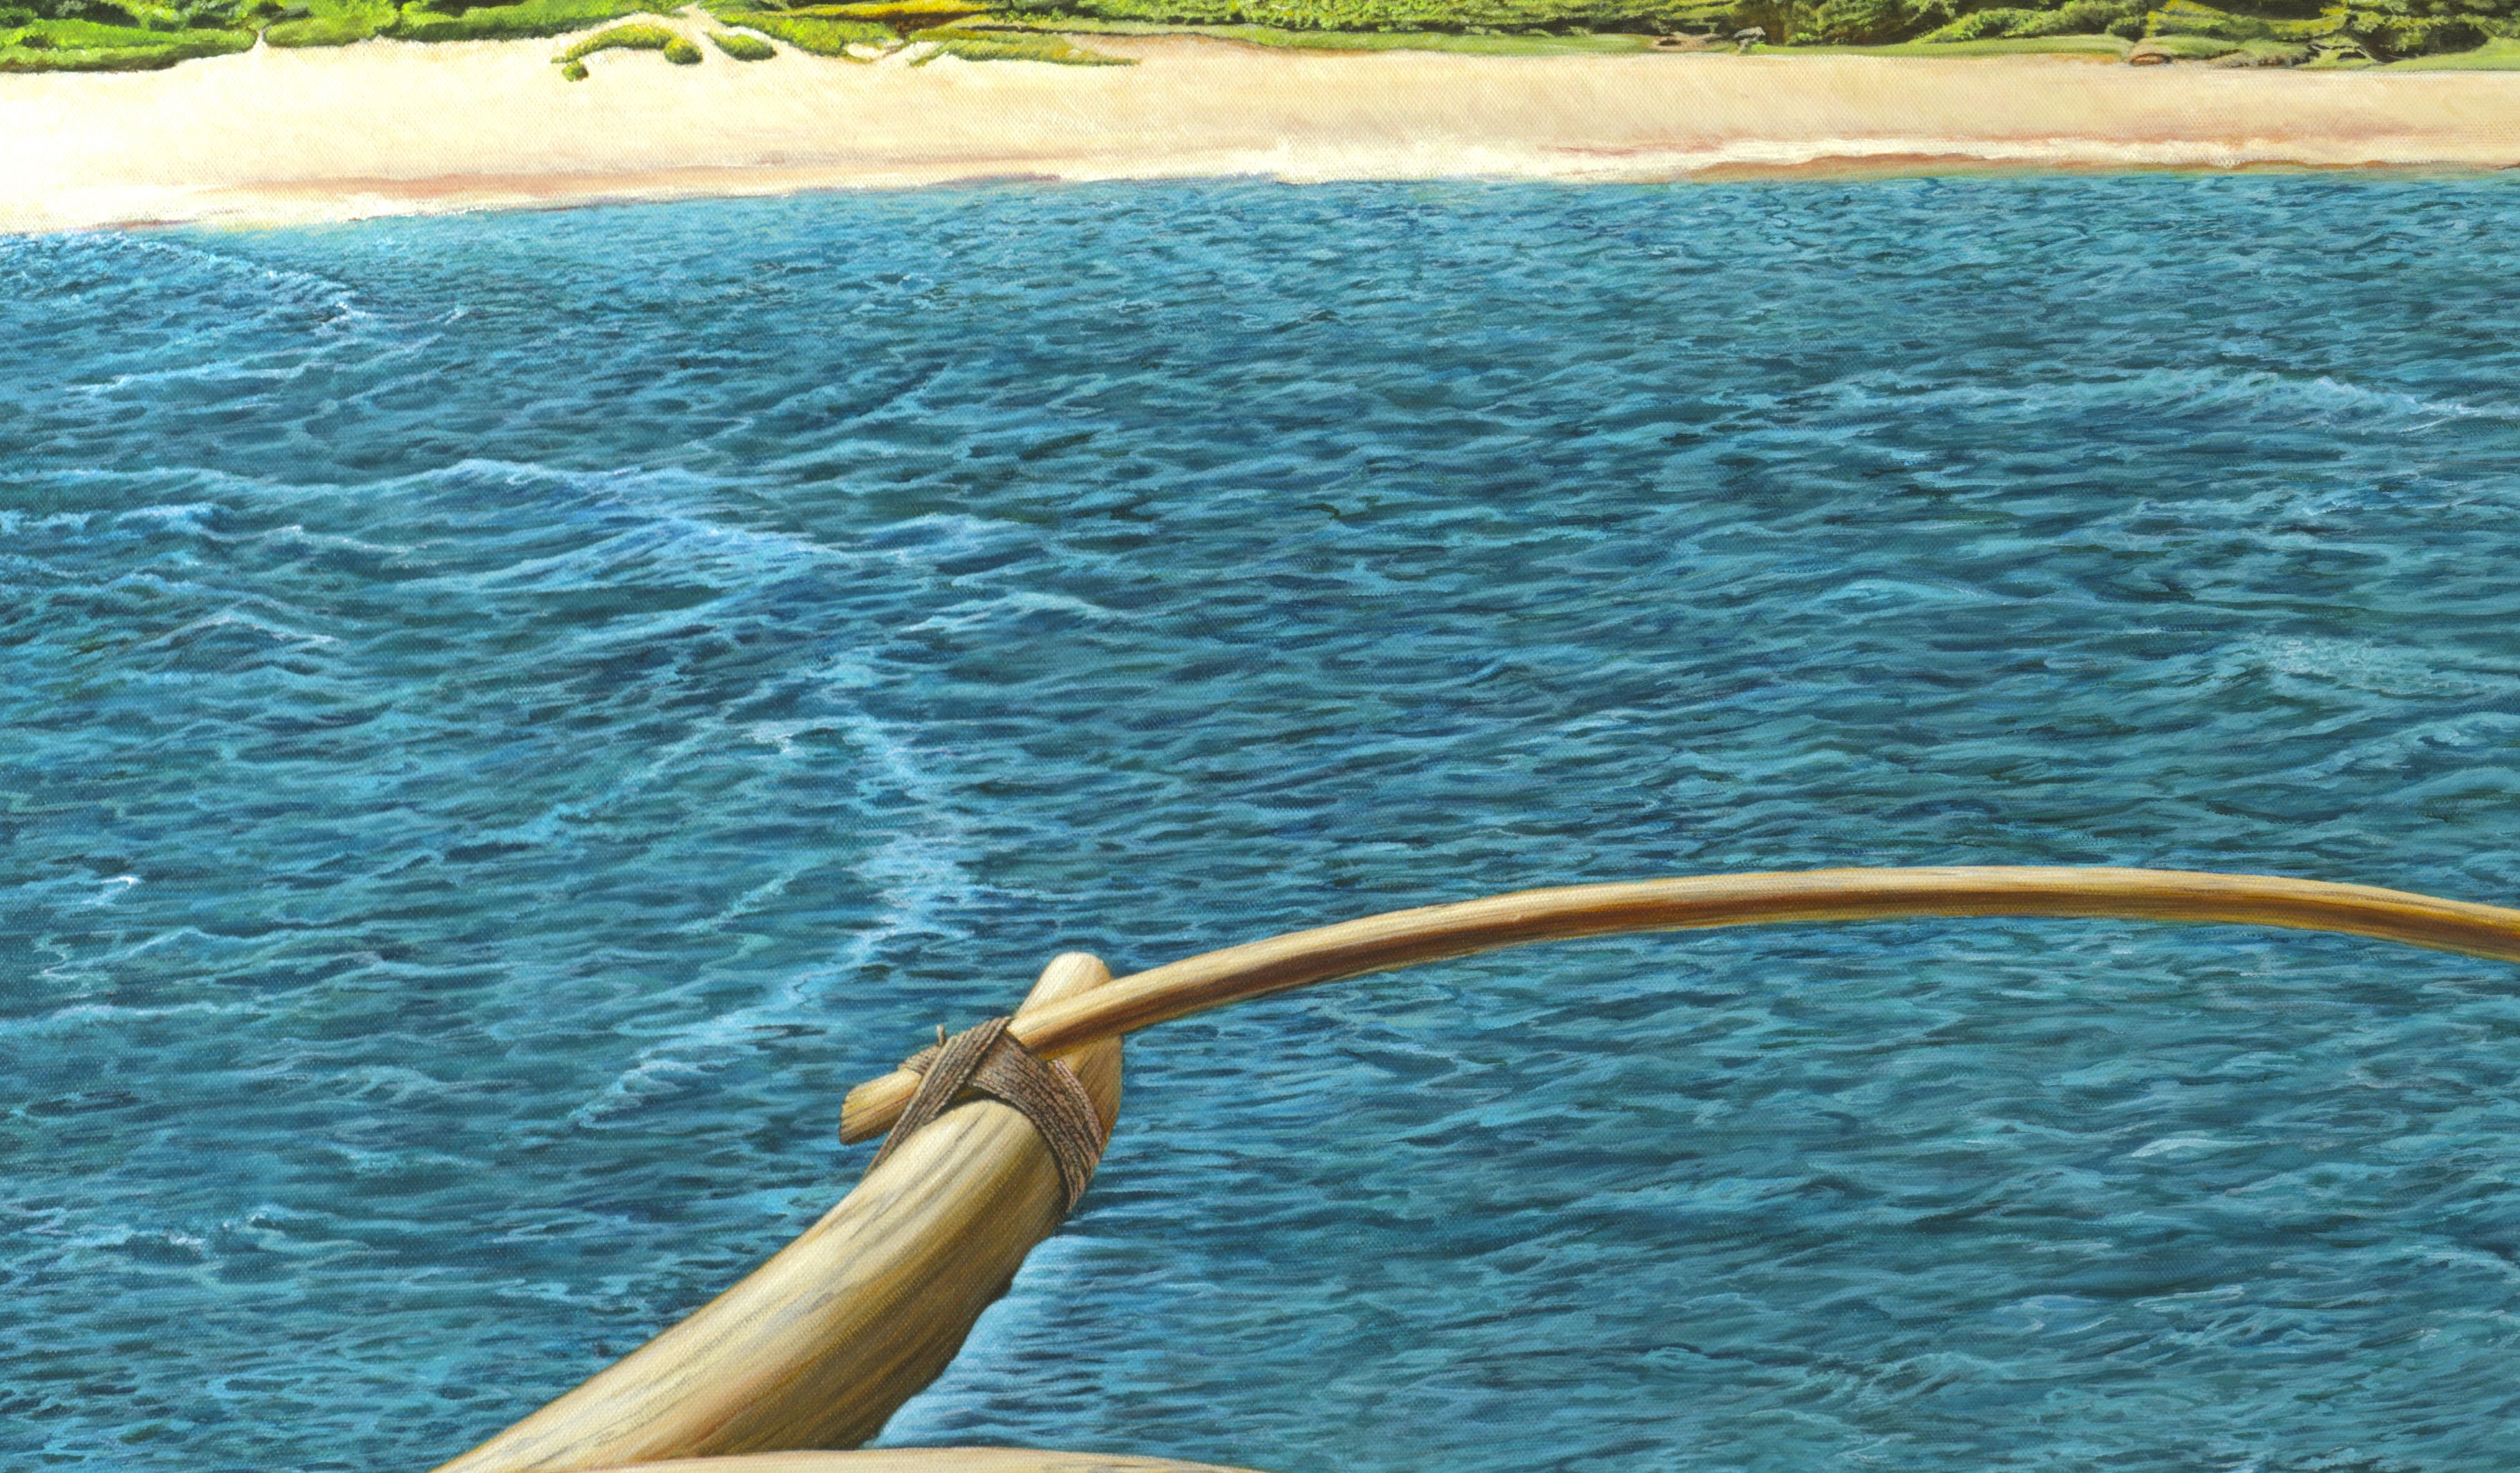
Hi, I'm trying to lighten wave tops in a painting I'm touching up. I cannot remember from earlier videos how to do this, and I can't find it in the current video series. In the attached photo, you see some wave tops just 'above' the outrigger that go diagonally up and left toward the top of the painting. In the original these wave tops "pop" a lot more than in this reproduction, so I need to duplicate that. Can anyone help my memory? I have the Nikon .NEF raw so will be starting from there ... Thanks.
-
I will try it. I wish there were explanations for each of the choices.
-
Walt, I predict that you won't like this response. However I ask that you read it not from the perspective of a longtime Affinity user used to its vagaries but from the perspective of a long-time Windows application user used to certain conventions being honored by different software used. But first, please don't confuse the word "ratio," which is a proportion of length to width, with "ration," which is a portion size typically less than a full measure. We are talking about ratios here, not rations. Second, you are missing the point. Photo (and presumably other Serif products) works inconsistently. Sometimes when I change the size of something without using Shift as I do so, Photo distorts the aspect ratio compared with its original ratio; sometimes it doesn't. No other application I have ever used has behaved this way; on the contrary, the seemingly universal convention is: If you want to maintain the aspect ratio of whatever you are resizing, you must press and hold the Shift key while changing its size. If you want the aspect ratio to change while you are resizing, don't press and hold Shift. So right out of the gate, Serif is going against decades of convention. Your arguments about rectangles and circles likewise don't hold either. I know that a square is a rectangle with four equal side lengths, and I know that if I change the width of a rectangle without changing its height it remains a rectangle. I also know that a circle is simply an ellipse with a constant radius. However, if I start with a bitmap image or a rectangle or a square rectangle or an ellipse or a circular ellipse - or a hexagon or a star or a curve or an irregular curve or a pointmap or ... basically any other graphic element - of a given aspect ratio, and I want to change its size, I could not possibly care less whether someone has arbitrarily said that any of these things have a "natural aspect ratio." Either I want to maintain the original aspect ratio or I don't, and the application I use should work with ANY of these objects in a consistent manner, and (in my opinion) it really should follow the age-old convention that if I want to maintain that aspect ratio, use Shift; if not, then don't. Let's bring in the snark factor a bit here and let me ask: has Serif published a list of those elements it defines as having a "natural aspect ratio" so I can know, when I begin to resize something, whether I must use Shift or not to maintain that ratio? In a quick look through their latest help guide (for 1.7.1.404), a search for the term "natural aspect ratio" brings up a single article: "isometric and axonometric grids." Searching on "resize" brings up a number of topics, including "Changing Image Size" but this topic does not cover "natural aspect ratios" nor does it mention the use of Shift or not. Right now, if I want to resize something I don't know whether or not I must use the Shift key to maintain its ratio or not, and the application does not always provide help. Further, I've noticed that for some operations, resizing the same element seems sometimes to require Shift to maintain its aspect ratio but sometimes it doesn't. This is frustrating to me and I'm sure it is frustrating to others as well. I realize also that Serif was closed in the UK when I wrote my comment on Friday, so they have not had a chance to respond. The two responses so far seem to have come from users, not Serif employees, so I will wait for Serif to respond so I can have a definitive answer.
-
Alfred: "... objects with a natural aspect ratio to maintain it ..." I'm also very confused by when I must use Shift vs. not, and your explanation makes no sense to me. Don't know if you work for Serif or not ... Every graphic element has a "natural aspect ratio" regardless of whether it is vector, bitmap, or ... whatever. A vector image that is 1.234783483:1 has that aspect ratio. A bitmap image that is 1024x768 has that aspect ratio. A circle is 1:1. A rectangle whose length is twice its height is 2:1. These are all "natural aspect ratios." Resizing any of them without changing their aspect ratio means that you don't change the ratio as you change the size - regardless of the specific mechanism a tool such as Photo requires to do it. Click to maintain; Shift-click to maintain - either maintains the aspect ratio the image was originally saved with. Why does Photo require no Shift- sometimes, and require a Shift- sometimes? This is inconsistent. Every PC-based graphic editor I have ever used - and I've been using computers for about 36 years - has used the standard that not clicking Shift allows the aspect ratio to change while resizing, and clicking Shift restricts a resize operation to maintain the aspect. Why did Serif break this long-standing tradition? Additionally, what pressure can we in the user community bring to bear to convince you that your current way is wrong and that you should change it to match the standard?
-
OK. I looked again at the HDR tutorials and see what I was missing. When I click the tool at the left edge (i.e.: the overlay brush) I am creating a new Overlay Brush overlay. Then I can do stuff with that, and when I move back to the tone map tab anything I do only affects that overlay. If I then click back in the Master overlay I'm now looking at and manipulating the whole image. More experimenting to do, but I'm on the right track now.
-
Firstdefence, I don't understand how this is supposed to help. I don't see any "try this" in what you say. Here is the HDR image as first displayed in the Tone Mapping persona: Note the sun is completely blown out. Now I select Overlay Paint, set my brush width to about 200 pixels and paint around the sun. Here is what the screen looks like now: Note that the sun now is no longer totally blown, and I can see the star pattern that my furthest-underexposed image shows. Fantastic! But. How do I apply this adjustment? There is no "Press Enter to complete Overlay Paint", or any other way to make the red go away and leave that beautiful sun as I want it. At least not that I can see. The only "make it happen" action I can see on the screen is to click Apply. So I did. The result was the original HDR image, with the blown sun, but now I'm in the Edit persona. How do I make that Overlay Paint adjustment "stick" while I'm still in the Tone Mapping persona? There must be something I'm missing ... Serif cannot have added the capability to start an effect but no way to complete it. I looked at your later suggestion to use the gradient rather than overlay paint, but the same problem exists: there is no way I can see to complete the effect. What am I overlooking? Thanks.