

MICTIP
-
Posts
6 -
Joined
-
Last visited
Posts posted by MICTIP
-
-
I am using the most current 1.6 version and did as instructed but when I did a paste it pasted the whole image instead of just the piece that I selected. How do I make only the piece 'active' and not the whole cover? It still had the piece I copied highlighted (or the piece had the little broken line around it). I do notice tho that when I select the spine portion of my picture it doesn't give me the broken lines at the top and at the bottom of the selected portion; why would that be so?
-
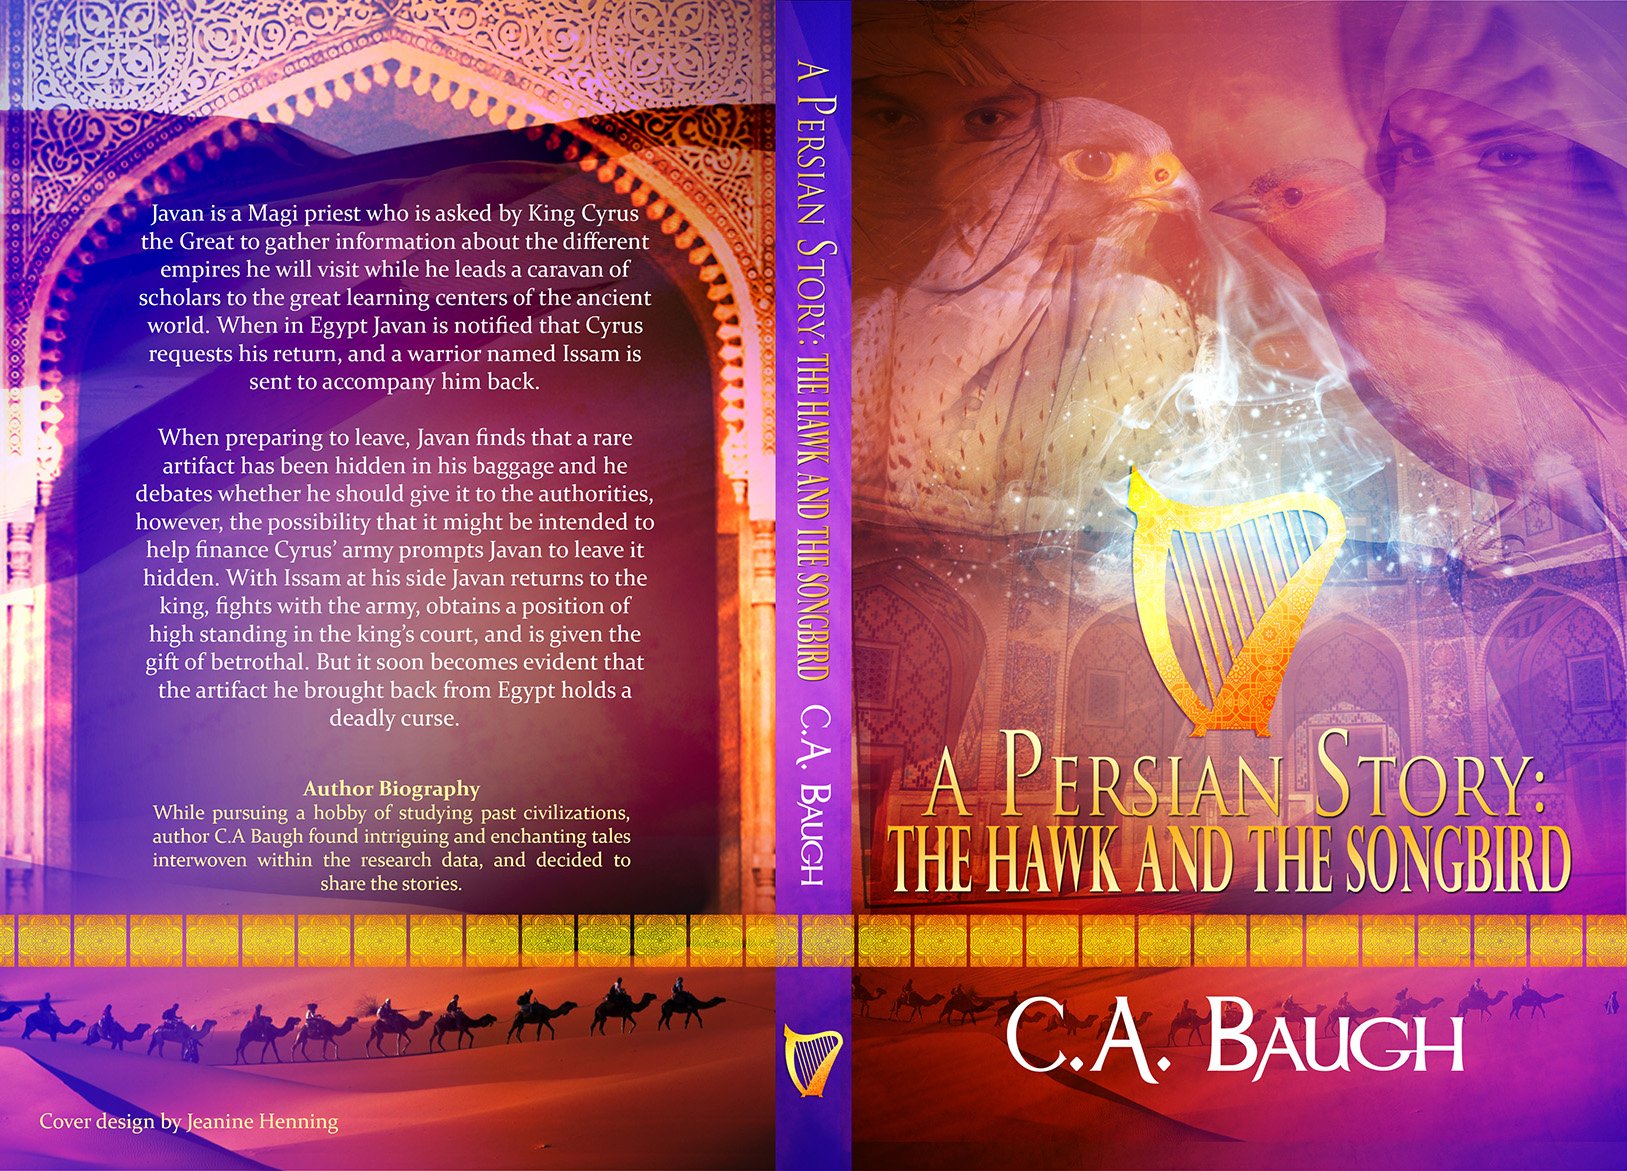
I'm new to Affinity Photo. I publish books for authors. I have an artist who creates covers for me in JPG and PDF formats. I publish the books using a worldwide publishing company named 'Lightning Source' (division of INGRAM Publishing). Lightning Source requires the covers to be submitted using their 'template' which they send my artist in PDF format and she created the 'submittable' PDF using InDesign 9780999561805-Perfect.pdf 9780999561805-Perfect.pdfbut she no long is doing that. I need to take their template and my artist's JPG and place it (in pieces?) on their template and save it as a PDF then submit it to them. How do I do this as my artist's JPG is one 'picture' that has a front, spine, and back and the template requires each piece to be placed in EXACT locations on the template! Is there a single tutorial that would demonstrate this? Thank you.

-
Alfred - how can i find the *.afdesign file? I have Photo only and need to create a circular text element in my project. Any help on this would be appreciated. In fact since this function is asked for sooo much why isn't there a definitive answer or workflow defined yet? Even better, have a tool in Photo to do such.
-
-
I have watched over 30 'tutorial' videos and almost every one starts out by using a photo they want to 'enhance'. A basic 'workflow' video on "How to create a JPG/TIF/PNG/GIF/SVG File" for beginners (meaning when instructor grabs a 'tool' they specifically show the viewer where it is; not assume they know what a 'flood fill tool' is and where it is within the software).
I have absolutely no experience with any 'photo' software. I just purchased Affinity Photo to see if I could learn how to create a JPG to use on my website. I would like to open the application, create a 'foundational' or base layer that is black. On that foundation I would like to add a photo and crop it to eliminate the periphery within it. I would then like to add a separate text sheet and create some text using a specific font style. I would then like to save the project as a JPG and export it to my folder on my PC.
The results would look like what I have attached (but of course with a new book photo and description). I publish indy books for authors and need to stop paying to have JPG's created so I can update my website that advertises their books!
Help me Obi-Wan Kenobi - you're my only hope!
MICTIP (Chris)
PS: If I become 'really good' I would like to actually create the artwork in Photo for the book covers and save my clientele a few hundred dollars (and that's if I charge them a few dollars for my time/effort). The artwork looks like it is simply one layer upon another layer (or am I too limple-minded to think such?). And don't worry, I own the rights to the attached file.

Create Book Cover (PDF) using Lightning Sources Template
in Resources
Posted · Edited by MICTIP
I did but when I pasted it to the section of the other document it didn't do it; it just 'moved' the section I was pasting to to the left w/no image. I'm working with two pdf documents; would this make a difference?
Followup: I just exported and saved both documents as JPG's then closed the application without saving my work; reopened the application and opened the new JPG documents and performed the selection/rasterize/copy/paste and it worked! I will now save the one document as a new JPG as well as a PDF and it should be good to go. THANK you so much for your quick help/responses. Cheers! Mictip (Chris)