Jeroen
-
Posts
67 -
Joined
-
Last visited
Everything posted by Jeroen
-
Good point, I had been looking for such a setting but did not find it. To answer your question: not as far as I know. But I know now what to do about it. Thanks.
-
In Affinity Photo Beta 1.10.0.244 sometimes the Levels control shows no histogram. This behaviour is erratic and I have found no reliable way of reproducing it. The control itself may be responsive. After several minutes and possibly related to some action from my part such as saving the file or bringing up the "About" dialog, the histogram may suddenly appear. I have not observed it on every occasion, but then I might not have waited long enough. PS I have noted the same behaviour in 1.9.3.

-
Title says it all. The copy is smaller than the original. Checked with 1.9.3, there the size stays the same. I can reproduce the behaviour. See attached. screen shot.
-
Big performance problems with Photo on macOS
Jeroen replied to duncang's topic in V1 Bugs found on macOS
Thank you for this. This is what I am doing right at this moment. It seems to work much better so far. Actually, I am just submitting my first (unrelated) bug report... Thanks again. -
Thank you for this reply. Unfortunately, I purchased my version from the Mac App Store. I will reach out to Serif to see if they can help me.
-
As I mentioned in a reply to another thread, Affinity Photo AP 1.9.3 is unusable for now on my iMac due to frequent freezes. I have a project that needs finishing. I would like to temporarily go back to 1.8 or even 1.7 (which I know worked fine for me). Is there a way to download an old version to help me out? Thanks in advance, Jeroen,
-
Big performance problems with Photo on macOS
Jeroen replied to duncang's topic in V1 Bugs found on macOS
Same here. I do not think you are expecting too much. I have been a very satisfied Photo user for years. The controls used to work virtually instantaneously. But not anymore. Coming back after a pause, with 1.9.3 I constantly have freezes. So bad that I first thought that I did something wrong, since (for example) twiddling with the Levels control did absolutely nothing. Only after many seconds it appeared to work after all. I am not doing anything out of the ordinary, compared to what I did in the past. A few layers with one or two live filters, that's all. One file at a time. Also, I noticed that with the Levels control sometimes the histogram does not show, at other times it stays at the master display when I am on red. Once, after saving the file, the histogram suddenly appeared. Could be due to the same freezing behavior, cannot be sure. I also found that a Levels control that (sort of) works at the global level becomes unresponsive if I move it to be subordinate to a layer (with mask). That is, sometimes this happens. Could again be a temporary (but long) freeze. I do not think that there is anything wrong with my system, or with the files I am editing (300 MB or so tiff files). System is an 2019 iMac, 3.7 GHz 6-Core Intel Core i5 processor, 40 GB 2667 MHz DDR4 memory, Radeon Pro 580X 8 GB video card. The system is lightly loaded. I am running the latest version of OSX (Big Sur 11.4). I hope that Serif is paying attention. I have always found Affinity Photo an excellent alternative to Photoshop and I have been an active ambassador for the program, but based on this version I cannot recommend it to anyone. Please have this fixed ASAP. I have a project that needs finishing. (If there are any tests I can do that could help find the cause, I will be happy to help. I know about computers.) -
Live denoise shows strange artifacts, also with export
Jeroen replied to Jeroen's topic in V1 Bugs found on macOS
Hi Justin, Interesting.I can see that NaN values might certainly cause erratic behaviour. The question of course is where they come from. You are correct in that I developed from a raw file, and I did it in AP. I do not keep records of develop adjustments. Normally I tend to keep development settings simple and leave most of the work to the Photo persona, but I do not remember exactly what I did here. I can provide the raw file though, if that might be of use. It is a Canon .CR2 file. Let me know if you would like me to. Best regards, Jeroen. -
I could not replicate it, but I recall having noticed similar behaviour at other times. If and when it reoccurs I will report again, with as much information as I can.
-
See attached image. The HSL adjustments and WB adjustment suddenly stopped working. The Levels adjustment still worked.I made a recording of the "HSL lucht" adjustment not reacting, also attached. Maybe it is relevant that I have layer masks on the HSL and WB adjustments, and not on the levels adjustment. After saving and reloading the project, the problem had gone away. I therefore suppose the project file would be of little value in diagnosing the issue, but I kept it safe and can upload it if requested. For the record, I had Metal compute activated and the project is in 32 bit HDR. Schermopname 2019-07-12 om 11.08.02.mov
-
Live denoise shows strange artifacts, also with export
Jeroen replied to Jeroen's topic in V1 Bugs found on macOS
I uploaded "About this Mac' to the Dropbox link you provided. Please let me know if I can be of further help. -
Live denoise shows strange artifacts, also with export
Jeroen replied to Jeroen's topic in V1 Bugs found on macOS
Uploaded. Please let me know if I can be of further help. -
Live denoise shows strange artifacts, also with export
Jeroen replied to Jeroen's topic in V1 Bugs found on macOS
Uploaded. Please let me know if I can be of further help. -
Live denoise shows strange artifacts, also with export
Jeroen replied to Jeroen's topic in V1 Bugs found on macOS
Thanks for the encouragement. I now have a workaround. Yet, I may misunderstand you here... but it seems to me there is definitely something wrong at the moment. I have a 2019 Mac with all software up to date. You are certainly not suggesting that Metal support is fine as it is, and thus needs no fixing? Then, why is it not working as expected? -
Live denoise shows strange artifacts, also with export
Jeroen replied to Jeroen's topic in V1 Bugs found on macOS
Disabling Metal compute does indeed fix the issue. I have uploaded the file to the link you sent me. -
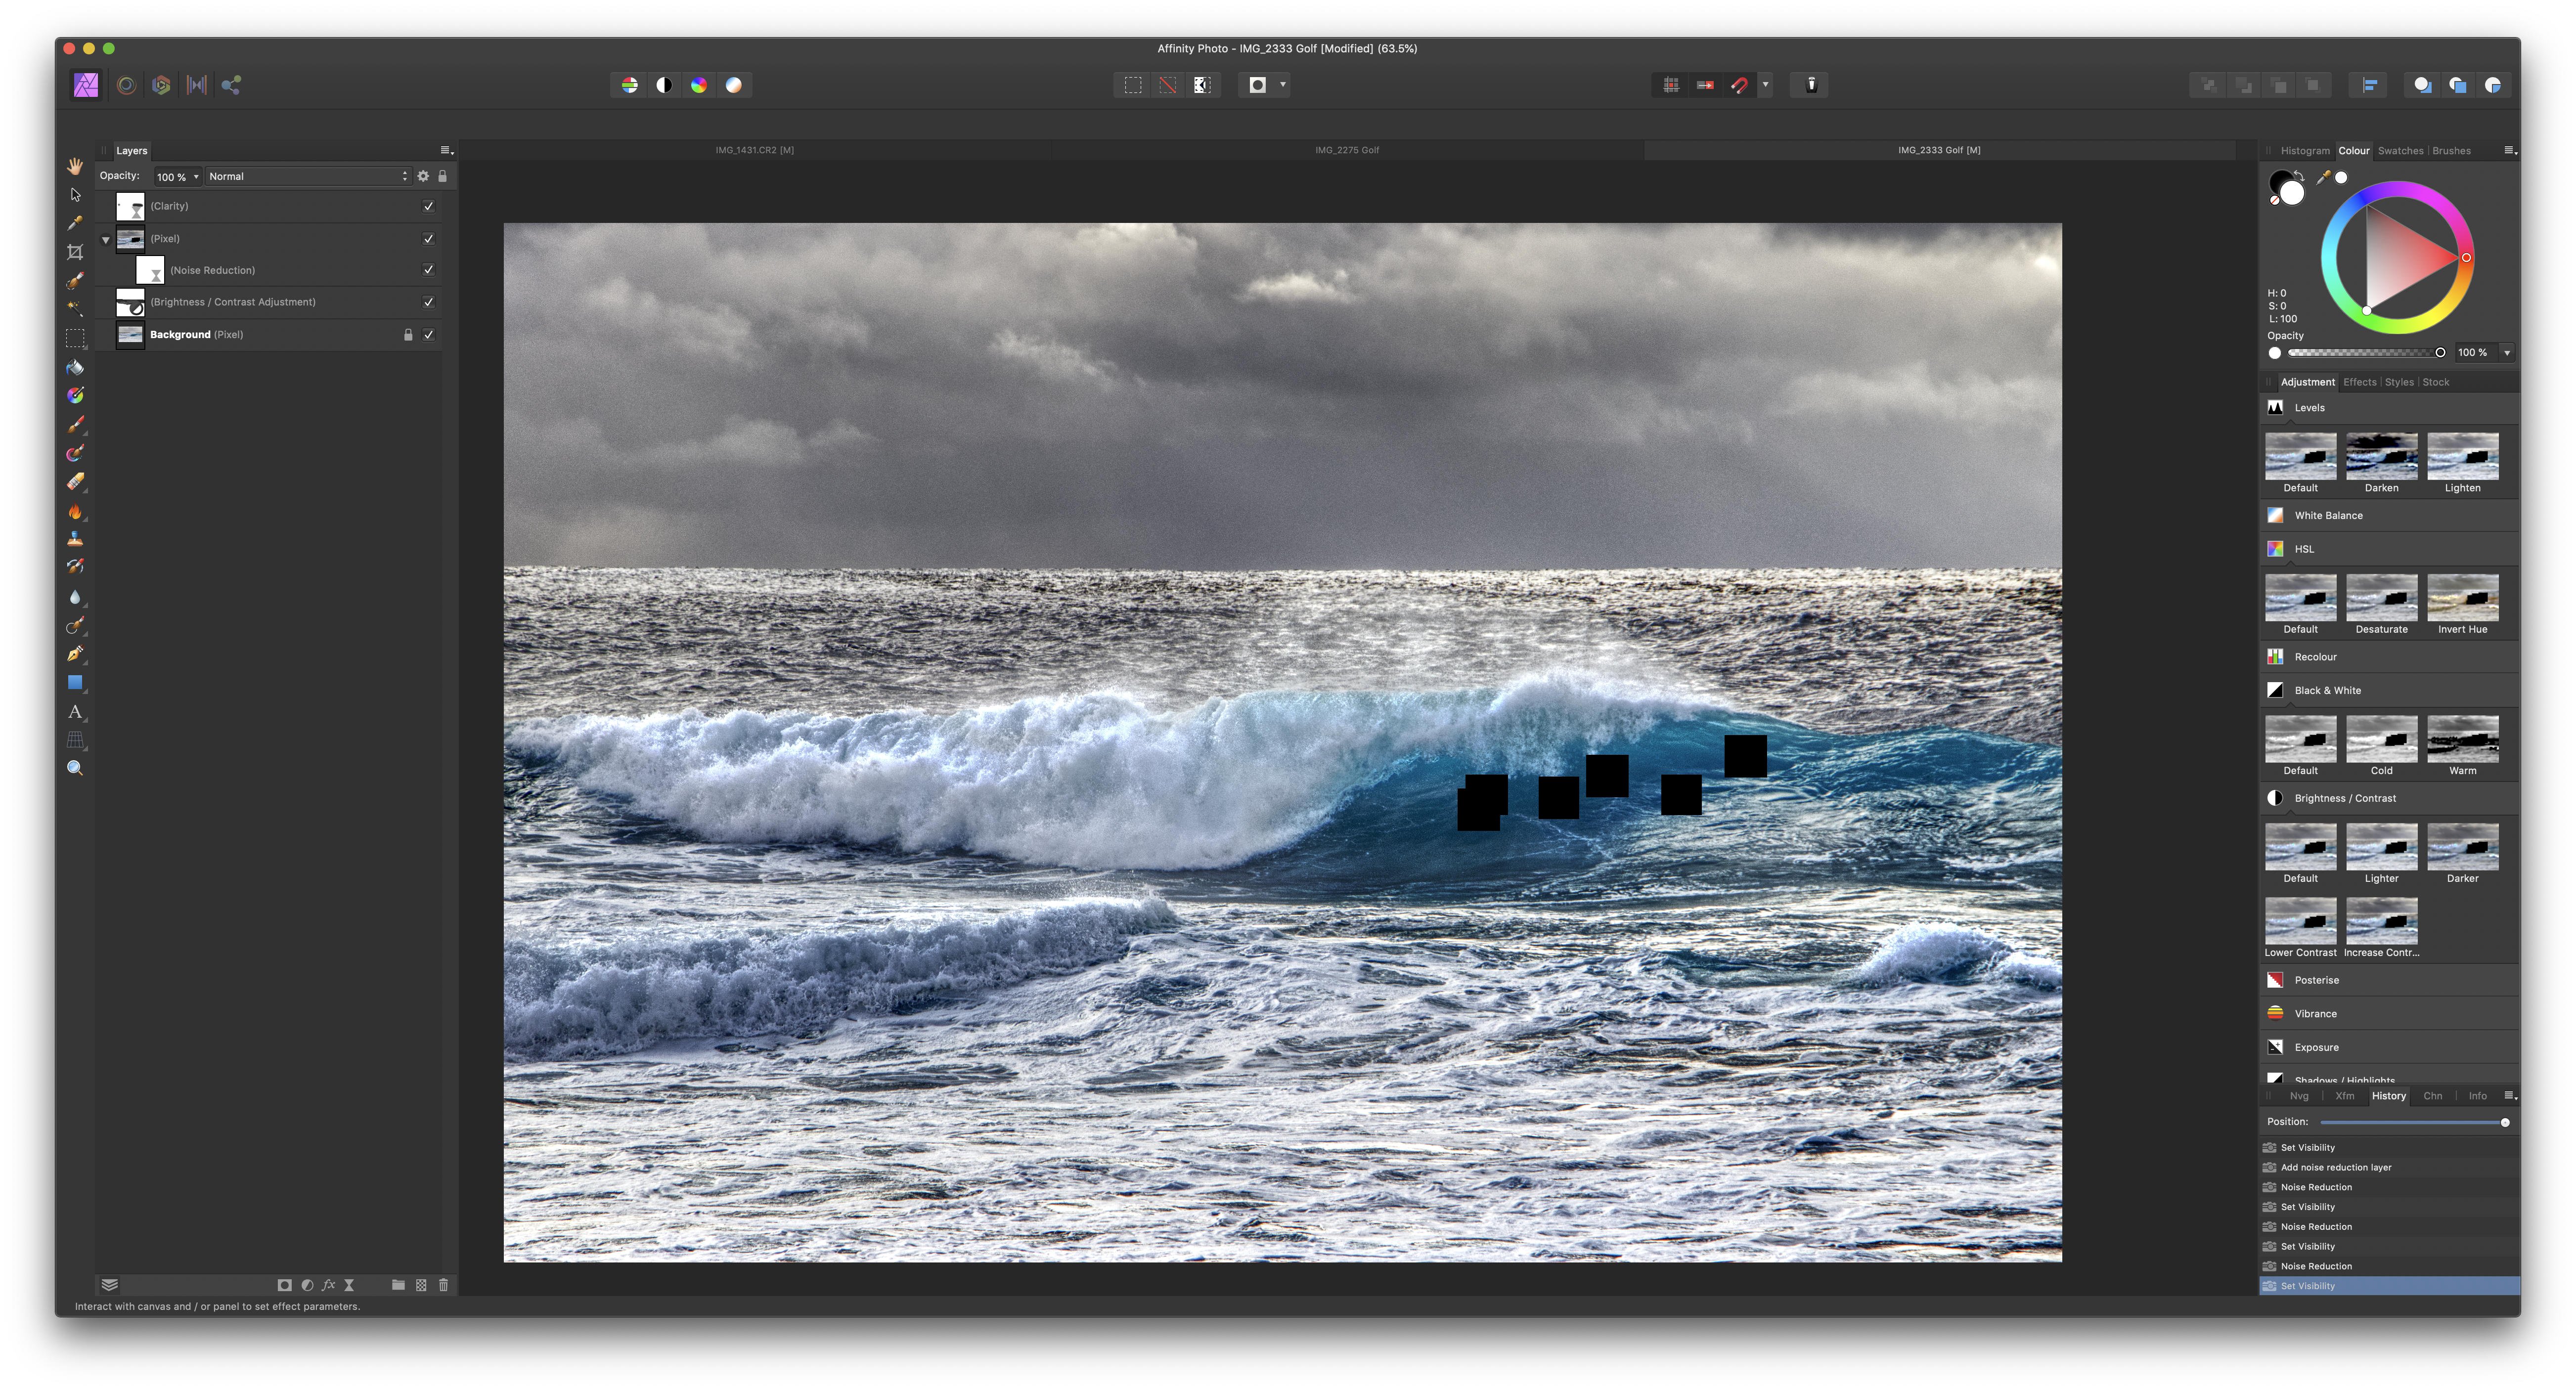
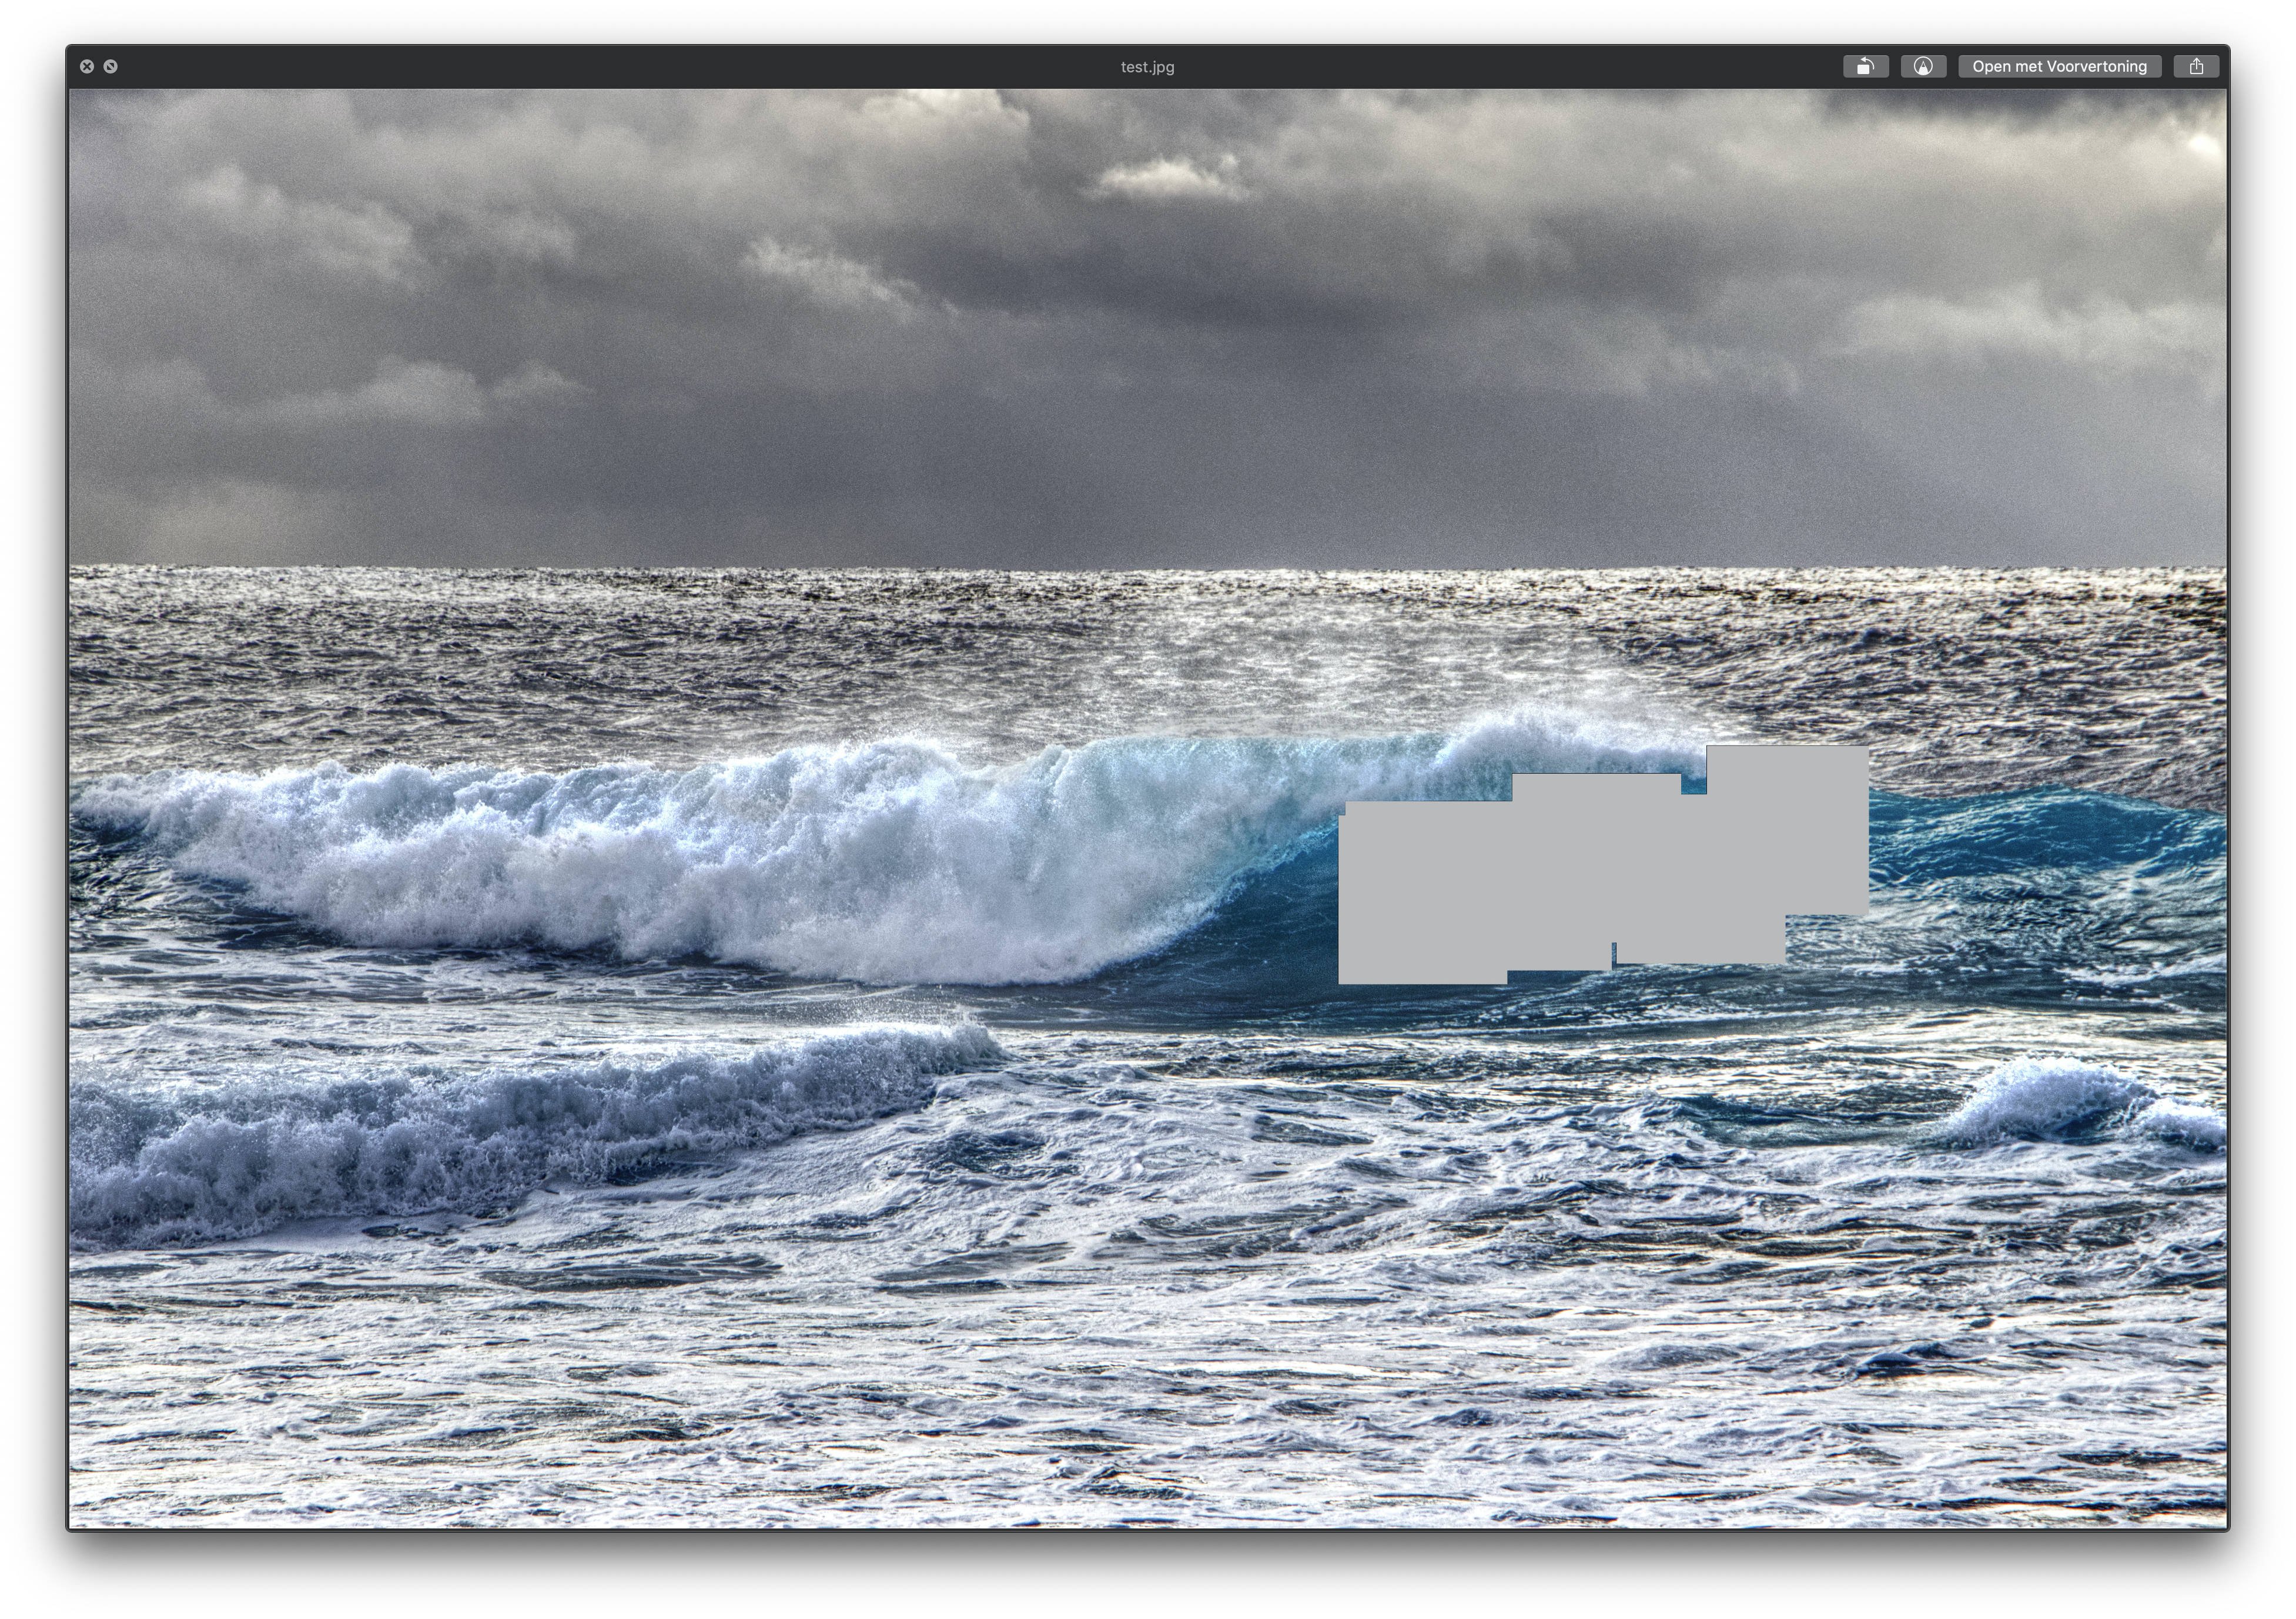
In attached project, the following shows artifacts appearing when applying a live denoise filter, even after resetting the filter: With the denoise filter deactivated the artifacts disappear: Exporting to jpg of the project with the filter active also shows artifacts, although different ones: Exporting with the filter deactivated gives a clean picture. The project can be closed and reopened, and the behaviour remains. Jeroen. IMG_2333_Golf.afphoto
-
That's it! Thanks a lot.
-
Thank you Callum, problem is solved.
-
Quite right. I now also understand why the lines appeared only after cropping. This has to do with the display threshold value for the baselines. Issue completely solved. Thanks.
-
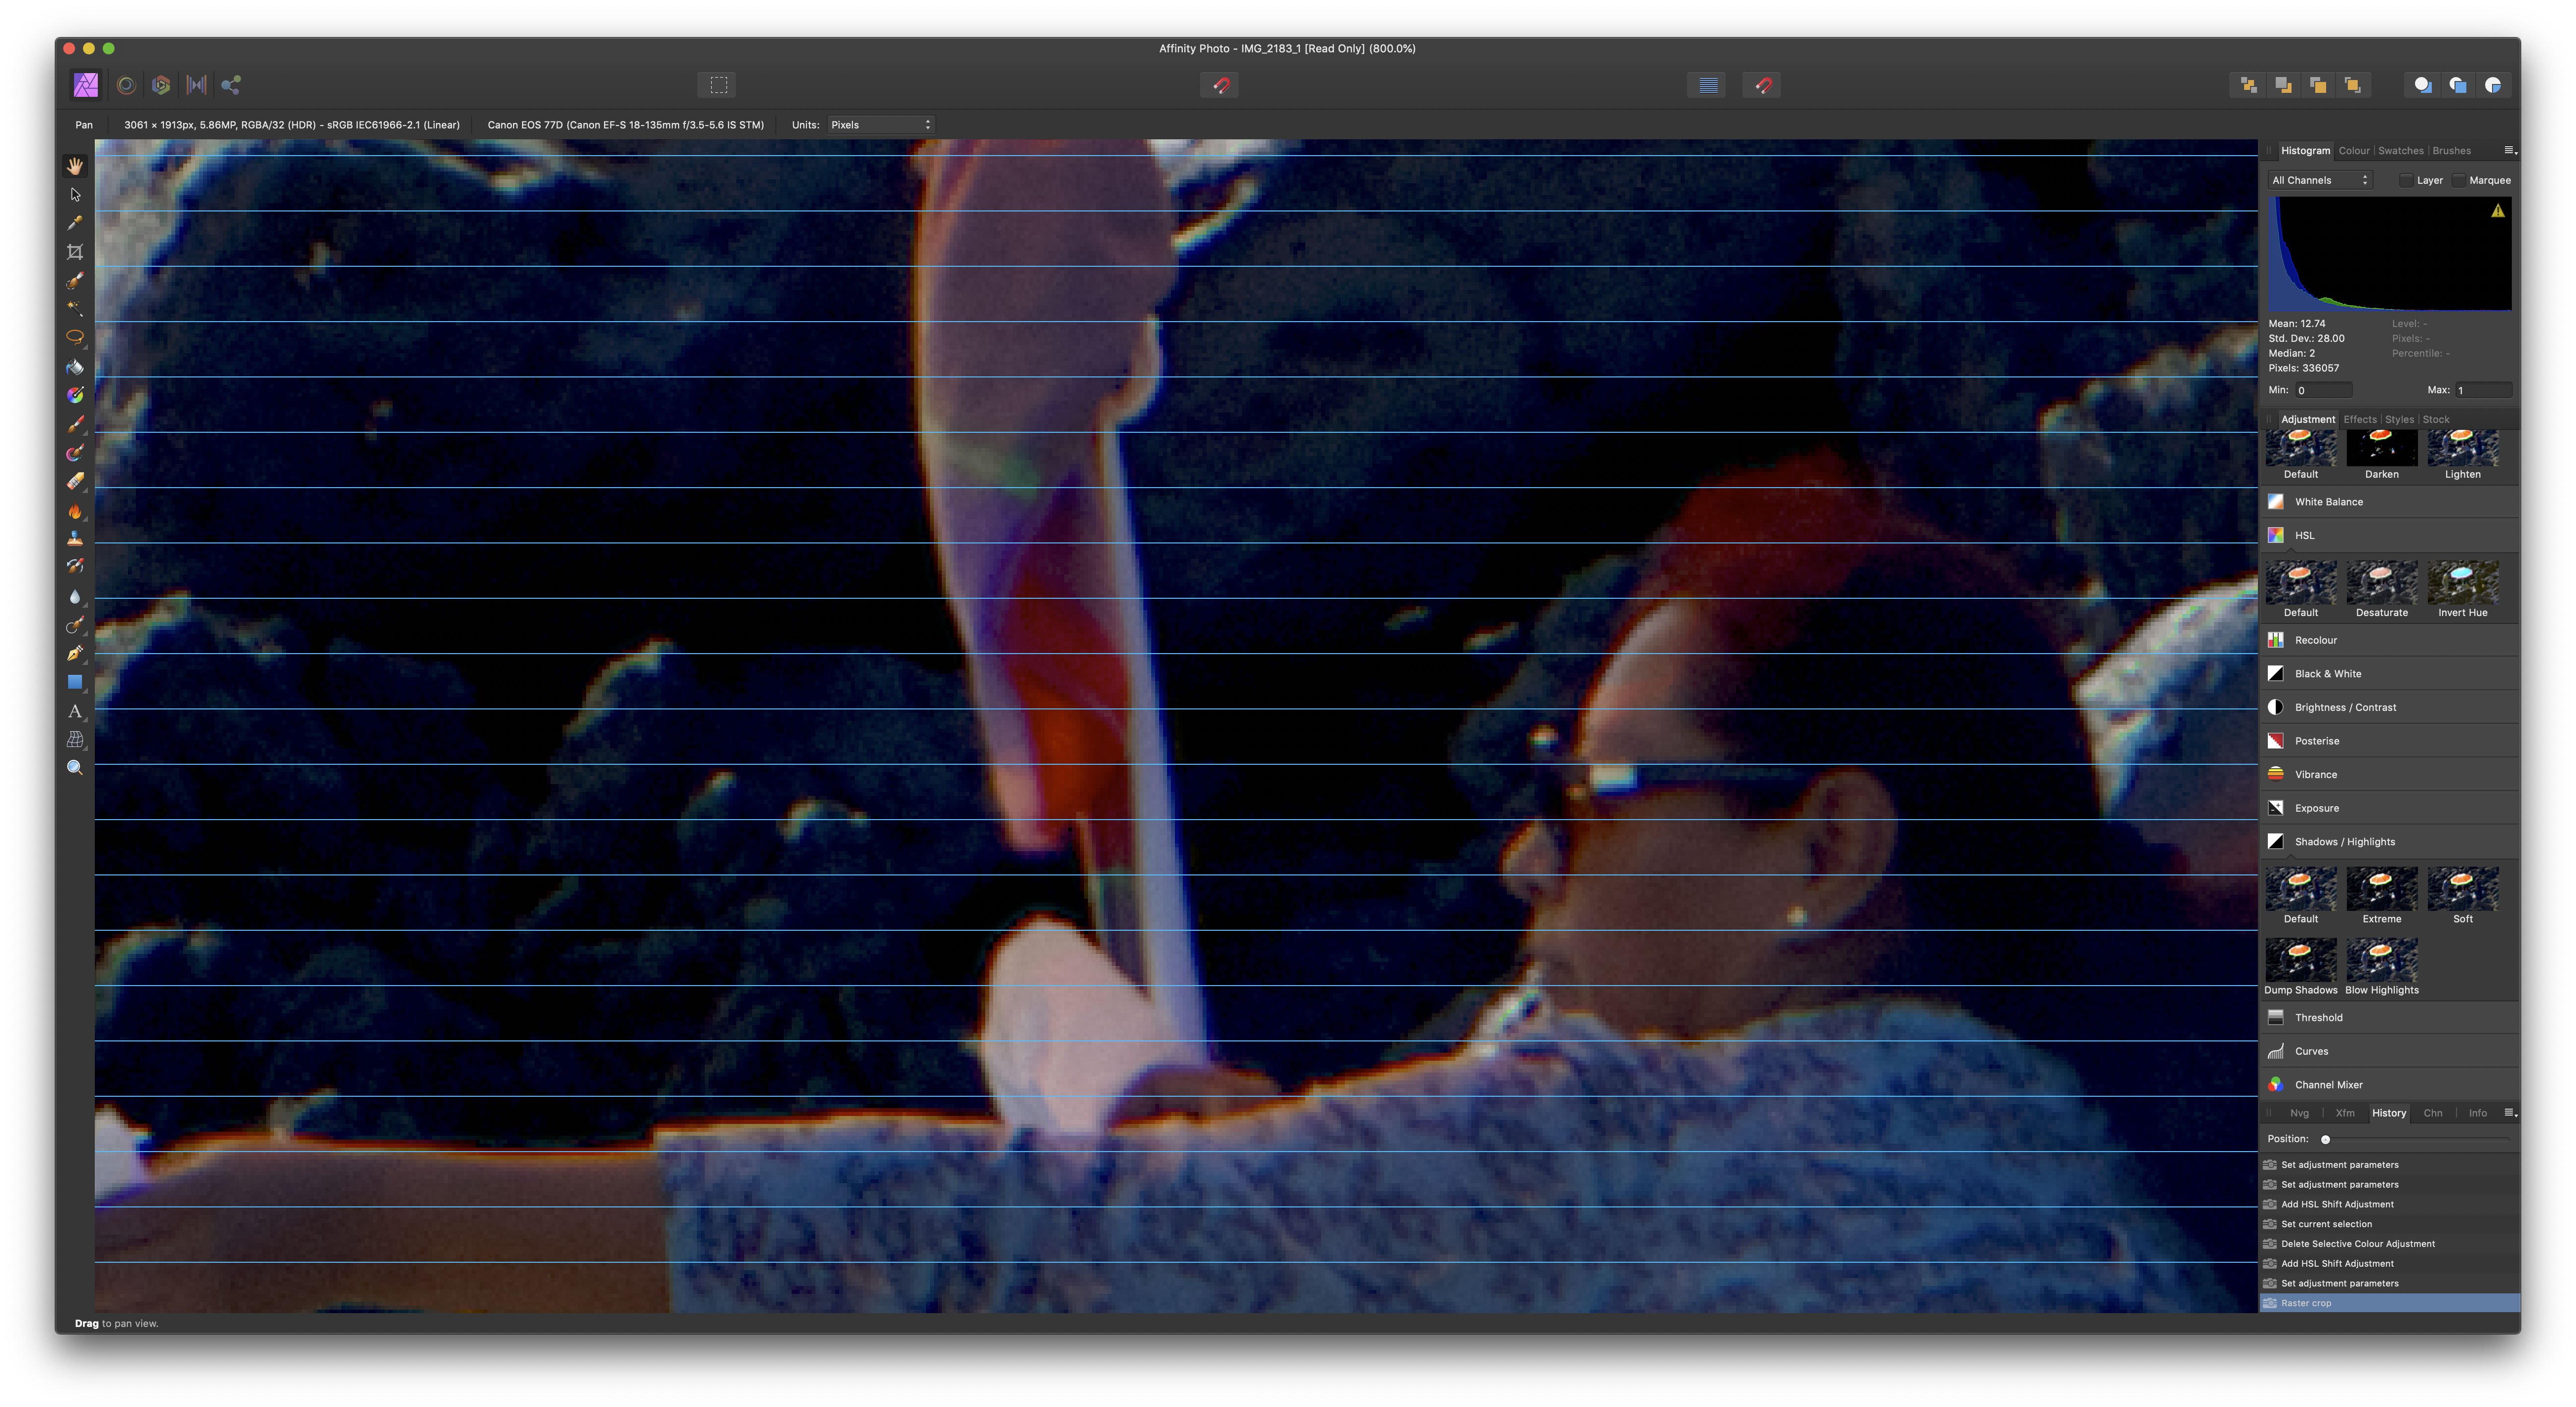
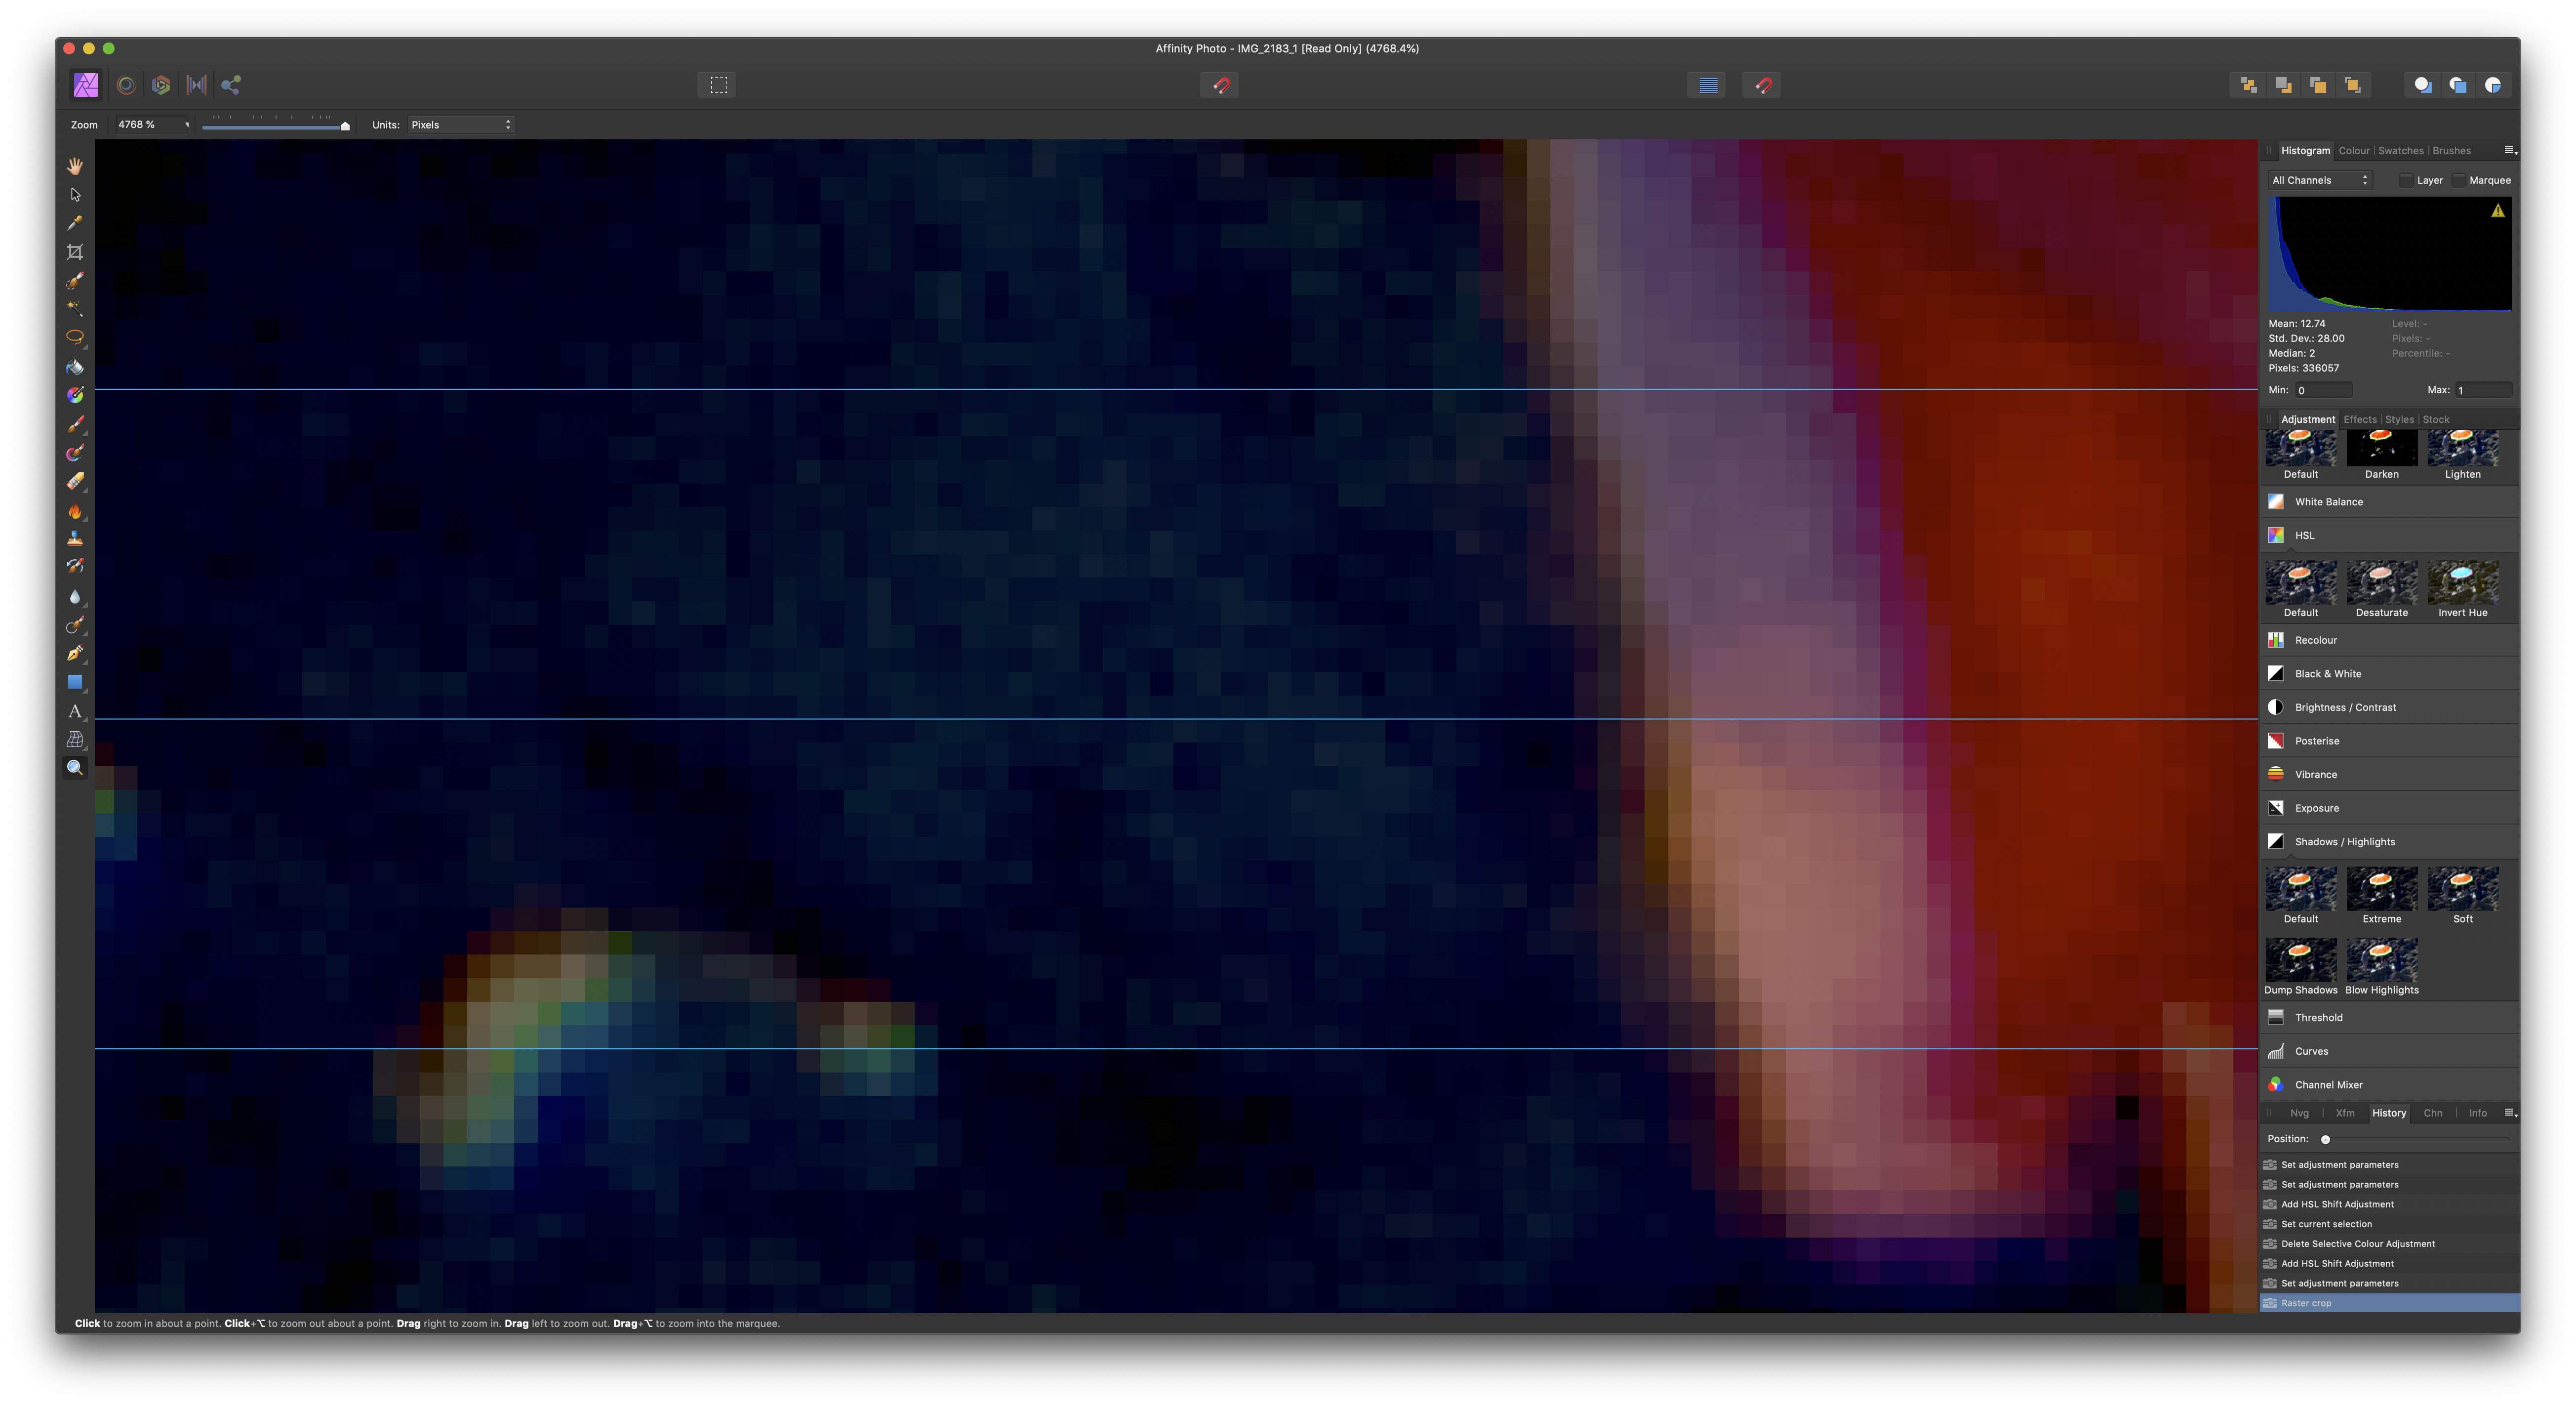
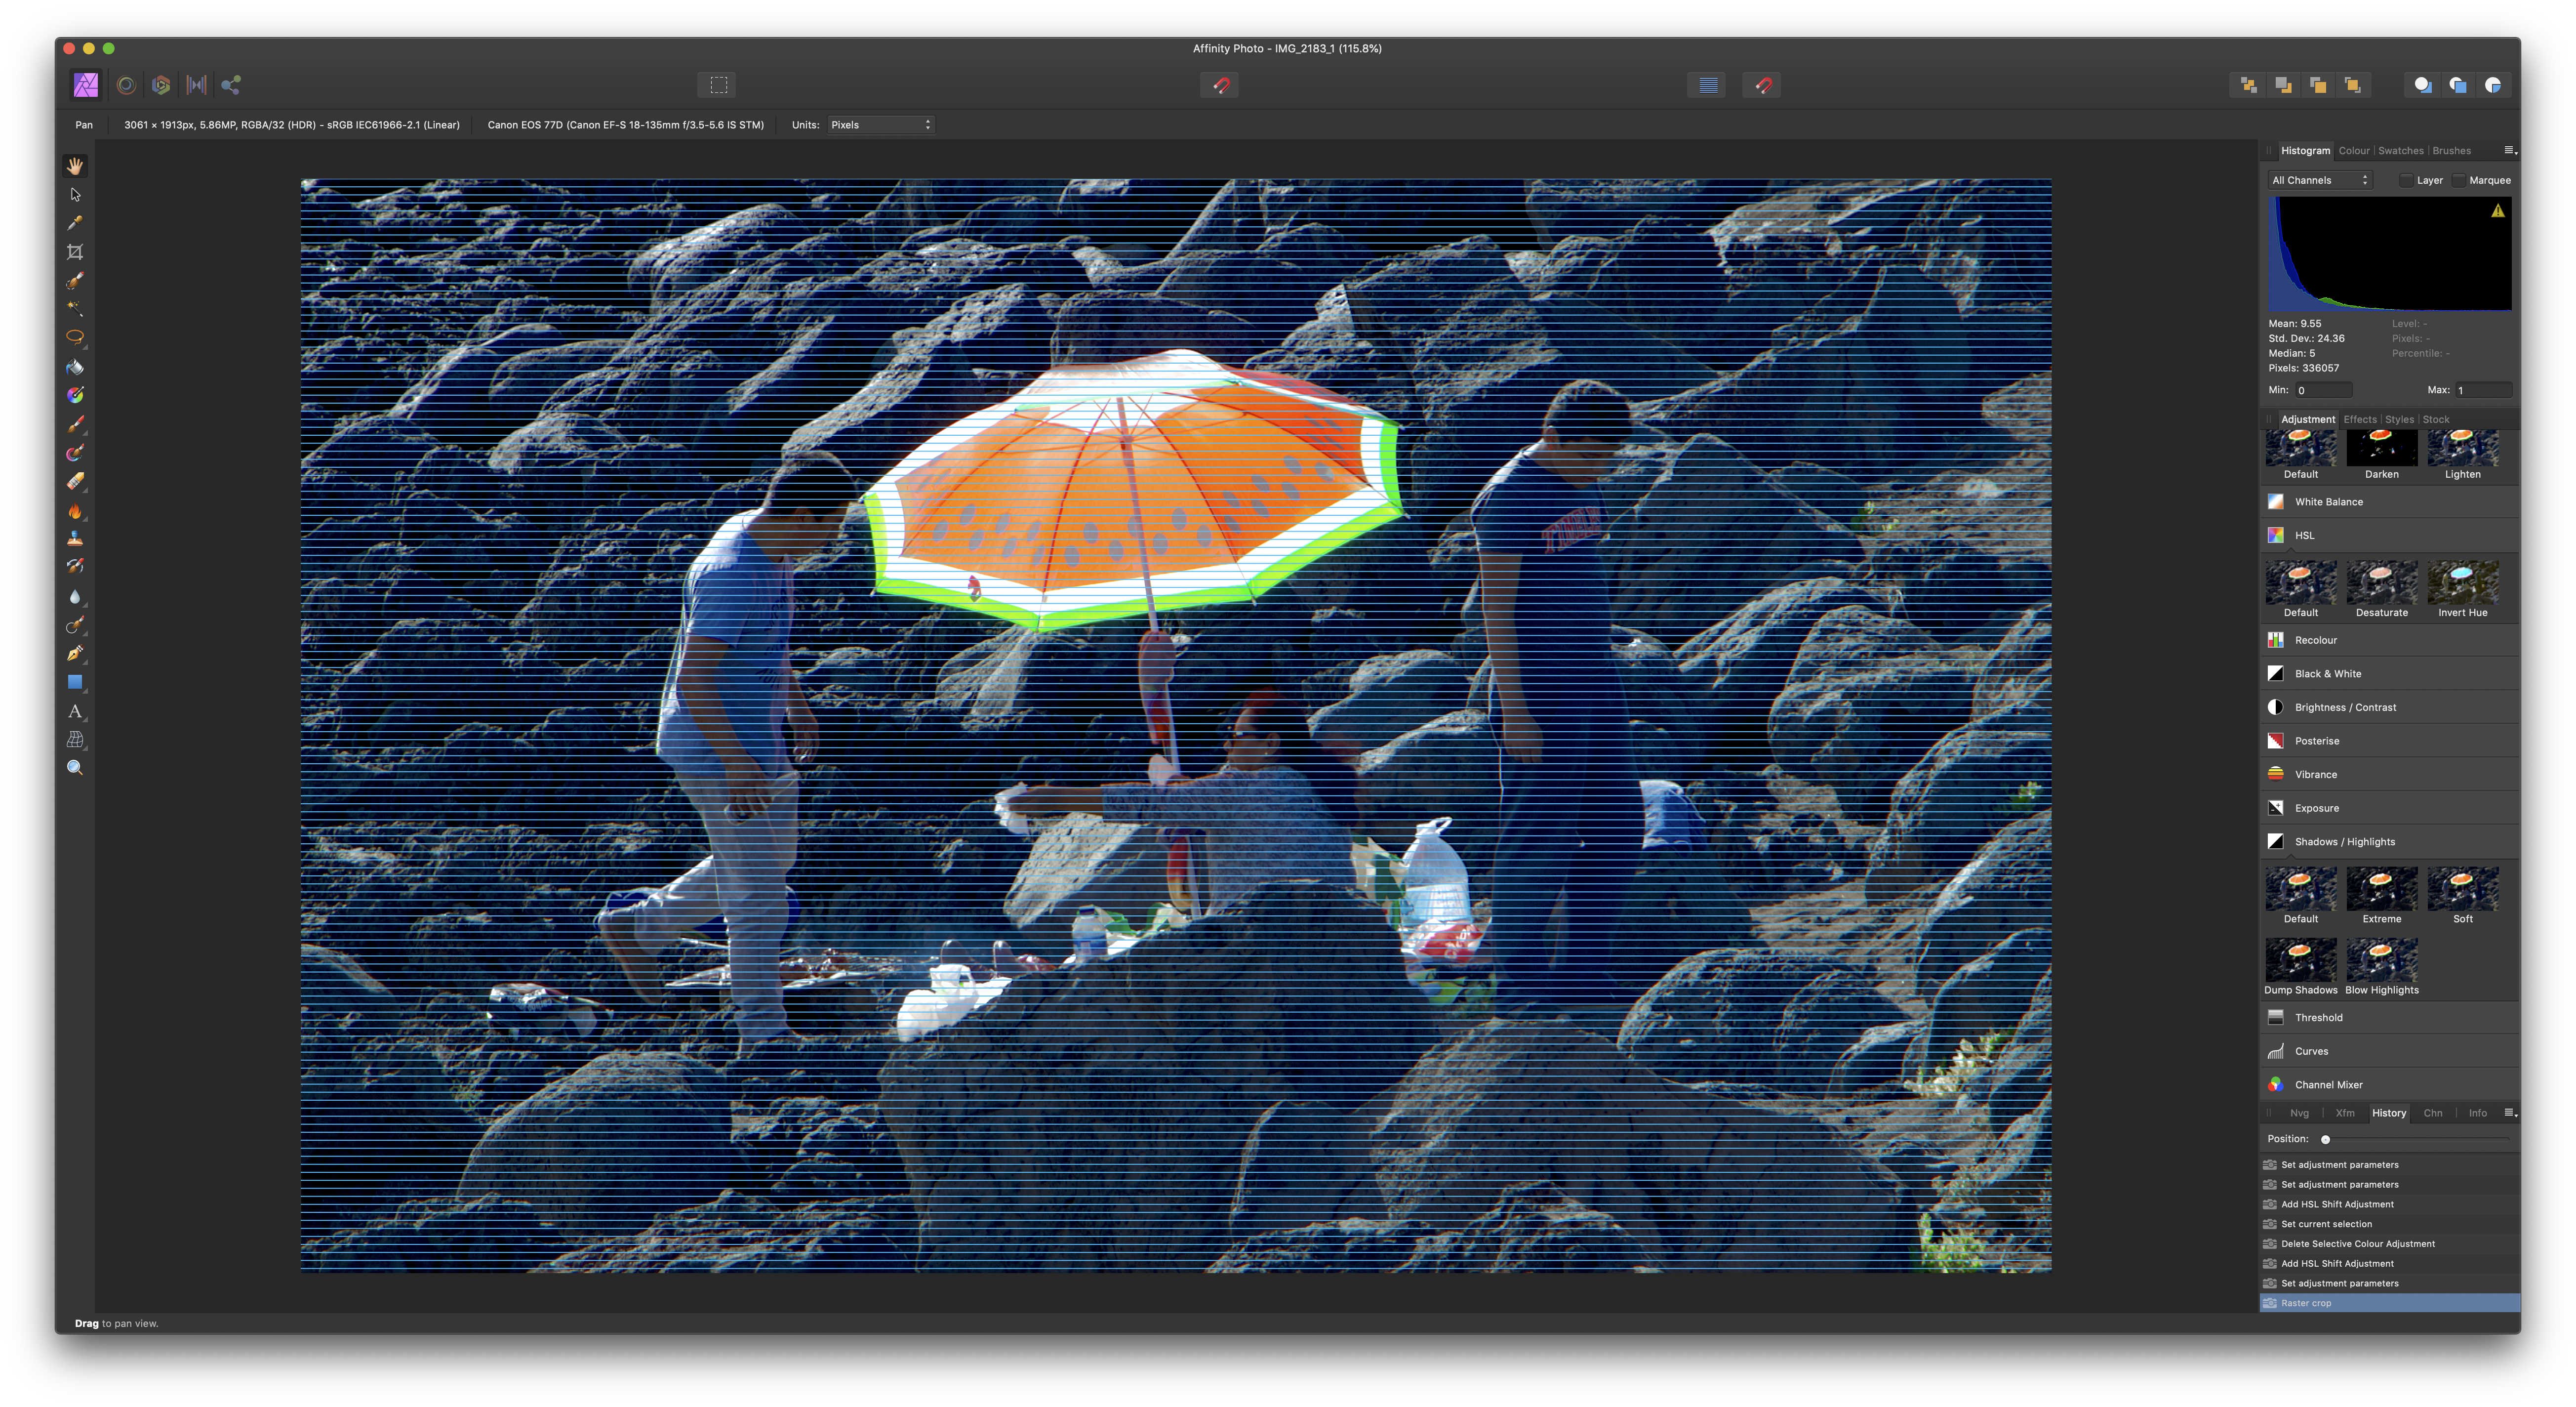
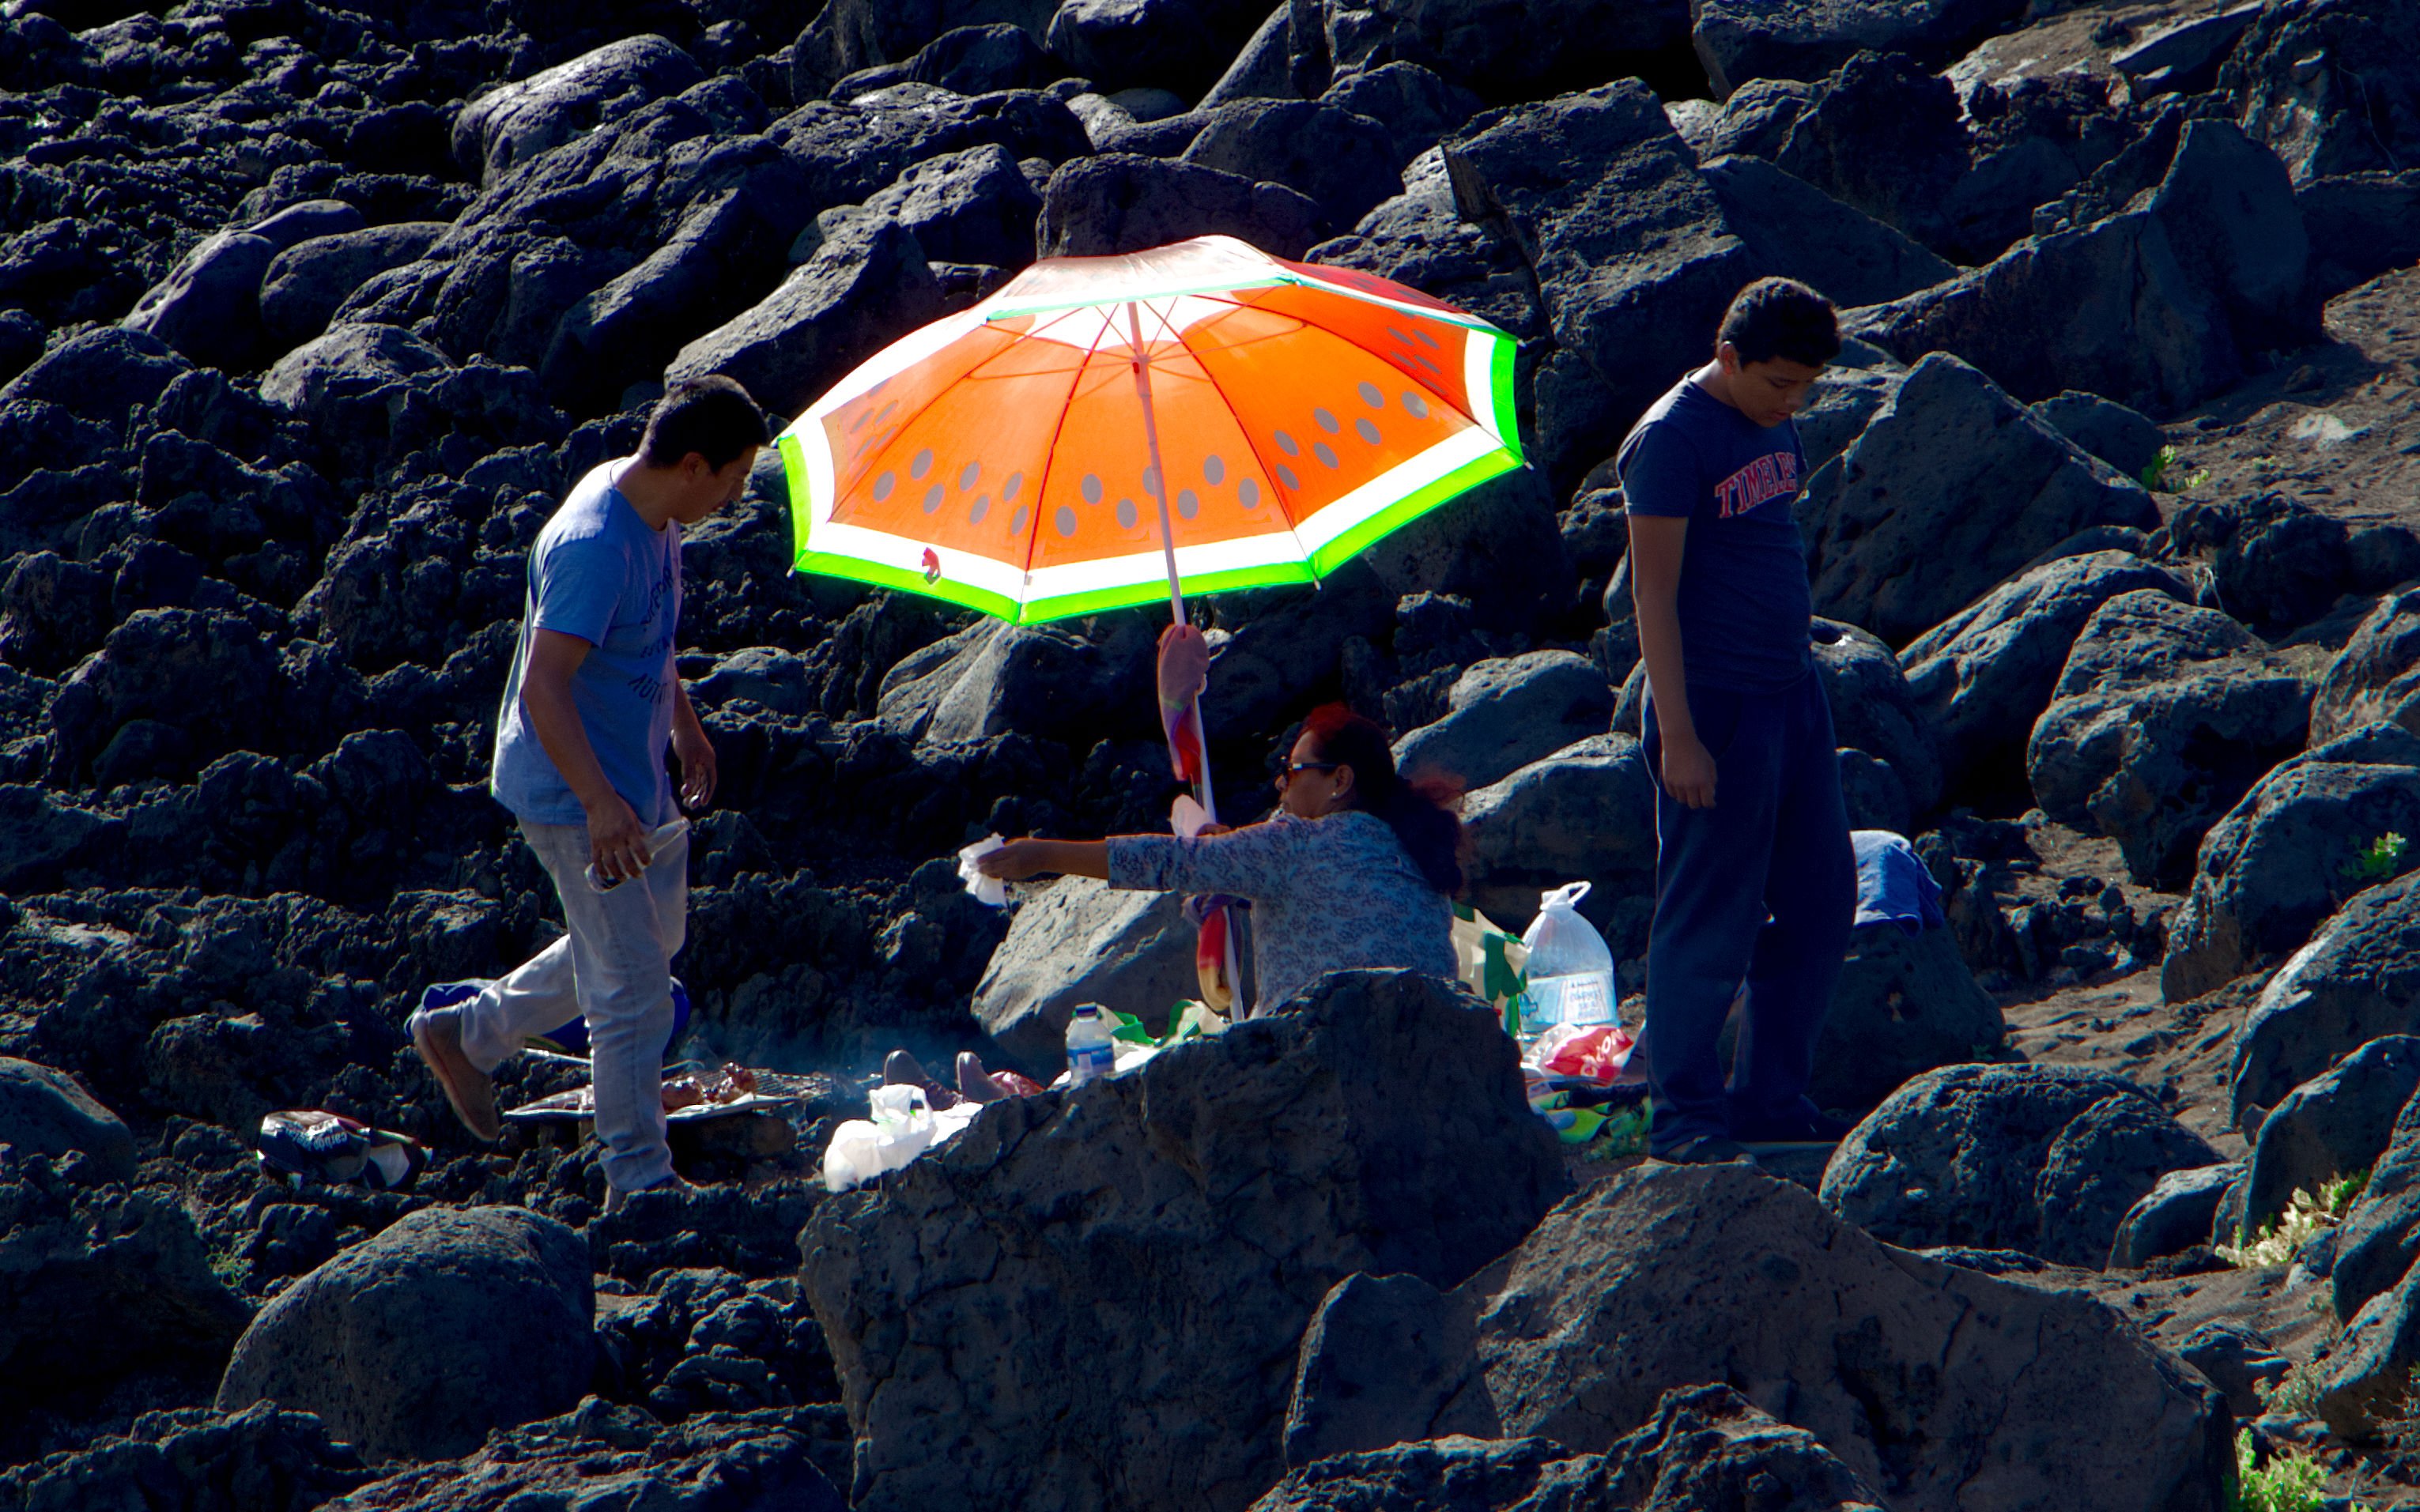
I changed the zoom level up and down. The striping changes with it. Attached is a picture of zoom level 4. If I zoom further out, it does not look like pixels: So it is not in the image, which explains why it is not in the jpeg. It must be a sort of display issue, but one that scales with the zoom level. The lines are very neat. The thickness of the lines remains constant.
-
Attached is a screen shot of AP 1.7, with a picture loaded. It displays with horizontal stripes: I am not aware of having created these, nor do they show when I export the file to jpeg: I have not been able to reproduce the issue, but I have kept the history saved with the file. One unusual thing - for me - is that I applied tone mapping. The problem appeared after I cropped. Affinity Photo 1.7.0, iMac (Retina 5K, 27-inch, 2019), Radeon Pro 580X 8 GB, MacOS 10.14.5 Mojave
-
Great! Thanks.
-
Hi James, Thanks for your ongoing educational efforts! Your videos are an indispensable resource for me. I do love the format & quality of the new videos. Will eventually all old videos be adapted? I have a particular wish to review a video explaining how to select the sky from a foreground with a tree, using (if I remember correctly) temporarily converting to BW and enhancing contrast, then selecting by tonal value. I hope this one will be available soon, since I have a question on it. Alternatively, same question as above: are the old ones still available? Cheers, Jeroen.
-
Thanks for pointing this out. It is simpler than I did. Using channels was actually an attempt to keep the selections around, in case I need to revisit them later. But for this demonstration not needed.
-
Thanks for pointing this out. It explains why things do not work out as I wished. Next question: How to achieve that goal? You seem to be explaining how normal blend mode is supposed to work on the alpha channel, and to be arguing that there is no bug in the way it is implemented in AP. Fine. I accept that. But my point is not to seek for a supposed bug, but to understand what goes wrong and from that to achieve my goal. As I found out experimenting, and as you explain in terms of mathematical operations, my original approach does not work. Applying normal blend mode to the image, masked by a selection, and the same image masked by the inverse selection, does not recreate the original image if there are partially opaque pixels in the selection. That is not saying that normal blending is implemented incorrectly ("bug"), only that this particular blending mode does not achieve what I am looking for. And what is, in my view (but also in that of others if I understand correctly from the discussion), a natural thing to ask for in the context of selections representing parts of images. Now for a possible solution for the problem: a selection and its inverse from the same image, to be combined into the original image. In fact, for presentation purposes, I created this simplified version of a more general situation: an image with a number of selections, derived from the full image by repeatedly creating a selection, setting it apart, and continuing in the same fashion with its inverse. Eventually the whole image is "covered" by a number of selections that are mutually exclusive, except that theyt may overlap on their boundaries, where opacity on each of them is below 1. At all places, all opacities together will add up to 1, however. So, now what would for the simple case composing the two masked images need to come down to? - color: unchanged from the underlying image. - alpha: the sum of the alphas of the parts. In the two selection case, always 1. So, I need a blend mode where alpha comes out as the sum of alphas from the selections being combined. Also, on the colour channels one can have any reasonable blend mode as long as it leaves identical pixels alone. A simple example would be a blend mode that acts as Normal in the colour channels, but as Add in the alpha channel. I tested my small example by taking the result, with two selections with a partially transparant boundary, and setting alpha to 1 everywhere (using Filter/Apply Image on the combined selections layer and setting formula DA=1). The boundary, and with it the problem, was gone. So, in summary, there certainly seems to be a working solution to the simplified problem and it is not difficult to achieve by hand. I now am looking for an elegant way to set alpha to 1 everywhere without touching color information. And to generalize to more than two selections, which is my real use case.