Manofjesus
-
Posts
142 -
Joined
-
Last visited
Everything posted by Manofjesus
-
 Because i am testing beta version for bugs, and if it (bug) still exists both in beta and release version - for me it is logical to report this bug in beta than in general discussion. If there is already a solution (not just confirmation) then i would be happy to join and read. It is zooming with cntrl + wheel but i am talking about weird zoom ratio, it is completely wierd in comparison with zoom ration when using Cntrl "+" and Cntrl "-"
 -
Guys, is there is a way to fix zoom ratio when zooming in or out with mouse wheel? To work the same way as it work with Cntrl "+" or Cntrl "-" from keyboard?
-
If you would use gradient mask for layer transparency - there is no need for using effects. The layer is red, the mask is gradient - voila. In such cases there are a lot of ways to receive the same result but in different techniques.
-
Thank you for the kind words of support. Yes, i already planning it to release, but a lot of other work ))) I am launching inks business (epoxy colorants, fountain pen inks, etc) and it takes a lot of efforts ))) I hope in the beginning of this summer - it will be added.
-
In you your upper example you add red gradient layer on the grayscale Beavis, i download your attached file. The effect works as it has to be - everything is correct. But on lower example you show Beavis in RGB colors, as i can judge from your screenshot. So you need to apply the same effect but to the RGB Beavis. If you want to use masked Beavis to use as mask for gradient - set the fill opacity to 0%. Also you can play with OPACITY MODE in gradient (overlay, multiply or others) for tuning the blending mode for the most suitable result.

-
I was installed both versions on two PC's - it was flawless, also as previous installations. I notice it can depends from system environment settings. If i set the TEMP drive to SSD - it do not installing. But when the TEMP is system default - it is total ok. I reported some time about such issue.
-
It hard to visualise this bug, but i found dependencies. I working in dark gray color mode. So in this mode - the non working area ouside the working content is changing the gray level by itself when i moving the mouse with any selected tool. It is looks like the whole marked area becomes darker a bit during the mouse movement and It also affected for Release and also in all Beta versions (afaik). But only today i make investigation and choose WARP renderer - and it is gone !!! So this bug depends somehow from renderer mode. On my working PC there is no GPU, only embedded Intel UHD Graphics 630 and it selected by default.
-
What Affinity Version you mean, can you show the screenshot of the problem?
-
affinity designer Banana death in vector :)
Manofjesus replied to vkasper's topic in Share your work
Very volumetric !!! -
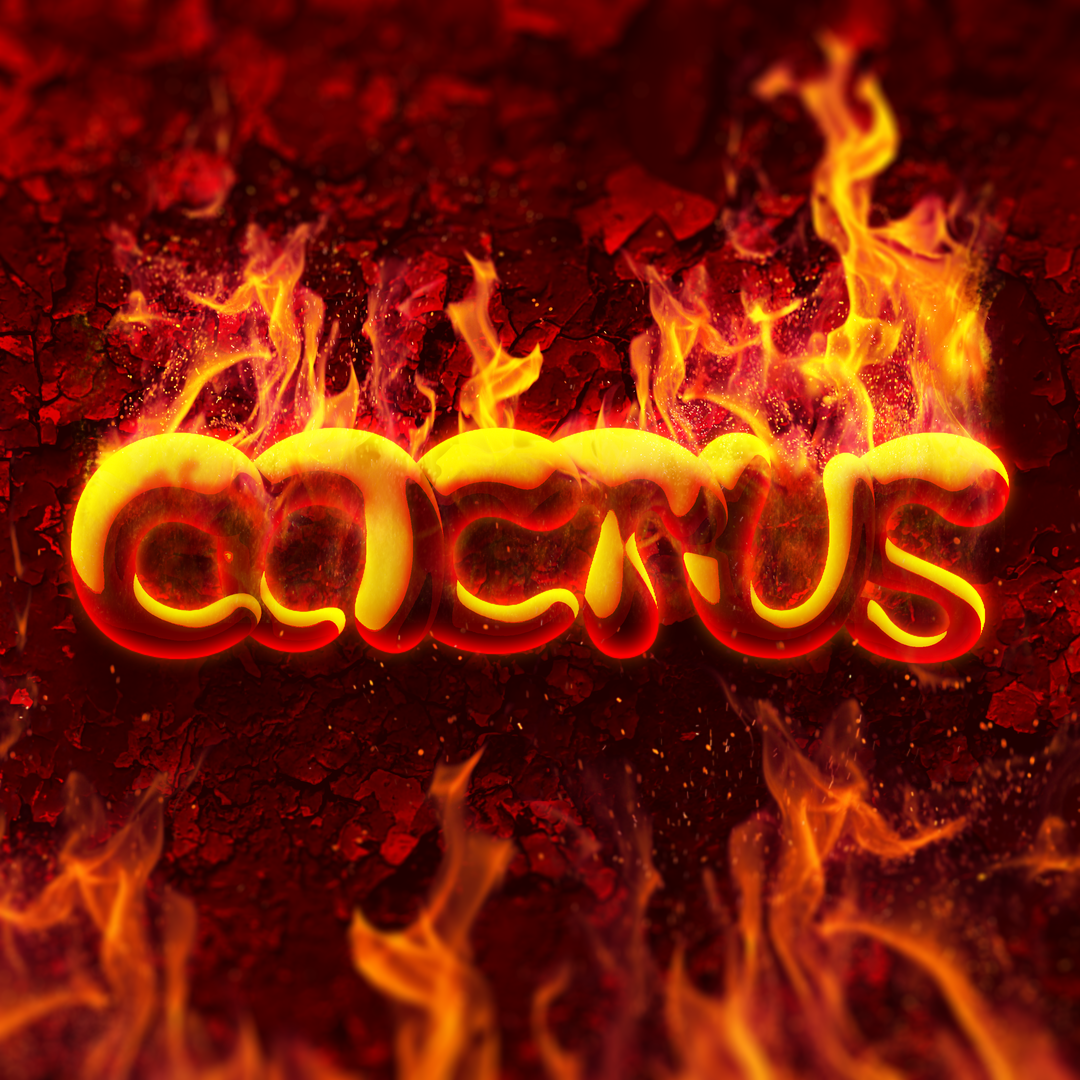
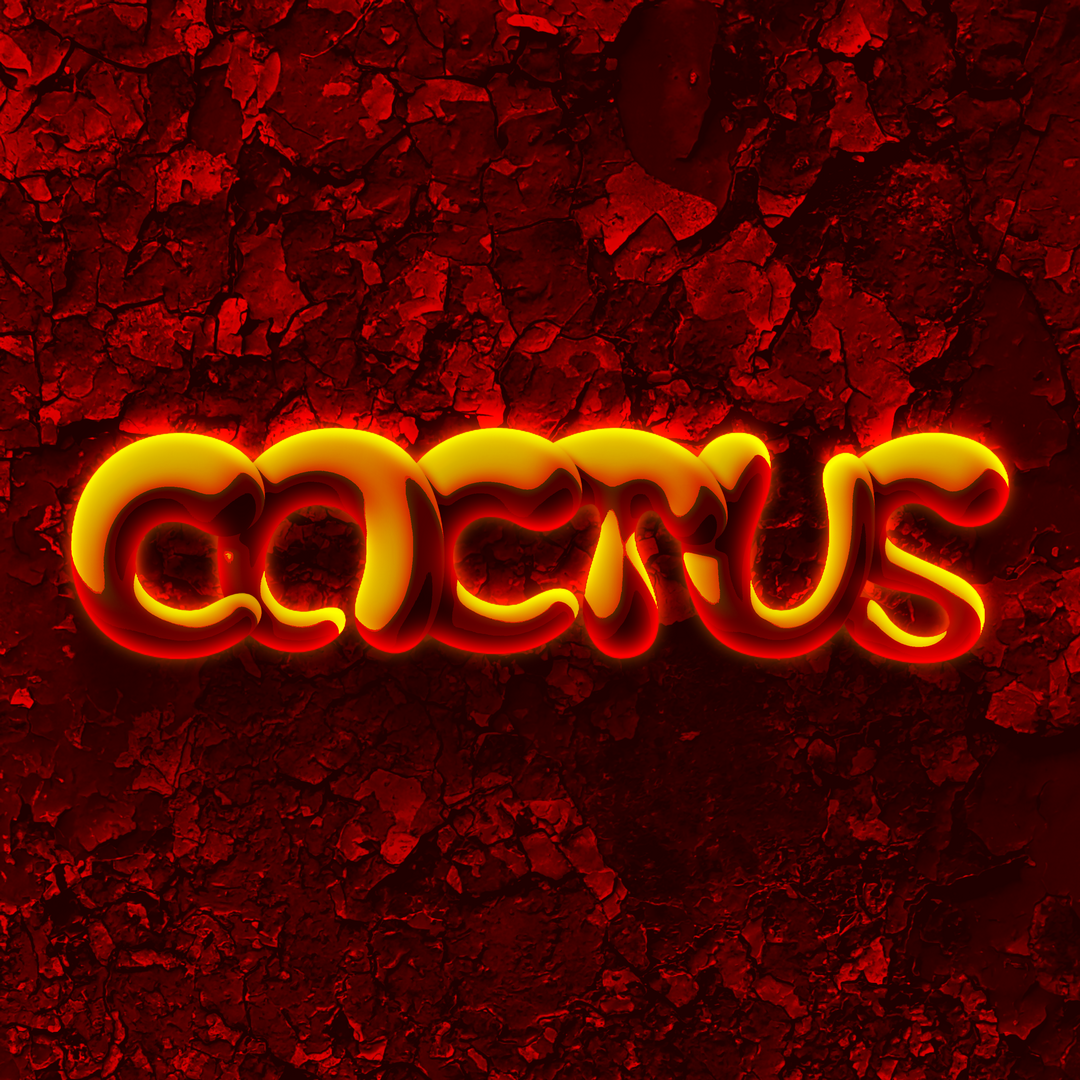
Don't ask me, why I am "burning" CACTUS Because I have no answer, but i include both versions, fire effect with and fire free. Let it snow, let it snow, let it ... burn
-
affinity designer Polar Bear - Vector and Painting texture!
Manofjesus replied to Jhonatan S's topic in Share your work
Cute bear for sure ))) -
-
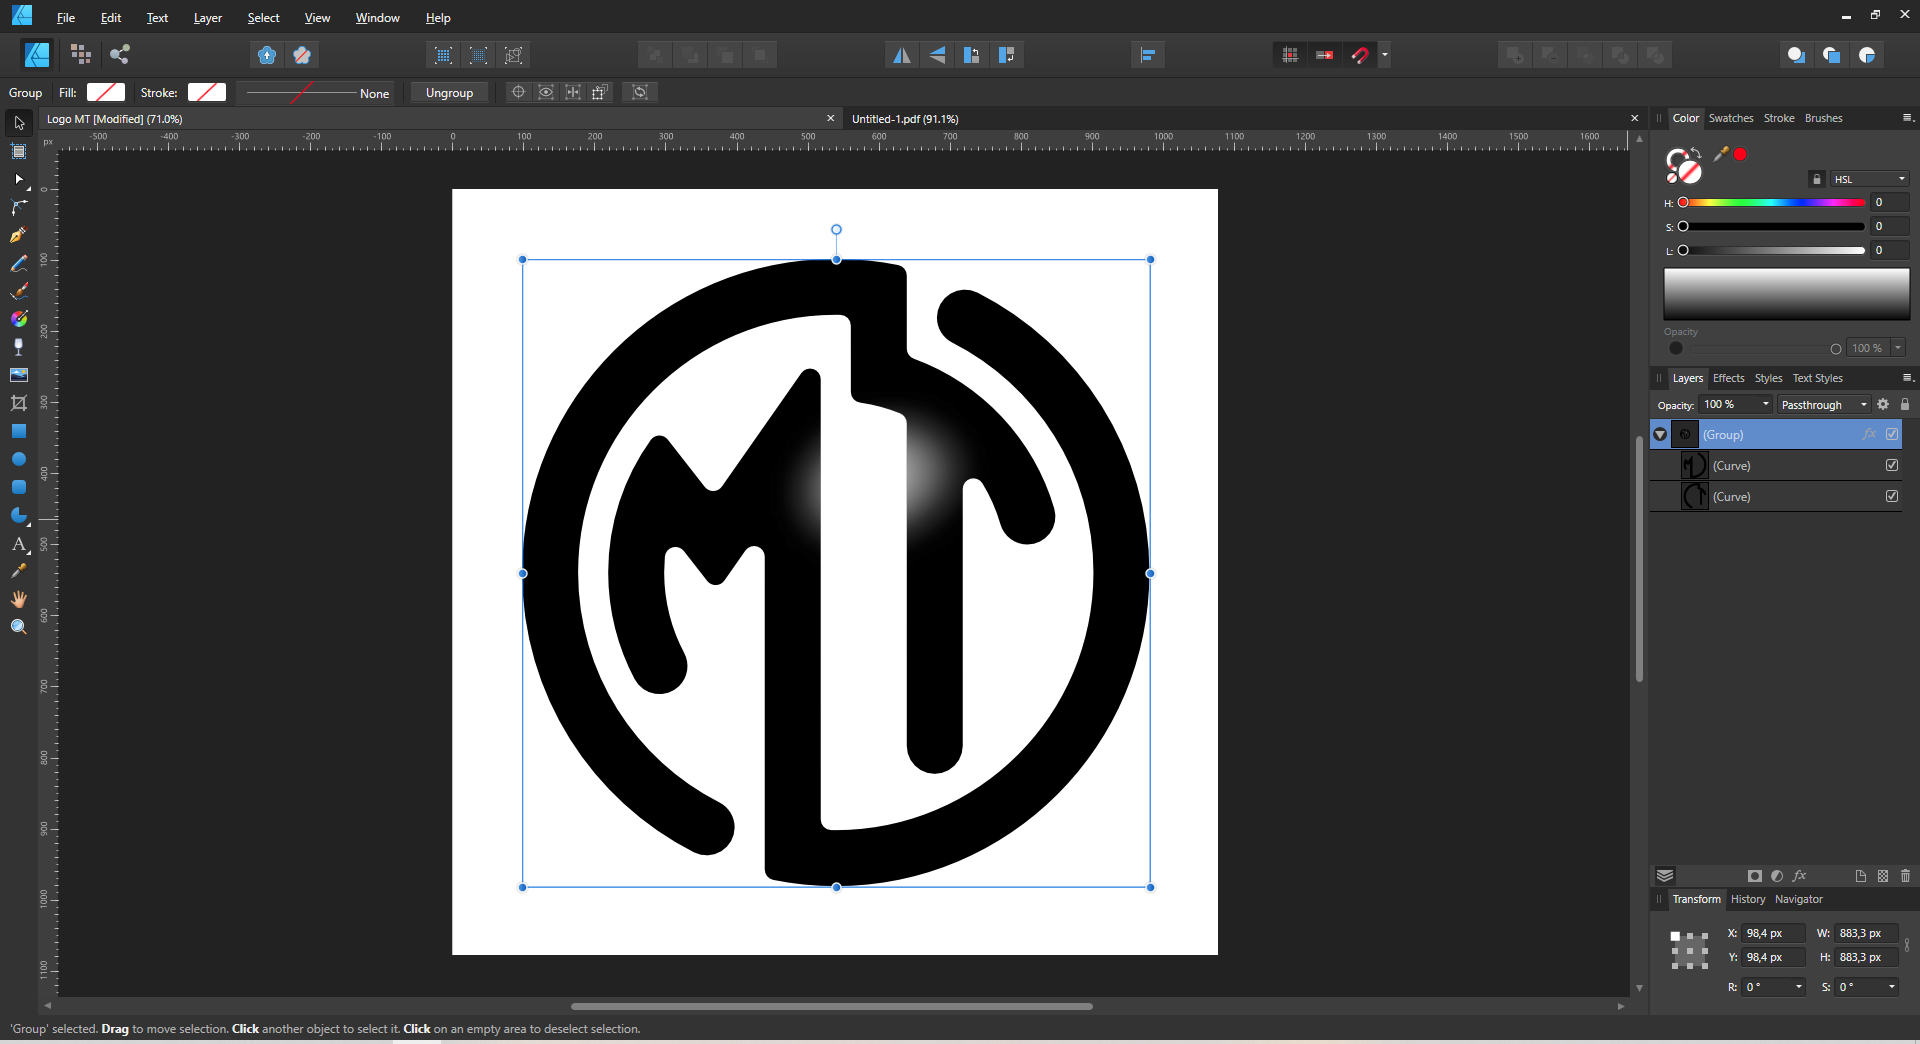
Фактический сброс происходит, то есть ты нажал и оно сбросило. Ну если говорить о практической составляющей, лично я больше воспринимаю как фичу, так как особых затруднений в реальной эксплуатации кистей в повседневной обработке это не несёт. Может они как-то и заменят или преобразуют это, разделив на два раздельных значения - применительно к слою, на котором работаешь и применительно к кисти, активной в данный момент - то есть будут отображать две пары значений возможно. На данный момент это особенность не конкретной кисти, а самого подхода к этому нюансу в движке.
-
Я поставил режим Paint Mixer Brush - я устанавливаю произвольный оттенок, щелкаю по слоям - он не сбрасывается. Потом меняю его местами с контуром - опять он не сбрасывается. Но если я делаю сброс до прочерков, как у тебя - он заменяется как и в обычной кисти на два белых кружка. И так для всей серии кистей. И в этом режиме обычная кисть ничего не рисует, как и было задумано, пока я не укажу явно цвет.
-
То есть когда у меня выделен инструмент пикер и я щелкаю по слоям - я вижу преднастройку по слоям. А когда выделяю кисть, тогда при нажатии на каждый слой показывает привязку к текущей кисти. То есть если ты в режиме кисти сбросишь эти настройки, то при щелкании на каждом слое будет одна и та же картина, пока ты в режиме кисти. И кружки с перечеркнутой линией в режиме кисти будут автоматом заменяться на белый цвет, так как рисовать пустотой кистью программа не будет :))))
-
Я выбираю разные слои и на разных слоях у меня разные значения заливки и контура. При том что инструмент при этом я не меняю.
-
Ты выбираешь другой слой и там отображаются преднастройки для этого слоя - цвет заливки и цвет контура. А что именно не так?
-
I upload short PDF tips and tricks manual about ORIGINAL - link is here MY IG POST WITH LINK
-
Ohh, sorry for duplicate, sir )))
-
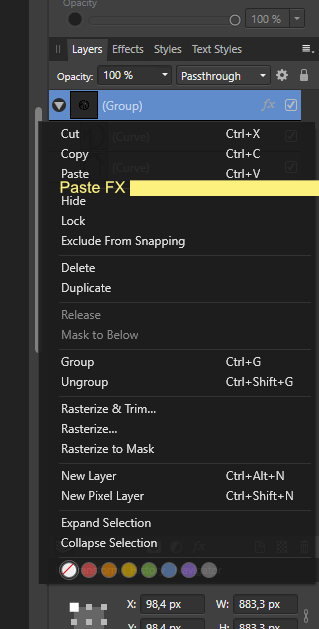
Paste FX glitch and SUGGESTION
Manofjesus replied to Manofjesus's topic in Feedback for Affinity Designer V1 on Desktop
Good advice, i repost it in BUG section, thank you ! I receive answer " The Paste FX behaviour is a known issue/bug that's already logged to be looked at. " -
2. SUGGESTION - why not to place Paste FX in drop down commands for the Layer tabs - as on my screenshot? It will be more handy and logical - where you work with FX, adjust, copy and paste them in one area/window ..... maybe )))
-
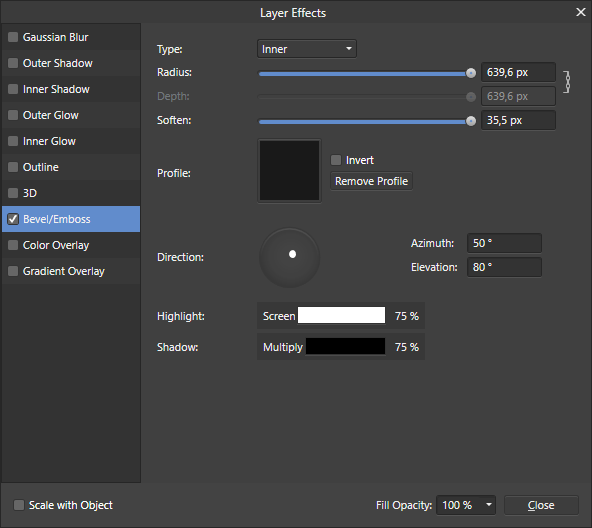
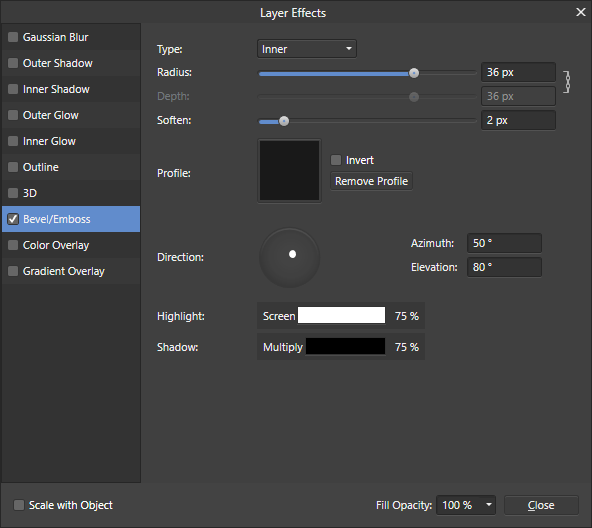
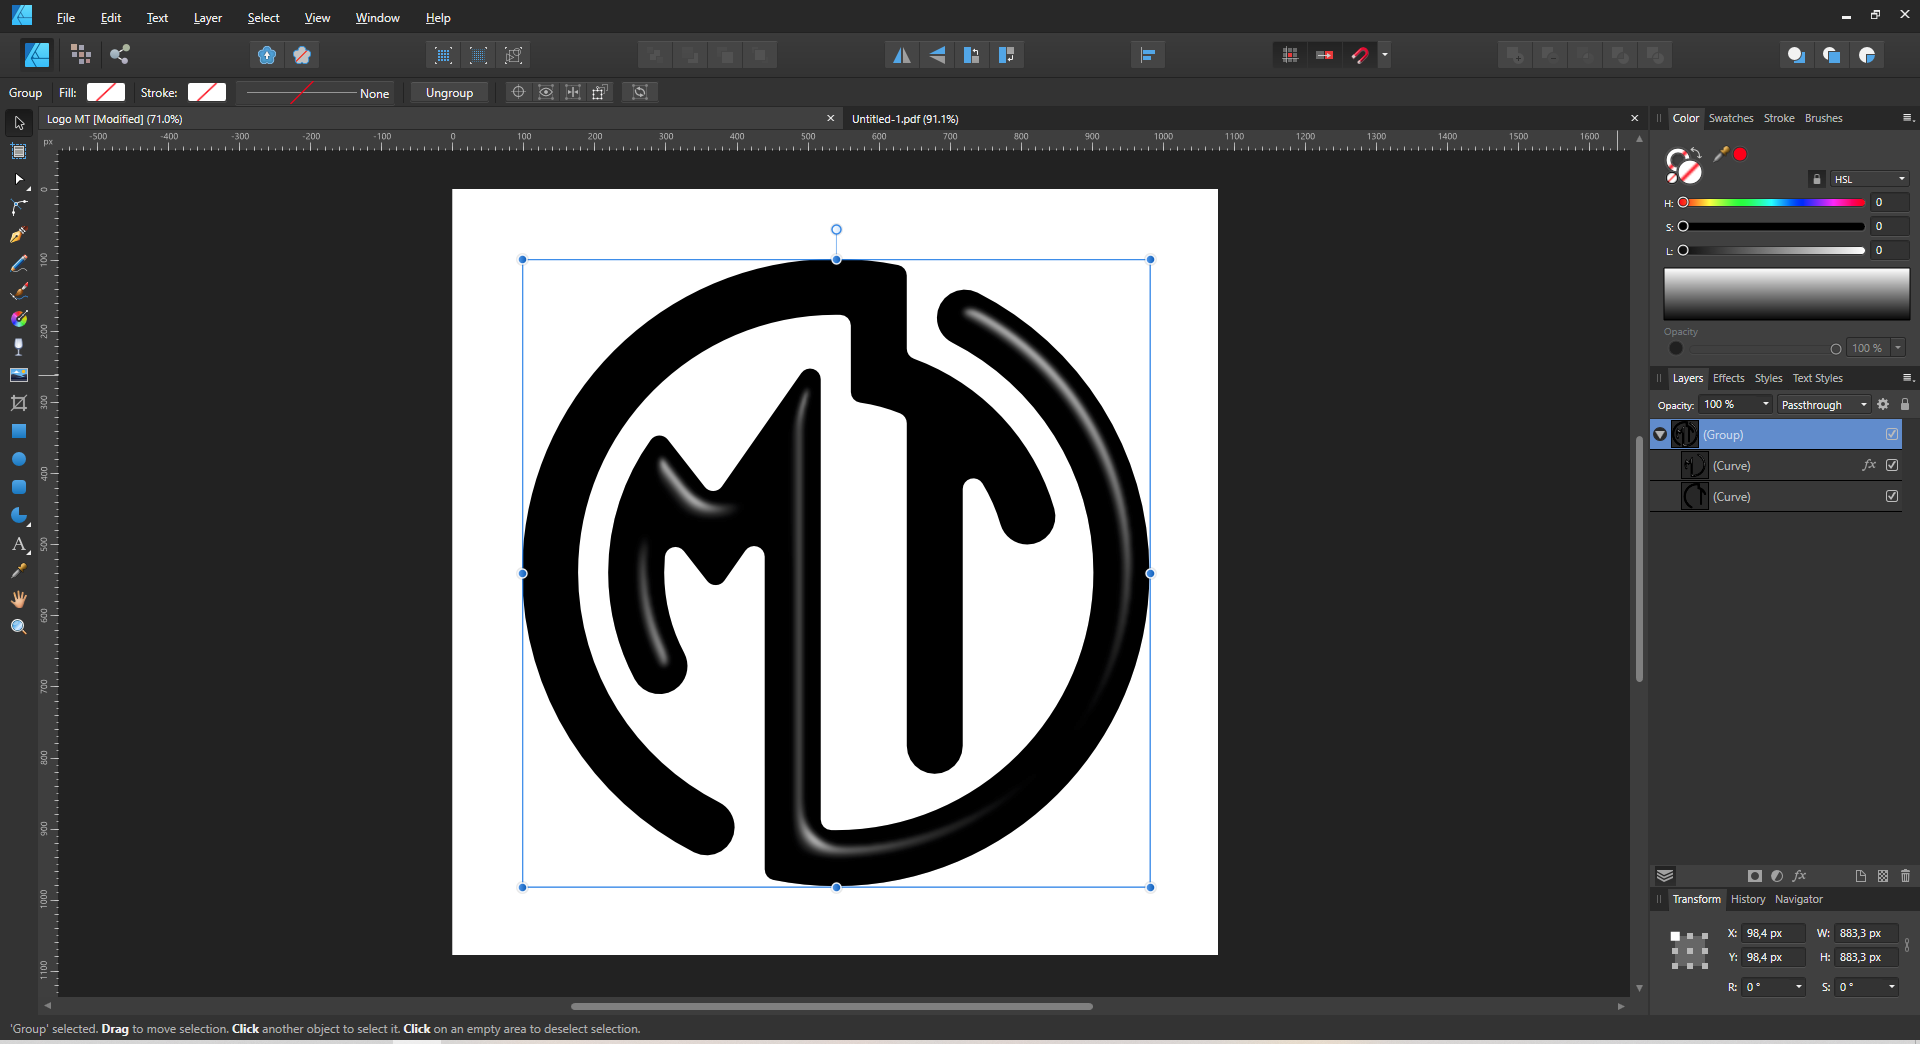
1. Hello, friends. First of all i want to describe glitch. I have a design with two elements in one group. I make bevel FX adjustments to one of it. Then i copy one element with adjusted FX and then use for my group - Edit/Paste FX command. The settings for bevel FX are changed a lot and overall effect looks completely different. I dont check other FXs - it need to be checked additionally. Why the RADIUS from 36px becomes 639,6px and SOFTEN value from 2px becomes 35,5px ? Source FX values are multiplied by the same value in destination layer FX, the value is 17,75 . Look at this - 2*17,75 = 35,5px and 36*17,75=639,6px. Hmm, what an obstacles (software or hardware) to put 36px as 36px and to put 2px as 2px? I can still enter the requested FX values for the group manually - and it looks like it have to be - the same, as it looks for individual elements in group. The FX engine has the same functionality for group of layers, as for the single layer. It works with group and single layers without any limitations in FX functionality. The FX values must to be transferred from one object to another without any changes/distortions i think )))
-
Here is my example, that illustrates, what i was talking in previous ENGINE post. This is very useful and unique feature ))) Thank you, Affinity team ! P.S. Click to picture (you see just big thumbnail in my post) and look to it at 100% zoom to evaluate actual difference.
-
affinity designer My latest vector work.
Manofjesus replied to serdarduran's topic in Share your work
Nice work !!!- 1 reply
-
- 1
-

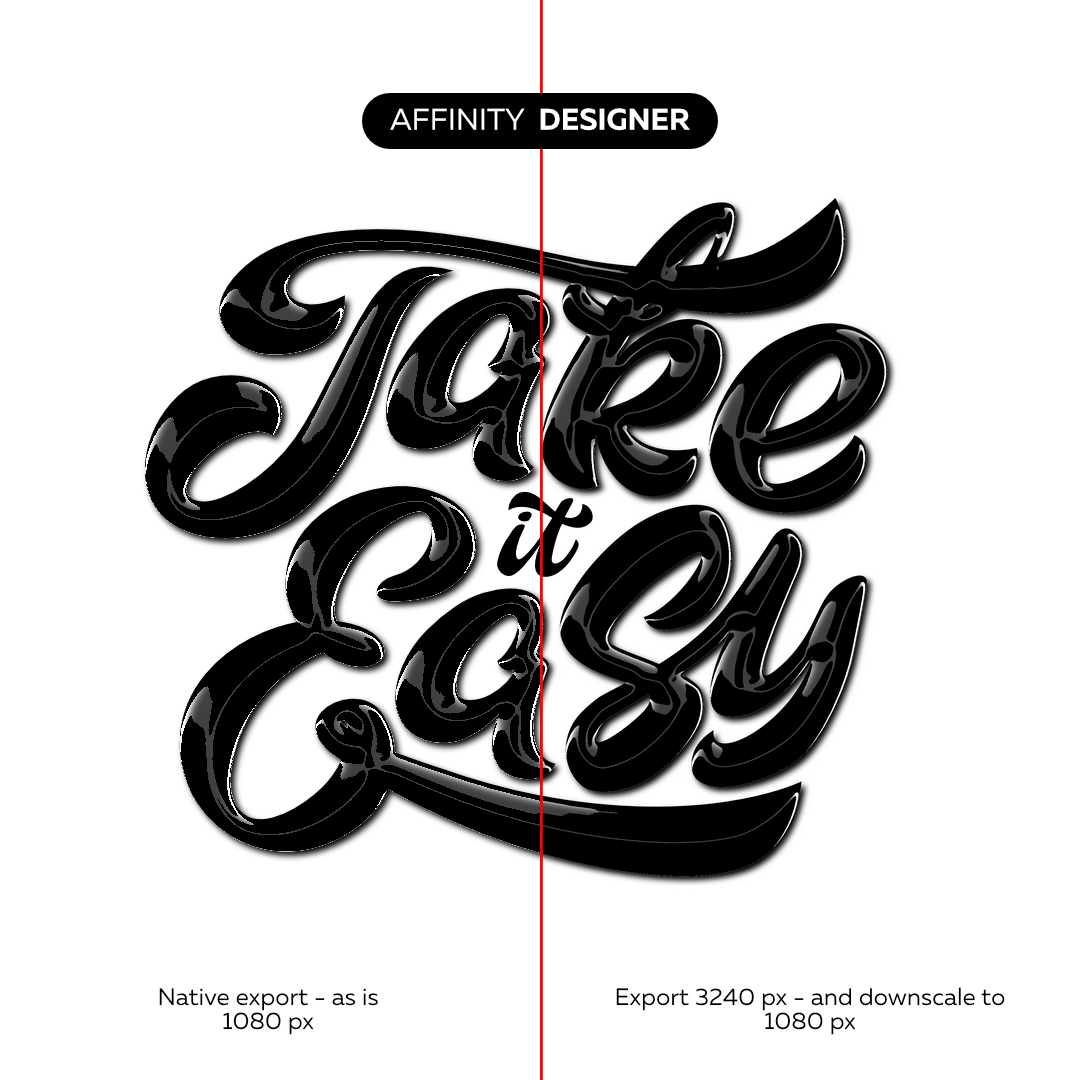
-
This time i decide to reproduce NEON effect in Affinity Designer. All elements are from vector. Only background is a bitmap. I found interesting thing. My file dimension is 1080px square. And after applying intensive FX - some image areas looks harsh. What i found to solve this issue - during export i enter resolution 3240px square - 3x per side bigger. And then open exported image and downscale it back to 1080 px square as i need. And it looks MUCH better . P.S. I use lanczos separable