jw432
-
Posts
26 -
Joined
-
Last visited
Everything posted by jw432
-
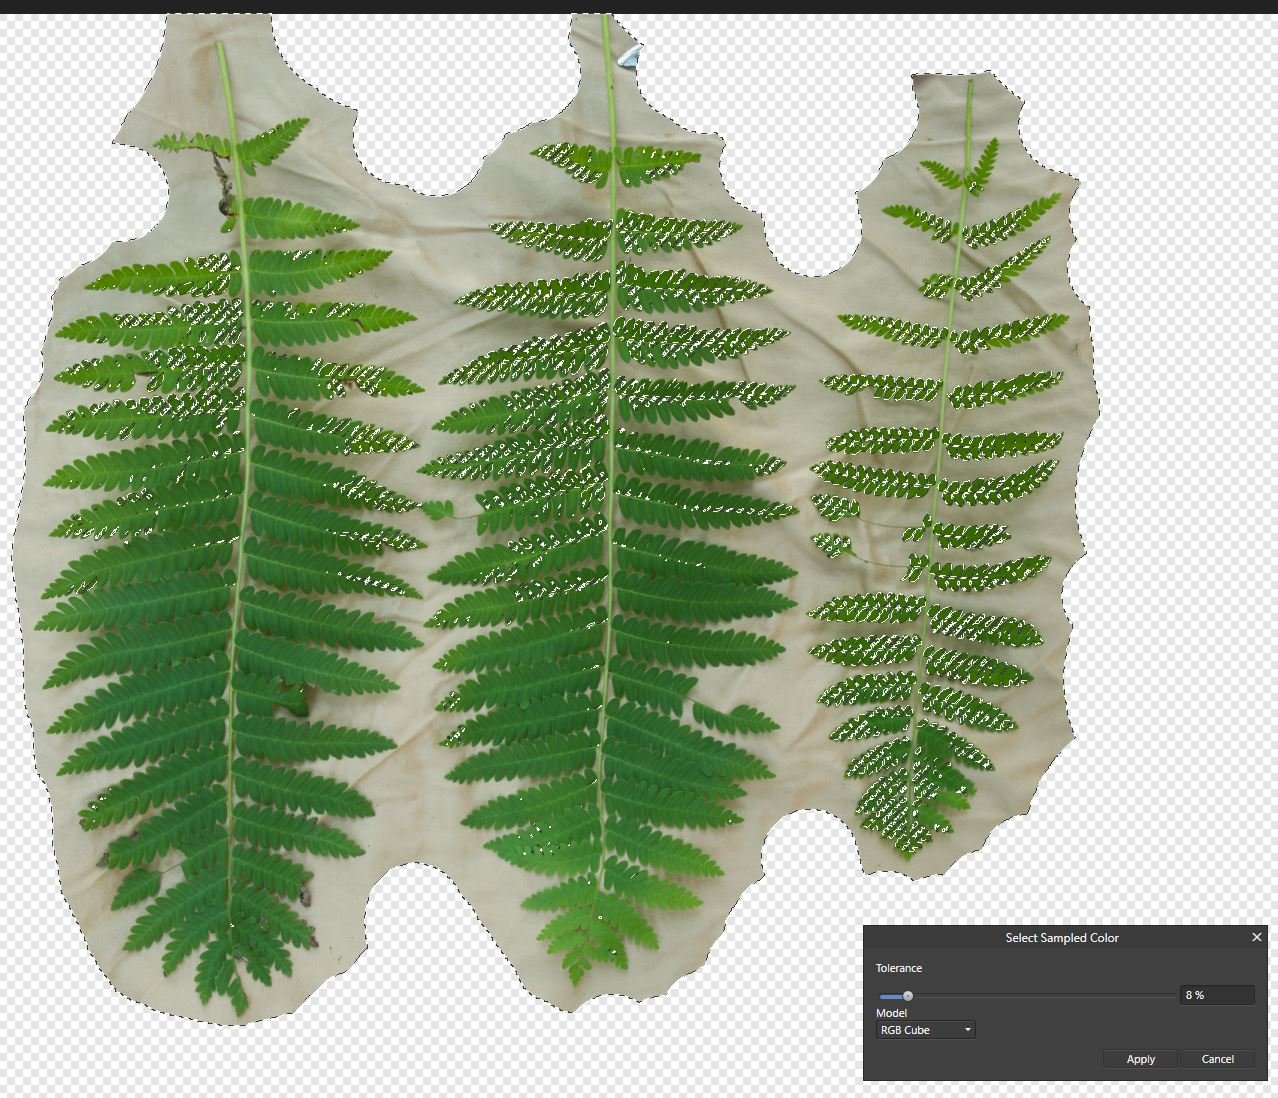
Hi all - I feel like this should be very easy. I am having trouble selecting just my ferns ... I've tried the various selection methods and in every case I am getting a lot of the orange-ish sheet behind the ferns. I've tried the flood select (on the sheet and ferns) with and without contiguous and various levels of tolerance. Ive tried the select color range and select sampled color (on both the sheet and ferns). I thought that putting green ferns on an orangey sheet would make selection of the ferns simple and easy, almost one step. Instead I am finding separation very difficult. The selection brush seems to do OK but a lot of manual work. Why can't I simply select GREEN and just get the ferns. The sheet really is orangeish although it shows more beige here. How can I easily do this, what am I missing? Is there a better choice of sheet for the background?

-
I am finding that 1.9.1.979 crashes a lot more than older releases. Things that make it crash: focus stacking, panorama stitching, loading saved projects which have several layers and unusual crop sizes. This attached file, seems to crash AF everytime I try to load it, it loads, thinks for a bit, I scroll in and out, and bam !! AF crashes. -- Appears upload of af file failed with a -200 error
-
ha ha - what a maroon am I - Opacity was 0!!! Pebkac
-
well old Bruce, you are probably on the right track - I don't know and I guess I need to RTFM a bit more. 🙂 I'll take more explanation on there if you're up for it, or I'll find it in the docs. Thanks Update: Online help says nothing about this under Inpainting brush using image or pixel layer. My layer is a 'merge visible' layer named of all things 'Pixel'. So I'm guessing I'm dealing with a pixel layer.
-
Often when I use the inpainting brush NOTHING happens (regardless of the layer setting (Current Layer or Current Layer and Below). I paint over the object, the computer does some thinking and then the image looks just the same. Am I missing something on how to use this properly? It happens a lot. I'm on 1.8.5.703.
-
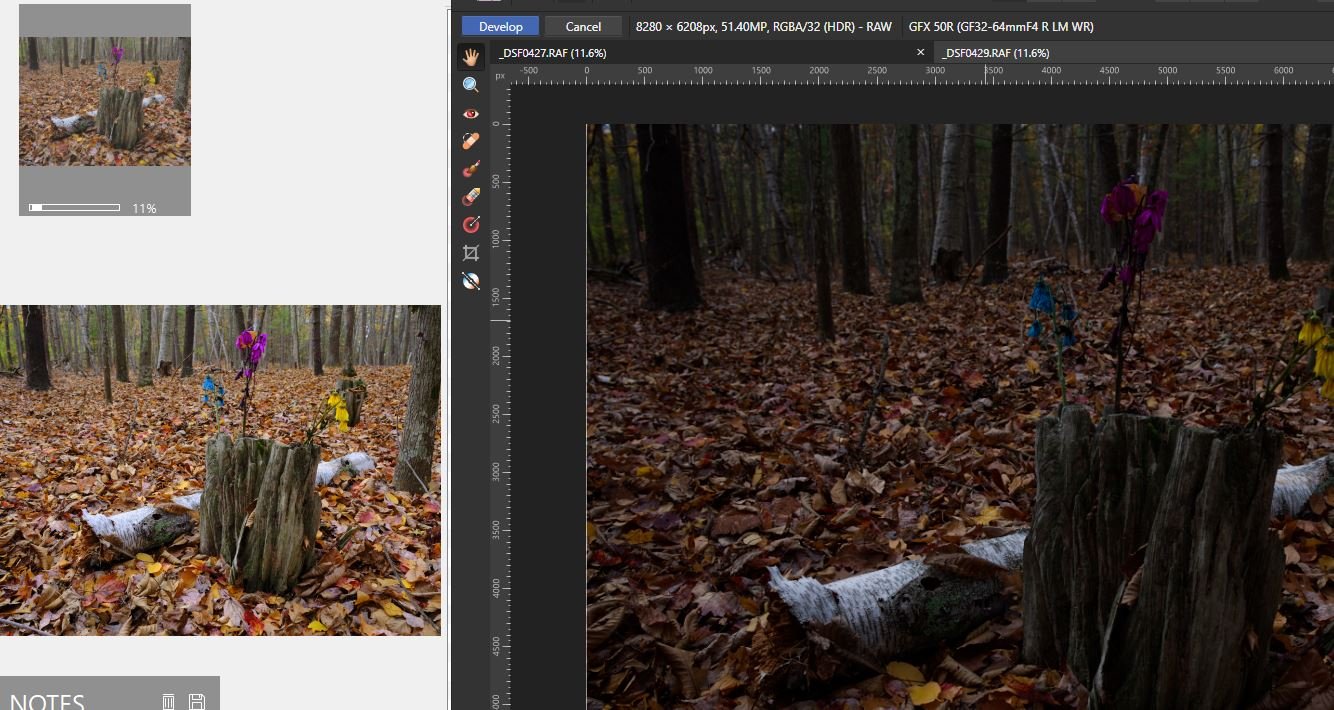
When I open Fuji GFX 50R .RAF images in AP, taken with a Dynamic Range of 400%, they are underexposed. They are correctly exposed everywhere else in other software. It would appear from my testing that AP does not recognize the GFX 50R dynamic range settings causing the photo be be underexposed in AP when a Dynamic Range of 400% is used in the camera. Picture shows image in Nomacs and AP side by side. Picture take at iso 500, Dynamic Range 400%
-
I don't think so becuase when I select the layer the purple box / move tool the purple box gets the dots for resizing and rotation. I would not expect the snapping candidate to have that, although I must note that the Snapping is ON. I'll see what happens when I turn it off.
-
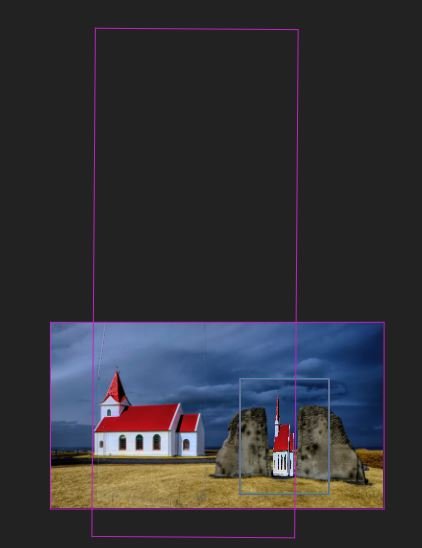
I used the selection brush tool to just select the church, and then duplicated it onto a new layer and used the Move tool to move its position. The purple box showing the slection is WAY TOO BIG for the selection, which means I have to zoom way out to grab the control points for adjustment. Why is this purple box so much LARGER than the selection? IS there some setting or some way to fix? Yes, I know I stretched the church (just playing) but I would expect the purple selection box of the smaller church to basically bound only the church, not extend way over to the left of the original church nor stretch way up towards the top, beyond the steeple. First pic, the AP selection area is way to large for what was selected Second Pic - I drew a rectangle around what I would want/expect the selection control size to be.
-
AP is no longer behaving in it's normally awesome way. I am noticing lots of little quarks that seem to be graphics related but are hard to describe and hard to explain (see attached image) but let me try a few examples: I am now seeing magenta square box around ALL of my layers when I chose the move tool even though I I selected a specific layer. I did not see this before When using the mask brush I may not actually see the expected change until I actually start brushing, it used to show me the intended change before I brushed When working on a layer mask, all of my other layers disappeared and did not come back until I turned off and back the other layers Screen did not fully refresh Installed plugin disappeared from list, and I had to re-add it to AP despite the fact it never changed at it's installed location My hardware specs are awesome, so it's not that I don't have enough; Geforce 1070ti with 8G, 32 Gig Ram, i7 Any ideas?
-
Yes, I believe HVDB is correct - Delete the temp folder Unruly temporary files maybe ?%appdata%\Affinity\Photo\1.0\tempIf so clean up the temp directory ... I ended up posting to some AP facebook page and got a very rapid response but can find that post. Perhaps it was deleted in favor of creating a positive image or I am just a searching noob? Whatever - DON'T clear your setting as suggested -it won't fix the problem and you'll have to set your AP up again, it will wipe out any plugins you have I did clear out some directory, probably the ProgramData one and that DID resolve the problem, as I suspect, some file is sitting on the hard drive making AP think that it is loading a file when it is not. Without a file on the file system or an entry in the registry how would a restart cause a program to think it had pending work?
-
Anybody else have other ideas? Problem persists, resetting did not fix it.
-
Tried that, cleared the first 3 items. Could not close the app, same problem. Killed and restarted and the problem continues.
-
AP does not quit gracefully anymore. Every time I try to exit the application I get a dialog that says: Quitting At least one file is currently being opened. Please wait for the files to load before quitting the application. However NO files are being loaded. There must be something messed up and I bet it's easy to fix. Any body know how to fix?
-
Recently I am seeing a processing wait bar that says "Analyzing Scene" - this seem to come up and take several seconds every time I switch layers. I have version 1.6.4.104 and I do not recall seeing this happen with great frequency until recently
-
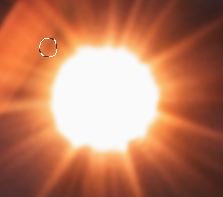
I have a photo that includes several round balls. I want to select one of the balls, which is mostly round and I would like to use the 'Elliptical Marquee Tool' not the Selection Brush because I can 'see' the edges I want better than the Selection Brush. But I just don't get how to use the Elliptical selection tool. If I start a new selection at say point X, Y, the larger the selection, the more the 'top left' corner moves off of X,Y to a new position, X+a, Y+b. My selection ends up not aligning perfectly the ball. How do I micro adjust the selection to get the proper alignment? I don't have the 'balls' shot handy but assume this light is a ball and I want to very carefully select a round object. I don't understand why I can't start the circle at the top left edge or how to properly refine it later
-
I just took the image to practice/experiment with a new manual focus lens and my relatively new Fuji X-E3. After I shot it I wondered how easy/hard it would be to extract. I'm just am amateur who likes taking pics, likes editing them and like trying out ideas from Affinity tutorials ... As much as I like photography I am not a pro. My thought in extracting it would be to composite it in some unusual background (City Street, Forest, Underwater, etc) and see if I could create tonal symmetry between the two and possibly create something unusual/interesting. I've found that there are many times when I can get the images I want to combine but am challenged to get believable tones when compositing.
-
Thanks all for the great ideas! MUCH APPRECIATED! Being a newbie I thought that simply putting a white piece of paper in back would give me an easily selectable background considering that white is very different from the tone of Shiva. I did not account for the shadows. I did quickly get a better selection, but not as good as the one v_kyr got, but using Colors -> Erase White Paper and then selecting the background/inverting. Fortunately this is just an experiment not a necessity! I could easily reshoot, with a flat perspective, better lighting and a piece of blue paper in back, perhaps with some distance to reduce shadows. Not every desired selection gets shot under the right conditions and I really like AP, but I did expect this extraction to be easier - A good learning exercise. Here is working version with a color background to reveal problem areas, Not final at all. I see that I would have to chose between reducing/trying to eliminate the shadows, or embracing them an being sure to consistently keep them. I;ve definitely improved my selection skills/knowledge with this exercise as well as my thinking about scene set up if extraction is the goal.
-
How would you select Dancing Shiva? I thought "I'll just slap a piece of white paper behind Dancing Shiva, select the white and invert it"... boy was I wrong, multiple attempts with different selection tools and just not getting a clean selection. I am open to all suggestions including doing something other than putting a piece of white paper in the back, but after learning the Affinity selection tools, I really thought this would be easy.
-
I had the same question, Just use the marquee tool to select the areas that you want red eye fixed in and AFTER you 'Develop' the red eye will be gone. My test shows that it does NOT remove the red eye until you develop, which is kind of unintuitive as I expected the tool to do it real time in the Develop Persona.
-
I agree with Sergi, I would like a Close All too, I've opened 20 files, now I have to run thru 20 Ctrl-W
-
Worked Great toltec, thanks!
-
Thanks all! Defringe by itself did not do it, but these steps got the image along a lot further, It's still not as good as I would like but upon closer inspection I now see that the real problem is in the source image, where the leaves are both grayish/purple and disconnected in the most troublesome area and remain gray and disconnected even after doing a pretty good job of eliminating the purple. I appreciate all of the advice and thank you for taking a look at this challenging photo - the video tutorials make it look so easy compared to what I faced in this picture. Fortunately I am learning, not trying to get a perfect image.
-
Can someone tell me how to do a good sky replacement of this photo? Included are the original and my failed attempt. As you can see there is a lot of purple in the leaves (upper left) in the original. I tried to defringe but that did not solve it. There must be some way to get rid of that purple, make the sky selection/replacement easier. Don't worry that they are not the same size, I am looking for good technique not an interesting photo. Thanks in advance. Orig.afphoto badReplace.afphoto
-
Stock Photos
jw432 replied to toltec's topic in Pre-V2 Archive of Affinity on Desktop Questions (macOS and Windows)
I would like the ability to add other Stock providers too, Unsplash looks good, I agree with Verdi.