

rangerpaul
-
Posts
8 -
Joined
-
Last visited
Posts posted by rangerpaul
-
-
7 minutes ago, Old Bruce said:
I am curious as to why you don't use the builtin mask on the HSL layer? Fill it with Black and you should have the same result without making a Mask layer and grouping it with the HSL layer.
Let's say I have a picture of a busy marketplace outdoors on a sunny day. The image is completely filled with people, shapes, structures and objects, in all ranges of intersecting colors, contrasts, lights, darks, highlights and shadows. The whole image is chaotic, and no part stands out from any other. Now, among that chaos is a street cafe, and in front of that cafe is a table with a woman having tea. I want to make the woman the focus of the image. Trying to use selection tools to create a mask of her would be a nightmare, and takes forever. By doing this I can quickly isolate the subject and do whatever I want to make that part of the image draw your eye. It's a hack but it works for me.
-
Update: Thanks all. Your replies gave me some ideas to try. This time I duplicated the HSL adjustment layer. Then, I grouped both of those layers. I used the Empty Mask tool as recommended, which indeed placed an inverted mask over the entire group as it did in V1. After doing that, everything worked as before. I'm going to try this out on a real image next and I'll post up my results. Thanks again, one and all.
-
23 minutes ago, Ralph Johann said:
I like the video, but it's actually for V1. I wish it would still work like this 😖
First thing is that AP V2 doesn't put one layer automatically in a group anymore, it must be two minimum, don't ask me why 🤭
When I start working and I know my next layers will be in one group I usually start grouping the first layer and work on in this group. AP V2 allows grouping only if there's more than one layer (video1).I'm using group masks quite often and don't understand why APV2 doesn't add the mask to the group anymore. Instead it creates a new layer as mask layer which I manually have to add to the group. Can someone explain me why they changed that really useful feature ?!?
I also dont understand why the mask symbol isn't shown right next to the group symbol as it is in Photoshop. Masks for adjustments layers always appear next right to the layer symbol and the mask for the group is a layer underneath the mask. That always leads to misunderstandings, because the mask layer is also on the same line with all the other masks, it would help if it would be more or less inserted as the other layers just to make it obvious that it's the layer mask. And hen the group is closed I can't even see if it's masked or not.
Any suggestions ?
Exactly
-
4 hours ago, Lisbon said:
If I mistakenly click on the group instead of the mask before inverting (Ctrl+I), it will rasterize the group, resulting in a transparent pixel layer.
Rather than adding a mask + inverting the colors, I suggest adding a negative mask in one single step.

If you prefer, you can assign a shortcut:
Edit > Preferences > Shortcuts > Photo/Layer: New Empty Mask LayerI'm gonna try this out. I'll let you know thanks.
-
14 hours ago, Ron P. said:
I don't understand your concept of adding a mask to an adjustment layer, they have built in masks.
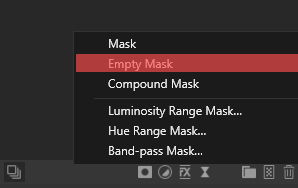
In V2 which Mask did you apply? Mask, Empty Mask (which is the same is Inverting), Compound, Luminosity Range, Band Pass, or Hue Range?
The concept is to create a masked group. If I have a specific area in a photo that I'm going to apply many local adjustments to, I only have to paint the area once...
I'll attach a video explaining. I'm not really good at using the selection tools.
-
I can't consistently create masked groups in Version 2 Photo. I used it a lot in V1 but something in V2 is different. Here's how I know how to do it.
- I add an HSL adjustment layer to the top of the layer stack
- I pick a garish color and increase saturation to 100
- On the HSL I do a Cmd G to create a group
- I select the group layer and click on the Mask icon
- With the mask layer selected I invert the mask using Cmd I
- The HSL adjustment is concealed
- I select the Brush tool and Paint with White
- My HSL adjustment is revealed where I've painted
- I hide the HSL adjustment using the See/ Hide button on the right
- I add whatever adjustment and or filter layers on top of the HSL layer
- I get the expected results
In version 2, when I invert the mask I get a transparent mask rather than an inverted paintable mask. Sometimes if I screw around with the nesting positions It suddenly does what I want, but by then I have no idea of what I've done to make it so.
Can someone please explain what is different and how to achieve this in V2?
Thanks in advance
-
I second this motion

Masked Groups in V2 Photo
in Affinity on Desktop Questions (macOS and Windows)
Posted
Final: Here's a quick and dirty example of what I was trying to do. Test plane b4 is the original image. Test test image after is the edited image I made global adjustments to White Balance, Levels, Brightness and Contrast, and Vibrance to the whole image. Then I reduced the global brightness a bit. After that, I recolored the image red and duplicated the red layer. I grouped the two red layers and used an empty mask on the group layer. I painted the plane only in white on the mask to expose the red layer on it. Once happy with the mask, I hid the two red layers and added Brightness and Contrast, Vibrance, Clarity, and two High Pass (Blend Mode=Overlay) on top of the hidden layers in the group. The result is that the plane stands out from the other planes, port-o-lets, people, signage and etc. When I do this for realI, I try to make it subtle yet effective. Thanks again everyone.