MartinL
-
Posts
36 -
Joined
-
Last visited
Everything posted by MartinL
-
Shadows and highlights
MartinL replied to MartinL's topic in Affinity on Desktop Questions (macOS and Windows)
Omg, thx. That's why. -
Shadows and highlights
MartinL replied to MartinL's topic in Affinity on Desktop Questions (macOS and Windows)
It only increases the highlights.
-
Shadows and highlights
MartinL replied to MartinL's topic in Affinity on Desktop Questions (macOS and Windows)
Can it be used directly on a pixel layer (the photo in this case)?
-
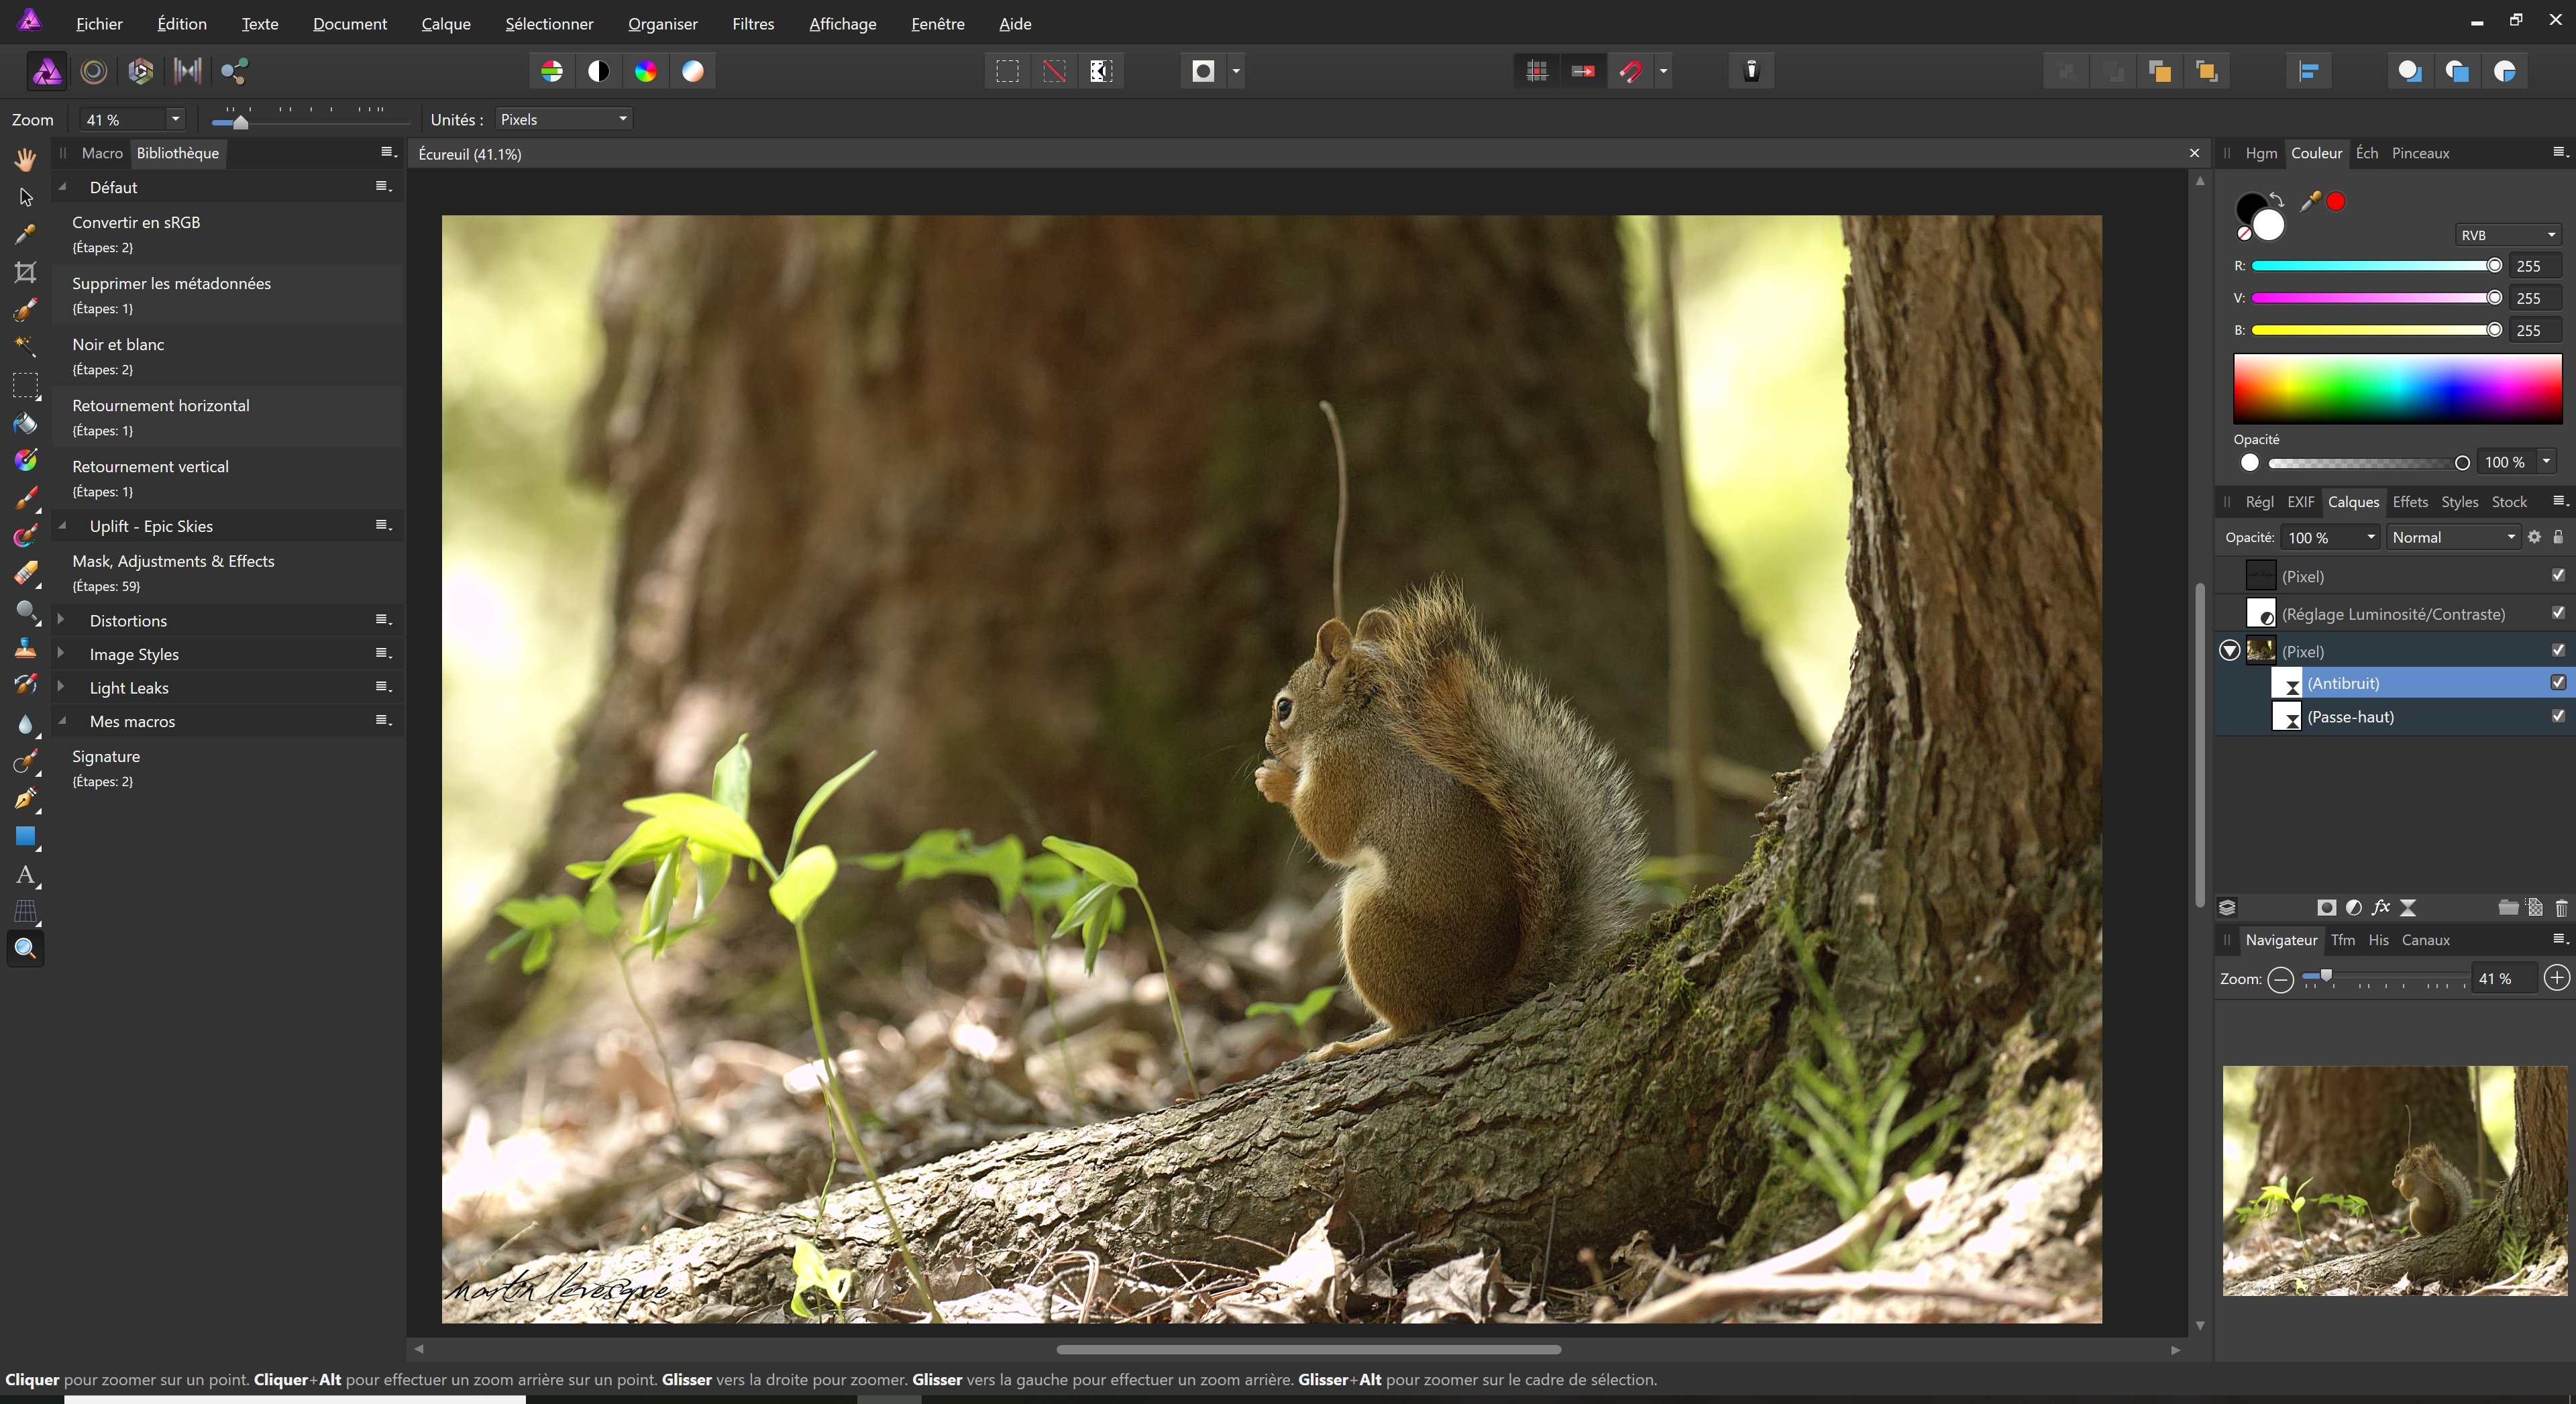
Hi. This is an old photo I took. I'm reediting it from scratch. I'm trying to lower the highlights. I decreased the shadows by 24% and the highlights by 25% and then I inverted the effect. Now I'm trying to paint in only the parts I want the effect to be applied. I may be misunderstanding something or I have a problem with my paint brush. The red circle on the left is with a hardness of 20% (Flux in my version) and the circle on the right (was showing just by moving the brush) is with 100%. Do you guys have the same effect or is it just me? Or maybe I'm misunderstanding something. I'm not an expert. Thank you.
-
Except I can't since there's a bug.
-
What tool do you use when merging two photos and you want to show some elements of one photo into the other? The paint brush right (shortcut b)?
-
I want to completely unselect a brush (those on the right of the screen) not select a new one. Even with ctrl+left-click, the brush is unselected but I can still paint that brush. ☹️
-
Hi. I get this annoying bug when using the paint brush. I made a macro for my logo and in this photo, the brush (for my logo) is not selected (the last one) but still being applied. Also, any way to unselect a brush when we're done? Because when I reselect the paint brush and want to include or remove elements when joining two photos, it applies the logo/brush instead. Also, when cropping a photo and then applying my logo, the logo is somehow cropped too. I found out I can ctrl+left click to unselect a brush but the bug still persist. Edited (message).
-
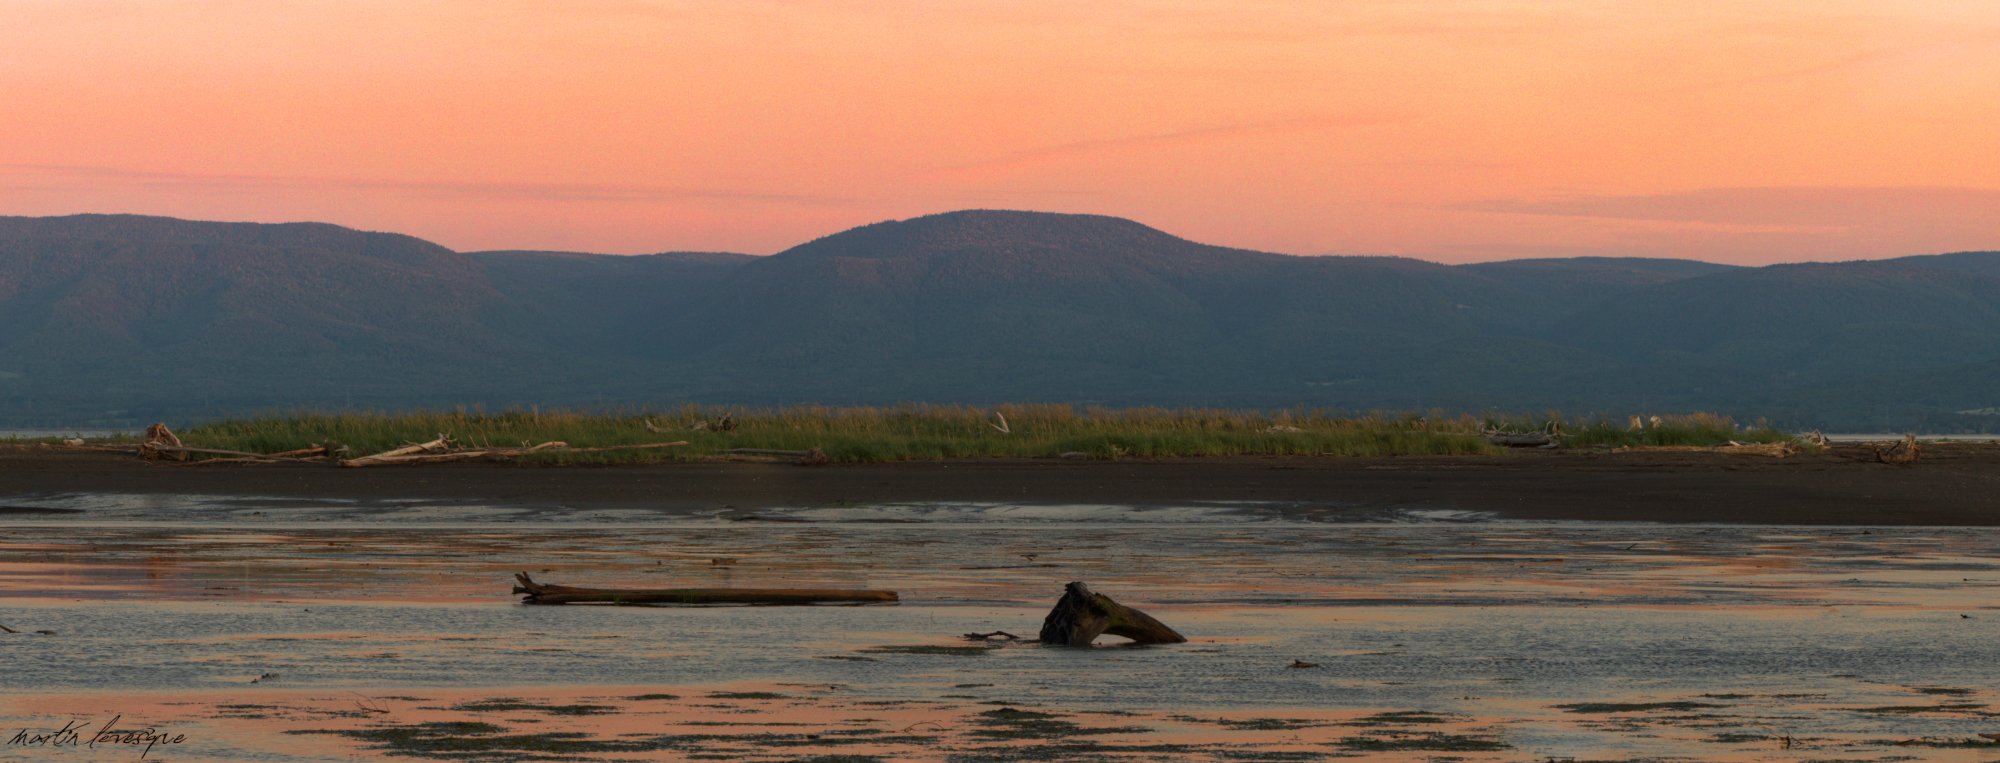
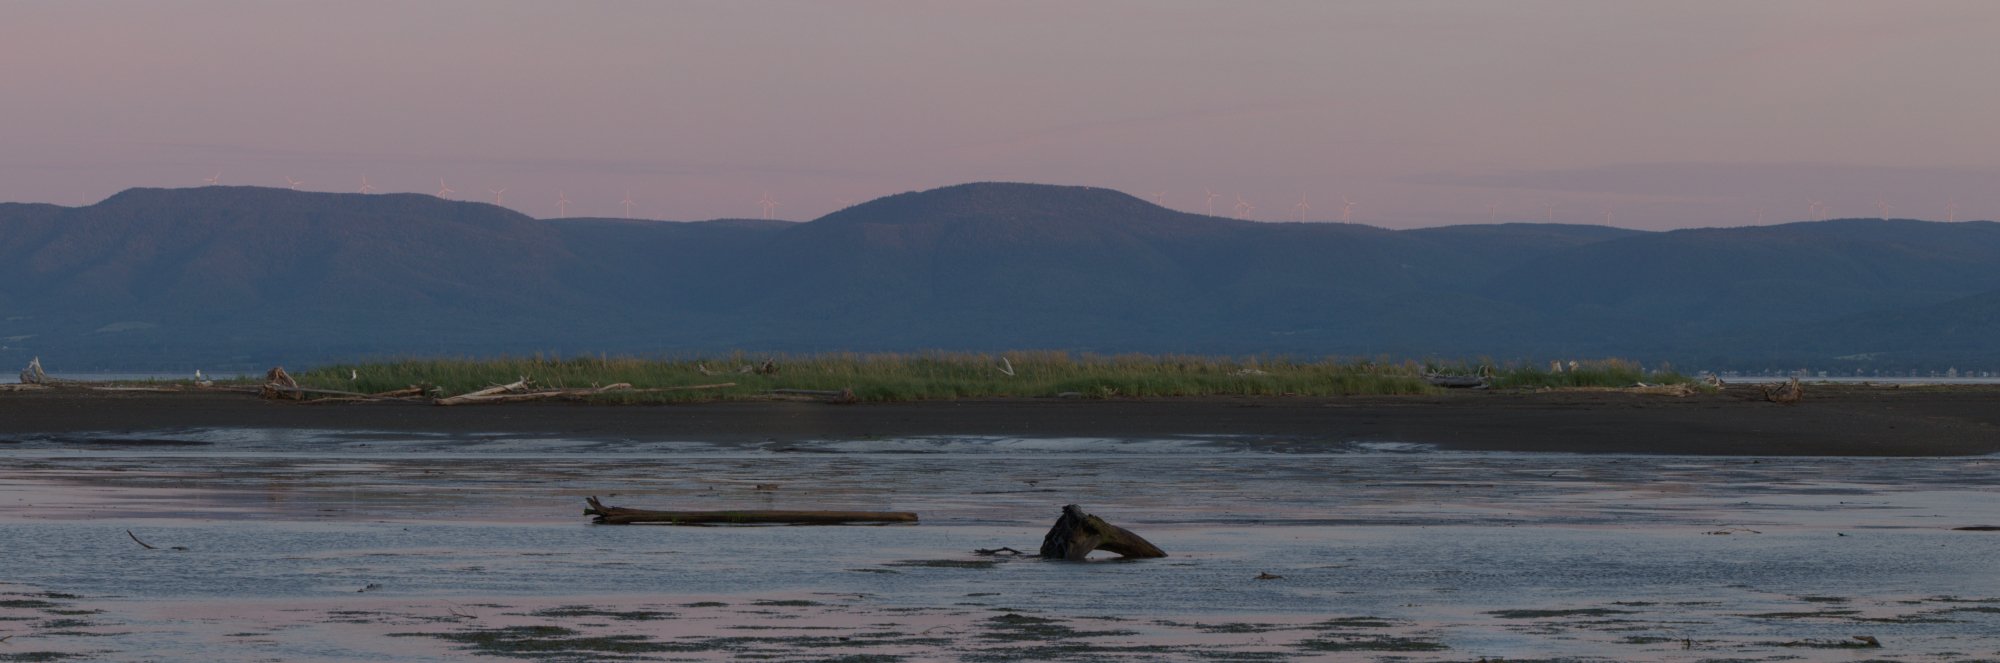
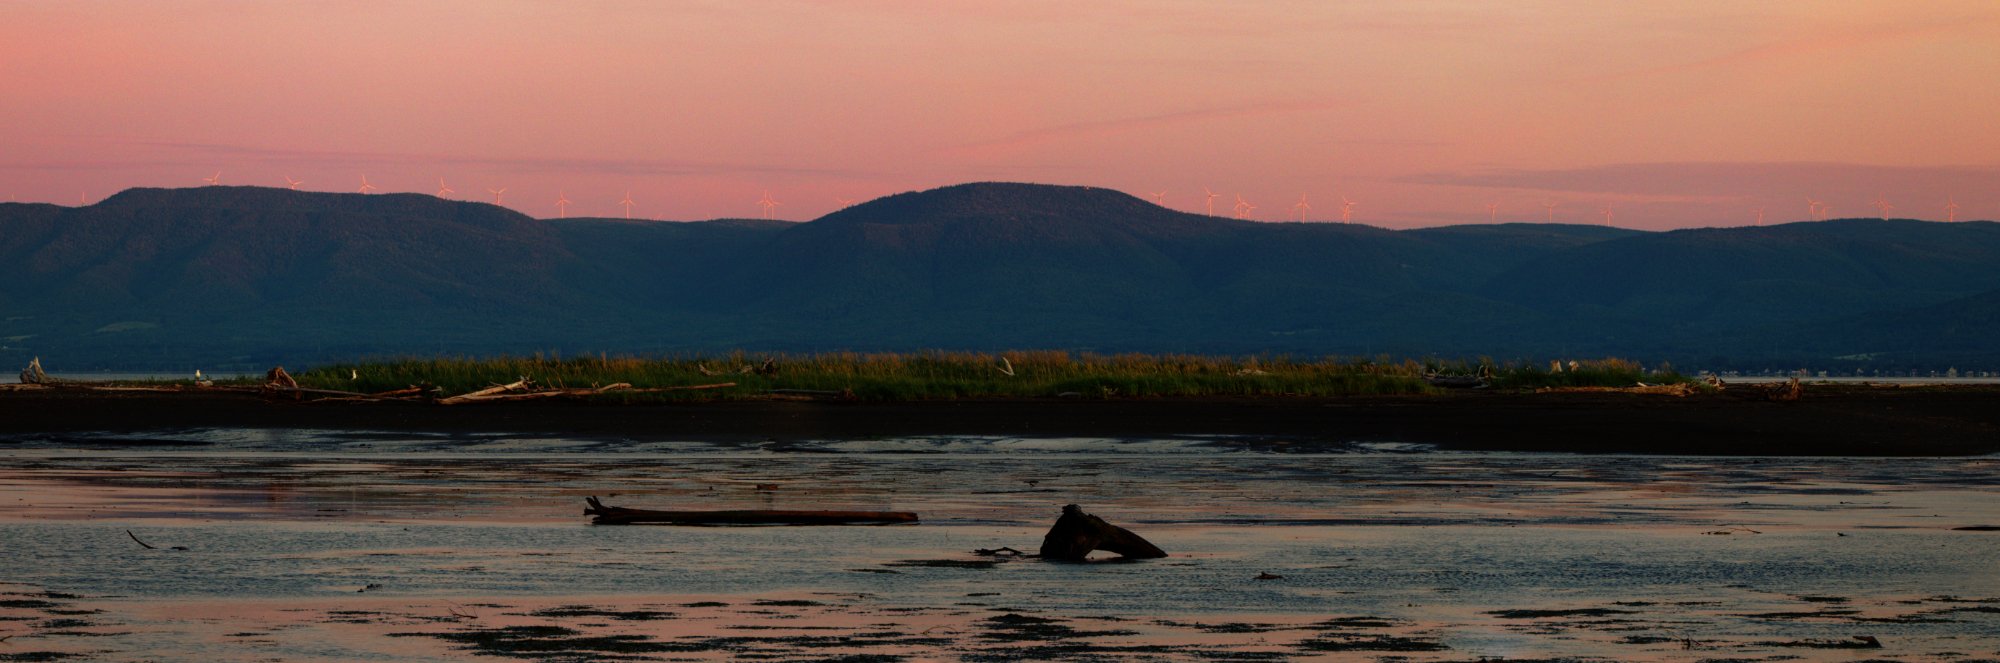
I cloned out the windfarm.
-
@Smee Again Here how it looks like now. I didn't try the gradient tool for the HSL adjustment yet.
-
Ok... I tried redoing the entire project. Not sure what else I can do. This time, I removed the windmills, the houses, the birds and a log. Removed the haze. Added a clarity live filter. I increased the exposure for the mountain using a graduated tool (from the botom of the mountain to the sky). Added white balance. Lens correction filter. Added vibrance layer. Added luminosity/Contraste layer. I tried ading a HSL layer with no success (I couldn't increase the color of the sky without affecting the rest of the photo). There is still noise in the photo and I can't remove it.
-
Ok, I have to admit the composition is not the best. But I still want to keep this photo and edit it. It's not the best sky for that spot during that week. The best one appeared while I was fishing so I couldn't go there to photograph it. The sky had more clouds, was darker with deep reds in them (for sunset). This photo was taken in the morning. The first photo is the original. For the second one, I created a copy to remove the haze and added some local saturation. Added a curve layer, a lens profile layer (it made the image warmer), a HSL layer (+15% redand +20% yellow), vibrance layer (+13% vibrance and +9% saturation), luminosity/contrast layer (+3% luminosity and +7% contrast) and a vignette live filter. For some reason, noise started showing up. Any idea what I did wrong?
-
Ended up with this version.
-
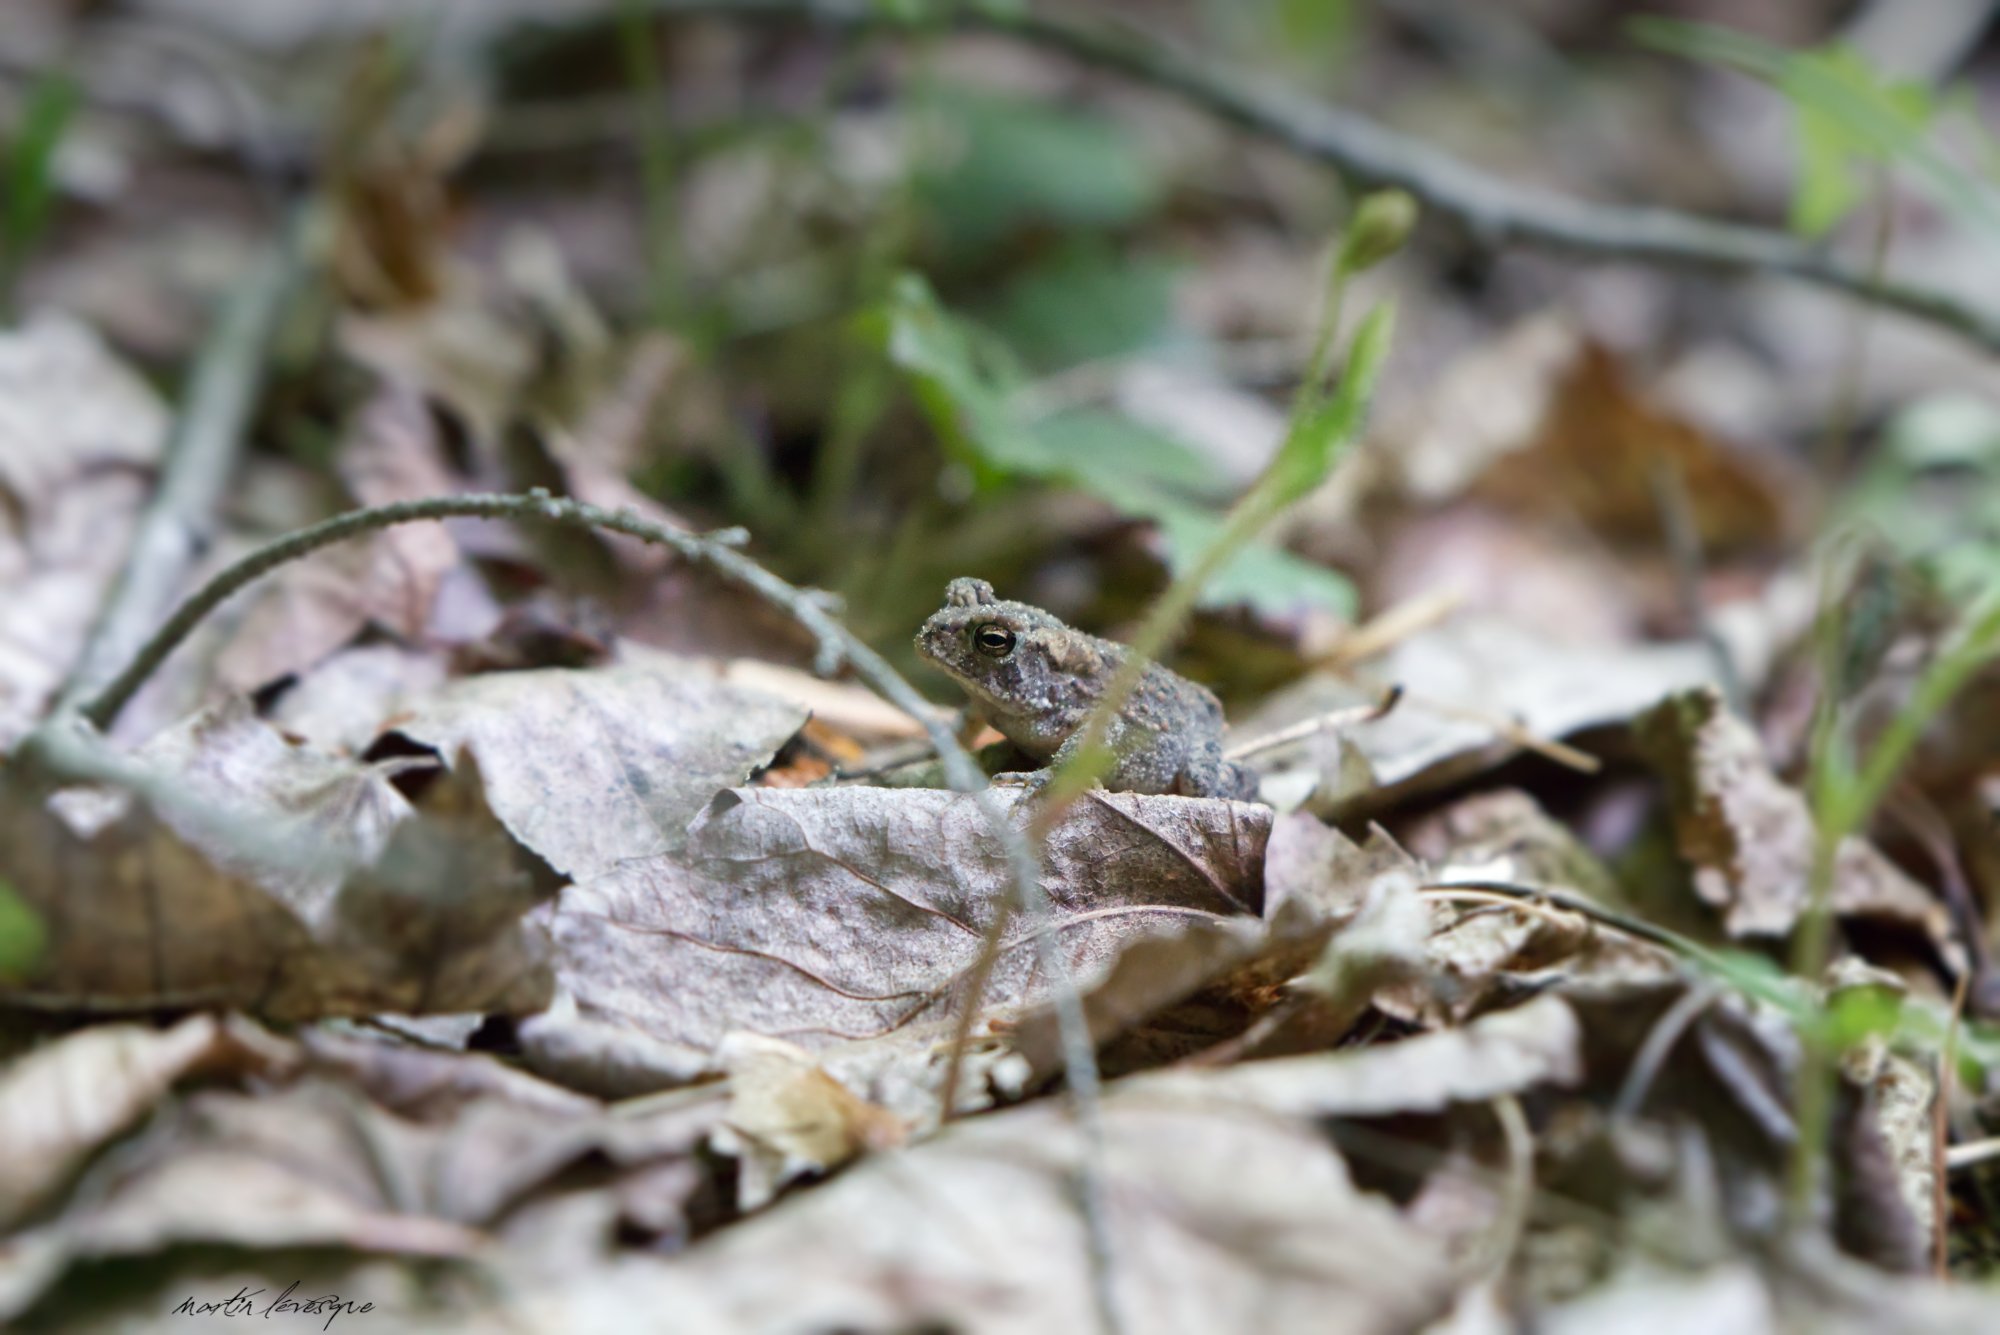
Hi everyone. I haven't been very active photographically wise but I'll try to change that. I went in the woods a few days ago and I wanted to try my new Tamron 70-200mm G2 lens. So I found this small toad (I love landscape and wildlife photography) and tried to photograph it (I used my 70-200mm Tamron lens). It's not the best photo of a toad but I'm still satified with it. Let me know what you think because I still like getting advices from better photographers. Here's what I did on this photo. I played with the basic settings in the develop persona (exposure, noise reduction, clarity, etc). Because some elements were in focus and disturbing the eye away from the toad, I used a dept of field blur tool and I made sure to put the center of the tool on the eye of the toad. I changed the exposure of the background with the help of a gradiant tool. Added signature.
-
Noise in photo
MartinL replied to MartinL's topic in Pre-V2 Archive of Affinity on Desktop Questions (macOS and Windows)
Oops lol thx for that.
-
Noise in photo
MartinL replied to MartinL's topic in Pre-V2 Archive of Affinity on Desktop Questions (macOS and Windows)
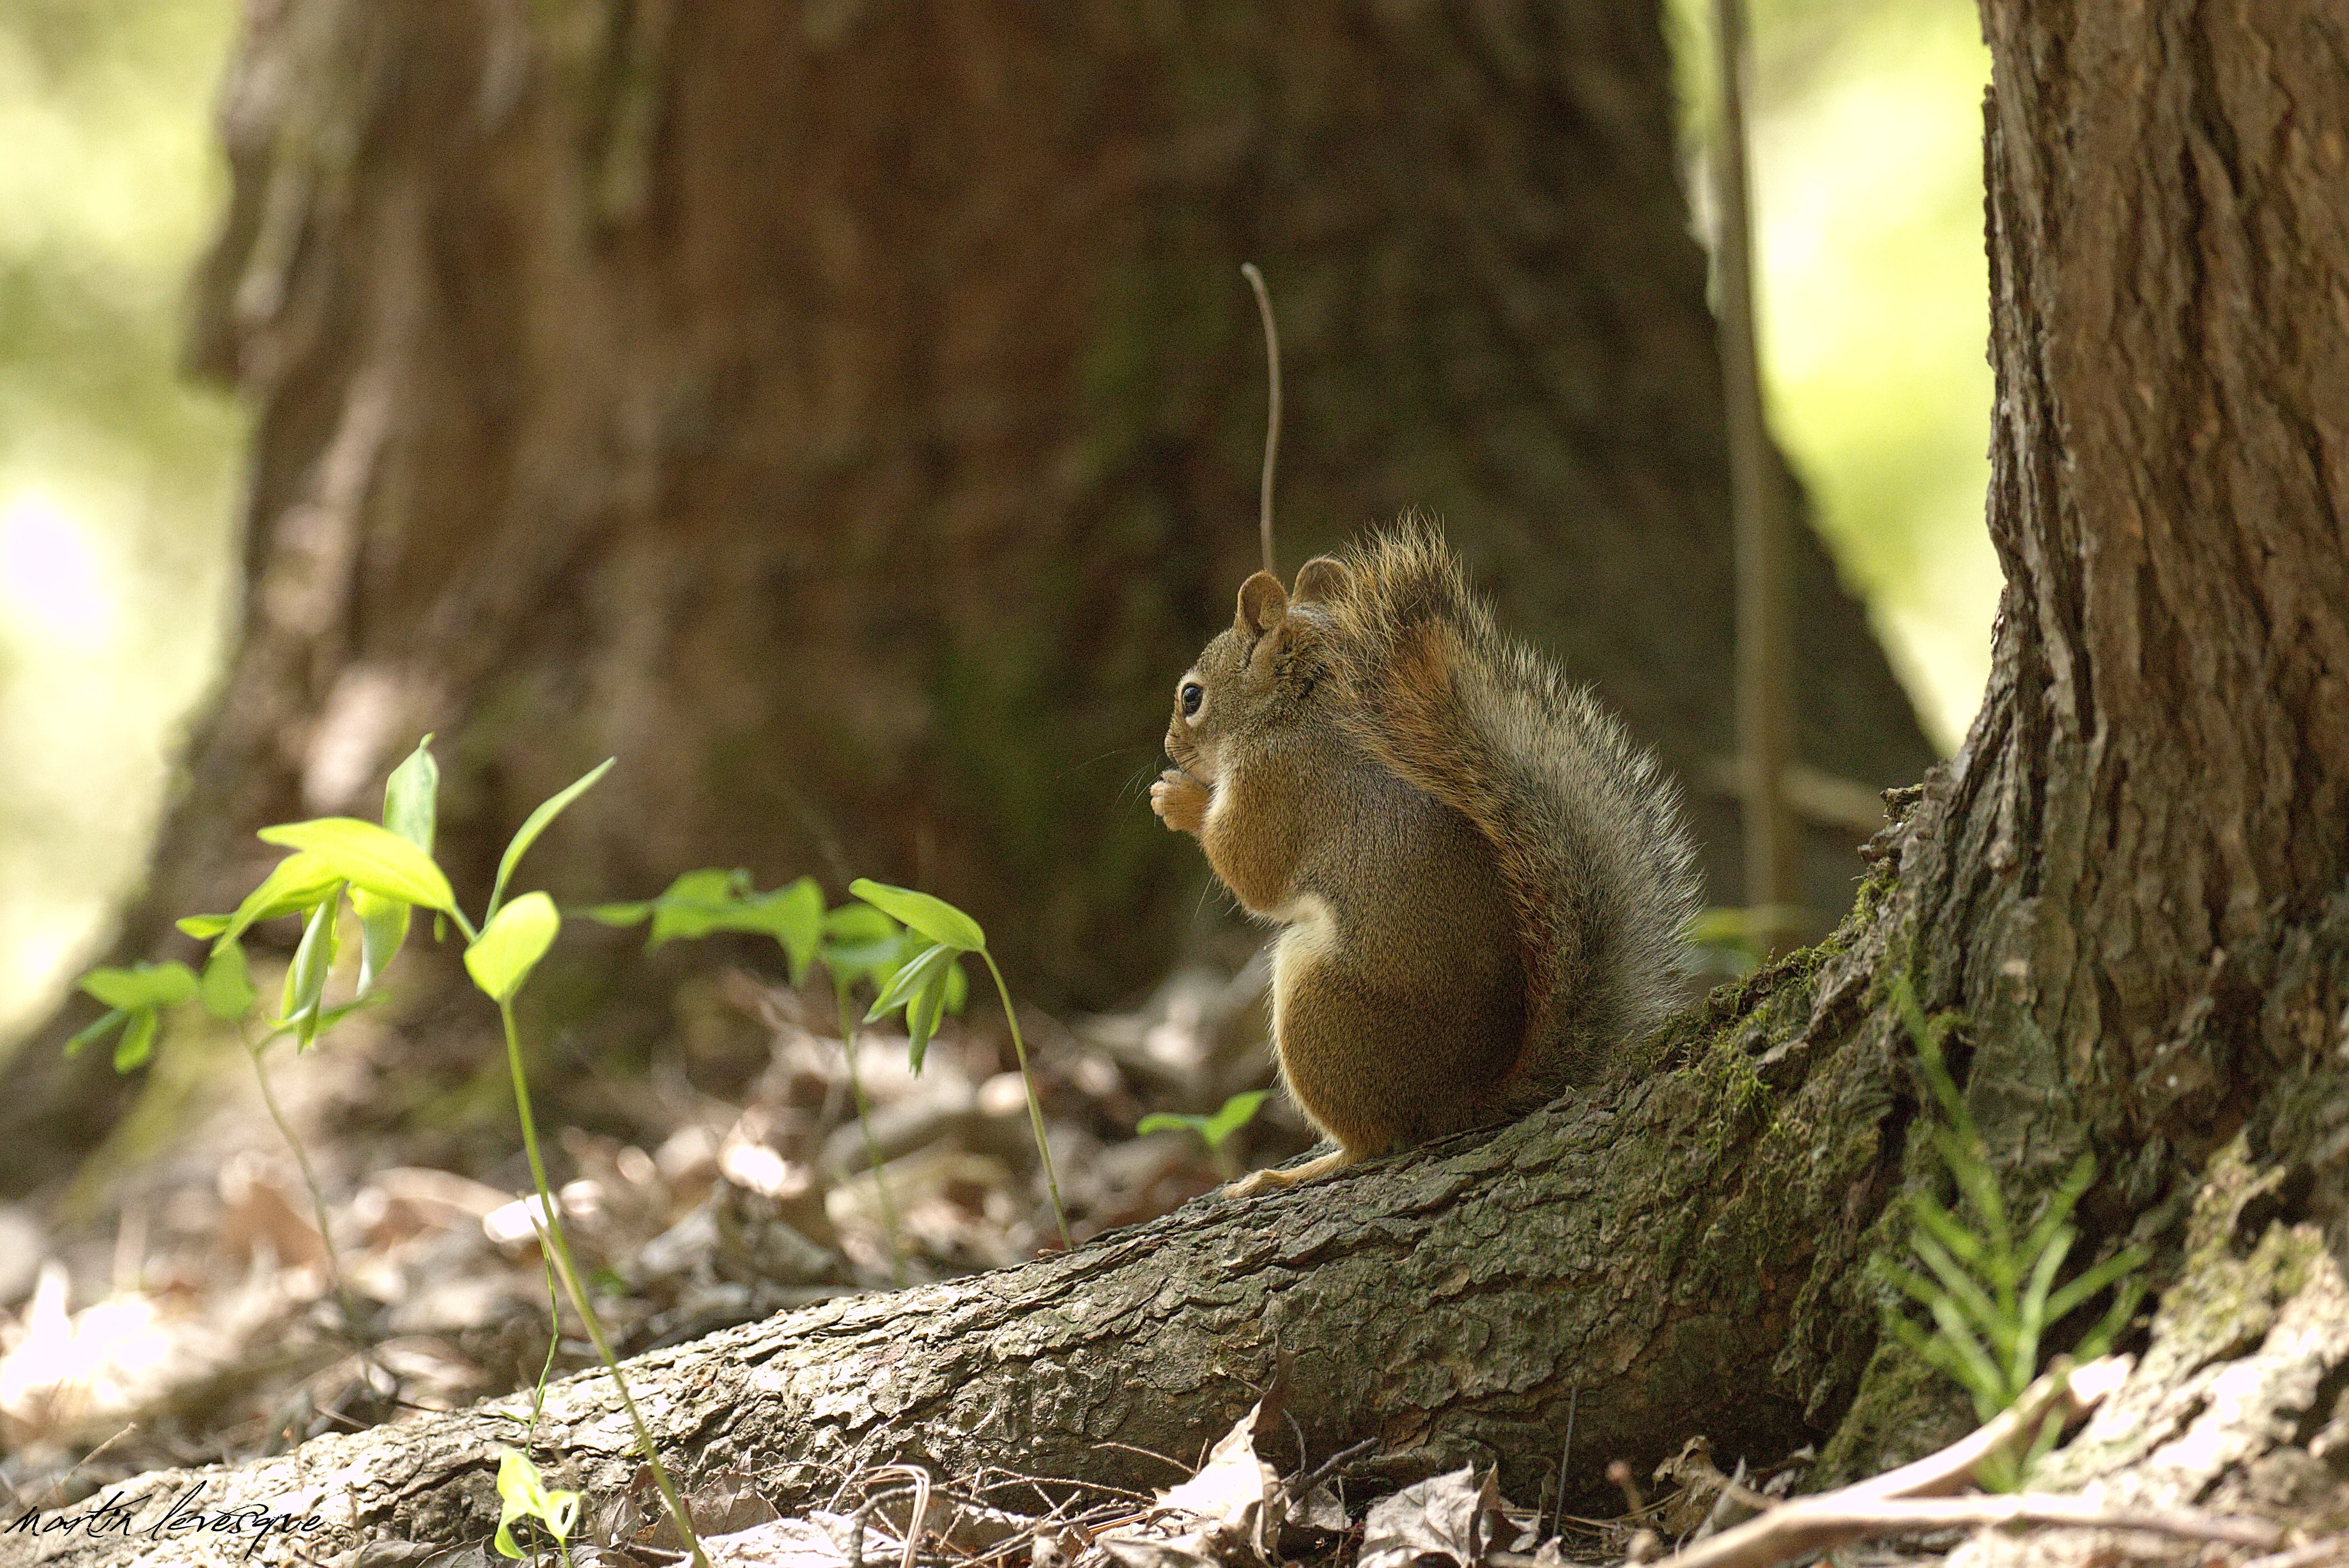
Thx you made me realize that. I think this is the best I can do about this photo. I did two seperate noise reduction here. One more extreme for the background and one less extreme for the squirrel only. So yeah no problems here but let me know what you think. Click on the photo for a better view.
-
For some reason, the software doesn't seem to export the High-pass layer I added (at least for the squirrel) and there's still some noise in the photo (I reduced the noise with a mask). In Photo the photo looks good (less noise) but not in the jpeg version. Any idea why?
-
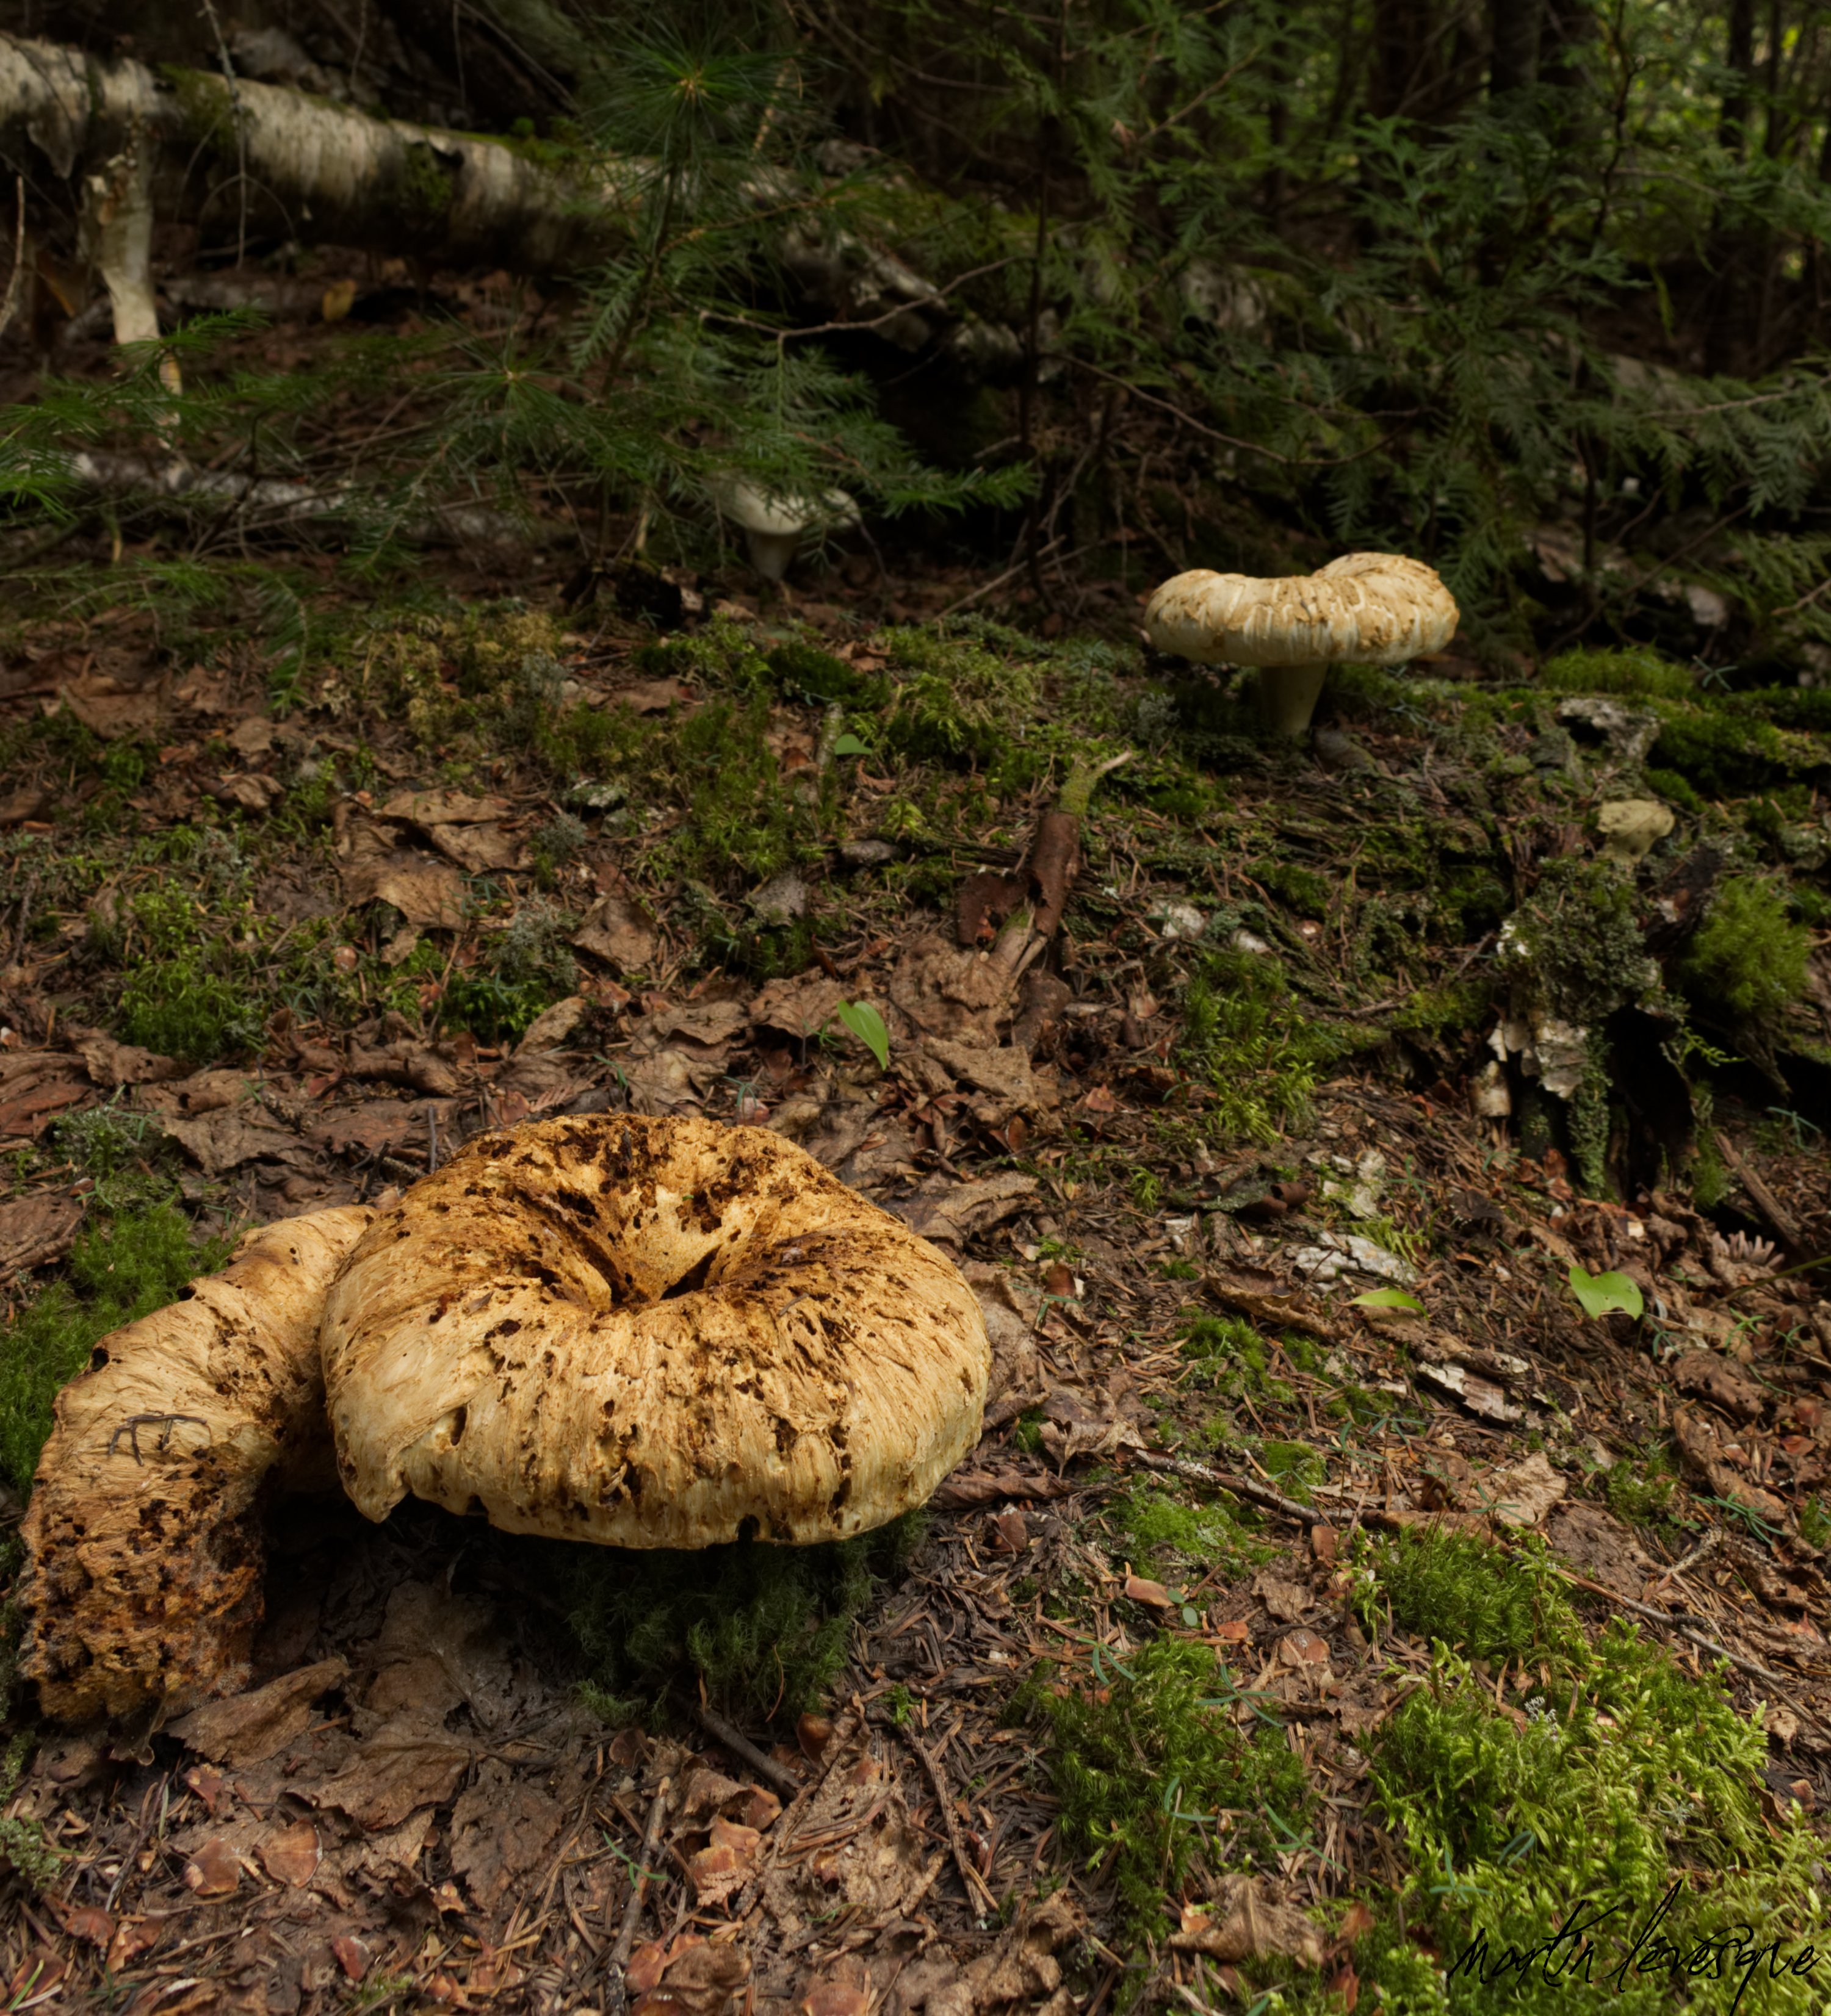
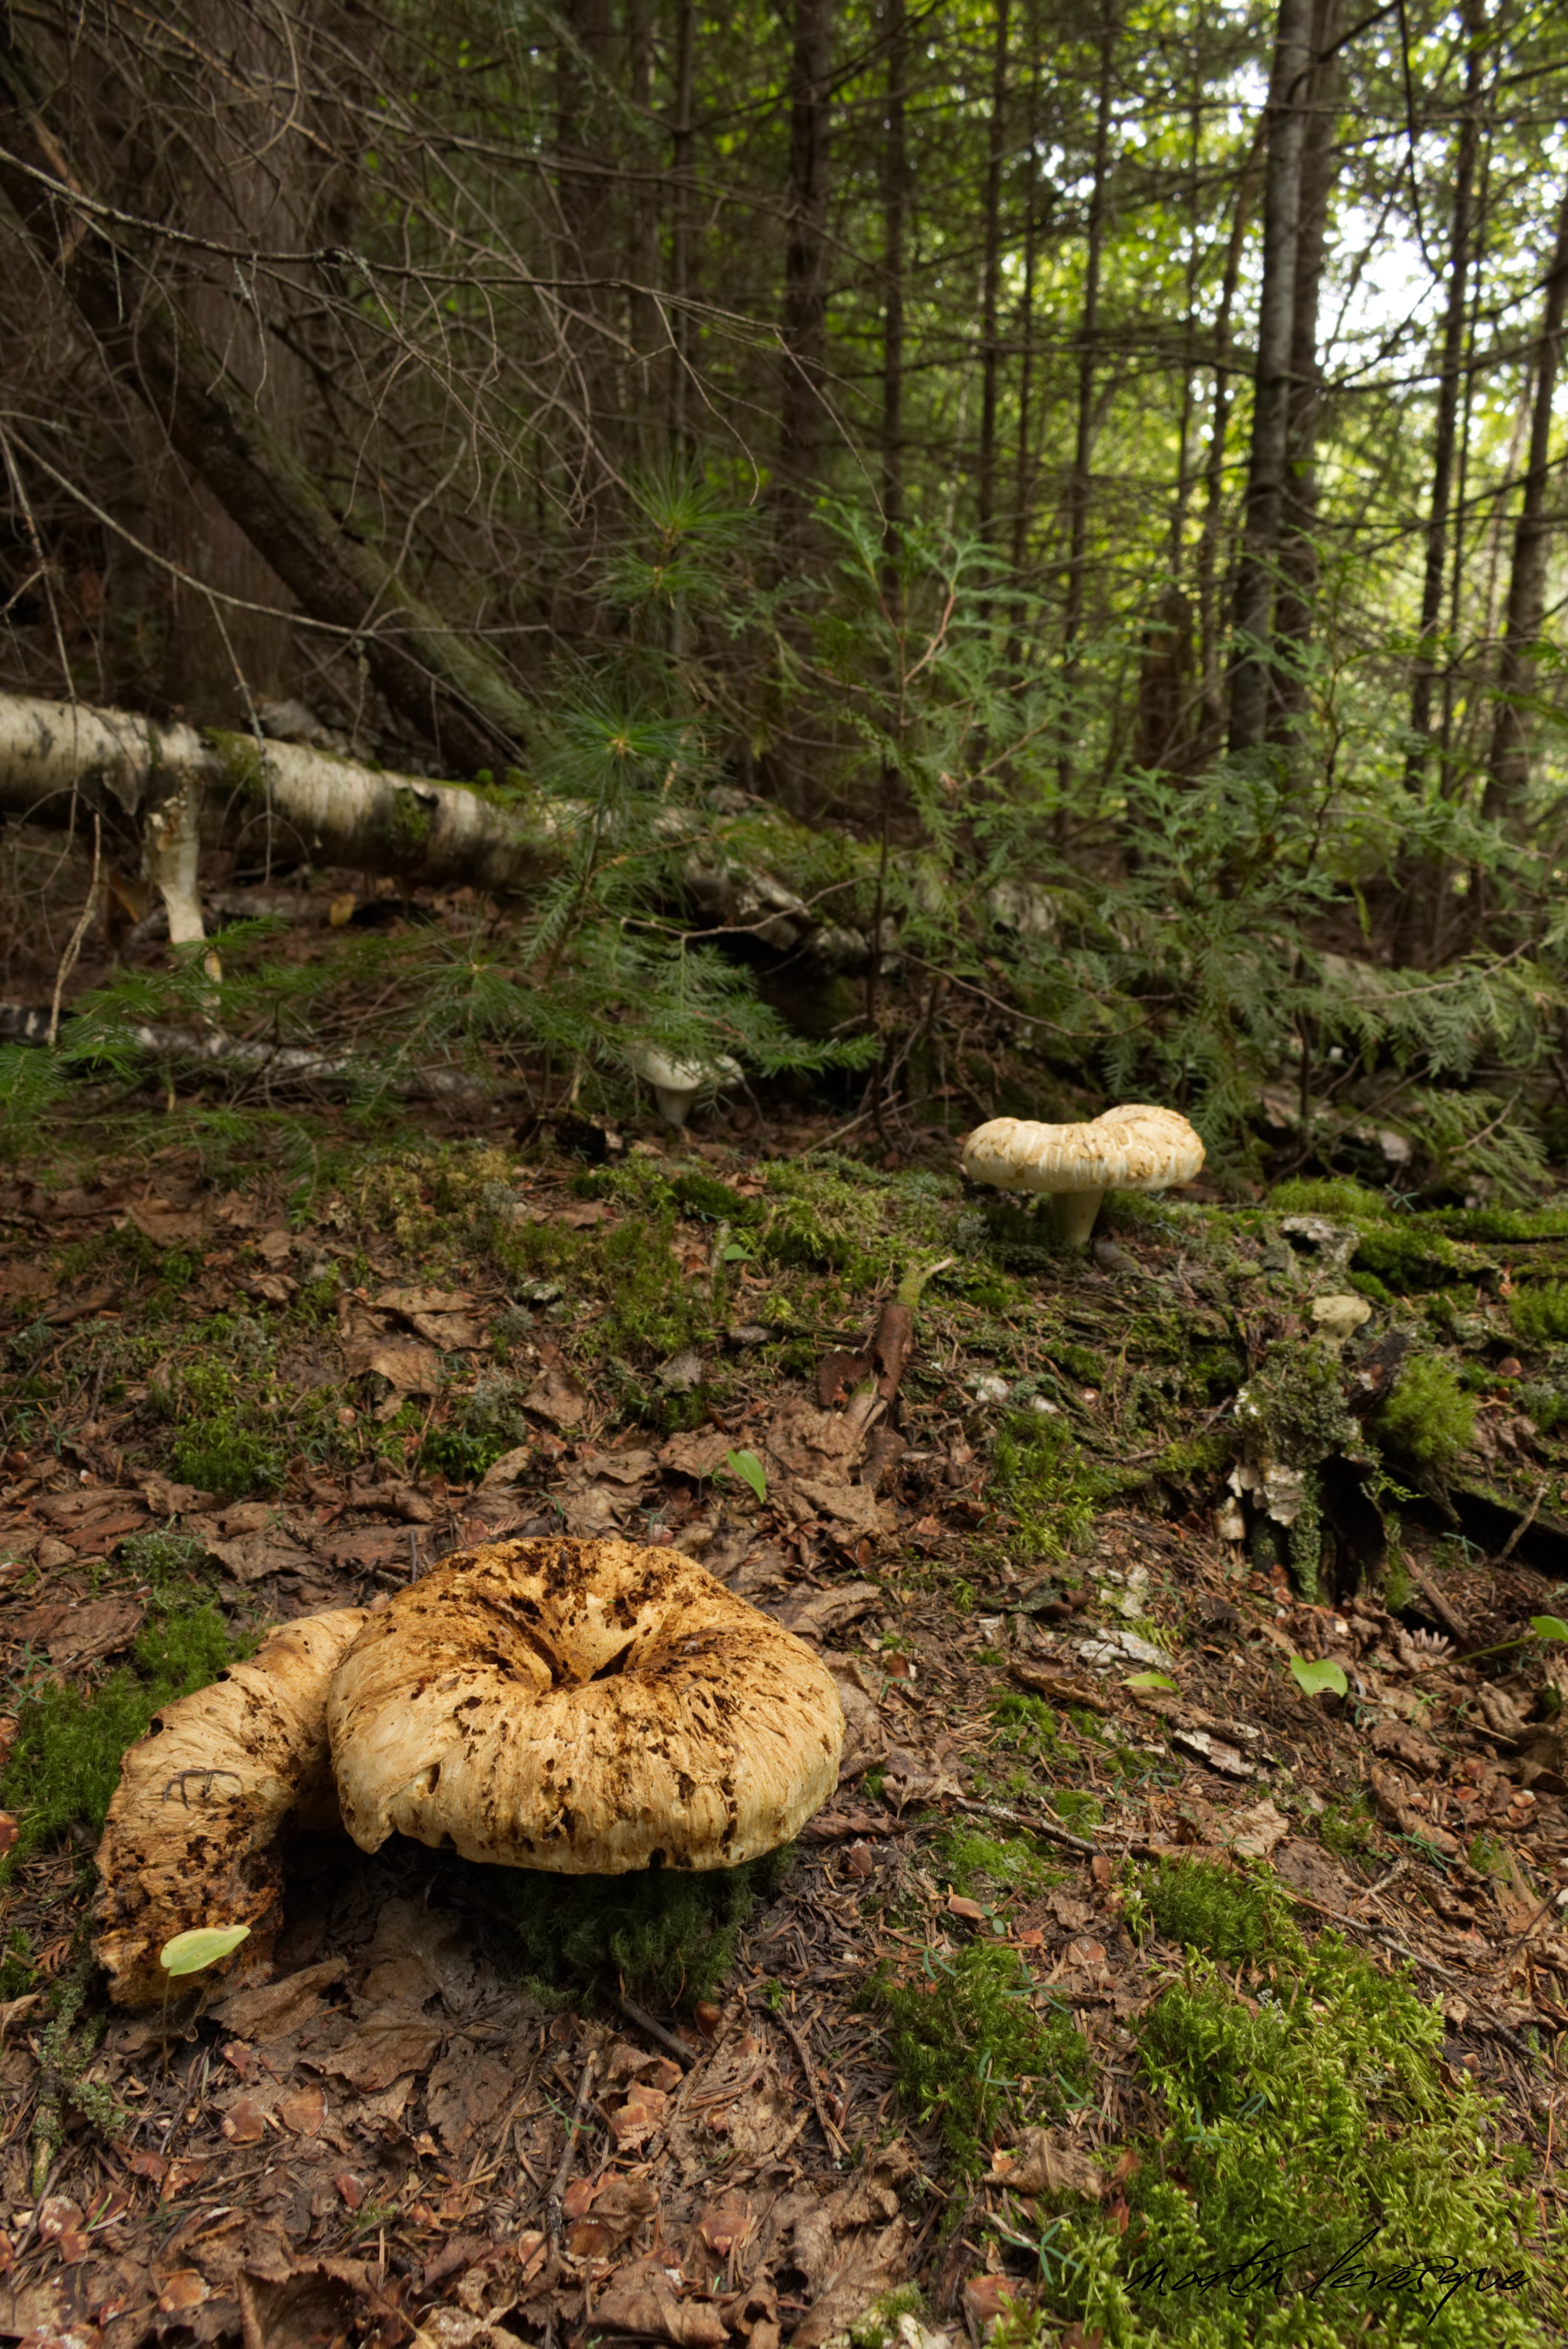
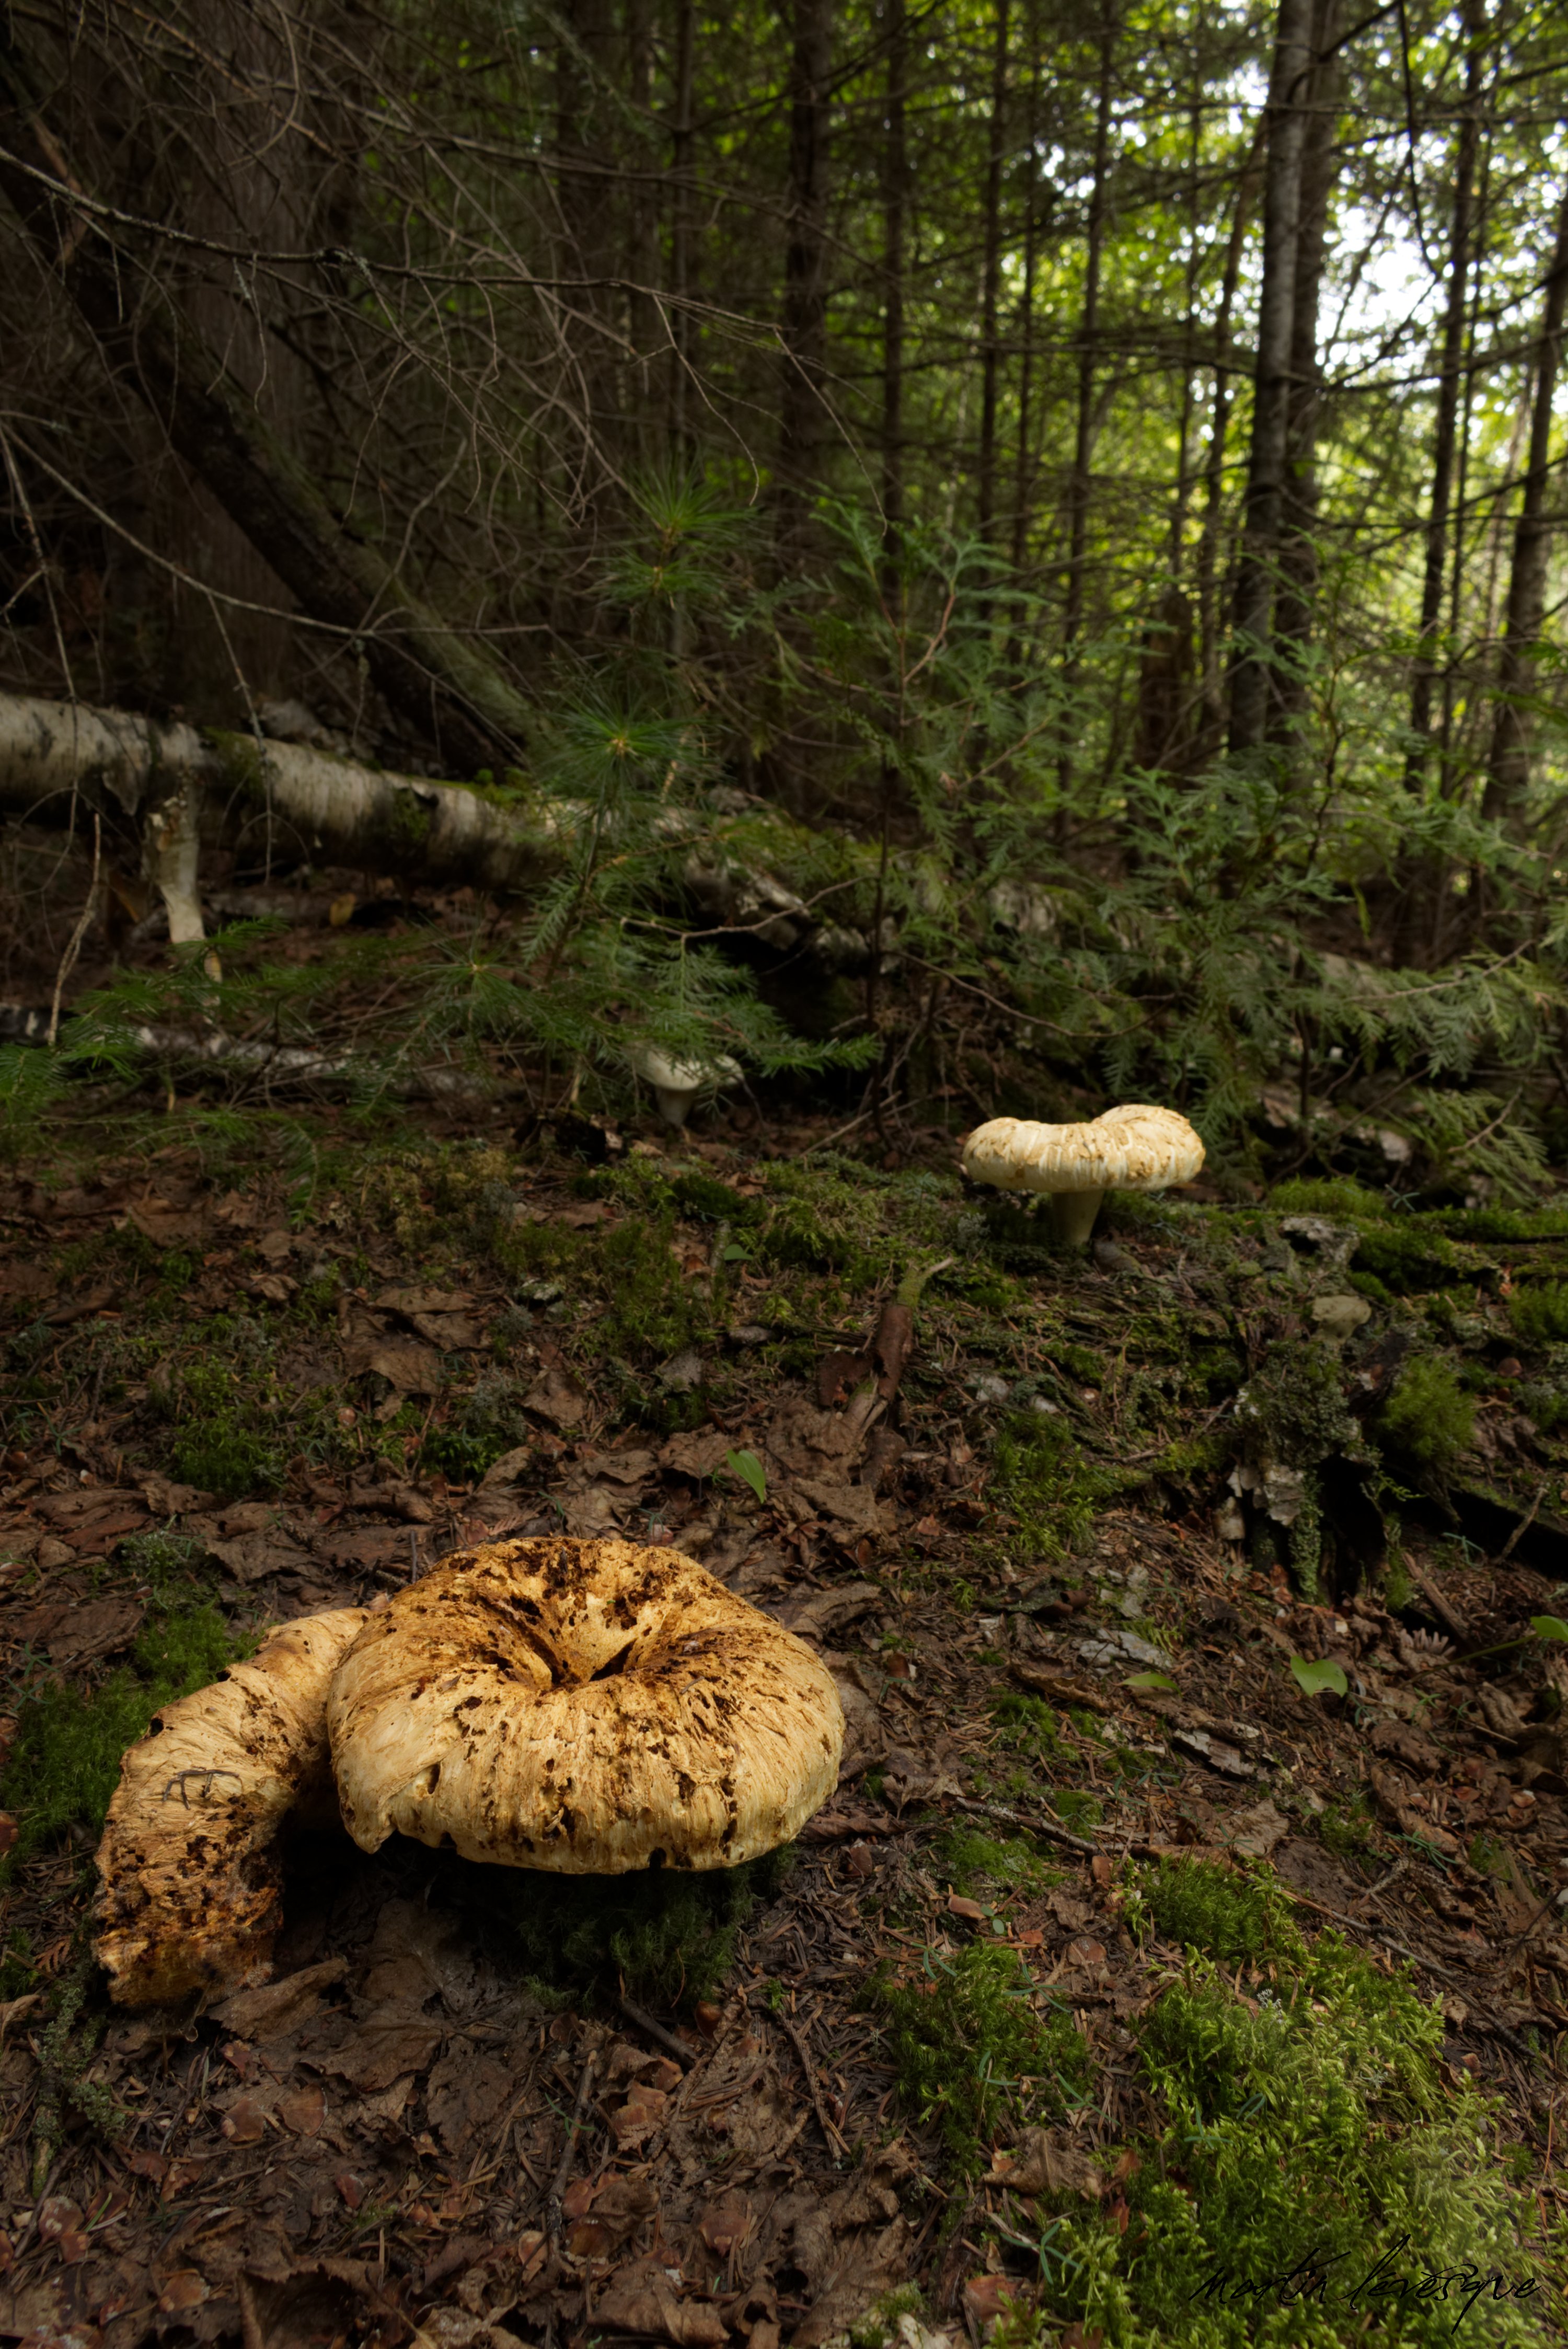
The slant is natural. The bigger mushroom (the one in black and brown) grew that way and the smaller ones grew on after.
-
So many different views suggested. Stuff I wouldn't think of doing. Thx all.
-
What do you guys think about this one? I found this under a small tree in a forest near where I live.
-
I am not offended at all. I take advices to learn. Since I'm not very artistic, I will often ask for advices to help me learn. I added your crop suggestion and I also added another suggestion from someone else on the Affinity Photo facebook page. Let me know what you think. I see what you mean by sharpness but I think it's the forum doing that because the photo is sharp on my end (I can see the difference here and on my computer). You have to click on the photo to see it properly. Edit: Someone suggested me I use a gradient tool to progressively darken the photo.
-
Ok I managed to upload the photos finally. I couldn't before due to the size of the photos. I didn't find any info on the accepted photo size on the forum.
-
Hi everyone. It's been a long time since I last posted on the forums. I took this photo in the afternoon (not the best time to do it I know) while I was on a fishing trip so my time to take photos was limited. I saw those two big mushrooms in the forest and I liked them so I took a photo of them. Since they were under trees, it was darker then on the open gravel road near the mushrooms but it was a cloudy day. I made a few adjustments to the photo (which I'll describe below) but I'm not sure if I could do more or if I did to much. I need help. I decreased the brightness and exposure (a little). I slightly increased the contrast and removed a green leaf near the first mushroom. Went into Photo persona. Selected both mushrooms and slightly increased their brightness. I created a pixelized layer and darkened the ground (15%) and slightly increased the brightness (5%) on a small portion of the moss in the lower right corner since it's originally brighter. Added signature. The top photo is the original one plus my signature.
-
Photo questions
MartinL replied to MartinL's topic in Pre-V2 Archive of Affinity on Desktop Questions (macOS and Windows)
Je suis francophone. -
Photo questions
MartinL replied to MartinL's topic in Pre-V2 Archive of Affinity on Desktop Questions (macOS and Windows)
Ok this is what I did so far. I started by taking a better picture of him in a more lighted area. I added a shadow below him and added gaussian blur to it. I added a white balance filter to make his color more orangish (hope I typed it correct). At this point I'm not sure if I should add 0.1px of gaussian blur to the entire character to make him blend a little bit more. So far I like the result but I would like your opinions too. Thank you.