

SF Charter Boat
-
Posts
103 -
Joined
-
Last visited
Posts posted by SF Charter Boat
-
-
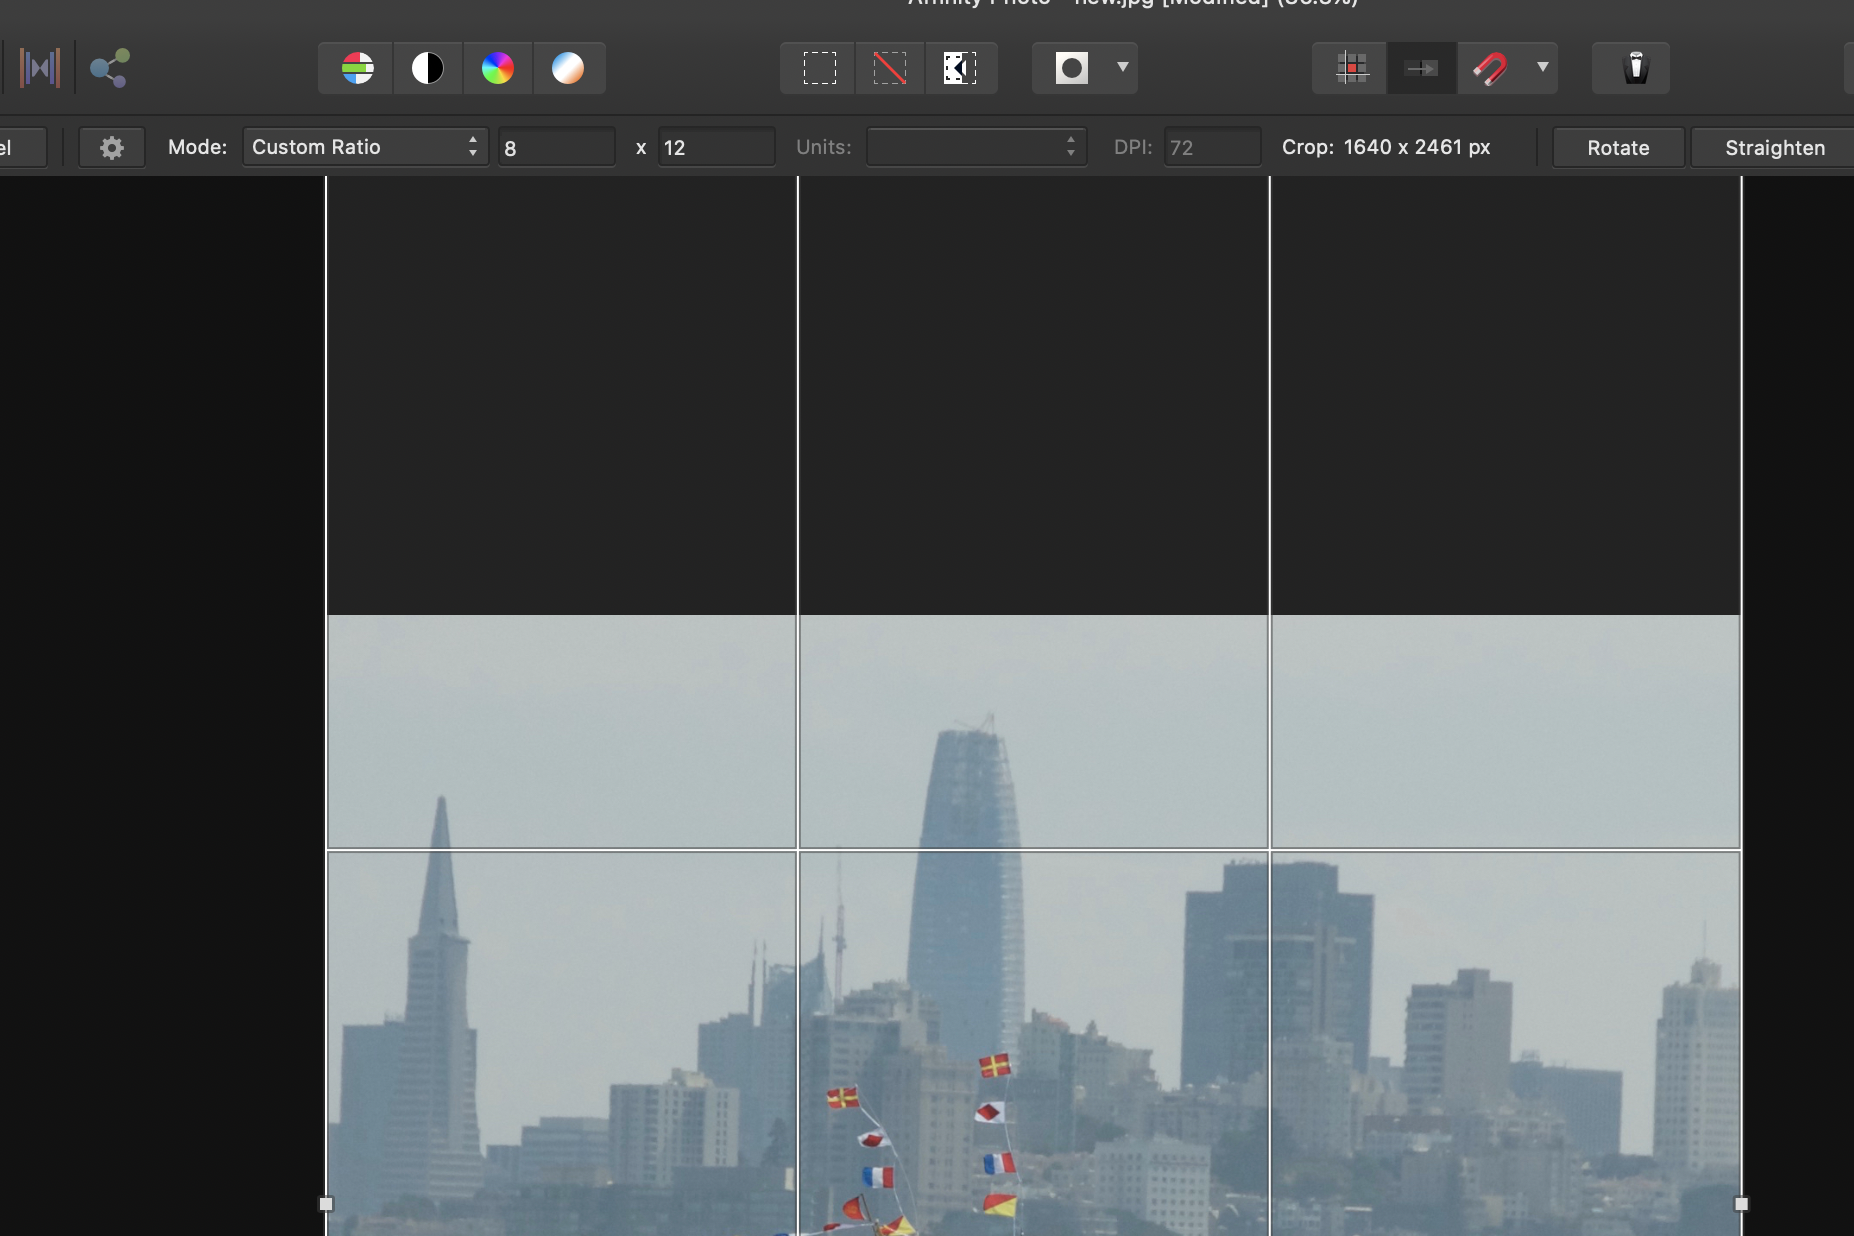
tried going to the tutorials, and this is the closest: "If you want to use a specific ratio, set the Mode to Custom Ratio, enter the ratio you want in the input fields and drag the grid corner handle on canvas to set the crop area you want"
But I do not see where I can insert 8 high and 12 wide. Any help appreciated, thanks!

-
Thanks but confused. I did your first line, to clarity.
I tried to select clarity layer for next step, but it combined with the background layer, both of them blue.
"Select only Clarity layer>menu>layer>invert" not sure how to do this after I had done the sentence above.
Thx
-
Have spent time going through the youtube AF Sharpen tutorials but cannot find a simple tool where I can click on the size and strength for a specific area.
Gosh, the number of things one has to go through I just could not follow, the High Pass (?) just the beginning of what is a series of things that have to be done. Seems very complicated for what was a simple tool in an outdated editing system, Aperture, on which I used a few basic tools.
I go to the top under Filters and there are three choices, but I did not find what I want: area specific determined by size and intensity
Does this exist in AF?
Thank you,
-
Will do, thank you. Just want to do the adjustments before getting back to the Grad topic, then I will return to this.
-
A little off topic, starting to go through what I normally use most of the time as tools in Aperture and learning them in AF, not sure to continue this thread or start a new, but my question is on sharpening. How to do it simply? Have spent time going through the youtube tutorials but cannot find a simple tool where I can click on the size and strength. Gosh, the number of things one has to go through I just could not follow, the High Pass (?) just the beginning of what is a number of things that have to be done. Seems very complicated for what was a simple tool in an outdated editing system, Aperture.
I go to the top under Filters and there are three choices, but I did not find what I want, just want area specific determined by size and intensity
Does this exist in AF?
-
Brilliant, thanks! It was "coarse", now it is "fine" in all senses
-
Starting with a new image. Will use crop, straighten, color, burn, dodge before doing my ND grad, so there may be some questions before I return to the original question on this link. The adjustments were done in Aperture before I brought the image over for the ND grad earlier. This time all in AF from the start.
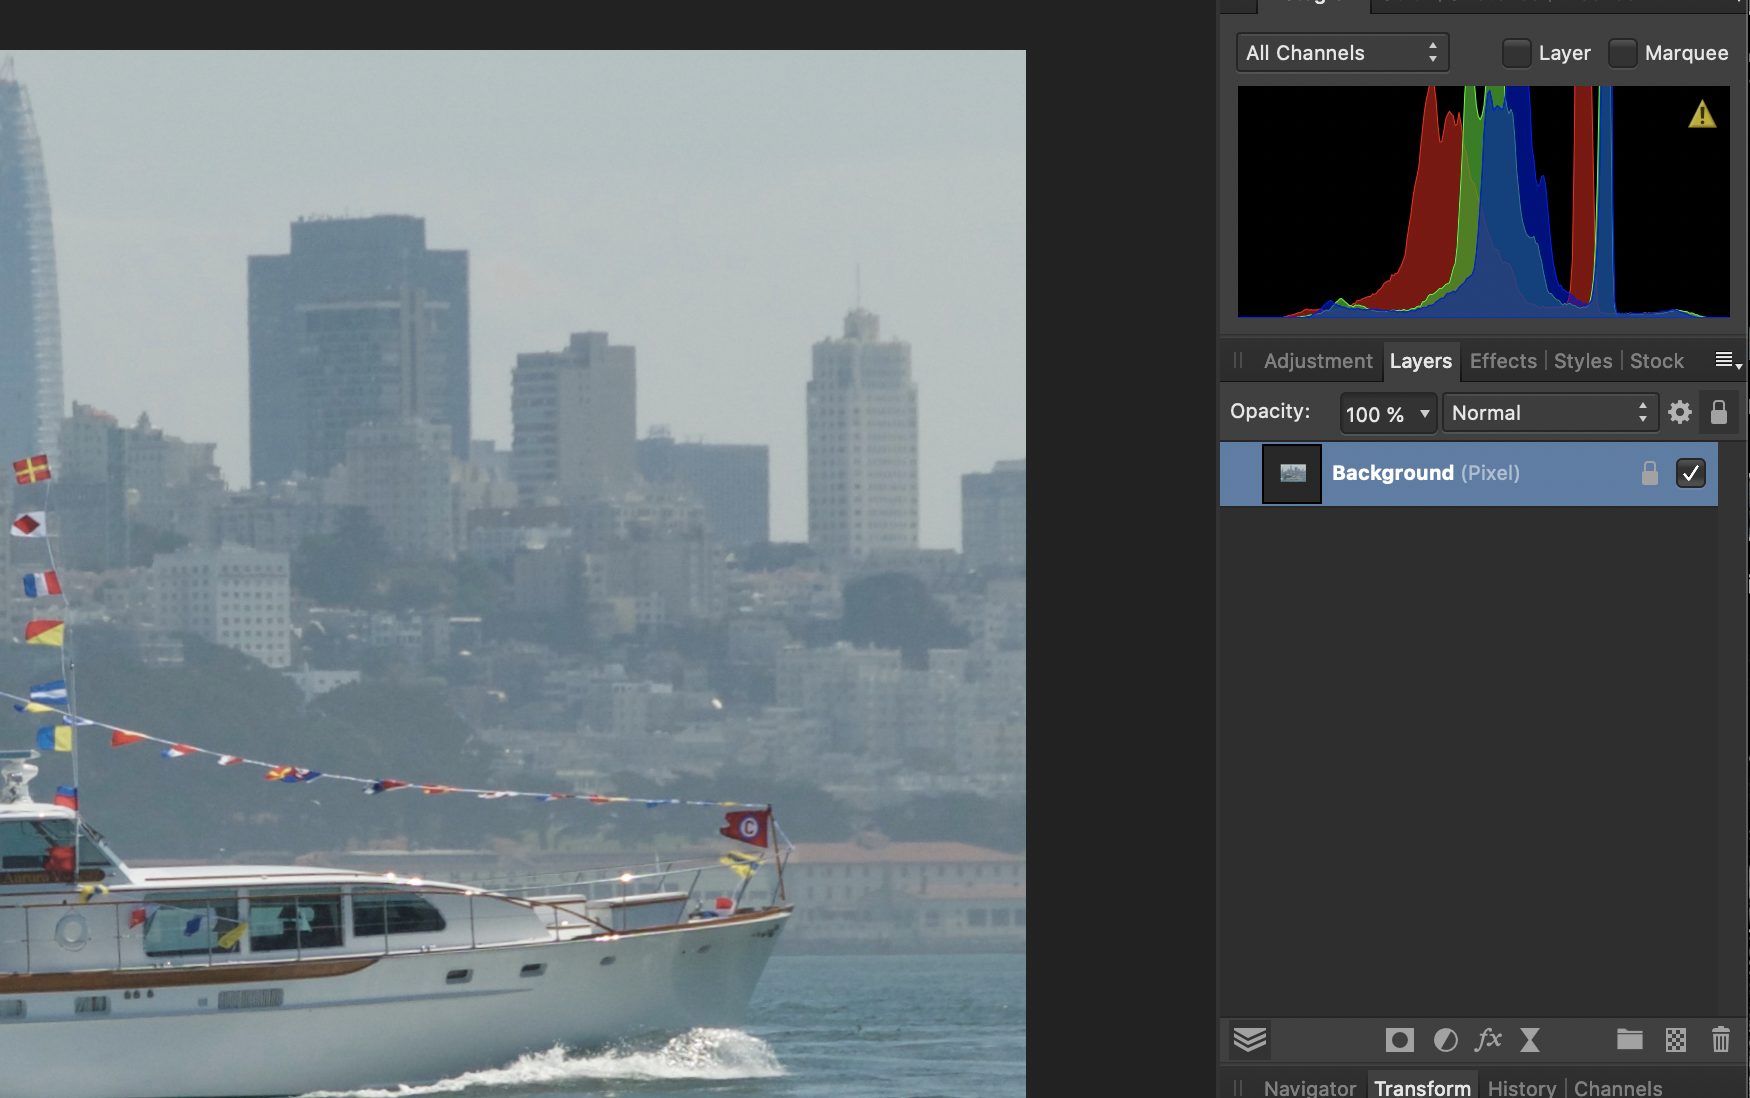
First question is why the yellow caution triangle in the histogram? And how to correct?
Thx
-
I have brought the original photo into AF. I clicked New to import and a window appeared with 72 dpi. Should it remain that figure or 300?
Then I clicked Open and my image appeared, so I will begin with cropping, color, sharpening, retouch, etc before applying the instruction from this thread for a slight ND grad in the sky. This will be my first complete attempt from beginning to end. Thanks for all the assistance!
-
I am going to start from scratch. The photo used I had cropped and done a few things in Aperture before bringing it over to AF, so I am taking a similar photo and starting from the beginning here. Aperture has been my training wheels but not supported by Apple for about 5 yrs but I have still been using it because I know the things which I use, not fancy stuff, just basic. It did not have, or I did not use, layers.
So I will begin my first project.
-what do I do with what I have been working on? I don't want to keep any of it. Drag it to the trash, the little icon on the right?
-"don't use the gradient tool while the Background layer is active." Does that mean to uncheck the Background layer when working on the Gradient layer?
Once I have the new photo, I will return to the top of this discussion and start again.
Thanks
-
OK
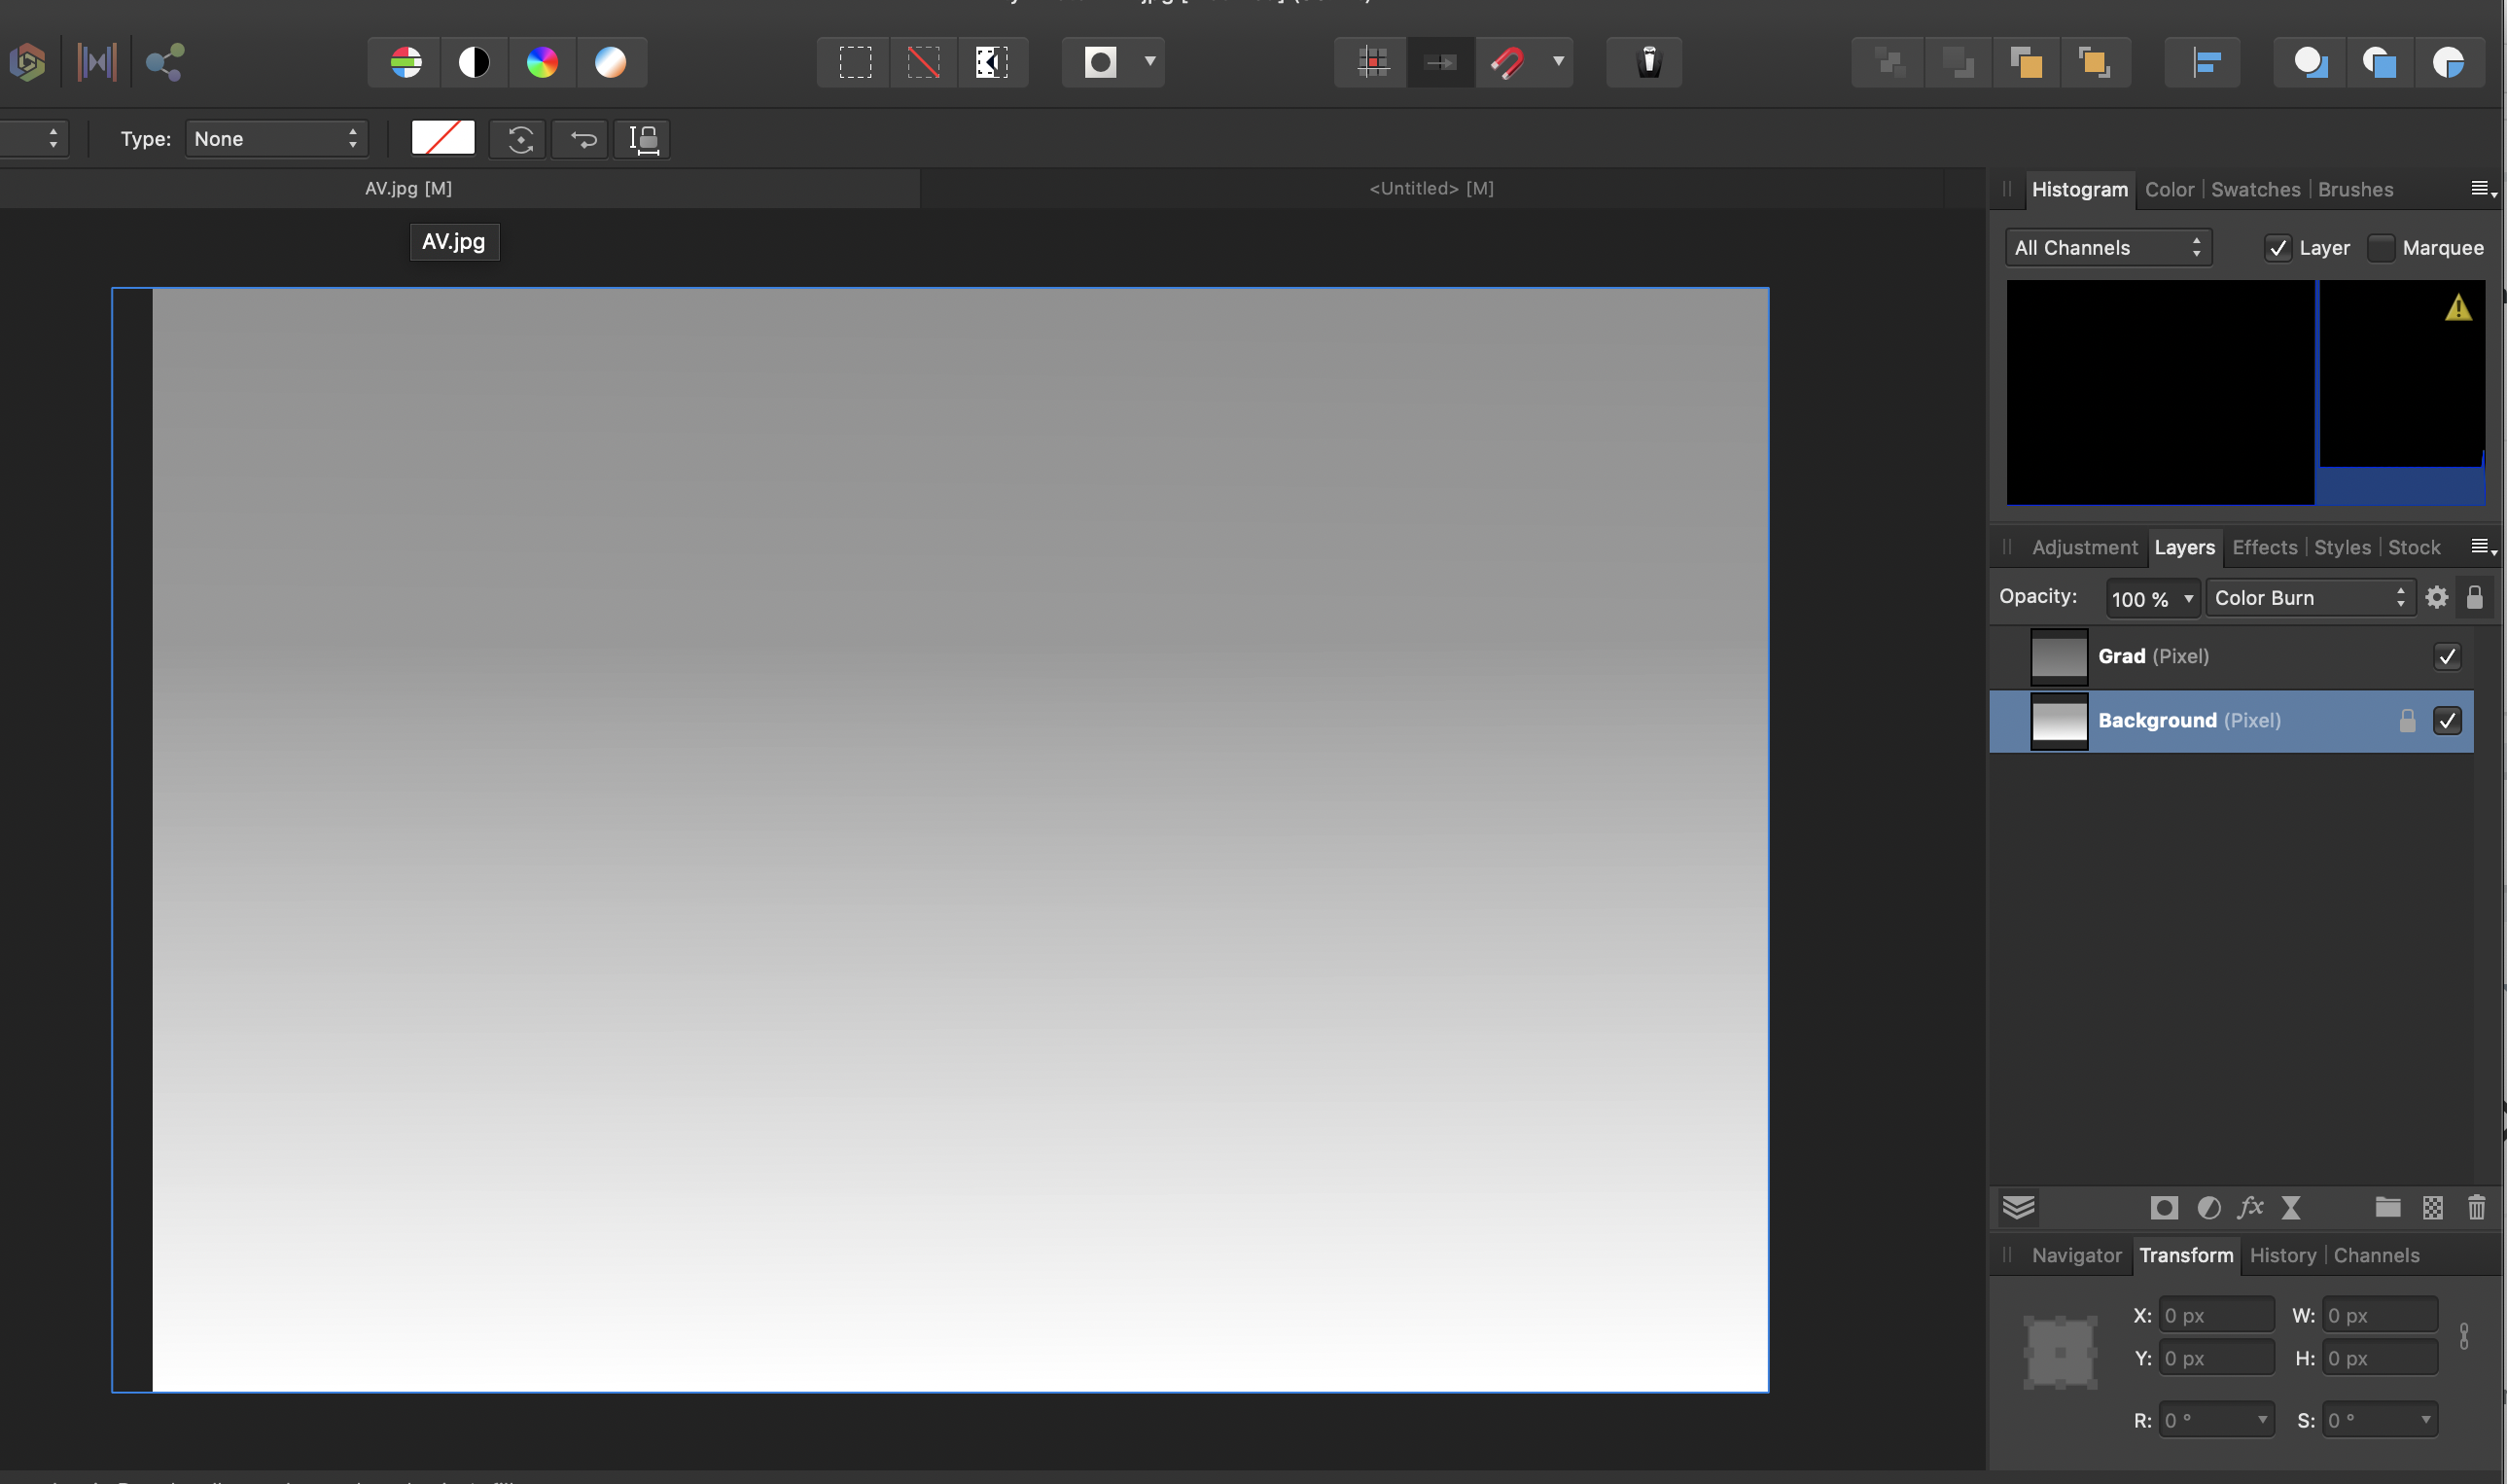
Background layer is on Normal
Grad Layer, above it, is on Colour Burn
But how to remove grad tool from background, as it is still white? I still see the icon, this should be removed I understand but what is the method?
thx
-
Don't know why I keep losing the background image, boat. Tried clicking o each layer and checking and unchecking boxes, but on both layers I get only white
Thx
-
Will do re saving! Thanks! Support of members on this forum very helpful! Just wish there had been a simple official or otherwise explanation. The AF book I bought is projects, and beginners have to get over the hump of teachers and Youtube tutorials assuming one has had Photoshop or Lightroom experience. I do have the Fraser tutorials and have started them, the closest to my needs re information, presentation and speed. So, am plugging along and very appreciative of those sharing their knowledge!
-
h_d
"Hope this gets you further, " thanks, made me laugh, very patient and courteous, feel like I am just trying to get in the sandbox with ice cream smeared over my face and a group of happy playful kids already in..
Anyway, success in finding my original photo. don't know why it did not appear earlier, but the boat photo is now there and I will go through the steps you have outlined and report back. One more question-if I complete, or do not finish the work I want on the photo, how shall I save it and where please? I may not be able to complete the work on the photo today and want to be able to keep the adjustments and retrieve from where I left off.
Much appreciation, Stuart
- h_d and jmwellborn
-
 2
2
-
Appreciate the time and support! Ready to read and apply the assistance and instruction, but when I open AF it shows two layers, the original boat pix called Background, and the one above it which I termed Grad. Both boxes checked and locked, but I can't find the original boat photo, even when the Background layer is highlighted in blue. The only one appearing is a white screen with where I ended yesterday at Step 2.
How to find and open the Background layer of boat photo?
Thx
-
h_d, "3) Change the blend mode of the upper layer to Colour Burn ."
I am stuck at #3.
-how and where do I "change the blend mode"?
-what is the "upper layer" ? Do you mean from the middle of the added vertical line, there is a little marker? Also, is it ok to have the vertical line for the tool just in the sky area instead of from the bottom of the image?
-am I to keep the Gradient layer box checked? Because without going to step 3 it is white.
-lastly, after I accomplish the above, where is Colour Burn?
Thank you.
-
Mike, For me I am at the crawl stage, then walk. All I want to learn is how to do a simple ND grad filter for the sky and it is very well pilot error but I did not find it in the book, the tutorial or could figure out any of the Youtube videos. To change the sky is an entirely different deal at this point. I will study and try the directions given in another answer when I can get to it soon.Thanks for the sample!
-
h_d, will try your instructions and assistance. Thanks but the first suggestion of replacing the sky too complicated for me, the directions and illustrated tools I hope will get me the desired result, just adding a bit of gradient instead of the flat consistent sky color . Many thanks for the time, will report back the results when I can try it, thank you again. Stuart
-
Hello, I have spent the last two hours on various Youtube videos, searched this forum, watched the Affinity tutorial, but, as with most of the instruction for me, it is too fast or complicated. Understood, the zillions of tools, but beginners, I feel, really need more attention, and the teachers either do not understand the patience needed or do not know how to teach someone starting. Most comment about Photoshop or Lightroom, for gosh sakes, please assume some is starting from scratch.
My rant over, I want to simply darken a sky. Essentially a neutral density grad filter. Pretty simple. A soft graduated ND filter. What are the steps please, 1, 2, 3. Or how to find what I consider a simple, basic tool? (I tried to do it with Aperture, burn tool, but the line is visible and it is not a good job, my error...)
Last thought-does anyone provide screen sharing instruction? That would be really helpful to me, and certainly worth a reasonable fee. Basically a personal tutor?
Much appreciation, Stuart
-
Thanks, I've never seen that link, looks useful. Am starting with the Dippy (sp?) Cat set of instructions, the Help link you attached I will listen to as well.
Many thanks, Stuart
-
Will make a new layer for this operation, thank you for the additional information
Got it re the book, am still at the beginning stage, so not doing the exercises. When you write "built in Help is probably better", are you referring to the very top right with the word "Help'? Thanks for the explanations and assistance!
-
Ahh, your second sentence is the key, thank you! Should I have a new separate layer for the clone? The original, Background, layer I highlighted and the clone tool worked, is that ok? Many thanks!
Cheers
Stuart
-
Hello, I saw the AF tutorial but the method is not working. I click on the area I want cloned with Option alt on my Mac and I cannot copy it to the area where I want it. Any assistance appreciated. Also the Affinity book I paid for is essentially useless to me, page numbers are not even visible on each page if there is an image, and it certainly does not even provide an answer to what I would consider a very basic question Thanks, Stuart
-
Thanks, will check it out.
-
frankentoon's is more illustration, but the Ezra Anderson video(s) is more what I need, thank you for the reference. Wonder why AF can not be as clear.
Cheers
Stuart

Simple Sharpen method?
in Pre-V2 Archive of Affinity on Desktop Questions (macOS and Windows)
Posted
Wow, that is a lot of stuff, thanks. Is there any way it can be slowed down a lot so I can follow step by step?