WKansepa
-
Posts
80 -
Joined
-
Last visited
Everything posted by WKansepa
-
I dream of the day when it will be possible to do this in Designer: 1. To place and actually see a single image/artwork spanning two or more Artboards 2. Being able to export the Artboards and getting separate files
-
 @Bobby Hendersonyou can also have great fun if you select all the objects that you need to align and click on the 'Show Alignment Handles' button found on the Context Toolbar. The function is truly remarkable. My only wish is for Affinity to expand the functionality by adding the ability to distribute objects. Currently the distribution buttons are way too hidden...
 -
@Bobby HendersonI just wanted to point out that to achieve a temporary zoom akin to Adobe's, you need to press Spacebar first and then Control key in any Affinity application. Coming from Adobe it somehow feels counterintuitive but it works.
-
carl123 Thank you. Problem solved.
-
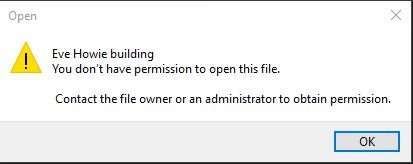
I have two user accounts on my PC and at times I experience awkward moments when attempting to open an .apub file that was created while working in the other user account, a message will pop up indicating that I don't have permission to open the file (Refer to attached image). I am only able to open these files if I run Publisher as Administrator. But again I don't want to do this as this will restrict me from clicking and dragging images from the desktop to place into Publisher. Note that these are intermittent occurrences but all the same annoying. This only happens with Affinity apps. How best can I overcome this challenge?

-
There appears to be a serious regression in Affinity V2 when working with linked images. I prefer working with linked images as opposed to embedding them and have been doing this ever since the link images feature was introduced in Affinity V1. This feature works as expected in V1. I created a design for an outdoor billboard sign in Affinity Designer V2 and got an unexpected huge size when I saved the file. The Image Placement Policy was set to 'Prefer Linked' but I got 222mb file size. I then embedded the image and resaved and the file size was now 223mb. I recreated the same file in Affinity Designer V1 and the results are as follows: Prefer Linked Policy: 458kb Prefer Embedded Policy: 111mb Also tested Publisher and Photo and got same results. The placed file used in all the layouts is a CMYK 8bit Jpg file which is 1.22GB in size. Size of billboard is 3m High x 12m Wide. CMYK document.
-
Affinity V2.0
WKansepa replied to Brian Lucas's topic in Pre-V2 Archive of Affinity on Desktop Questions (macOS and Windows)
The ANTICIPATION. One of the longest countdowns I ever had. Phew... -
Is AFFINITY dead?
WKansepa replied to J.T's topic in Pre-V2 Archive of Affinity on Desktop Questions (macOS and Windows)
DFTT -
Is AFFINITY dead?
WKansepa replied to J.T's topic in Pre-V2 Archive of Affinity on Desktop Questions (macOS and Windows)
Relentless. Killjoy -
Have you tried Alt+0149 using the numbers keyboard?
-
Have you tried to subtract without having to convert the font to curves first?
-
If you want to maintain a consistent transparency fade after you have replaced an image, you need to carry out the following steps: 1. Place the image and group it to create a new object BEFORE you apply the transparency 2. Apply the transparency fade (note that the transparency fade will be applied onto the group and not directly onto the image) 3. Dig into the group and select the image 4. Replace the image and you will notice that the transparency fade has not shifted since the effect has been applied onto the group Working with Affinity's grouping method is magical to say the least. The group itself is defined as an object and will accept all the effects found in Affinity (transparency, outer shadows, bevels, inner glow etc... For example, you can place an image or draw a rectangle and do the following: 1. Select Transparency Tool. Click and drag to apply a Linear Transparency effect to the right side of the object 2. Group the object (you now have a new object) 3. Apply a Linear Transparency effect to the left side 4. Repeat step 2 5. Apply a Linear Transparency effect to the top side 6. Repeat step 2 7. Apply a Linear Transparency effect to the bottom side 8. Now if you ungroup several times, you are left with the original object minus the left, top and bottom transparency effects.
-
My pleasure. You can even go back into the Layer Effects dialog box and spice it up some more by adding an outline effect to the group.
-
Thank you for the video Yodel. You can achieve this in Affinity: Create a shape and fill it with any colour Group the shape and keep it selected Go into Layer Effects dialog box Select Gradient Overlay and edit gradient to taste Exit the dialog box Now double click the selected shape (group) to edit the group Draw any shape(s) and the new shape(s) will become part of the group and adopt the gradient fill Move the new shape(s) around and you will notice that the gradient will also shift accordingly Exit the group by just clicking on an empty space
-
Hi Yodel Maybe a video to illustrate the feature from Resolume would help.
-
Scenario: Create a basic rectangle Fill it with red colour Draw an ellipse and make the fill colour yellow and keep it selected Select the Eyedropper tool and click on the rectangle to copy fill attributes Ellipse adopts the red colour Select the red rectangle and use the command "Select Same Fill Colour" Result: Designer refuses to accept the fact that the red colour in the ellipse is the same with the one in the rectangle… You also get the same results when using the Global Colour swatches. Using the Eyedropper tool, copy a global colour from another object and apply. Without anything selected, edit the Global Colour Swatch and you will notice that the copied colour will not update. Looks like a bug.
-
Outline tool preset?
WKansepa replied to *mark's topic in Pre-V2 Archive of Affinity on Desktop Questions (macOS and Windows)
Thank you @Mark.It's unfortunate that the method which I prescribed is not working on your side. I also realise that you are on a Mac platform and I am on PC Windows 10. I have used this method on other PCs and got good results. I would like to hear from other Mac users who can chip in and try the prescribed steps before we suspect a bug problem on the Mac. -
A common mistake being made by some users… They confuse the FX and Layer opacity settings with the Colour or Swatch opacity settings.
-
Outline tool preset?
WKansepa replied to *mark's topic in Pre-V2 Archive of Affinity on Desktop Questions (macOS and Windows)
Another efficient method would be to create a template. Steps: Create a new document Create a New Layer Remove generic name and rename it to 'Outline' Keep the Layer highlighted and click on the Layer Effects icon at the bottom of the Layers panel In the Layer Effects dialog box select Outline Input a desired Radius On Alignment choose Inside Close the dialog box If it requires that you work with different Outline Radii, you would need to add New Layer(s). But this will now be a breeze since all you need to do is to duplicate the first Layer and go on to change the Radius in the Layer Effects dialog box. Point of note: Just make sure that the Layers are appropriately labelled e.g. Outline 15px, Outline 25px, Outline 50px etc… (remember good habits) You can now save the document as a Template. Name it as Outline. Create new documents using this Outline Template and Place your images or artwork into the appropriate Layer and enjoy a painless ride. -
@Dan C -this is happening in the Publisher Persona.
-
@Dan C I also occasionally come across this issue. I can say it's random but deeply annoying if you are working on huge images. Am using Dell desktop with the following specs: Windows 10 Pro (fully updated) Intel(R) Core(TM) i5-8400 CPU @ 2.80GHz 2.81 GHz Ram 12Gig
-
Outline tool preset?
WKansepa replied to *mark's topic in Pre-V2 Archive of Affinity on Desktop Questions (macOS and Windows)
How about you try saving some settings as a Style? That way it will just probably be a single-click solution to your challenges. Try these steps: Create a simple rectangle Fill the rectangle with any color Go to Effects panel and select Outline by ticking in the box Apply a desired radius for the outline Click on Outline settings (the little gear icon) This will open the Layer Effects dialog box On Alignment choose Inside Click on Scale with Object setting Close dialog box And then do the following: Open then Styles panel Click the Dropdown at the top right corner Click on 'Add Style from Selection' The new Style is now saved Remove generic name and assign a specific name for the new Style (optional but good habit) Note that you can also add new Styles categories. You can then apply this Style onto your images and the Outline will resize accordingly since we already have Scale with Object turned on. -
Find and Replace Color in Publisher
WKansepa replied to Echoisa's topic in Feedback for Affinity Publisher V1 on Desktop
Yes, I agree with you on this one. One always faces great challenges when working with a document started somewhere. I suggest that the Affinity team should introduce and implement in their own way something similar or even better than CorelDRAW's Colour Styles functionality which populates all the colours used in a document to create global colour styles. It doesn't matter whether it's a single or 500+ page document it will still work its magic. You can then edit or merge the created global swatches to taste. -
Find and Replace Color in Publisher
WKansepa replied to Echoisa's topic in Feedback for Affinity Publisher V1 on Desktop
Yes, global colours is the way to go. This requires proper planning right from the start and unfortunately some users don't want to plan this way… -
Transparency Tool In Affinity Photo?
WKansepa replied to Willy Pimentel's topic in Feedback for Affinity Photo V1 on Desktop
You can add a mask by clicking on the Mask Layer icon at the bottom of the layer panel. You then paint on the mask using the Brush Tool, (which by the way is a lot more flexible) or alternatively the Gradient Tool. Remember that a dark colour (black) hides pixels and a lighter colour (white) exposes pixels…