reminous
-
Posts
117 -
Joined
-
Last visited
Everything posted by reminous
-
Hey @norbinw! That worked better than my previous discovery... actually, try this: export one single artboard using the artboard icon, after use the 'Export Slices' option for the remaining ones and everything works just fine!! Done, we just fixed a bug for Serif while they are busy ignoring it lol. I hope that works for you guys!
-
I've tested it in the 2.1.0.1709 and the bug is still there... I don't know, I'm starting to think that that is gonna be there for a while! So, I'm using the workaround while the bug persists: finish my design, export one artboards using the file/export option, then making my following export using the Export Persona. It sucks, but it's much better than come back to Adobe environment.
-
There is a work around: Before using the Export Persona, export one artboard using File/Export. After that, Export Persona will work as intended! You can export anywhere (Dropbox and Google Drive included). Before I do that, I had to use Affinity Photo to export my work properly. I hope it works for you guys too.
-

Affinity Designers can't select directory to export
reminous replied to Sveto123's topic in V2 Bugs found on macOS
I've been exporting artboards in Affinity Photo a while now, but I recently found out that we can export at least one artboard from File/Export, then the Export Persona will work normally. But common Serif, let's fix that already! -
Affinity Designer freezes up when using export persona
reminous replied to Bambao's topic in V2 Bugs found on macOS
It is happening with me too. I just gave up trying... I'm forced to export from Affinity Photo. Very frustrating. -
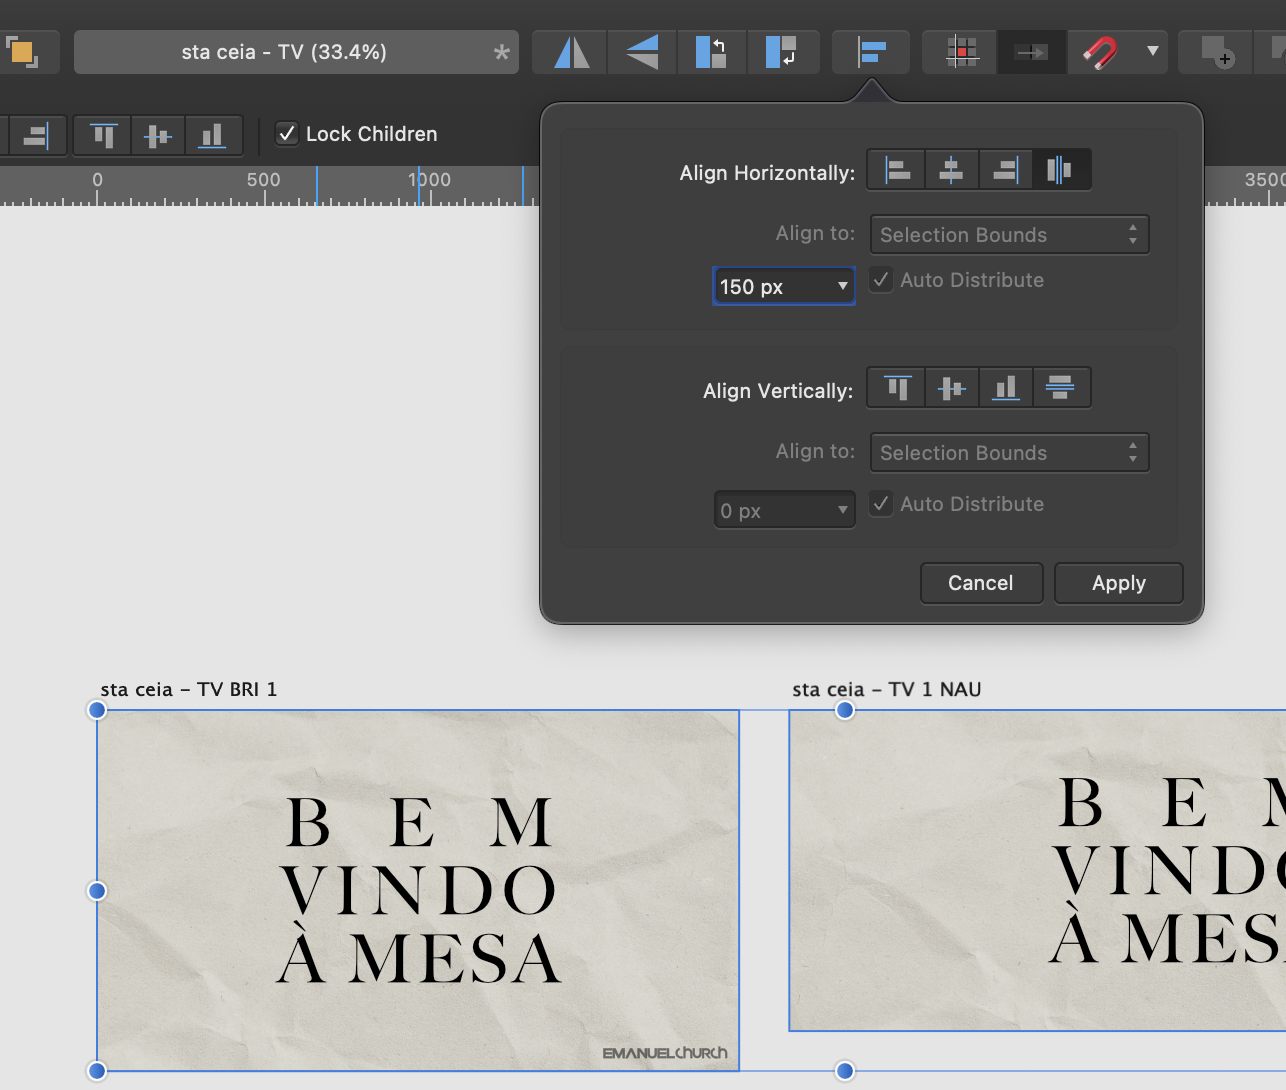
Hi there, That is hapening because the Artboard is not positioned in whole y and x pixels, but there is an easy fix. Just folow these steps if you have more than one Artboard: Method 1 (harder, but good for documents with two or three Artboards) Select the Artboard number one (that is the one the top of your layer panel) Open Transform panel (View>Studio>Transform): you will noticed that its position is X=0 and Y=0 right? (if its not you're not selecting the Artboard on the top of your laer panel) - The step above is ONLY for verification: what you want is make sure the other Artboards are also with X and Y positions with WHOLE pixels. To do that select the second Artboard and force the X and Y values to whole values (you'll notice that these positions have broken values, so delete the dots and the value after that Done - you can export without that anoying white border Method 2 (faster, good for multiple Artboards) Select all Artboards Select Align Select Align Horizontally, then enter a whole value into the field (do the same for the Align Vertically if needed) Done - all your Artboards are now positioned into whole pixes I hope that helps,

-
Hi there! Make sure the Wet Edges is de-selected
-
+1 for shortcut or global right mouse contextual click also
-
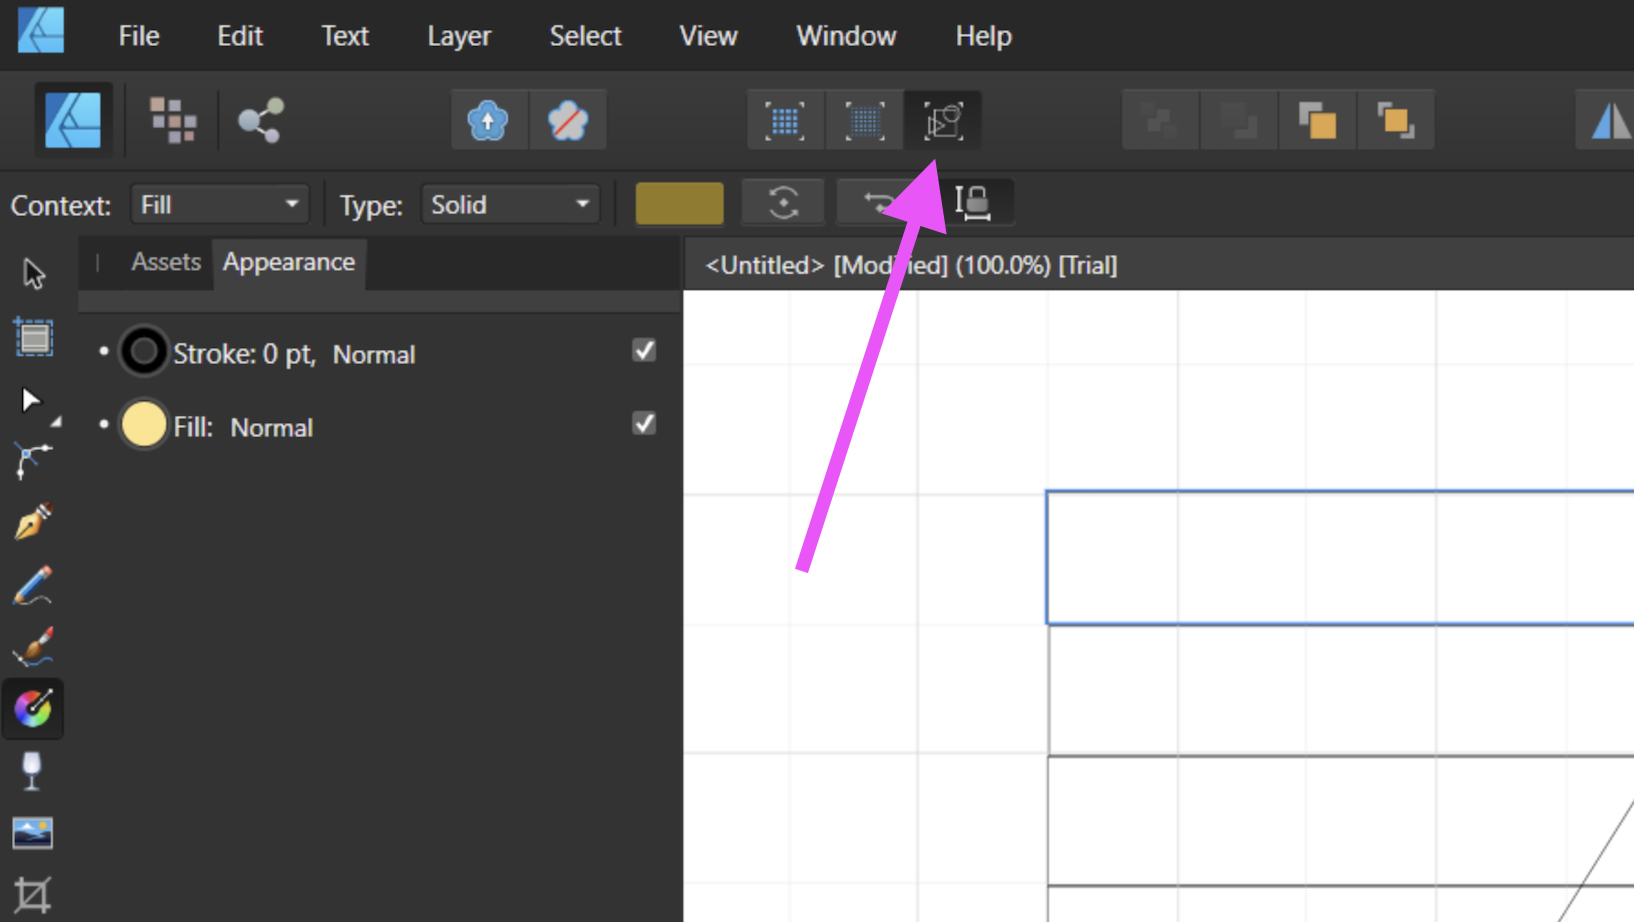
Hi there, According to your screenshot you are in Wire Frame view mode. Just click on the button to deactivate it.
- 1 reply
-
- 1
-

-
Hi there, I'd love to be able to integrate the Assets Panel with my DropBox and/or Google Drive, so I could have it sync across devices and apps. Today, I have to manually sync it to storage assets for different clients/projects. With a cloud system we could also share assets with other team members or the Affinity Community. I hope the AF team consider something like that in the future versions. Cheers, Reminous
- 1 reply
-
- 1
-

-
Shortcut for 'Lock Children'
reminous posted a topic in Feedback for Affinity Designer V1 on Desktop
Hi there! I find myself using 'Lock Children' all the time... I wish we had a way to do a shortcut for out of that so I don't need to rely finding on top panel. By the way, this feature cannot be found in any menu also, which pretty unusual. I guess that should at least be placed somewhere in the Layers panel no? -
Hi there, I wish we had the Persona to mirror artboards to mobile devices. I think that would be a huge feature for most UX designers out there...
-
Hi there, For now, you can use the Vector Crop tool...
-
+1
-
H there, I wish we could rename the artboards when doubling click over its name direct from the canvas instead depending on the layer panel to do so... It would be much more intuitive! Reminous
-
Hi there, I noticed that selecting a text with no color, but with stroke does not show as selected if you try to select any other object altogether. Sending a screenshot to explain if better. Reminous
-
Hi there, Linking objects it's a common feature in some other layer based softwares and I don't use it very much... however, sometimes this is the only way to achieve what we want. It's different from grouping objects because sometimes you might want to move/scale to elements together from different layer for example. I know we can do it by selecting objects manually, but it's kind of annoying repeating this process every time... so, I'd love to just see a chain icon somewhere in the layer panel to make life a bit easier. Reminous.
-
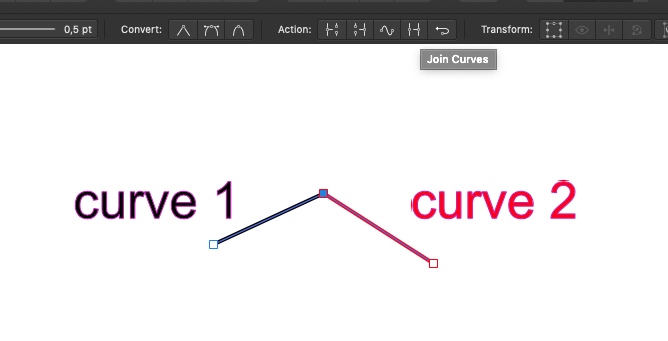
Join two points (fuse, weld)
reminous replied to quadcat's topic in Feedback for Affinity Designer V1 on Desktop
-
Change default constraints
reminous replied to Morten_Hjort's topic in Feedback for Affinity Designer V1 on Desktop
Hi there, You can actually achieve that today using two different methods: 1) Create your design using objects and artistic text, then group them and apply constraints (View/Studio/Constraints). Then set the text to not scale, you might want to constraint the left and top position as well. I bet that this would be de most common method since you're doing UX and the constraints were actually build with that in mind. 2) You could simple create your design with frame text instead artistic text... Then you just select your objects (group it if you want) and scale the whole think without worrying because the text frame will expand/stretch but the text will remain the same. If you want to scale the text, you can do it by using the second marker on the corner. I did two quick videos to illustrate it better. I hope it solves your problem! method 1.mov method 2.mov- 1 reply
-
- 2
-
-
-
Align Space
reminous replied to AndRo Marian's topic in Pre-V2 Archive of Affinity on Desktop Questions (macOS and Windows)
Hi there, Try selecting your objects, then click on "Alignment" button on the Tool Bar, then uncheck "Auto Distribute" for "Align Horizontal" (or vertical) then set any value the slide field... Should have the job done.
-
Flip Photo
reminous replied to Dekade's topic in Pre-V2 Archive of Affinity on Desktop Questions (macOS and Windows)
-
About that... I see it as a downside to be honest.
-
Hi there, I was wondered why the colour palete look different in AffinityPhoto if compared with AffinityDesigner (and Publisher)... I can understand that on AP, you may use this palete to switch colour between your brush tool, however, I also have to confess that I'm always confused when I need to change the stroke a color of a shape from that same palete... Maybe it would be a good idea have this palete smart and change its appearance when a shape is selected so we would have the AffinityDesigner look?
-
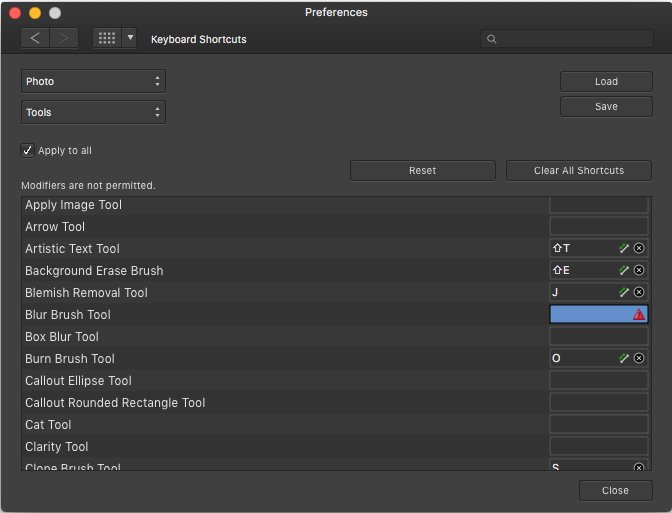
Hi there, When I try to set a shortcut for a tool using SHIFT, or COMMAND I got a red icon saying it's not possible... it was possible before (as shown on the attachment), I could for example set the Blur tool to "SHIFT + R". Is that a bug?
-
Affinity Designer Customer Beta (1.7.0.5)
reminous replied to MattP's topic in [ARCHIVE] Designer beta on macOS threads
Did I read "Arrowheads"?? OMG! Seems so simple, yet so nice to count with it! Thanks a lot for the news!!