Pedro Soares
-
Posts
88 -
Joined
-
Last visited
Everything posted by Pedro Soares
-

multi Affinity Tutorials & More
Pedro Soares replied to Pedro Soares's topic in Tutorials (Staff and Customer Created Tutorials)
Hi EdD, Thanks for the feedback. Regarding the subtitles, the colour scheme is set by default but the user/viewer can change them. Just go to the Cog icon where you can also set the quality, choose Subtitles, then choose Options and you can change all the options available for the subtitles. I have mine set to white background with black subtitles. Cheers, Pedro -
HI webyonder, What I normally do when I have a Photoshop file with smart objects, is to open the smart objects layers and save them back (you can also copy them) as normal layers into the host document. This way I have a unique file with the full list of layers available. Save the PSD and if you now open it in Affinity Photo, you have also all the layers available. Cheers, Pedro
-
Hi peanutLion, Welcome to the Forum :) I also use the Zone System. I even created a Gradient Style where I can pick and compare the value of the zones I want to measure (you can create the gradient by hand or using the Posterise Adjustment). My idea is to create a repeatable workflow in Affinity Photo. Until know I never used AP to do what you want to achieve since I use Capture One Pro for my RAW images. Nevertheless when I want to measure the Lightness of a given colour, I use the Info Panel. I just add a new Sampler, set it to Lab Colour Mode and place it over the colour I want to measure. Then I can correct it accordingly. Not sure if this could help you but most of the times it works for me. Cheers, Pedro
-
multi Affinity Tutorials & More
Pedro Soares replied to Pedro Soares's topic in Tutorials (Staff and Customer Created Tutorials)
Just to let you know I added a new tutorial to the list. Please see the link in the previous post. Thanks. -
Hi Lane, If you share the template I can have a look. Cheers, Pedro
-
Hi lanew, You're welcome. I should had been more clear but here it goes again. As MEB said Affinity Photo doesn't support Photoshop Smart Objects (yet) so the layer you mention is not necessary. Normally the smart objects you find in that kind of mockups have a dedicated mask layer with effects, lighting adjustments, etc. What I normally do is use the Place option I mention before to place my design and then place that design/layer inside the mask. I saw your video and I believe the mask is inside the white group layer that is checked. I know it's not the perfect solution but it works for me. Please try it and see if it worked. I'm sharing some tutorials in my YouTube channel and I have three upcoming videos covering three kinds of mockups. You can subscribe it to be notified as soon as it goes online. The first one will be next week. If you need more assistance I'll be glad to help you. Just let me know if my suggestion worked for you. Cheers, Pedro
-
Hi lanew, welcome to the Forum. Did you try to use the Place option? You can find it in File > Place… Normally it works for me. Cheers, Pedro
-
Please scroll down to the end of this post to see the latest added tutorials. Thanks. Hello Everyone, In the last couple of weeks I shared in the Forum different topics related to video tutorials I upload to my YouTube channel. To make it more practical, I'm gonna share them and new ones in just this topic. Feel free to scroll down and find all the videos I already uploaded. If you want to know a bit more about me and what to expect, then keep reading. Photography (and design) is part of my life for more than twenty years. I began working in the advertising industry in the 90's and from there I covered many different areas from the creative process to production. Today I mainly do portrait photography, fine art, special assignments and some design projects. In the last years and as a certified trainer, I began to share what I've learned and continue to learn in workshops. I mainly cover Portrait Photography, Black & White, Digital Workflow and Retouching. For the love of sharing my passion about photography, I decided to start making video tutorials and this is the reason I end up here. The amazing software the Affinity Team made gave me the enthusiasm we normally have when we get a new toy. For me it's been a fantastic experience and discovery of new ways of doing the same things in a different, and many times better, way. And this experience is what I want to share with you. This is also the reason I'm going to cover more the Affinity apps in a photography scenario. But you can expect more, a lot more... I'll also be covering photographic tips and techniques and other software that I find relevant to my/our work. This is the case of Capture One Pro that will have also a special feature. Apart from this I'm also preparing some "extras" but that's for another time What to keep in mind: Every time I make a tutorial where I create a special resource, like a macro, a brush, a style, etc. I'll share it for free. You just need to follow the video tutorial or blog post to see the download links. Some tutorials also have a related post in my blog with more details. You can check it here: (available in Portuguese and English): http://blog.pedrosoares.photo/ The tutorials are made in Portuguese but they have English subtitles. Nevertheless I make them in a very easy to follow pace. For that reason they are suitable for both beginners and advanced users. The list I have for upcoming tutorials is long but if you have a specific topic you would like to be covered just let me know. You never know if your request is my next tutorial. This was the case of the Glow Effect video. I'm going to share them chronological so the new ones will be in the end of this topic. Finally my idea is to share tutorials on a regular basis so feel free to subscribe to my YouTube channel to be the first one to know about it: https://www.youtube.com/channel/UCxdrAaW4Zr9lYktQmt5O4VA You can also subscribe to my Blog where you can find other topics: http://blog.pedrosoares.photo/ Sorry if I made this introduction to long, but it was important for me to share this. I hope you'll find each tutorial a useful resource and also a source of inspiration. TUTORIALS How to Create "Good Looking" Snow | Affinity Photo Tutorial + Free Snow Brushes How to Combine Text and Imagery | Affinity Photo Tutorial How to Extract Detail | Affinity Photo Tutorial + Detail Extractor Macro How to Create a Glow Effect in Letters | Affinity Photo Tutorial How to Create a Winter Scene | Affinity Photo Tutorial How to Create an Anaglyph 3D Effect | Affinity Photo Tutorial + Anaglyph 3D Macro How to Create Light Rays | Affinity Photo Tutorial + Light Rays Style How to Make Amazing Bokeh | Affinity Photo Tutorial Mock-Up Design - Clothes & Shoes | Affinity Designer Tutorial Ribbed Glass Effect - The MDNA Cover | Affinity Designer & Photo Tutorial
- 9 replies
-
- 8
-

-
- instructionals
- affinity photo
- (and 6 more)
-
How to Create a Winter Scene
Pedro Soares replied to Pedro Soares's topic in Tutorials (Staff and Customer Created Tutorials)
Hi Pollux, You're comment is most welcome. Thanks for the feedback! Cheers, Pedro -
Thanks hlarledge :)
-
Thanks Puffin! (by the way, great name and lovely bird)
-
Hi lilmisslondon, For the example I shared, I used a combination of Curves Adjustment, Gradient Map Adjustment, Tone Mapping, Lens Filter Adjustment, a pixel layer set to Soft Light with one of the colours I wanted in the sky and Mask Layers. And I also add some light rays with a technique I use. This week I gonna share a tutorial on how to create light rays with that technique and one of my upcoming tutorials will be covering this theme - Skies. If you want you can check my YouTube channel for this tutorials and more. Cheers, Pedro
- 6 replies
-
- 1
-
-
- book cover
- tutorial
- (and 2 more)
-
affinity designer Tunkita Pig - Made with AD
Pedro Soares replied to Frankentoon Studio's topic in Share your work
Looks great Frankentoon :) And made me laugh and that's always a good sign. Congratulations for the good work!- 13 replies
-
- 1
-
-
- illustration
- brushes
- (and 3 more)
-
You're welcome :)
-
Hi davidescalante, Why don't you use the Transform panel to set the exact size you want? You can create one of each size you need and just duplicate them as you like. Pedro
-
Hi lilmisslondon, See the attached images to see if this is more or less what you're looking to achieve. Cheers, Pedro

- 6 replies
-
- 1
-
-
- book cover
- tutorial
- (and 2 more)
-
How to Create a Winter Scene
Pedro Soares replied to Pedro Soares's topic in Tutorials (Staff and Customer Created Tutorials)
No need to be in Portuguese :) I have Allow Comments in all my videos. Maybe YouTube doesn't like us :D -
How to Create a Winter Scene
Pedro Soares replied to Pedro Soares's topic in Tutorials (Staff and Customer Created Tutorials)
Thanks jer and yes, you can avoid a walk in the cold :D P.S. - Your comment doesn't show up. -
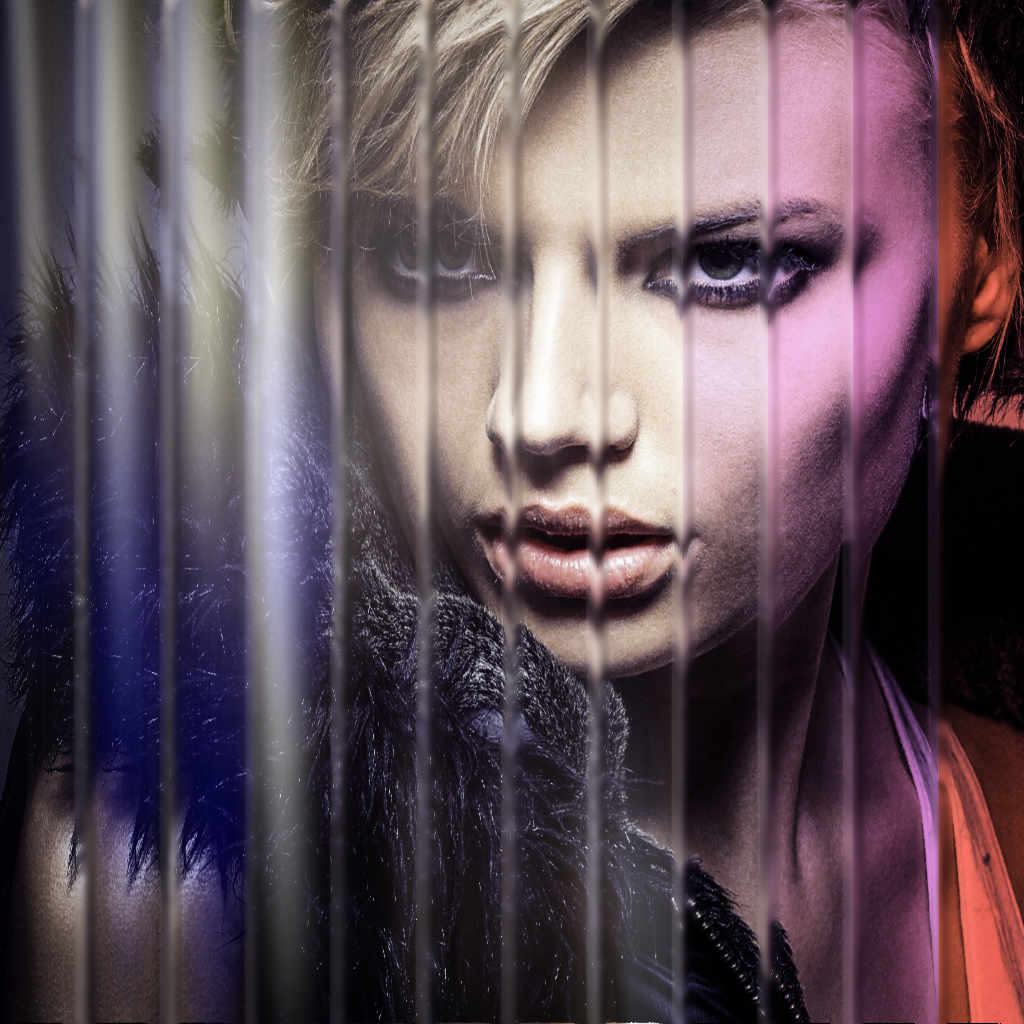
Madonna MDNA "Mirror" Effect
Pedro Soares replied to Anna Susanna's topic in Tutorials (Staff and Customer Created Tutorials)
Just a small update regarding the MDNA ribber glass effect... This is probably the final image. I'm gonna try to finish the tutorial next week :)
-
I made this Macro to extract detail from an image for a tutorial and then I made it available for everyone. If you want, you can check the tutorial related to this Macro in the following link: https://www.youtube.com/watch?v=JdaySWNEpY0 Pedro Detail Extractor.afmacros.zip
- 5 replies
-
- 3
-
-
- affinity photo
- macro
- (and 2 more)
-
In this tutorial I cover how to create a winter scene using channels selections and a few more tricks. This is also the first part of the tutorial - How to Create Good Looking Snow. ;) https://www.youtube.com/watch?v=XGbCcpIyZYA The language in the video is portuguese with english subtitles. Hope you enjoy the video :) Pedro
- 6 replies
-
- 4
-
-
- affinity photo
- tutorial
- (and 5 more)
-
How to create a winter scene
Pedro Soares replied to GermanDennis's topic in Tutorials (Staff and Customer Created Tutorials)
Hi GermanDennis, I now it's been awhile since you made this topic but if you still want to know how to create a winter scene in Affinity Photo you may want to see the tutorial I made covering this subject. You can see it here (english subtitles): https://www.youtube.com/watch?v=XGbCcpIyZYA Hope it can help you. Cheers, Pedro -
Based in a topic here at the forum I made this tutorial to cover how to create a glow effect in letters. ;) https://www.youtube.com/watch?v=ejB93TiS4mU The language in the video is portuguese with english subtitles. Hope you enjoy the video, Pedro
-
- 3
-
-
- affinity photo
- glow
- (and 5 more)
-
Hi jer, I have a different technique to fix this problem. Please see the file attached. This approach lets you adjust colour/tonality and the amount of texture, despite that in this image you can't see very well the full impact it can have because of the lack of resolution and texture in the all image. I hope this could give you another solution. I also addressed a bit of the colour cast but this is a tricky one since I believe we are going to see colours differently. Pedro reflection01-PS.afphoto.zip
-
How to Extract Detail
Pedro Soares replied to Pedro Soares's topic in Tutorials (Staff and Customer Created Tutorials)
Hi jer, I just saw your image and I'm gonna share with you another solution that as some advantages. I'm going to share it and the file for you to check in the topic you wrote in the first place. Pedro