telemax
-
Posts
928 -
Joined
-
Last visited
Everything posted by telemax
-
 Compound.mp4
 -
Hi, Have you tried using Symbols for this? (perhaps I misunderstand) Symbols.mp4
-
This only works with a special layer created in Affinity Designer. This allows you to work with many objects in a particular layer, ignoring everything except this layer. This way you can work with a very complex design without being afraid of accidentally moving objects on the bottom layers.

-
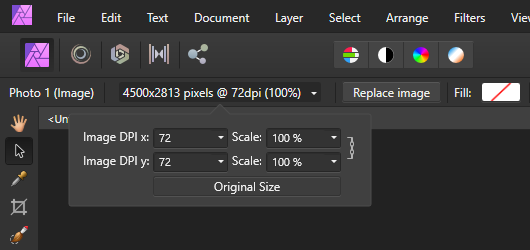
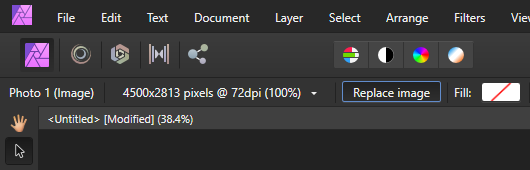
image allows you to replace images, this is very useful for working with complex design image allows you to return the original scale or dpi (ppi) image saves compression if it is jpg, reducing document file size https://affinity.help/photo/English.lproj/pages/Layers/layerImage.html image can be a link to a file, which greatly reduces document file size https://affinity.help/photo/English.lproj/pages/Media/embeddingVsLinking.html
-
It seems to be a similar problem:
-
Rasterize multiple Layers at once
telemax replied to evtonic3's topic in Feedback for Affinity Designer V1 on Desktop
+1 -
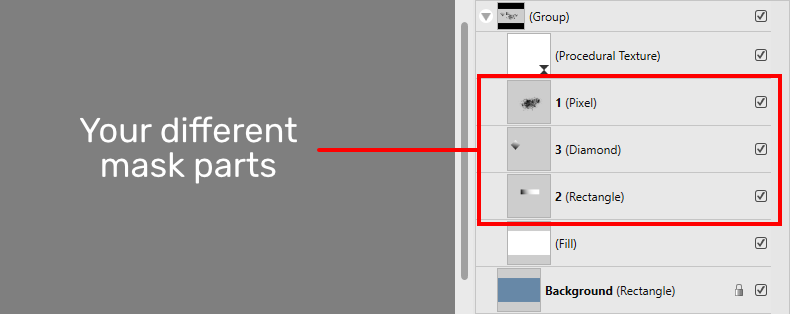
The Affinity community has created a special composite mask, which is a group. With it, you can perform any manipulations with masks, as with any other layer. And also create a complex design, consisting of many masks. 1. Install Asset Nondestructive_Mask.afassets 2. Place your mask layers (any layers type) between the Procedural Texture and the Fill Layer. 3. Change the FIll Layer color, to change the mask background transparency. non-destructible_masks.mp4 Explanations:
-
Artboards in Affinity Designer also work as a rectangle. In some cases, it may be more convenient to use artboards in Affinity Designer, since there is a better visual control. But the artboards will require renaming manually. Artboards.mp4
-
I was solving a similar problem. To do this, each Logo layer must be nested in a rectangle the size of a canvas. Using_Canvas_Size.mp4
-
The Affinity community has created a mask that gives this opportunity! You can use it to create a complex design. Opportunities Nondestructive editing and moving Multiple individual mask parts Vector and raster Color and greyscale Applying adjustments Mask.mp4
-
You can also sync with new ones. Synch.mp4
-
This is a solution for creating non-destructible masks:
-
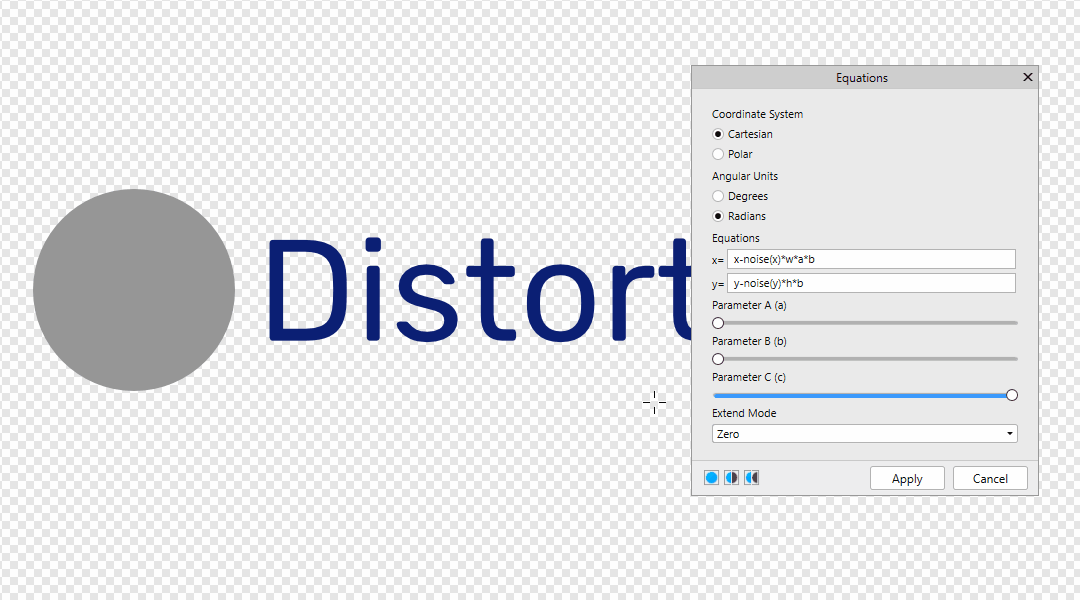
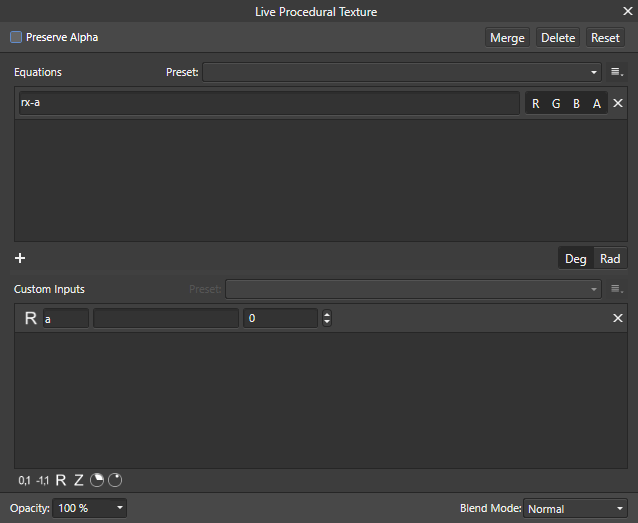
I think I was able to get a dependency of A from B. x-noise(x)*w*a*b y-noise(y)*h*b
-
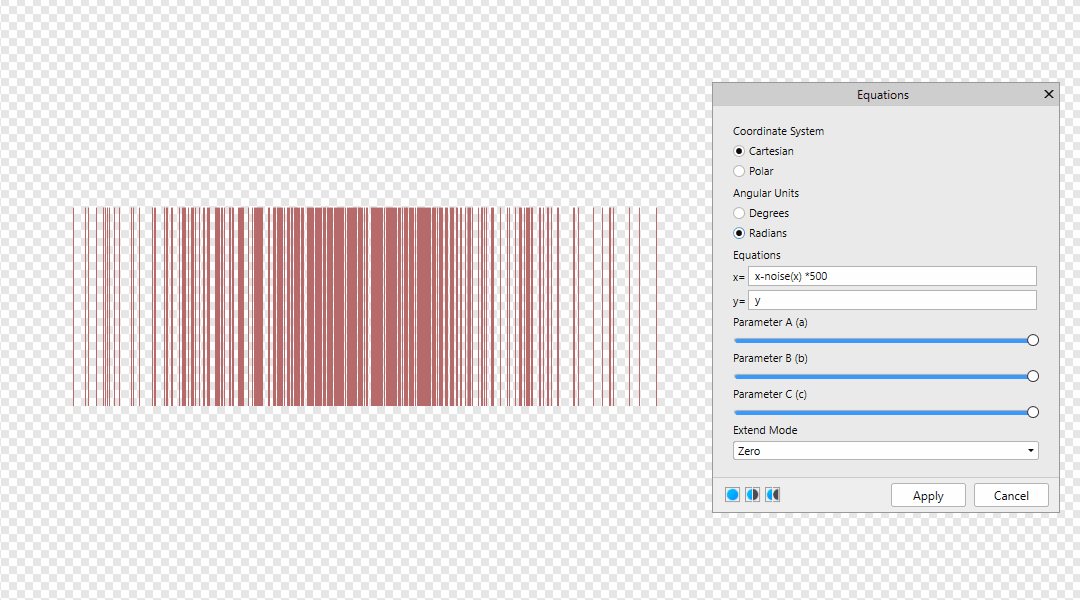
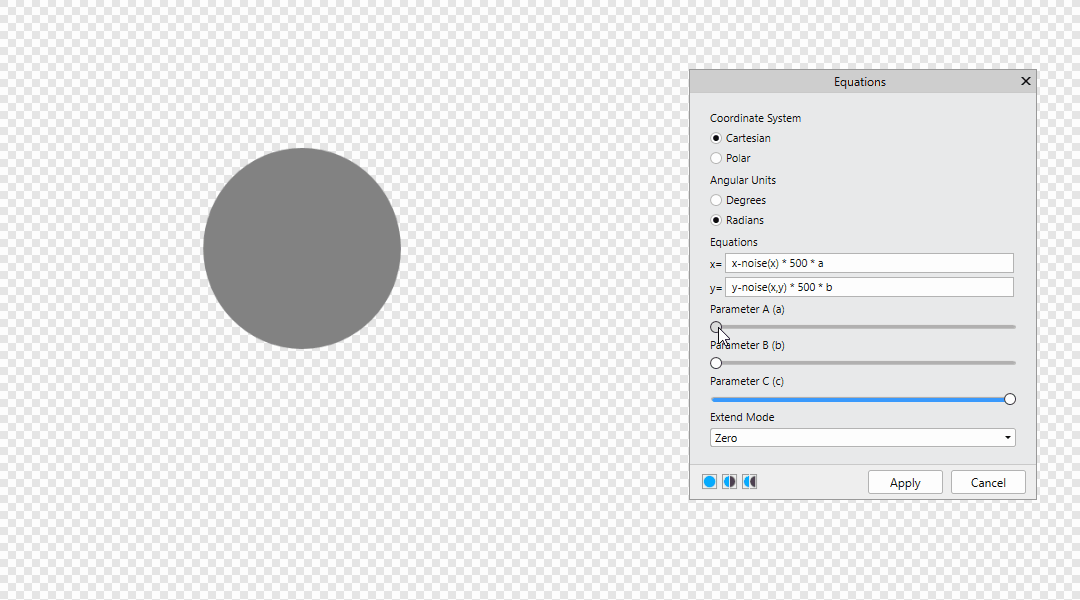
You can find Equations Filter in Filters > Distort > Equations Many thanks to @NotMyFault @John Rostron and @R C-R Leave your formulas here! x-noise(x) *500 | x-noise(y) *500 | x-noise(x,y) *500 y x-noise(x) * 500 * a y-noise(x,y) * 500 * b The value 500 is the offset distance. It can be replaced by w or h, then the offset distance will be equal to the size of the document in width and height. x-w*a y-h*b Also below is an example of the dependence of A from B x-noise(x)*w*a*b y-noise(y)*h*b
-
When searching for one solution, there are other interesting effects 😁
-
Wow it really cool effect! But I just wanted to offset a lot of selected layers, in random X and Y directions.
-
Thanks, I checked it out. x+noise(x,y) and y+noise(x,y) create small noise on the image, including image edges. It also works x-noise(x,y) and y-noise(x,y) a little explanation image offset works more simply, x-50, y-50 or x+50, y+50
-
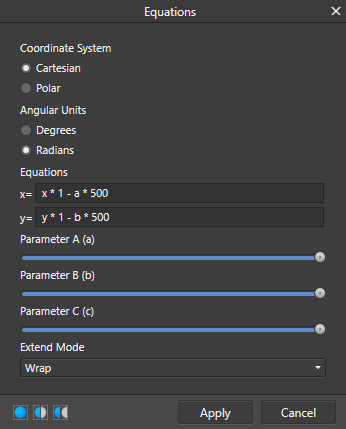
Thanks, it works in Equations. I made an offset of 500 pixels. Does anyone know if it is possible to make a shift by a random number of pixels, within the limit?
-
Thanks, i was only able to get a white image with offset by one of the coordinates. But I'm trying to move the layer to the side, some distance along X and Y (random offset).
-
Hi, Is it possible to offset pixels along the X and Y axes, using a procedural texture?
-
File > Document Setup > Colour > Transparent Background
-
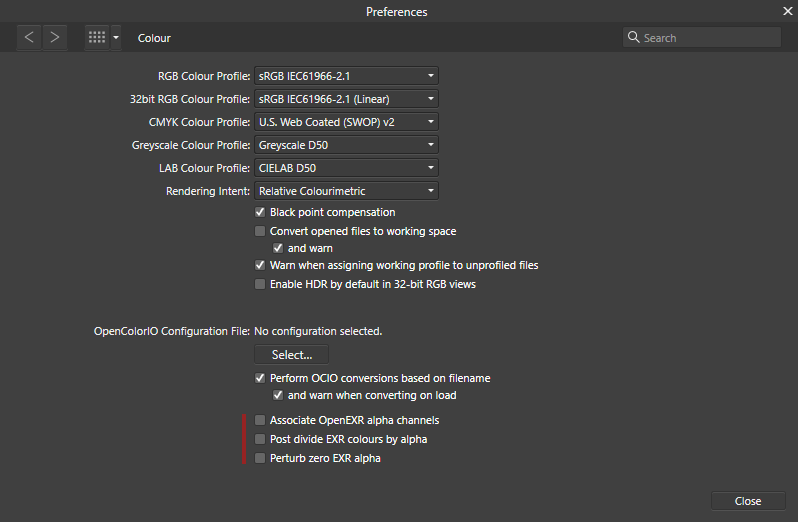
See the options for these settings Edit > Preferences > Colour
-
It looks like IrfanView ignores Alpha. Try this: