
telemax
-
Posts
928 -
Joined
-
Last visited
Posts posted by telemax
-
-
1 hour ago, lacerto said:
Channel editing is pretty much different than in PS so that just needs to be learned.
By the way, channel editing is not available for the "image" layer. At least in AP V1.
-
In simple terms, the "image layer" tries to preserve as much information about itself as possible.
-
It is based on the Lighting filter with the "bump" parameter.
The information automatically used from the layers below will create an incorrect dark normal map from any layers below, except white.
Therefore, to get the correct result, you need to load the image by clicking the "Load bump map" button. -
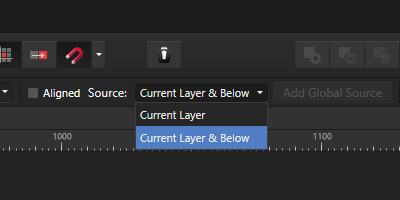
It doesn't work for me with hardware acceleration turned on or off. AP 1.10.5.1342
-
The problem seems to be caused by the "Current Layer" mode. Select another "Current Layer and Below" mode.

-
1 hour ago, Jung21 said:
Which is better between this method and alternative method with procedural texture?
Both methods do the same thing. The main concept is to make the contents of the group work as a single mask. The main advantage is keeping the contents of the group in their original state.
-
19 hours ago, NNN said:
Thank you very much. Really great asset.
Is it possible to speed up the process a little bit more by automatically deleting the logo and loading the bump map?
Removing the logo will make the Asset invisible in the Asset panel, but you can do it.
It is not possible to automatically load and update the bump map, unfortunately.
-
Pattern Layer can be larger than 1024px.
1 Create a rectangle of the desired size in pixels
2 rasterize it
3 Layer > New Pattern Layer From Selection -
Here is a good method, it allows you to accurately control the result:
-
Yes, masks can consist of several parts, and can also be non-destructive:
-
-
An additional faster and more convenient way.
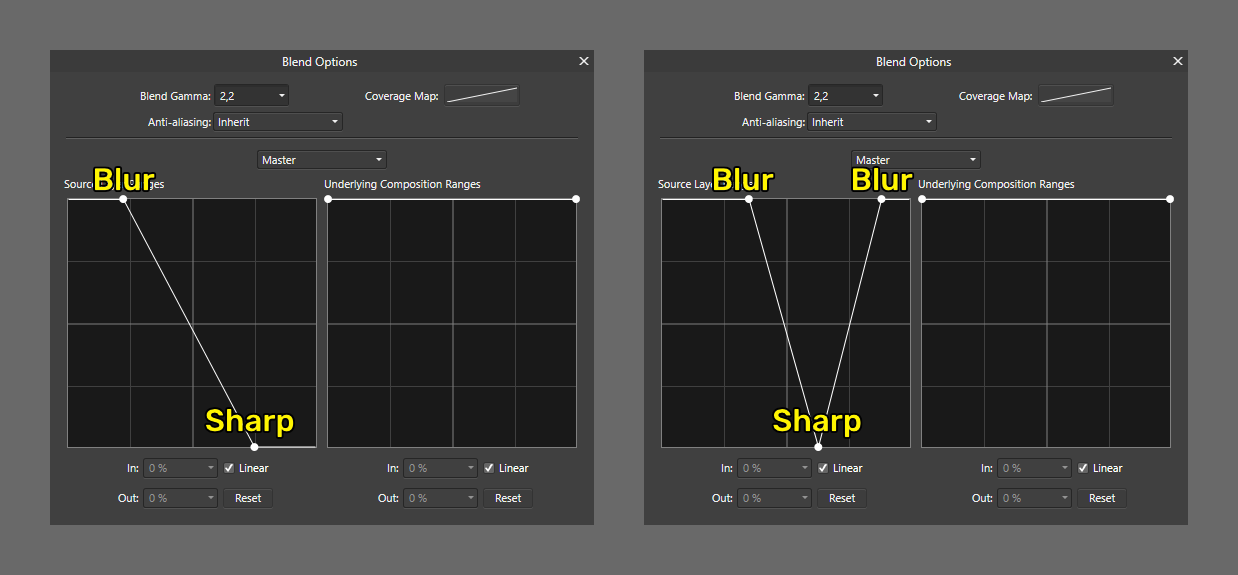
1. Add Non-destructive Blur.
2. Add a Mask (z-depth layer) for the blur effect.
3. Adjust the "Blend Ranges (cog icon)" curves for the mask.Levels adjustment of the z-depth layer is not required.
The distance between two points in the "Blend Ranges" can be represented as a field of focus.-
-
Hi,
The z-depth layer must be rasterized into a mask:
In this case, the mask will determine transparency rather than the strength of the blur effect. Therefore, it will be somewhat similar to the Orton effect.In some cases, the "Depth of Field" filter can be useful:
-- Ekin Aydemir and Johannes
-
 1
1
-
 1
1
-
Hi,
Try a non-destructive boolean. Hold down the Alt key before the boolean operation.
-
I think if you add a wireframe view, it will be clearer to many people.
-
These are actions for Affinity Photo:
1. Select a layer with your logo, Filters > Erase White Paper
2. Layer > New Adjustment Layer > Recolour -
Yes it works in Windows AP, AD (1.10.4)
1. Affinity Designer > Swatches > Add Application Palette.
2. Add the desired gradients, Export Palette.
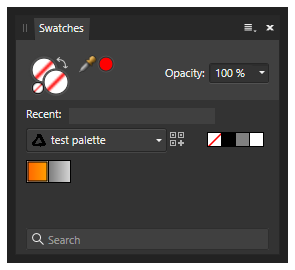
3. Affinity Photo > Swatches > Import As Application Palette.Here is the palette file created in version AD 1.10.4 in Windows: test palette.afpalette
This is how imported palettes look in AP in Windows:
-
12 hours ago, NotMyFault said:
You can find downloadable resources in that thread.gradient hor brush.afdesign
Easter Egg! This file also contains an example of how to turn off noise for a gradient 👍
-
-
13 hours ago, aloescher said:
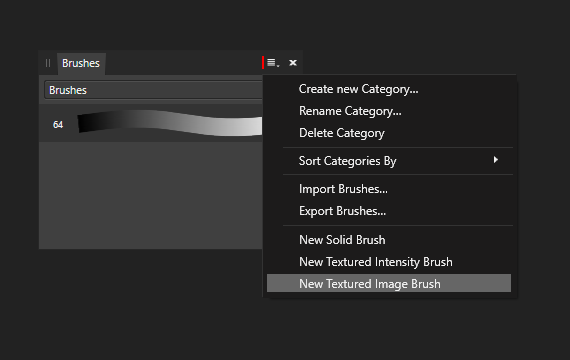
It is a combination of Texture Brush and Layer Adjustment.
Damn it! What a trick! Wisely 👍
This would be a good addition to these brushes:
-
Hi,
There is no exact alternative, but the Affinity Photo has a non-destructive "Field Blur". It is a "live filter", which means that it will act in a non-destructive way.
After creating the "Field Blur" you can move and edit all the objects underneath it.The live filter appears in the Layers panel as a layer, and acts on all layers/objects below it. You can also isolate the effect with a group, or by applying it only to the selected object.
All live filters created in Affinity Photo can be edited in Affinity Designer.
In this example, I first selected an object and then applied a live filter. So, the filter will act only on this object:
But you can also pull that filter out of that object, and apply it to another object or group:
Field_Blur.afphoto -
Thanks for the reply! I just wanted to reduce the resolution of some of the content to export to PDF ("Nearest Neighbour" method, no blurring).
2 hours ago, EmT said:You could make a hidden copy of the group/layer as a backup before rasterizing.
Yes, I'm using that technique now.
1 hour ago, joe_l said:When you work with AD or APu lower the document DPI e.g. from 300 to 72 dpi, rasterise the object and then change back the document DPI to 300. Not sure about any side effects.
I use a different method, I create a duplicate for a backup, reduce by half the desired content, raster, increase by half, raster. That's my workaround.
The second workaround is to use the "Pixelate" filter instead of rasterizing, but it gives a slightly rougher result.
-
46 minutes ago, MmmMaarten said:
Another map I've done in the past was in fact built in 3d tho
This is awesome!
47 minutes ago, MmmMaarten said:I'm missing something here I guess. I'm not a gamer. No clue what you mean by this. 🤨
Your interactive map reminded me of an old game:
-
I'm sure there should be an option to display all the terminals on the map.
Spoiler

Always noise in gradient.
in V1 Bugs found on Windows
Posted
Hi,
There's a trick that works at least for V1.
1. Select your gradient layer.

2. Apply FX (located in the layers panel at the bottom).
3. Use Outline FX.
4. Set any value for radius, and zero for opacity.
Thanks to @NotMyFault, he hid it somewhere in the bowels of this forum, in an easter egg.