Subclavius
-
Posts
179 -
Joined
-
Last visited
Everything posted by Subclavius
-

Winding fill mode and intersections
Subclavius replied to Subclavius's topic in V1 Bugs found on Windows
Hi @Sean P Thank you. That is indeed the problem. Now I also understand the reason why there's a Reverse Curve button! Apologies for the title of the post by the way, most of it seems to have got lost. Have now amended it. This thread can be closed. -
Winding fill mode misses some intersections of shapes (drawn with pen and node tools) when they are all on one layer. Please see pics for views of Alternate and Winding modes Missing areas have to be filled in manually which is not only annoying but very time consuming.

-
Hello Serif Moderators, Thank you for your help with this and for all your hard work
-
Thank you. Please would you explain what the essential difference is between low and high precision - I know it sounds obvious but what are the consequences for the document being worked upon. FWIW I also notice a much improved performance (a lot less, if any, lag/stuttering) with a direct USB connection, which operates at a much higher bit rate than bluetooth.
-
Breaking a curve into segments auto-creates new layer
Subclavius replied to Subclavius's topic in V1 Bugs found on Windows
OK, thanks @Chris B. The reason why I raised it was because the pen and node tools seem to form a natural pair, but perhaps that's not how it was intended. The solution was too deep for me to find. You can close this one as 'by design'. -
The title isn't very good but attached is a video of what I mean. Multiple shapes (pen tool) drawn *on one layer* => when one of the curves is broken (splitting it to make another shape) to create an 'orphan' section, the node tool in APhoto automatically creates a new layer despite the setting "Add new curve to selected layer" being selected with the pen tool. The node tool appears to ignore this setting. Clearly the example is trivial, but with complex shapes it's inconvenient as it always entails redrawing the orphan section (at least, I haven't found a way of pasting the orhpan section into the existing layer as a shape). 2020-08-19_12-04-43.mkv
-
I get some behaviour like this too - a 'stuttering' effect as if Affinity can't process the incoming information fast enough and then suddenly catches up. It appears most frequently with large documents, (relatively) high magnifications [this means 185% of 256 MB tiff, 1600dpi, RGB/8 format] and slow pen movements. Oddly APhoto seems ok with quick pen movements and these seem to make it 'catch up' again. Am using Wacom Intuos Pro. It was also occurring the one of the earlier beta builds (681). It doesn't occur consistently however.
-
Thank you @Alfred, that is indeed the problem. I have put in an enhancement request for APhoto
-
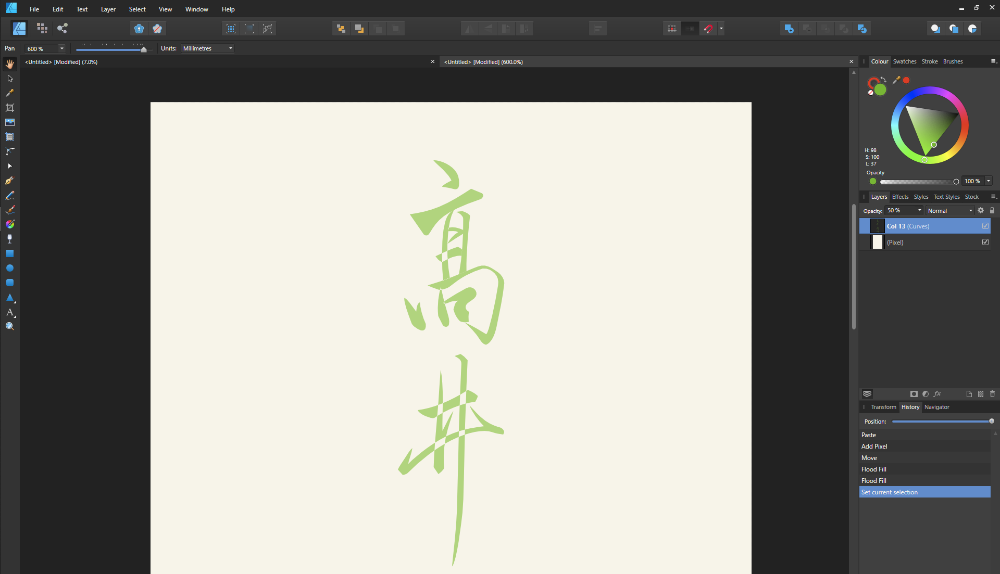
Using Affinity Photo to create curves (pen mode) - when objects on the same layer are filled, the intersecting area is always empty (no fill). This is equivalent to 'Alternate (even-odd)' mode in Affinity Designer. It would be very, very useful for me to have the 'Winding (non-zero)' mode from Affinity Designer available to counter this problem. I use the pen mode to trace objects - writing in particular, and where strokes intersect there is always a blank area which has to be later manually filled. I would like to make a plea for this enhancement which on the face of it looks not too dificult to implement.
-
When drawing independent curves on the same layer (using the pen tool) with a fill, the fill vanishes where the curves intersect: Is there any way this behaviour can be changed so that the fill also applies to the intersection? I am using a fill opacity of 50% and ideally I would want the intersection also to have 50% opacity, as opposed to 2x50% opacity. I think there must be something simple I am missing but I can't find the answer anywhere (yet). Please can anyone offer some advice
-
Paint brush behaviour changes after Erase brush use
Subclavius replied to Subclavius's topic in V1 Bugs found on Windows
Aha! Thank you @carl123 that appears to be the source of the problem. It looks as though use of the erase brush interferes in some way with the 'Wet edge' parameter though the erase brush doesn't have an obvious 'wet edge' setting itself. The problem works either way around after the first time usage. However, after explicitly setting 'wet edge' (or unsetting it), APhoto appears to remember it. Will leave this thread for review by the moderators as the status of the problem has been reduced from 'very annoying' to 'inconvenient'. I guess there's no substitute for experience! -
Windows 10 Pro build 1909/APhoto 1.8.4.693/Wacom Intuos Pro I have experienced a problem with the new release (also present in beta build 681) where the paint brush changes after the erase brush is used. It happens with Affinity native brushes and purchased ones and it most noticeable when the flow is a low value. To demonstrate: New document add pixel layer select brush with a low flow e.g. Dry media/Triangle crayon draw a few strokes with the paint brush use the erase brush (in my setup this is set to one of the Basic series brushes) draw a few more strokes with the paint brush and see the difference. The only way I have been able to work around this behaviour is to reset the flow (temporarily) to another value without drawing and then set it back again to its original value. This behaviour happens with the Wacom and the mouse. I switch a lot between between drawing and erasing and it's very annoying
-
I -had- a nasty (temporary) problem after installing the 693 version. With the Wacom the only set of brushes to work were from the basic set, simply trying to paint on a pixel layer. No other brushes worked. As a quick test I used the <L mouse> button to paint with other brushes - which worked fine - and afterwards the Wacom pen worked on all brushes. Am not sure there is there's an initialisation issue here but I can no longer reproduce it. On a separate note, I switched from USB to Bluetooth connection today and there is noticeable response in delay APhoto such that it's each to overdo a pen movement if it is too quick. With USB the response was instantaneous. This may be normal so am leaving it as an observation.
-
pressure opacity control please
Subclavius replied to korni's topic in Feedback for Affinity Photo V1 on Desktop
A related request but a similar idea. Adding it here rather than starting a new topic. When the <L mouse>/<tablet pen> is clicked/tapped (whilst holding down the appropriate mouse/modfiier keys), different brush parameters can be selected - size/hardness, spacing/shape, rotation. This is great but I would like see a 4th set added for altering flow/opacity (in the same way perhaps - horizontal/vertical movements - as size/hardness) so that I don't have to keep changing position and fiddling with the sliders. Any thoughts anyone?- 1 reply
-
- 1
-

-
Windows 10 Pro 64 bit (version 1909), Wacom Intuos Pro, driver 6.3.40-2 (Windows Ink off), APhoto 1.8.4.681 I'm going to throw in my twopen'th here. I've been having a lot of trouble with 'stability' when it comes to holding down the pen and tapping to change brush properties - sometimes as @TEcHNOpls says I don't get de-click and keystrokes (e.g. <alt> or <ctrl>) are held, even outside of the application. However, the process is not (so far) repeatable although it does occur very frequently. I didn't try using the mouse but unplugging and reconnecting the USB connection worked. It's a real pain. So I tried reverting to driver 6.3.39-1 and so far (limited testing only this evening) I haven't been able to fault APhoto. Makes me wonder if the problem lies with the Wacom driver or some other (so far untried) combination of options in the Properties of the Wacom tablet. However I note that the latest incarnation of the Wacom drivers appears to include significant new functionality. Will be testing the older driver further.
-
@Mark Ingram In view of the (probable) forthcoming changes I am rejigging my use of the mouse buttons anyway (see below). I like the use of <ctrl>+<alt>+pen tap giving first brush size/hardness, then shape/spacing, then angle (maybe this has been there for ages but I've only just discovered it!) @carl123 Thank you. I have renamed the Beta executable and I can now attach it as a separate application in the Application tab of the Wacom properties. I have discovered a very inconvenient/annoying feature of the new button arrangement in APhoto. I have the 4 lower buttons on the tablet (am right handed so these are the lower left) set at the default settings of <shift>, <ctrl>, <alt>, <pan/scroll>. I change brush size quite happily by pressing <ctrl>+<alt> with my left hand and changing the brush with the right hand. It's important here to press the buttons in the right order - I have to press first <ctrl> then <alt>. However, if I'm a little too hasty and press <alt> and then <ctrl> Windows itself get completely messed up and thinks that I'm holding down the <ctrl> key permanently - even outside the application. The only way to remedy this is by disconnecting the tablet (USB connected) and reconnecting (or a reboot). Have tried assigning (as modifiers) <ctrl>+<left alt> to the upper button on the pen but this simply doesn't work in APhoto. The lower button on the pen is assigned to <right click> which I intend to leave as is. Any comments would be much appreciated. Thank you
-
Hello All, I think I've figured out now that <ctrl>+<alt>+<L mouse> does brush size/hardness in the Beta version (as opposed to <alt>+<L mouse>+<R mouse> in production). Ideally I'd program the Wacom tablet (Intuos Pro) accordingly, one set for Production and one for Beta (corresponding to the same buttons). However, because the executable names are the same (Photo.exe) for both Production and Beta my Wacom tablet properties won't permit addition of both applications (in the Application tab of the Properties dialog). I need Production to be stable and reliable but it's nice to test Beta for the improvements so every time I switch between them I have to re-program the Wacom tablet properties. Can the Beta executable have a different name? Please delete this comment if it's in the wrong stream - when I open Production files with Beta it no longer asks if I want to make a copy or proceed with the edit or get any sort of reminder about this activity. Is this intentional?
-
Have since discovered that this bug applies to many help topics although not, apparently, all of them.
-
Windows 10 64 bit/APhoto 1.8.3.641 When I access the help on cropping (Help > Crop tool > Cropping [bottom of page]) I get the following error: It occurs repeatably without any operations being performed. In case any one can help with cropping - is it possible to crop part of a layer and leave the underlying image intact? I'm not sure what the Crop Tool does exactly - does it crop the canvas or simply restrict the field of view?
-
Here is a basic video. Thank you for your continuing help with this. 2020-06-22_15-07-22.mkv
-
Dear me. I've tried copying (from a web page shown in Firefox, it was google images - I chose something with lots of images to copy/paste) and, as you indicate, all of the images are pasted correctly. I wonder if there is something special about the web page that I chose, which is: http://www.holbeinartistmaterials.com/artist-watercolor-color-chart/ The document is set to "embedded" for the image paste preference. However I get the message "Linked Resource Changed ... outside of the application" for the second and subsequent pasted images. Looking in the (temporary) directory where Resouce Manager is storing them it appears that the first jpg file has magically been deleted, hence it's "Missing" status in the Resource Manager. I don't know if this has a bearing on the situation with regard to images being not being pasted correctly. Am in the process of preparing a video.
-
Jon P, thank you. Now I understand what is happening and fortunately it doesn't need a video to demonstrate: Select page 1 > paste image (from other app) => appears on page 1 in the centre - ok! select page 2 > paste image (from other app) => appears on page 3 in the centre select page 3 > paste image (from other app) => appears on page 5 in the centre select page 4 > paste image (from other app) => appears on page 7 in the centre select page 5 > paste image (from other app) => appears on page 9 in the centre You get the picture. It's nice to know the layers aren't lost but I still see it as a sort of bug though. It's just rather annoying behaviour which it would be nice to get a fix for at some point. Once again, thanks for your help, Nigel
-
Yes, if you paste the pixel layer from page 1 it works just fine on other pages. However, the point I was failing to make was the existing layers on pages 2 and 3, while present are not visible - in the document these were pasted directly from another application onto those pages. As soon as I figure out how to capture a video I'll post it (Windows Game bar won't play ball at the moment)
-
Test file has been uploaded
-
Windows 10 64 bit/Affinity Publisher 1.8.3.641 I am trying to create a colour chart, a multi-page document. It involves a table-like structure with, at the top of each cell a picture and underneath some text. The images are being pasted from another application (Firefox). The image layer is resized and rasterised after pasting. After I completed page 1 I find that the pasted images on page 2 (or subsequent pages) are not visible - that is, shown on the screen - despite the layer being shown as visible in the Layers list. The problem appears to be easy to reproduce: (1) create a 2 (or 3 or more) page document, (2) paste an image from another application on page 1 => success (3) paste this or another image on page 2 or later => not visible. The layer is created successfully but there appears to be no way to find/see/edit the image. Note: a very laborious workaround is to save the image as a jpg and then use File > Place... which does work on pages after page 1. It looks to me like a bug but what am I missing?