

AffinityJules
-
Posts
667 -
Joined
-
Last visited
Everything posted by AffinityJules
-
Affinity Photo V2 with a little help from GMIC plugin.

-

affinity designer Infected & Comic Book Toolkit
AffinityJules replied to StuartRc's topic in Share your work
I marvel at the speed in which you produce these other-worldly images. Just to satisfy my own curiosity - how long do you spend on an image? -
affinity designer Infected & Comic Book Toolkit
AffinityJules replied to StuartRc's topic in Share your work
- 51 replies
-
- 1
-

-
- affinity 2.0
- inking
- (and 3 more)
-
affinity designer Infected & Comic Book Toolkit
AffinityJules replied to StuartRc's topic in Share your work
This is album cover material of the highest prog-rock quality and, a subtle nod (not intended I'm sure) to ELP's "Brain Salad Surgery"- 51 replies
-
- 1
-
-
- affinity 2.0
- inking
- (and 3 more)
-
multi USS Enterprise, the original
AffinityJules replied to Foomandoonian's topic in Share your work
I had a model kit of NCC-1701 in my youth, I can see it now hanging from my ceiling. -
Going by your descriptions it sounds like you're working with an image layer rather than a pixel layer. Making a selection from an image layer and pasting it to a new layer will result in the entire image being copied. Doing the same thing with a pixel layer will work as expected - only the selected part will be copied to the new layer.
-
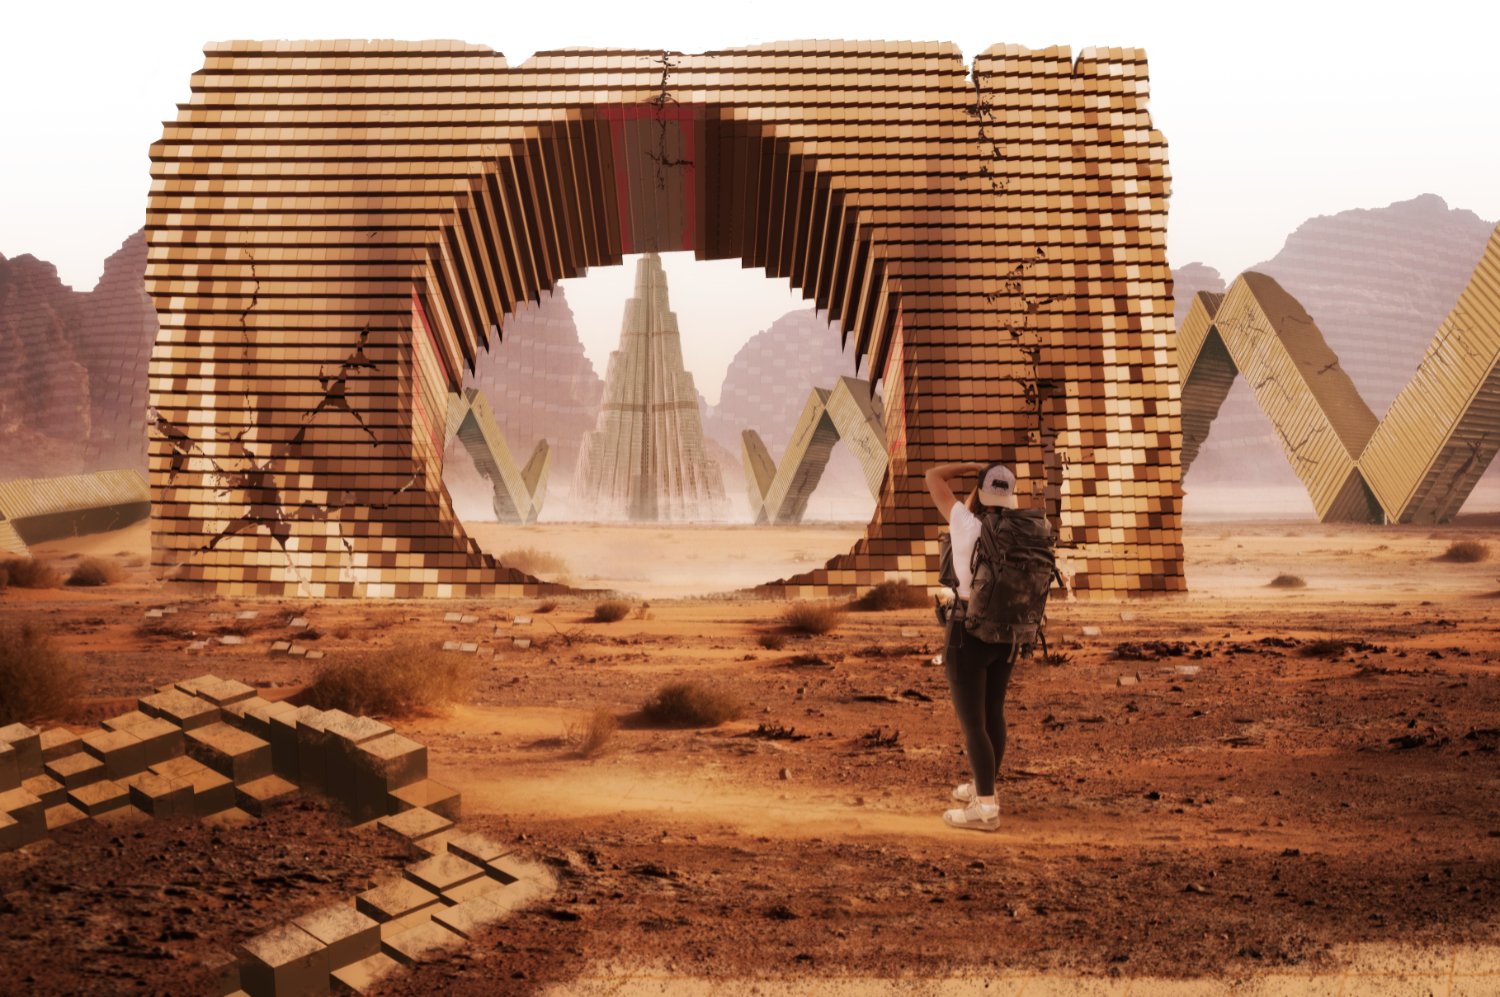
This is such a well executed picture and I like it very much, but for me there is one thing that spoils the overall aesthetic and balance of the picture. Yes, it's our old friend the shadows again - the recurring nightmare for any compositor creating a picture - I know because I speak from experience and many failures. In this picture there is one light source, and this light source (sun) is rather hazy because it's punching through a dusty atmosphere. This will result in soft shadows being cast off each and every object in the vicinity. The prime example here are the buildings, the shadow trails are soft in appearance with no hard edges because of the light quality. The two figures in the foreground have shadows as if from another light source, and not from the sun. Their shadows are darker with harder edges and they look somewhat out of place. Their shadows should match all the other shadows in the picture in as much as the colour and intensity as they hit the ground. When I first looked at this picture it was the first thing that caught my eye, I wasn't going to say anything about it because I really dislike criticising other people's work, but because I like this picture so much it's a shame to let an opportunity pass that will help give it a more authentic look. So excuse me and my interruptive opinions about what makes a good composite good, I just want to see this picture become as good as it can be.
-
Have you tried altering the spacing of the brush you're using? Click on the more tab and try increasing the spacing.
-
I'm curious. . .have you ever had the task manager open during these episodes to check if the CPU or memory have maxed out. In my case it usually is and until the computer recovers from these performance issues the program will inevitably freeze.
-
I see you're using the inpainting brush and not the healing brush, they both behave differently when processing. Using larger file sizes I always experience the very same thing you have pictured here. I have found no cure for this because it all comes down to the computers processing speed, and my laptop's performance is severely lacking graphically speaking. But as far as the inpainting brush goes, and its behaviour, it has become a normal thing for me to see. It takes as long it takes and that's all there is to it.
-
Your product key can be found in your account - the account you created when you purchased the software.
-
It's certainly a step in the right direction. If you look at the top tree on the left hand side of the picture and study the shadow cast, it shows the correct angle. One thing to note here is: where there is a dip in the ground or a sudden change of pitch, this will make the shadow skew off a little to reflect the change of angle. The case in point is just behind the Buddha where the ground begins to rise, it wouldn't make much difference in this picture but it's something to bear in mind in the future. Study the shadows in the foreground and try to match the colour tone in the shadows you have created, they are obviously green but have a different tint. Like I said. . .this is by no means easy and takes a lot of trial and error before you reach the point that touches upon realism. And thanks for the plug, but I am far from being an expert - just an enthusiastic hobbyist trying to make sense of the digital age like yourself. 😀 Tip: When I need to know if I am getting close to a colour match I use the colour picker and take a sample from the background and compare it with a sample from my own shadow layer. Double click the colour circle and when the window pops up it will show you the colour range, and more importantly, how close your shadow tone is or should be when held against the background picture. Advanced tip: Because the shadows are falling on grass it's useful to use a grass brush (if you have one) or the masking brush that comes with the Affinity package on your shadow. Mask the layer and zoom right in on the patch of grass and mask out parts of the outline trying to match the angle of the grass blades where needed. Again, this will result in a more realistic finish.
-
As a quick example of what I mean. . .I didn't take as long as I normally would over this, but it illustrates the idea of retaining the ground information in the picture.
-
Shadows are the resident problems that dwell alongside all the other difficulties that exist when composting pictures. I say that because I have been mucking about with composites for years, and although I have become better at it than what I was when I first started out, I still haven't discovered the science or definitive formula required for creating perfect shadows on every picture I do, but I have picked up a few tricks along the way. A technique I now use a lot is this: Regardless of the background or object that I am creating a shadow for, I always use the backdrop/background itself to create the shadow rather than making a black layer to put on the top of it. The idea and method is quite a simple thing to do and in my view makes a better result than any other I have tried through the years. Method: As an example, and to use your grassland picture to describe this technique (it will work using any object or background), I will try to explain what it is that I do. 1. Make a copy of the subject that will be casting a shadow in the picture. (in this case the Buddha) 2. Stretch/pull/distort the copied layer to suit the time of day to simulate the length and width of the shadow that is needed. 3. Once you're happy with the size and shape of the proposed shadow, place it exactly where it is to go then make a selection of the layer. 4. Turn the selected layer off. The marching ants selection will still be there. 5. Select the background layer (grass) and make a copy from the marching ants selection. Make sure the background is a pixel layer before you do this operation. 6. Hit paste and you will now have a new layer of the selected grass area in the shape of your created shadow. 7. You will not be able to see this new layer simply because it is a copy of the grass area itself and is a perfect camouflage. Now you can use a brightness & contrast adjustment, a curves adjustment, or any other adjustment that benefits the creation of the shadow for your picture. Adjust opacity etc to taste or preference. Tips: In general, the flatter the surface area, the harder the shadow cast will be, and areas with a feathery texture, the softer the shadow will be. Most shadow edges will have to be softened by some means, or blurred in others, a happy medium will have to reached in order not to over cook it. Length, light strength, and distance are also factors to be taken into consideration. The rule of thumb is to study the shadows that already exist in the base picture being used as the foundation of the composite and attempt to match them. Benefits: Using the actual background helps because it includes all the peaks and troughs that exist in a shadow where light might be present or not. If you look closely at your own picture where the natural shadows are, it is not all one shade of dark green and it has lighter spots scattered here and there. Using my technique will pick up these fluctuations or variants in light and make the finished shadow sit better on top of the composite picture. A bit long in explanation, but I hope it helps.
-
Nice. If it were me doing this I would have used a dark green for the shadows rather than black. A sample from the dark green shaded areas of the picture is a good place to start.
-
That's how it is, and works. It's always annoyed the heck out of me.
-
I would guess that you altered the shape of the brush. Look for the more tab and click it/when the brush options appear check the shape option of the brush and adjust the slider, that will modify the shape of the brush.
-
There are lots of ways to approach something like this, and some produce better results than others. If it's consistency you're after then try replacing the entire wall area with a gradient overlay or layer. Take a sample from the wall (mid tone, no shadows or light) and produce a gradient from that with a slightly lighter or darker tone of the original shade/colour. Mucking about with all the available tools with take ages and probably miff you off with the results you get. Just replace the whole thing - it's a lot quicker and eaiser.
-
In the export menu choose selection rather than whole document.
-
Use the colour picker tool to on the black area to get the right black tone. Use a hard brush and paint over the white area, or use the bucket fill tool. File/Export/PNG of your selection should give you a saved copy.
-
Go to the layers tab, and near the bottom of the drop down list select rasterise. Or right click (with the layer selected) and choose rasterise from the drop down list therein.
-
I don't know how PDF's work or behave in photo, and as your file is an image file the copy & paste will not work properly. If you make another copy of the original file and then rasterise the photo layer itself the copy & paste function will work. Give that a go.
-
If the file you're using is an Image file, the copy & paste will not work - the file will have to be rasterised. What type of file are you working with? You could upload the file, it might help solve the problem quicker?
-
Are you sure you are selecting the layer where the picture is? Your screen shot of the layer panel shows that the layer called picture frame is highlighted, is that the correct layer?
-
I used the selection brush tool then made several copies. I blacked out the area where the original photo was by using the colour picker. There are other ways to do this, but this is simple and quick. Steps: 1. Use selection brush tool on photo. 2. Edit tab/copy/paste. 3. Use the move tool to place the photo where you want it to go. 4. If needed the copied selection can be saved as an independent PNG file.


.jpg.f8e3b1735a1e2121e9ea36735684cdff.jpg)