TheWindowSeatistaken
-
Posts
8 -
Joined
-
Last visited
Everything posted by TheWindowSeatistaken
-
 Placing in the image might be a good alternative, I didn’t think of that. The reason for not just making new adjustments is if I have a set of drone images but each one is a slightly different angle and color. I wanted to use the same adjustments to tie them closer together. But I might have to adjust a mask depending on orientation...... or say the ‘curve’ creating my ‘look’ might need slight tweaking so that the images live better together. Im going to try as you suggested placing the other images into one. Then Saving them out as separate files. That will get the job done for now and ensure they’re all starting from the same place editing wise. Thanks
 -
Video Editing Software
TheWindowSeatistaken replied to OAW61's topic in Feedback for Affinity Photo V1 on iPad
Im currently using lumafusion for ipad And while its amazing and powerful. It would be awesome to have something that speaks with AP for ipad. Similar to how photoshop can open and edit video. this would be super helpful when creating cinema-graphs or placing video overlays on still images for social clients. - Dennis -
Am I missing something? but is there a way to drag adjustment over from one image to another? I know I can create a LUT and go that route. But for Example: Can I create a HUE/SAT & curve layer to get a desired color look. Then drag that over to another image and fine tune it? that way both images have the same feel? I had a whole folder of adjustment that I thought "Damn it would be awesome if I can drag this folder over to the other image"
-
I think this is kinda what your looking for??? Im actually in the process of trying to start making tutorials for the IPAD version only. I currently use photoshop for work, but see plenty of opportunity with this ipad app. If this isn't exactly what your looking for maybe we can chat about me making something closer for my videos
-
Non destructive working
TheWindowSeatistaken replied to Daryll's topic in Tutorials (Staff and Customer Created Tutorials)
Absolutely...... I do it on my drone shots constantly..... Not sure what aspects you'd like to create. But a quick way is just googling some light/lens flare images and then trying them on different blending modes. usually screen... overlay.... until you get the results your looking for. Hope this helps -
affinity photo Affinity wallpaer
TheWindowSeatistaken replied to YonderBen's topic in Share your work
Both look awesome... I like the touch of the shooting star refracting on the left side of the first one... really cool -
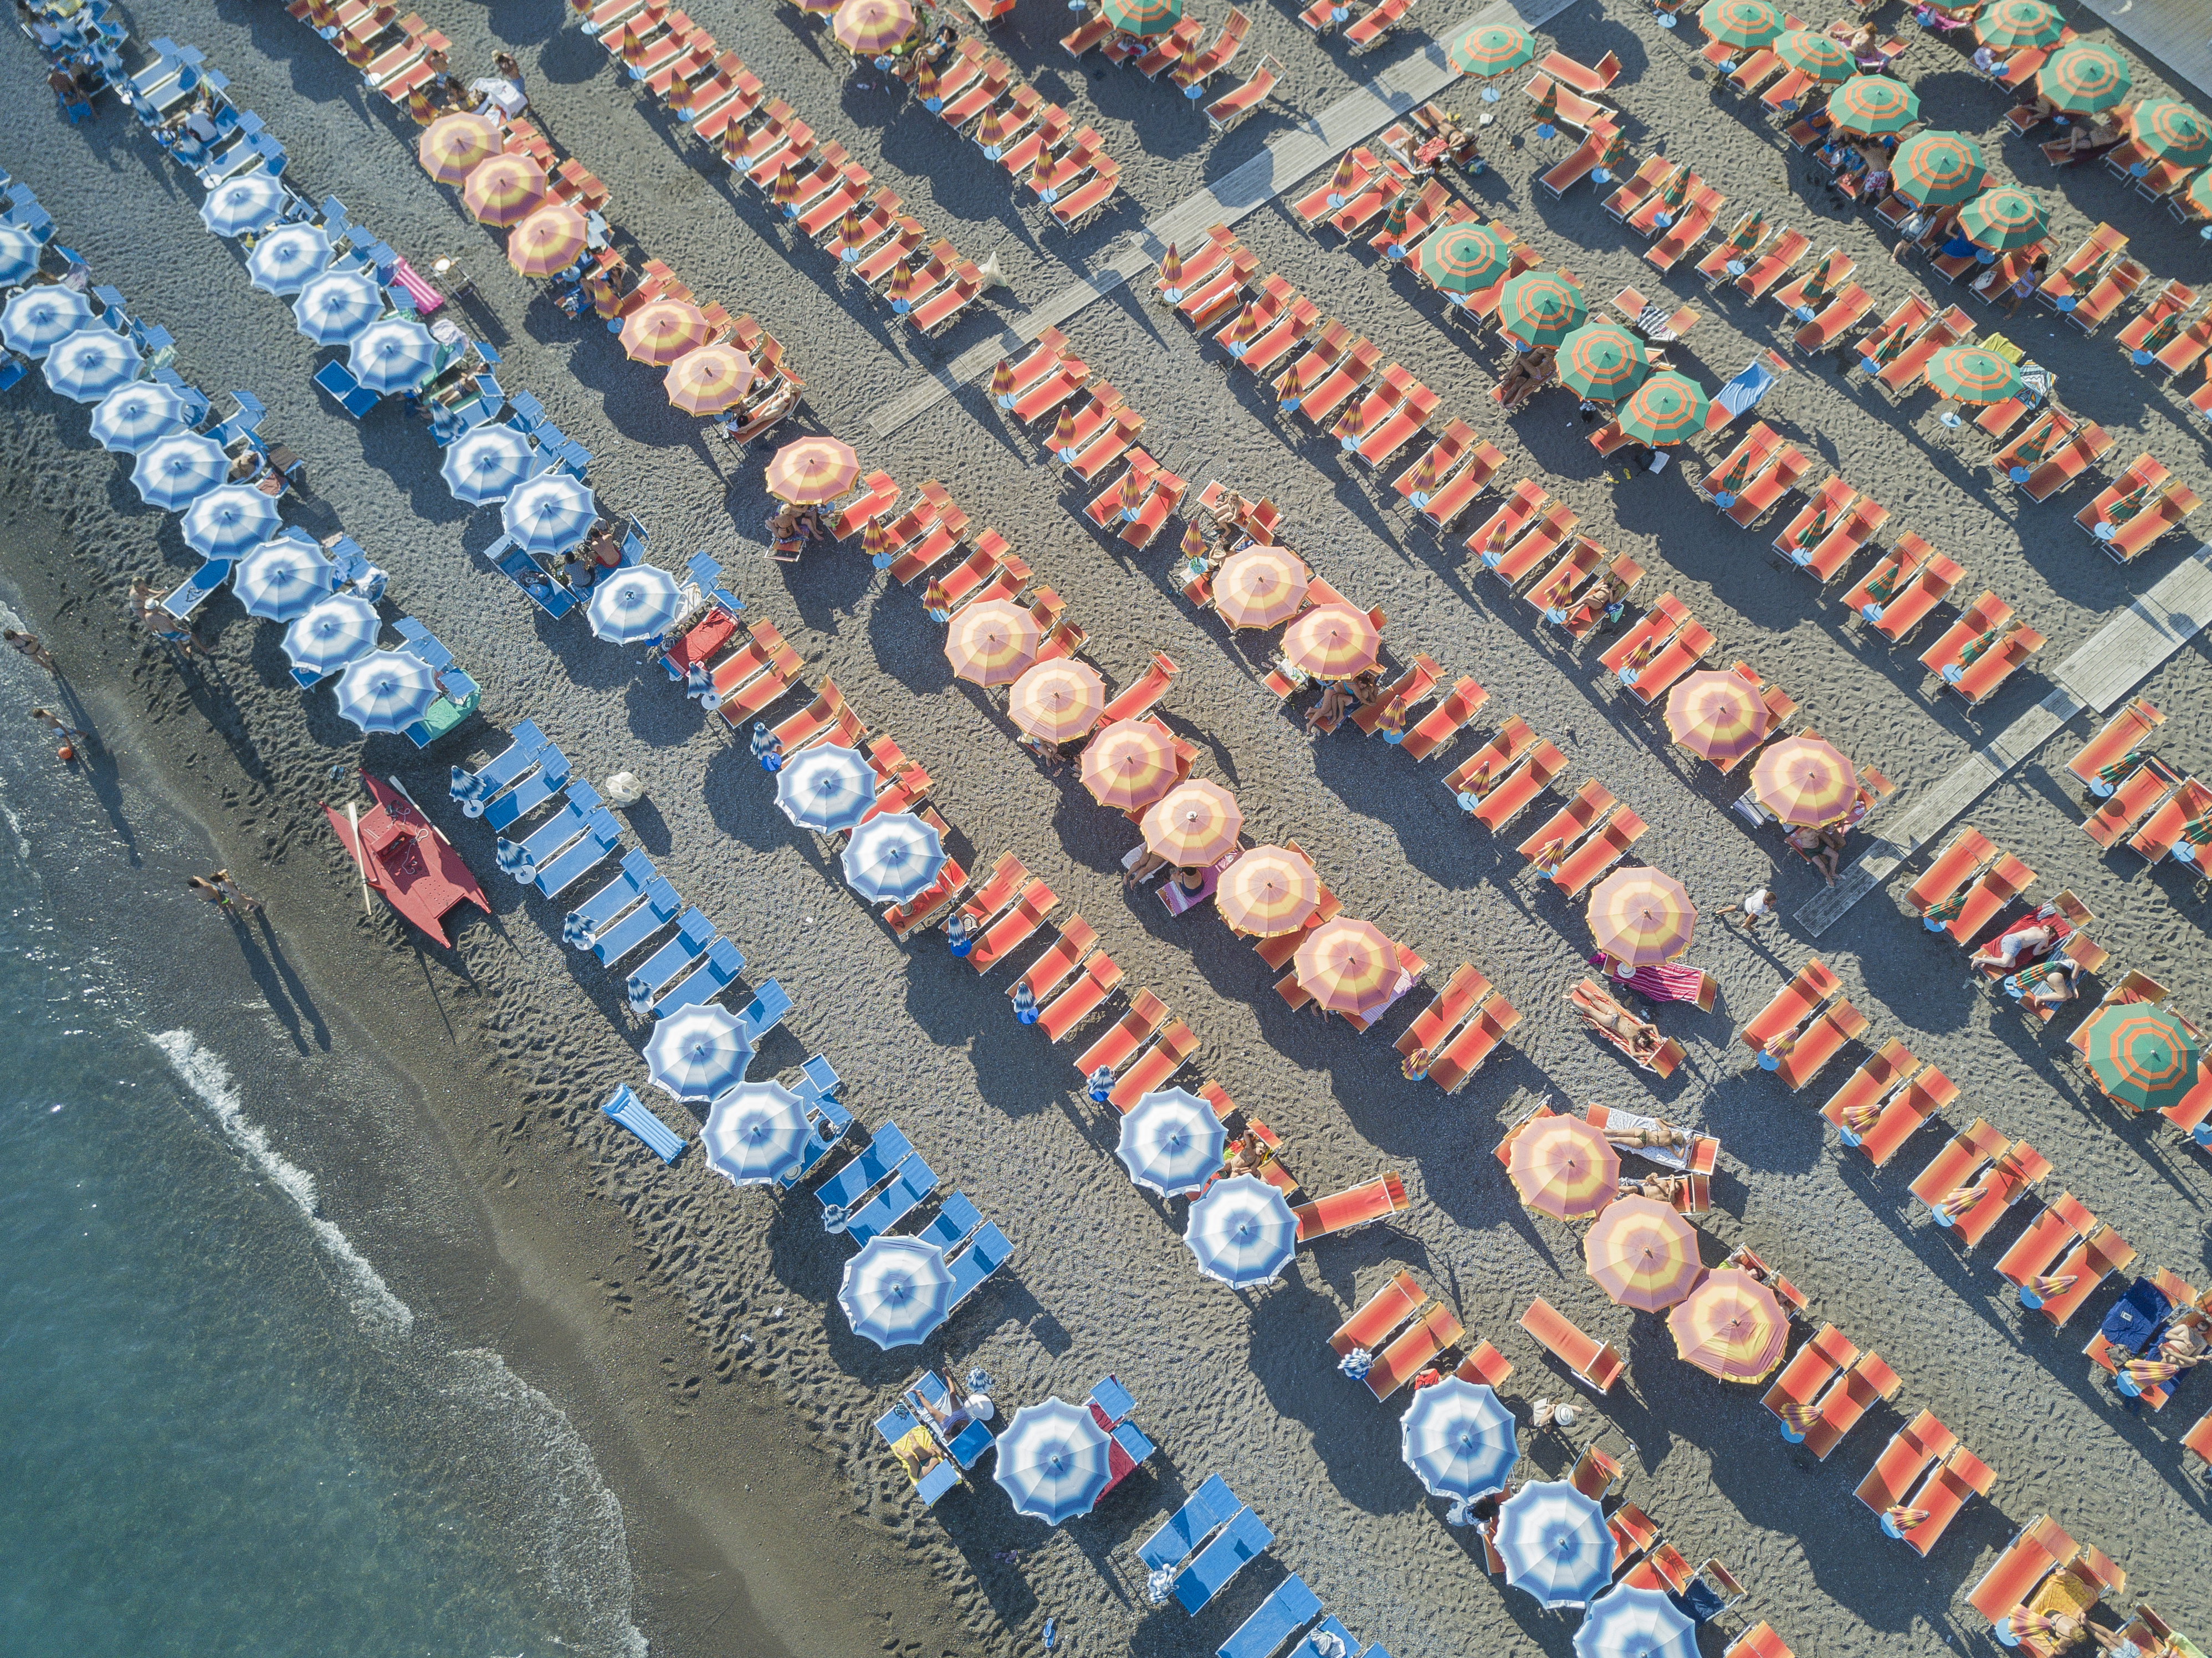
HEY Hows everyone doing on here..... I wanted to share some of my work but figured since its my first post I'd share a little about myself as well. Im new to the whole Affinity program but Ive been a Hi-End retoucher for over the past 9 years. Currently Im a retouching manager in New York specializing in beauty and Product retouching. At work we're using the Top of the Line MAC's fully spec'd out with the "industry standard" photoshop ....... BUT I've been looking for something equally as capable as photoshop but mobile! AND HERE's where AFFINITY comes in... This thing is amazing! Every time I use it I find myself going back to work the next day with another "Guess what else affinity Does" story. lol. Im shocked It can handle the files it does and I'm sure its only going to get better from here. Ive been quietly looking around on this forum and all ready see SO many talented people. So I hope to bring some of my perspective from someone who uses photoshop all day at work. But then AFFINIY for my personal on the go projects. Some info on the file - Theres over 60 layers of just umbrellas and shadows! (ZERO Slow down in app). The file closed is about 400mb but opened its 1.18gb. This was shot with my Dji Mavic Pro. Completely edited start to finish in AFFINITY Photo for Ipad Pro

-
How can I make this more realistic?
TheWindowSeatistaken replied to AffinityBrah's topic in Share your work
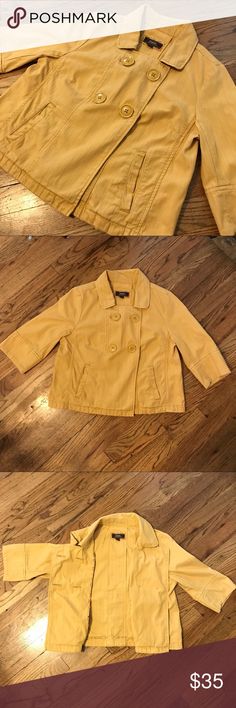
The major thing that sticks out to me is the shadow.... Its too big and loose. Its needs some more heaver shadows closer to the product to really help ground it.. Im a full time retouching manager here in NY so feel free to DM or private message me if you have some specific questions. I did a quick search online and pulled this image of a jacket on wood. See how the shadow is a lot closer and more defined. Once you get it closer... maybe liquify it at the end so it doesn't uniformly follow the jacket. Hope this helps - Dennis