Cara
-
Posts
24 -
Joined
-
Last visited


-
 lbohen reacted to a post in a topic:
How to Achieve Image Overlay with Text?
lbohen reacted to a post in a topic:
How to Achieve Image Overlay with Text?
-
emmrecs01 reacted to a post in a topic:
Screen too dark
-

Screen too dark
Cara replied to Randy Austin's topic in Pre-V2 Archive of Affinity on Desktop Questions (macOS and Windows)
Yes you're right! I mixed up the font size setting and the UI dark/light setting. My apologies everyone! -
Screen too dark
Cara replied to Randy Austin's topic in Pre-V2 Archive of Affinity on Desktop Questions (macOS and Windows)
Which OS and software are you using? You can change to a light user interface through Edit > Preferences > User Interface in Photo and Designer on Mac but unfortunately the option isn't available on Windows. -
You can request a refund from the Affinity store if you haven't already. Their returns policy states:
-
Quick selection of connected nodes
Cara replied to douglasrthomson's topic in Feedback for Affinity Designer V1 on Desktop
I suppose clockwise in closed shapes would make the most sense but whichever as long as it's consistent. Yes! Sorry, I'd forgotten to mention that in my previous post. Alt-drag is helpful but shift+click for multi-select would be a helpful option too, especially with complicated shapes. -
Quick selection of connected nodes
Cara replied to douglasrthomson's topic in Feedback for Affinity Designer V1 on Desktop
It would be nice if node selection worked like selecting files in file explorer; shift+click selects all the nodes between two and ctrl+click multi-selects one node at a time. Currently shift+click multi-selects one node at a time and selecting multiple nodes in one sweep can only be achieved by click+drag - both of which are fine, they're just less convenient. Also, if I delete a node, I'd like the following node to automatically be selected, like on DrawPlus. Again, not a necessity but for convenience. -
On Windows you can go to Window > Float or Float All if you want all the documents to float. You can also drag a tab to float it. To dock a document, drag a window into another and its tab will appear after any existing tabs (e.g. place Document A into Document B and the new tab order will be B then A).
-
You could add another node along the straight edge of the white segment, drag it to the bottom-right corner and adjust the node handles to fill the area. The node will probably snap to the corner if you have snapping turned on.
-
Cara reacted to a post in a topic:
Vector drawing with "loose" lines, what is the best way for me to start colouring this drawing.
-
T4Z reacted to a post in a topic:
Vector drawing with "loose" lines, what is the best way for me to start colouring this drawing.
-
firstdefence reacted to a post in a topic:
Carina
-
Cara reacted to a post in a topic:
Few words of appreciation
-
I have Designer, not Publisher, but sometimes the settings can be similar between the two. Can you reset your text styles by going to Edit > Preferences > Miscellaneous > Reset Text Styles? If you can, reset your text styles, close your application and restart it for the changes to take effect. The default font is probably Arial in black. As for your second question, you can click on the menu icon that appears on the Swatches tab to Add Document Palette (this adds a swatch palette for your current document) or Add Application Palette to add a palette that will appear for all your documents. Again, I'm assuming the same options are available in Publisher as Designer.

-
There's probably a lot of ways to tackle this but I would do the line art and colouring separately: Copy and paste the open lines. Close the new lines and remove their stroke Fill the new closed shapes with colour.
-
Carina
Cara replied to Carina's topic in Pre-V2 Archive of Affinity on Desktop Questions (macOS and Windows)
I have Windows 10 myself but I looked up how to change your font size in Windows 7. I think this article may help. To summarise: Press Windows Logo Key + U to open the Ease of Access settings. Under Explore all settings, select Make computer easier to see. Under Make things on the screen larger, select Change the size of text and icons. Select the Medium - 125% option and select Apply and press Enter. You may need to restart your computer for your changes to take effect. -
If you sign into your Affinity account, you can go to Menu > My Account > Downloads & Product Keys and your product key will be listed under "Affinity Photo". I haven't purchased anything from the Affinity store in a while so I can't remember if your account is automatically created when you purchase a product and the product key appears immediately after purchase, but I'm assuming that both of these are true.
-
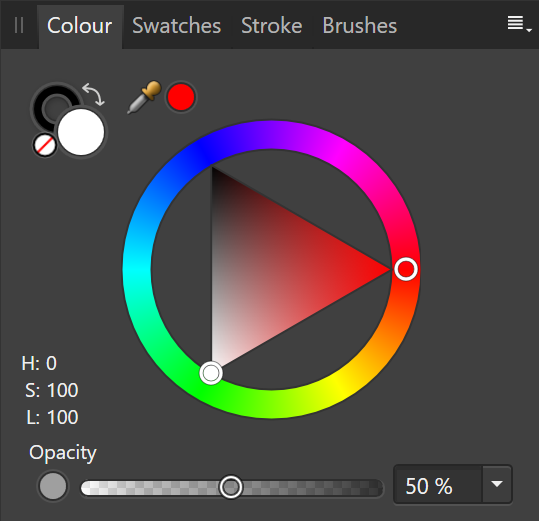
Which Affinity package are you using? This is how you do it in Designer but you might be able to achieve the same results in Publisher (and possibly Photo) using a similar method. Use the Elipse Tool to draw a circle over your image. Press shift+drag when drawing the elipse to create a perfect circle. Set its colour to white and reduce its opacity using the Opacity slider at the bottom of the Colour tab. Add text using the Artistic Text Tool or the Frame Text Tool . You can format your text using the toolbar that appears at the top when your text is selected.
-
 Cara reacted to a post in a topic:
Font License
Cara reacted to a post in a topic:
Font License
-
Font License
Cara replied to jdbaok's topic in Pre-V2 Archive of Affinity on Desktop Questions (macOS and Windows)
Thank you! I only have Designer at the moment so those fonts aren't available for me but I do have a free brush and texture pack available to download. -
I would love to see warp tools for images and text. I found the feature useful in DrawPlus so I would like to see it in Designer too. I have a solution for moving nodes apart at equal distances as mentioned in the link in the original post. This only works with shapes; it crops images and can't be achieved with text. Convert your shape into curves. Select the two nodes you want to transform. Select the central square in the transform tool (see the screenshot below). Increase the width to widen the nodes apart or decrease the width to bring the nodes closer together. There's probably an easier method but hopefully this helps.
-
Font License
Cara replied to jdbaok's topic in Pre-V2 Archive of Affinity on Desktop Questions (macOS and Windows)
Where might I find these fonts to download?