direct_current
-
Posts
22 -
Joined
-
Last visited
Everything posted by direct_current
-
 Thanks for your help!
 -
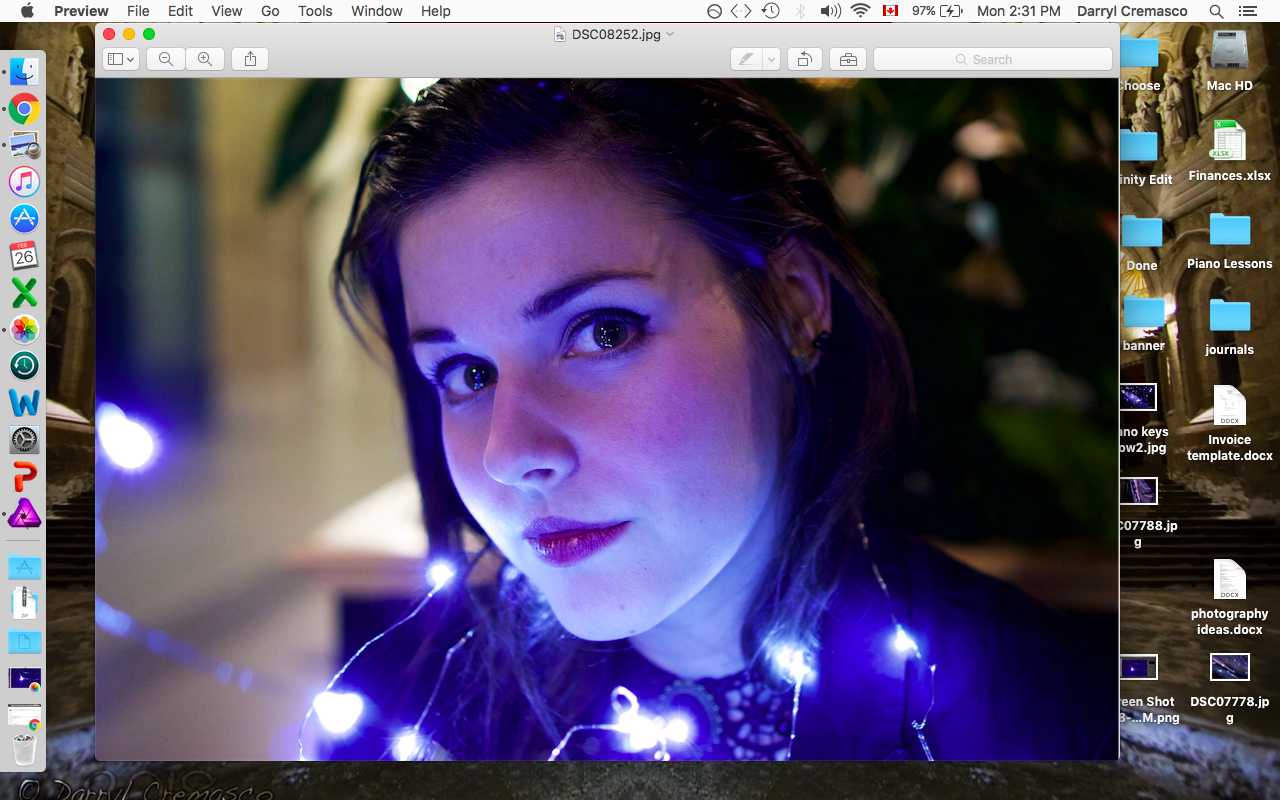
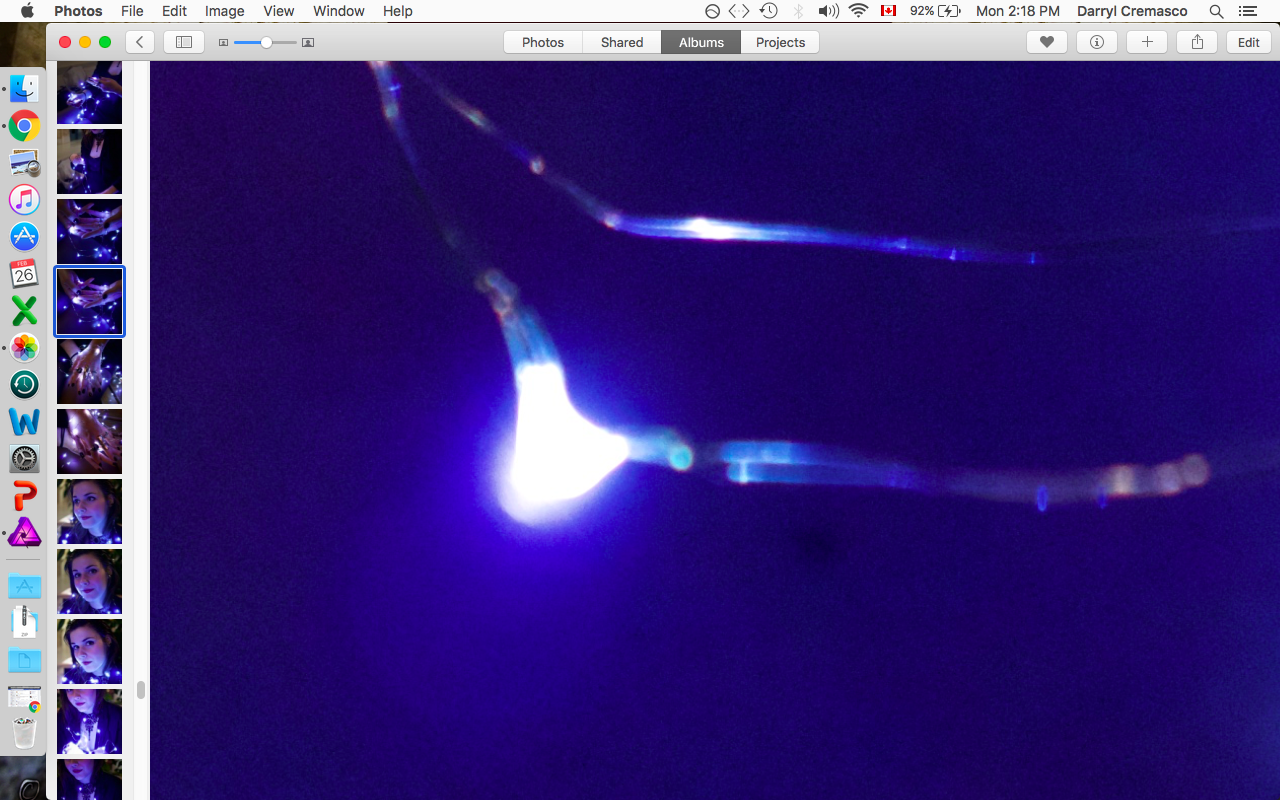
Here is perhaps a clearer example. I couldn't get the files to upload so I just took screen shots of them. The first one is Affinity. Notice how the lights are just washed out spaces. the second is from Photos the lights look so much softer and more detailed. How can I match or surpass this effect? Suggestions? Thanks!

-
Hey everyone, I'm continuing to enjoy the many versatile tools Affinity has to offer. I recently got into portraits and am using light strings in many of my photos. I've been editing pictures of a model's face or hand surrounded by bluish light strings. I am a Mac user. Today I noticed that the default image that Photos makes has been appearing superior when it comes to how it displays my lights. I find that the radiance from the lights are much more subtle and nuanced than anything I can do in Affinity. I even tried to recreate the same photo via Affinity but couldn't find that softness that Photos was producing just in its default. I am working with RAW files. Below are attached 2 images. It's a close up of one of the lights. The first is in Affinity and the second Photos. I also attached two images showing the model and the lights around her. I can't for the life of me figure out how to get Affinity to look the same. While it does display more colours and it seems there is a hardness to it that separates the little circular shapes in the light vs. blending them together naturally.
-
Excellent thanks!
-
I've always noticed a discrepancy when I move a photo from Affinity on my computer to my iPhone 7. What seems punchy and contrasted on my laptop often falls short when on a smaller, clearer screen like my iphone. I often use that "Lux" slider in Instagram to give a photo that extra punch before sharing it. What I want to do is be able to make a punchy photo like that without using some automatic algorithm to do the work for me. Below are two pictures. The first is the instagram lux adjustment and the second is what I started with in Affinity. I'm trying to see if I can alter the Affinity one to make it look like the instagram one but am actually finding it quite difficult. Nothing short of multiple adjustment layers and dodging and burning is getting me close to what flicking a switch in instagram did. Is there an operation in Affinity that will create the same effect or is more about fine tuning it with various adjustment layers? I want more control over what I'm doing if that makes sense. Thanks!
-
Ok thanks. Just wanted to see if I was missing something.
-
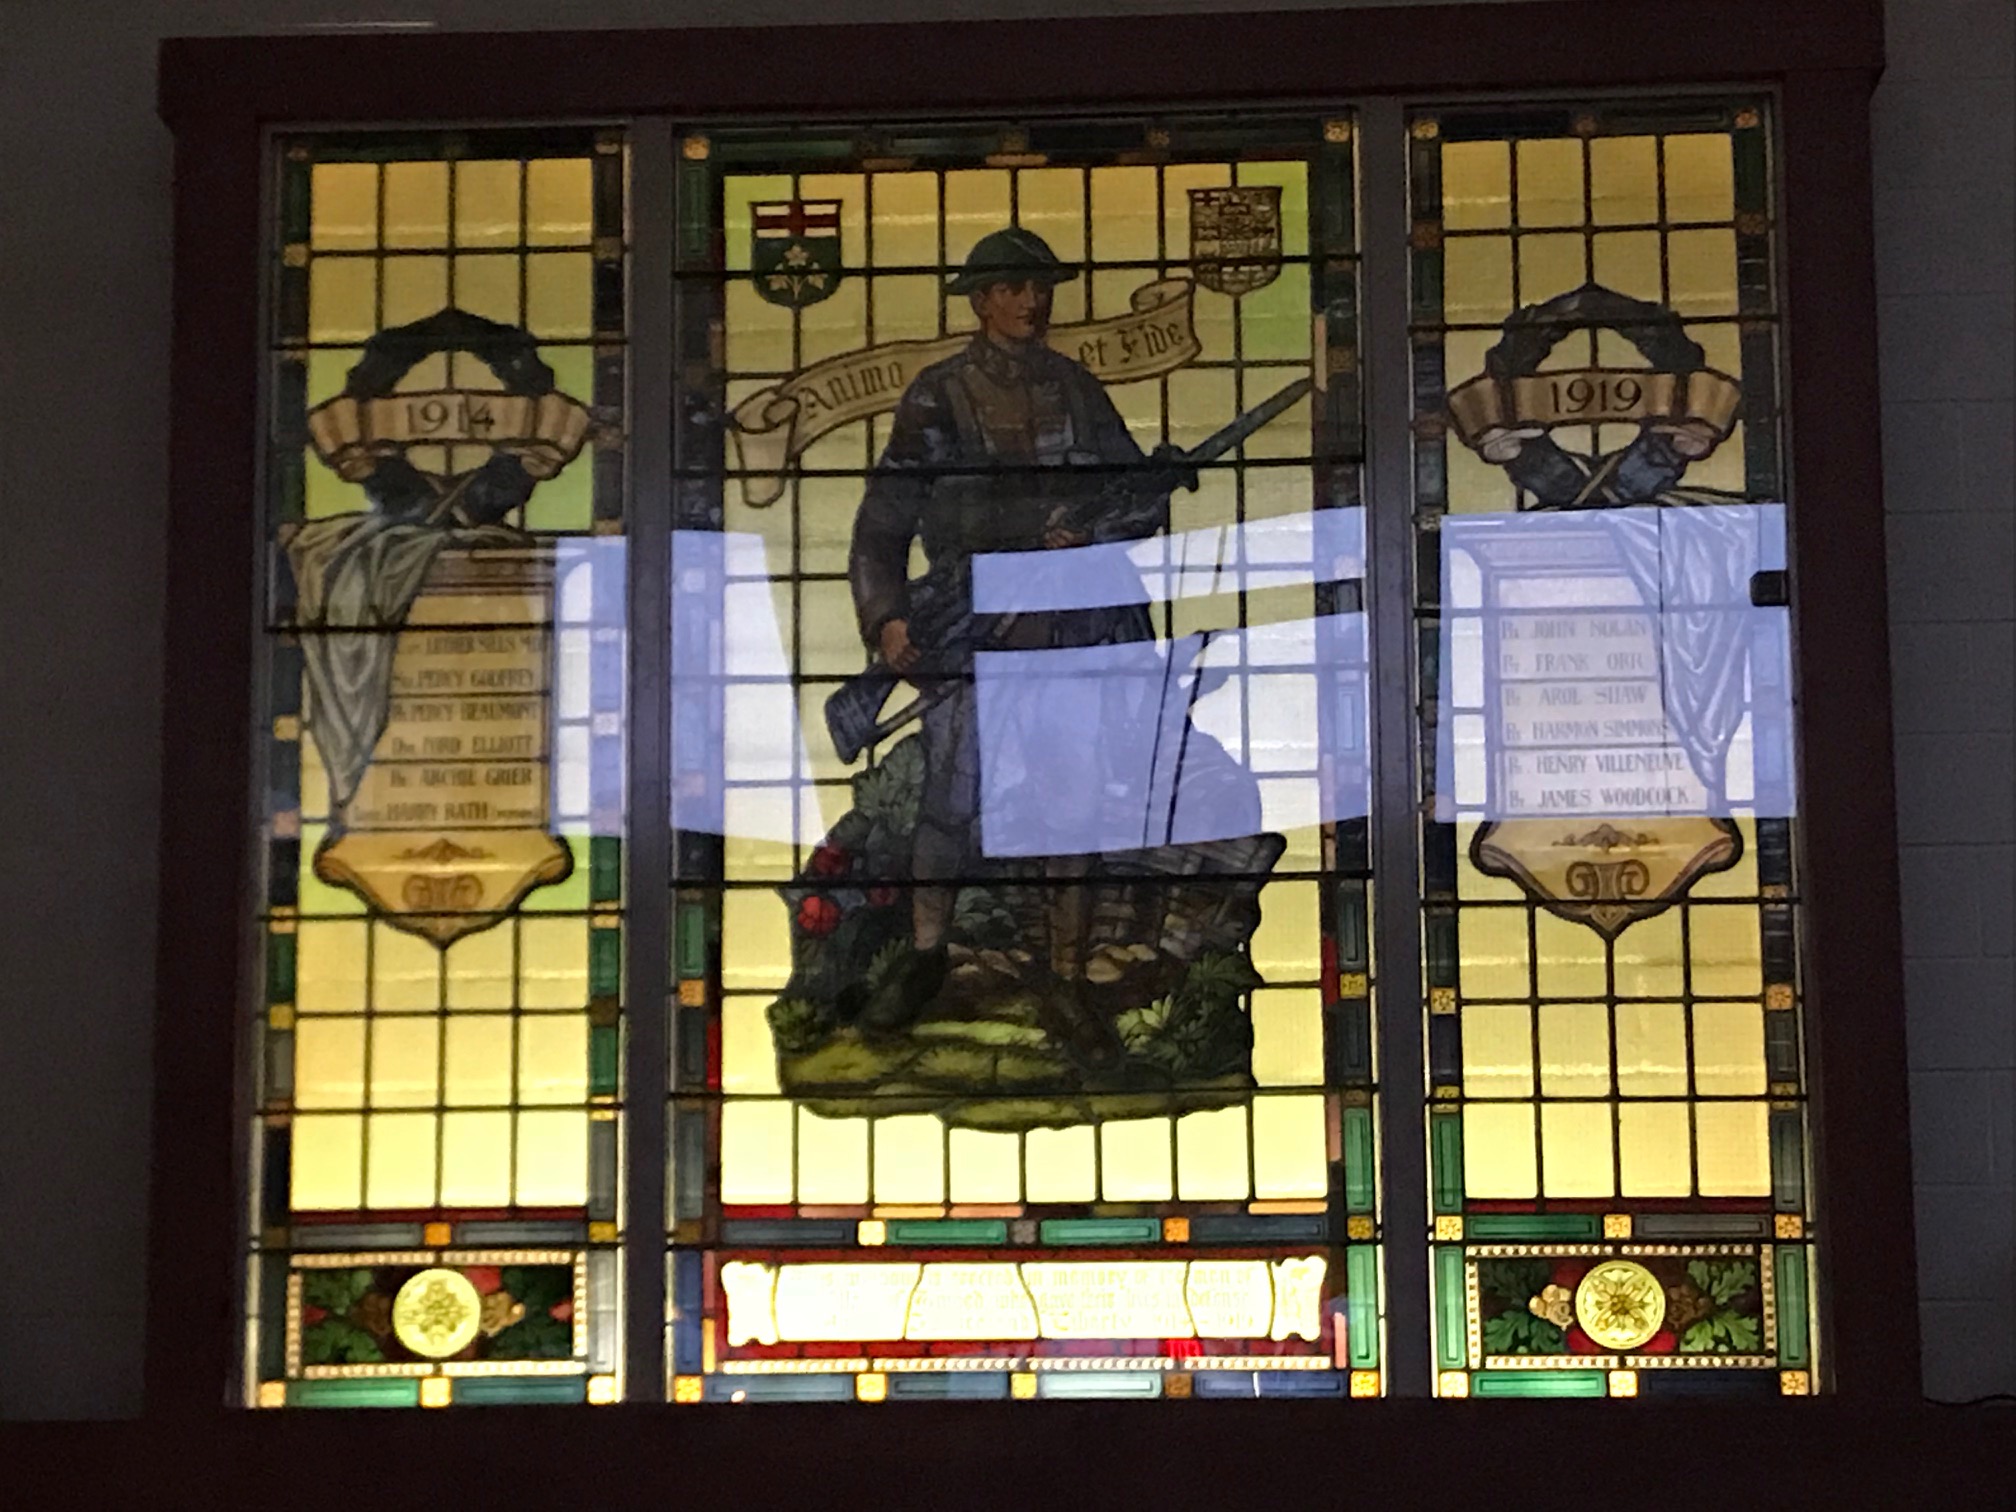
A contact of mine asked if I could remove the glare from this photo. I gave it a go but couldn’t get the section covering the soldier to match. It seemed a bit of a stretch to completely remove the glare. Is this beyond Affinity’s limits? Thanks!
-
Perfect, thanks a lot
-
Hello fellow Affinites, I have always wondered about how to find the gradient tool again after I've gone and done something else. For example, I like to use a black and white adjustment layer and then apply a gradient on top of that to make the photo part b and w and part coloured. After I've established my gradient and then go to another adjustment sometimes I want to go back and tweak the gradient. However, I cannot locate the original gradient and need to do it all over. I was wondering if there was a way to find the original one I made similar to recalling a selection when I push Command and then click on on the adjustment layer. Thanks as always.
-
Hey y'all, loving this program still! i only recently started to shoot in RAW thus the develop persona is new to me. I am wondering about the efficacy of the overlay brush vs the selection brush in the photo persona. I was developing a photo with my parents under a canopy in the foreground. The background was quite bright and my parents were very dark. After painstaking colouring over my parents with the red colour overlay brush I was able to select them and boost the brightness etc significantly to make a nice photo. It's amazing what I could recover from the RAW file. Anyways, I had a few thoughts about the overlay brush that I wanted to run by you here because I found it time consuming and difficult to use. First, is there a way to undo a mistake other than using the undo button? With the selection brush you can hold down option and then deselect what you didn't mean to select. Is there something similar for the overlay brush? Similarly, it took me forever to make the selection. After the adjustments there were artifacts everywhere as if my parents had new tattoos. These were the small gaps where my selection wasn't perfectly painted over. From my perspective I'm not clear why the overlay brush is used in the development persona. To me the selection brush is a lot faster and easier to use. Am i missing something here and making things harder than they need to be? I feel like I could have done a better and quicker job with the selection brush. thanks a lot
-
Also, I agree about the hair on her forehead. I'll probably edit it out.
-
Thank you so much for your thorough reply. I actually haven't learned about dodge/burn yet; it's on my list on things to go over. I will need to take some time to review your instructions. Will let you know about my progress! Yes, she's a very complicated picture!
-
It seems the picture have been switched around. The second pic is the original.
-
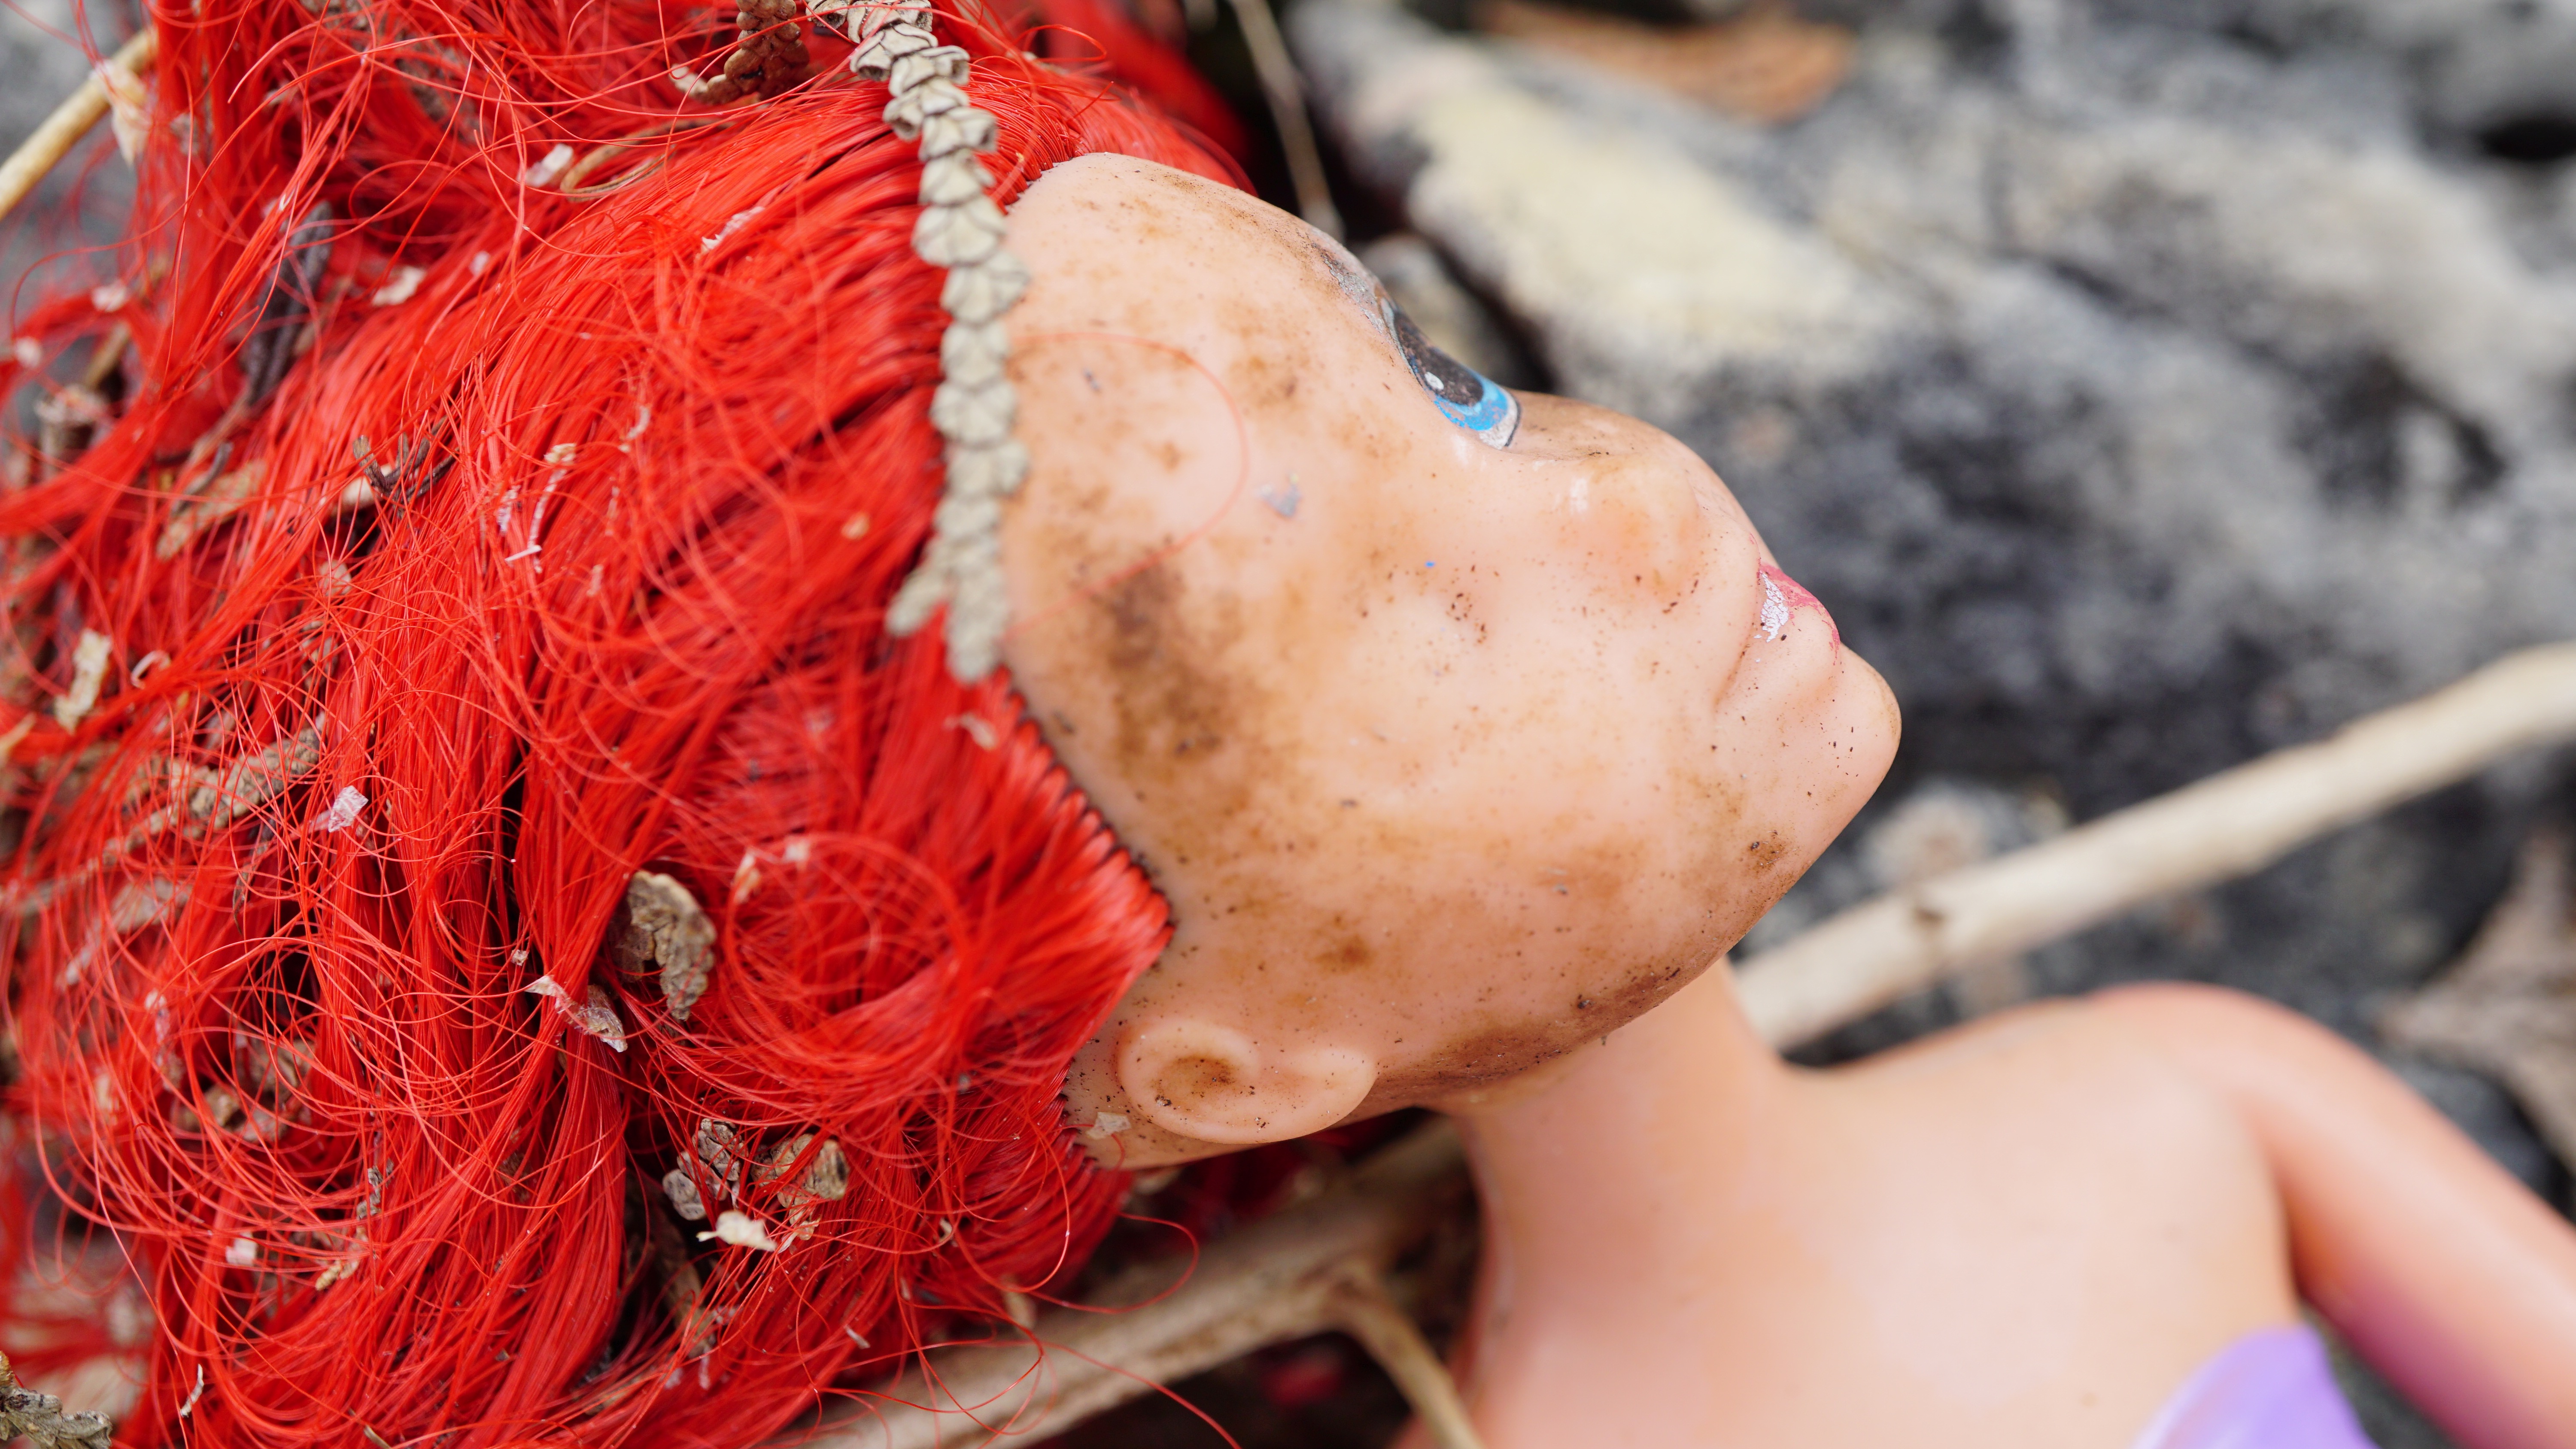
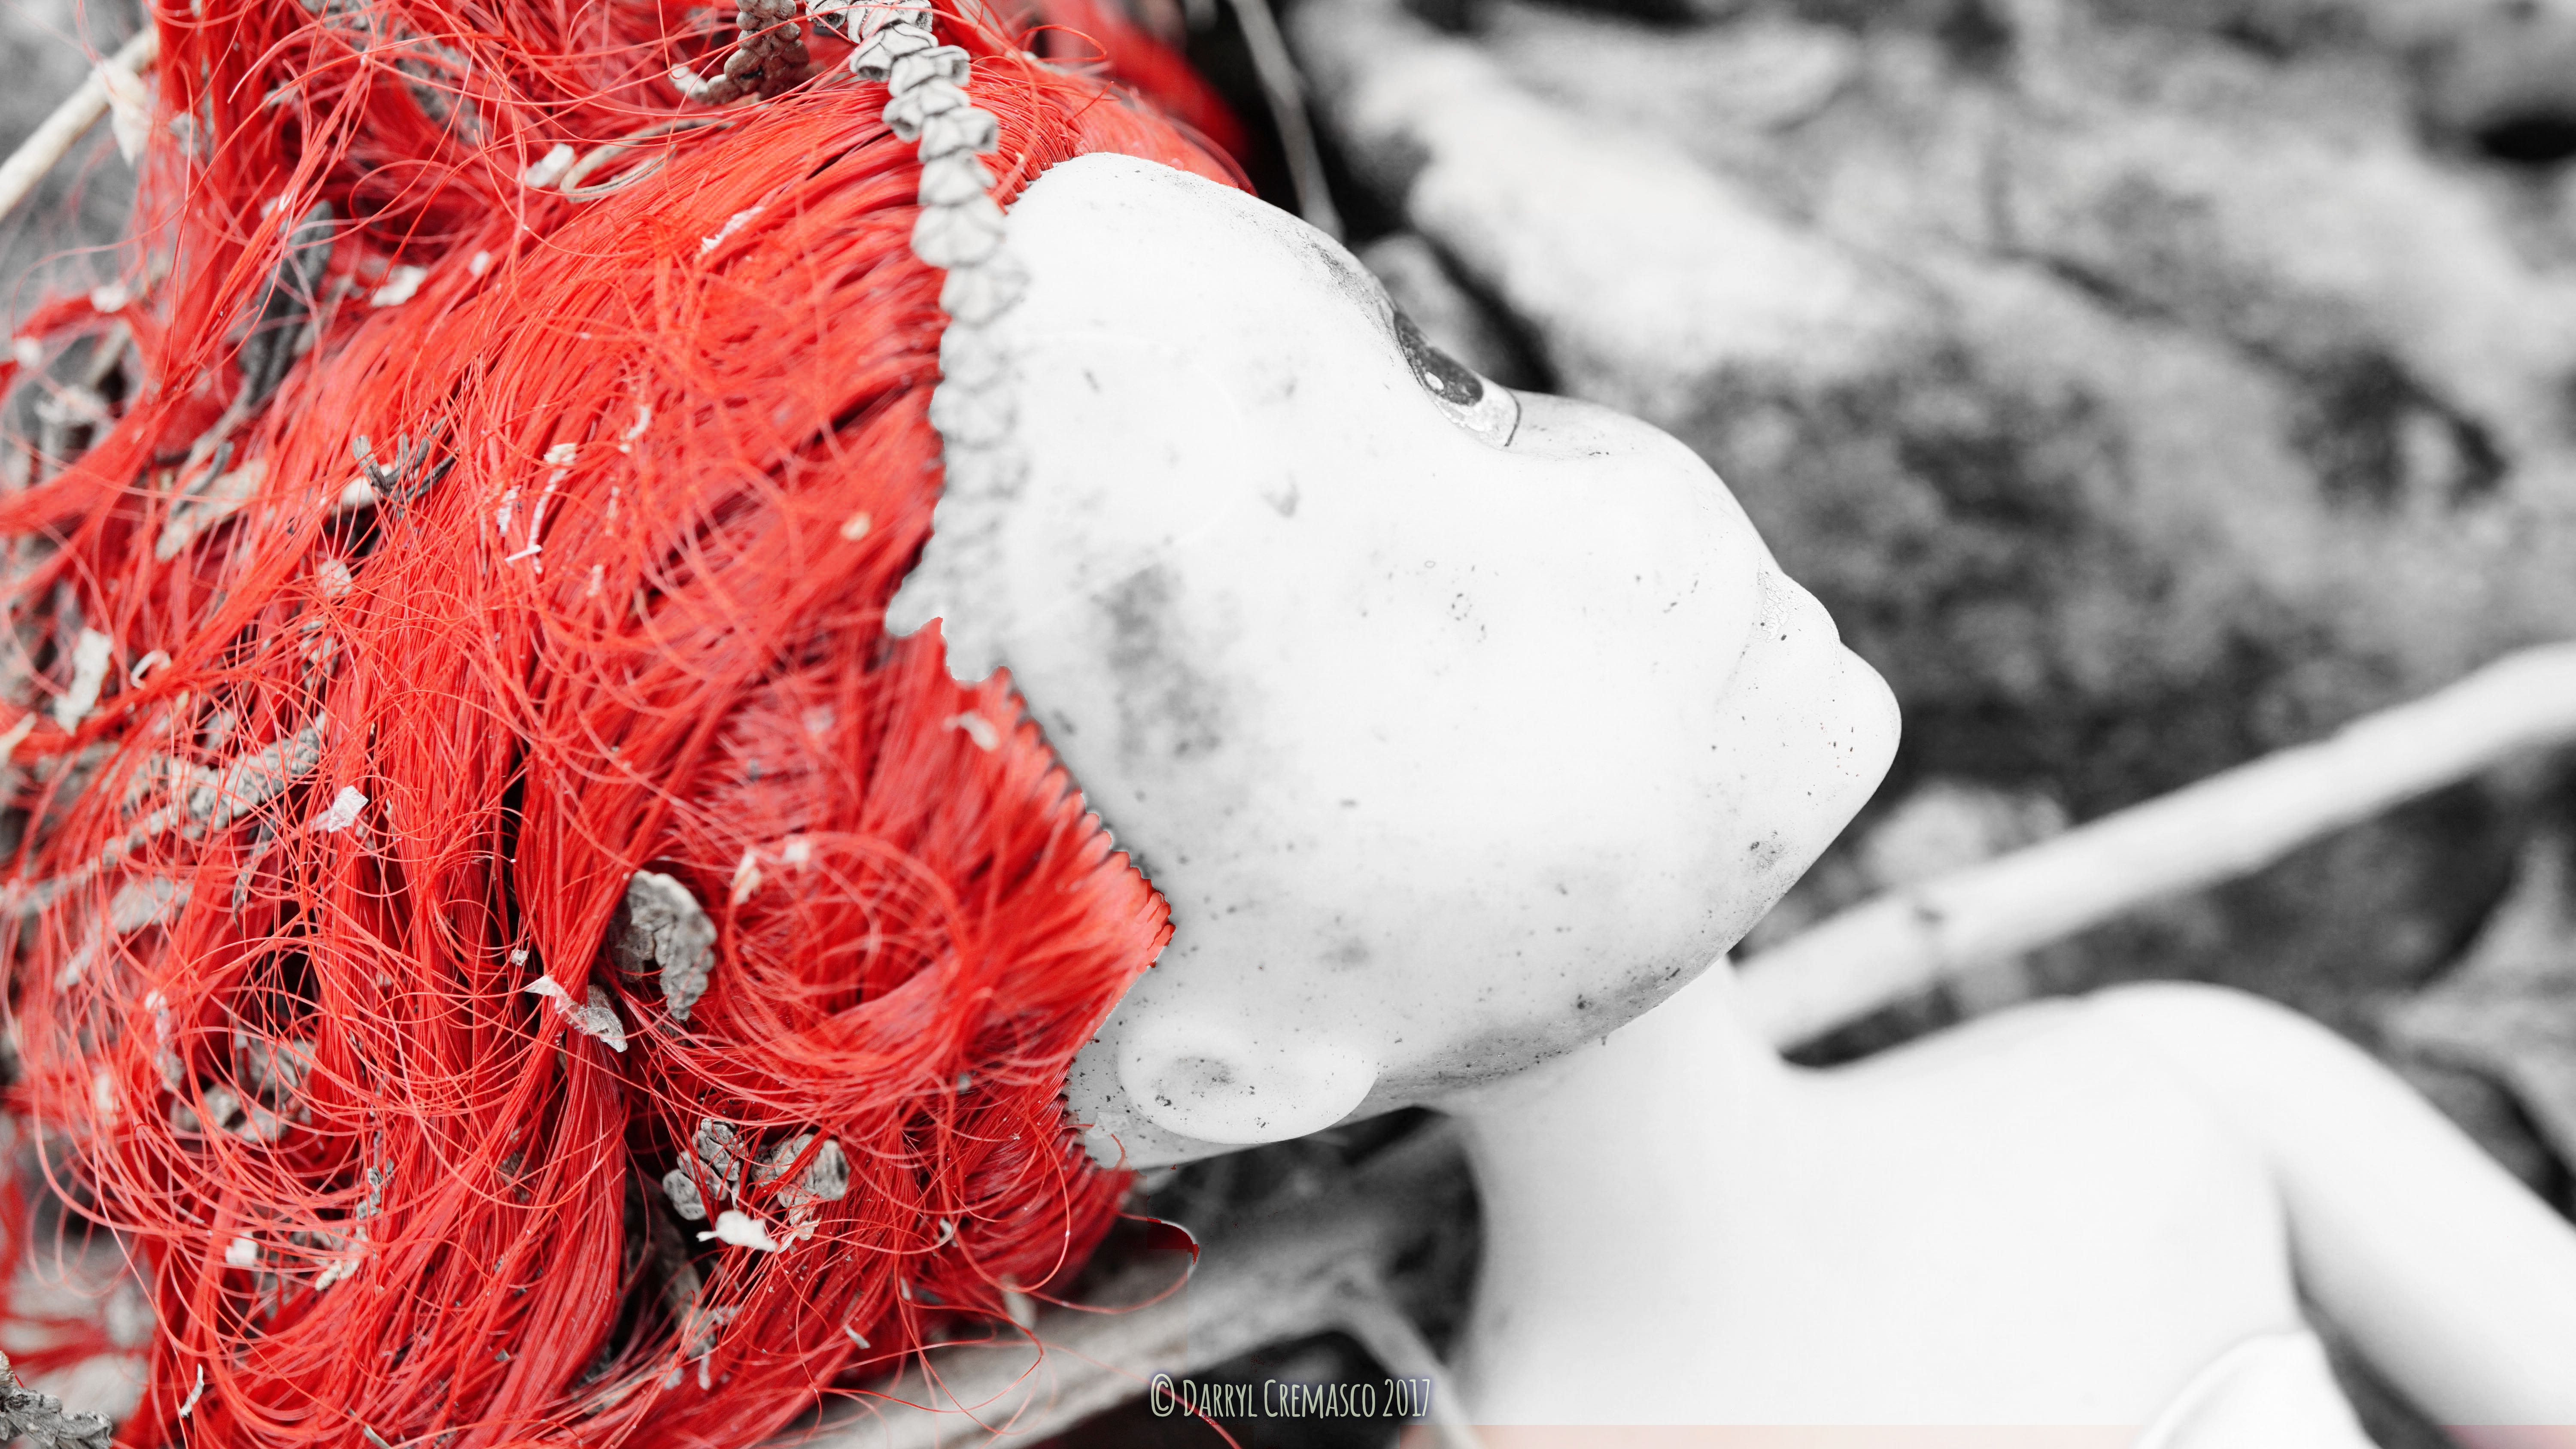
I am very new with Affinity and have only recently discovered the refine brush when selecting things like hair. I've got a picture of a Little Mermaid doll that washed up on the beach. She has hair going all over the place, some of it meshed with the background. I want to make a shot of her with her hair blazing red while everything else in the picture is black and white. I already posted something similar about this but I'd like to go into more detail about the challenge. Attached are a few photos of what I'm working with/trying to do. I want to select all of her hair if possible. this has proven to be a challenge for me. The main body of her hair is not difficult to select but the many loose strands over her forehead, behind her right ear and in the top and bottom leftside corners are very difficult to select. I've used the refine brush in those areas with limited success. About 25-50% of the strands are selected (usually random parts of them) while the rest remain unselected. I tried going to 'Select'->'Colour Range'->'Select Reds' as well as 'Select Sampled Colour'. Both produced ok results but neither really got those loose strands. When it came down to colouring them the best I could do was to zoom in and manually select them. i feel like there's a simpler way that I'm not aware of. Here are a couple of pictures. The first is the original and the second is what I've done so far with the hair selection. you'll notice that the strands are sort of coloured but not completely. Is there a better way to use the Refine Brush? Is there another approach anyone could suggest? Thanks!
-
Thanks toltec. Instead of changing the overlay colour I instead temporarily changed the hair colour and that seemed to help but I do have more questions about it which I'm going to post in another topic.
-
I found this lovely Ariel Little Mermaid doll washed up on the shore today. Got some great shots and decided that I'd like to make a picture of everything in black and white except her long, beautiful, red hair. Her hair is strewn all over the place so it's difficult to get a clean selection with the Selection Brush. I'd like to refine the selection tool to select hair only but low and behold the default overlay colour that selects the rest of the photo happens to be the same colour of red as her hair. This is problematic as I can't see what's being selected and what's being left as background. Is there a way of changing this default red colour? Thanks very much
-
Ok, thanks very much.
-
Hey everyone, I underscore that I'm still very new at this. I've recently realized that it's probably a wise idea to start putting a copyright marking on my photos. I understand how to do it thanks to a video I just watched. However, since this is something that I'm going to apply to every photo I plan on sharing publicly I was wondering if there was a way of doing it in a couple of clicks each time. I understand there's something called macros and I tried recording one but it says they don't work for the Art Text tool. It seems like it would be tedious to go through all the steps for each photo. Is there a shortcut that you could recommend? Many thanks, Darryl
-
Phew, wonderful! What a concept. Thanks very much, Matt.
-
OK, awesome thanks! I look forward to learning more about this cool software!
-
Today I downloaded the trial version of Affinity Photo. My initial impressions have been positive for the most part. Unlike Gimp 2 and Lightbox the interface is more intuitive and it simply runs faster on my 7 year old MacBook. I've had a few problems with the program though. I've noticed that many of the effects are not working consistantly. For example, sometimes the Inpainting Brush Tool works but other times it doesn't. Sometimes it will allow me to highlight an object in red which will make the object disappear. Other times there is no red ink whatsoever. When I move the brush over the object the status bar will come up as the program seems to be computing the change but the object will not be removed. A reboot of the program corrected this but then it happened again. I'm hoping that it's not something that will persist as I like the program otherwise. I've had the same experience with filters. Sometimes they work and other times they go through the motions but the picture looks the same after. Has anyone else had this issue? Am I missing something here? Thanks
-
Greetings everyone, I am considering purchasing Affinity because I've heard great things about it. However, my poor MacBook is getting a little old and I'm wondering how much longer it will function. I'm not worried about running the software because it meets the system requirements no problem. My concern is if I buy and install Affinity on this computer and it dies, would I need to buy another copy of the software for my next computer? Or is there a way to transfer it to my next computer? Thanks!