lepr
-
Posts
5,563 -
Joined
Everything posted by lepr
-
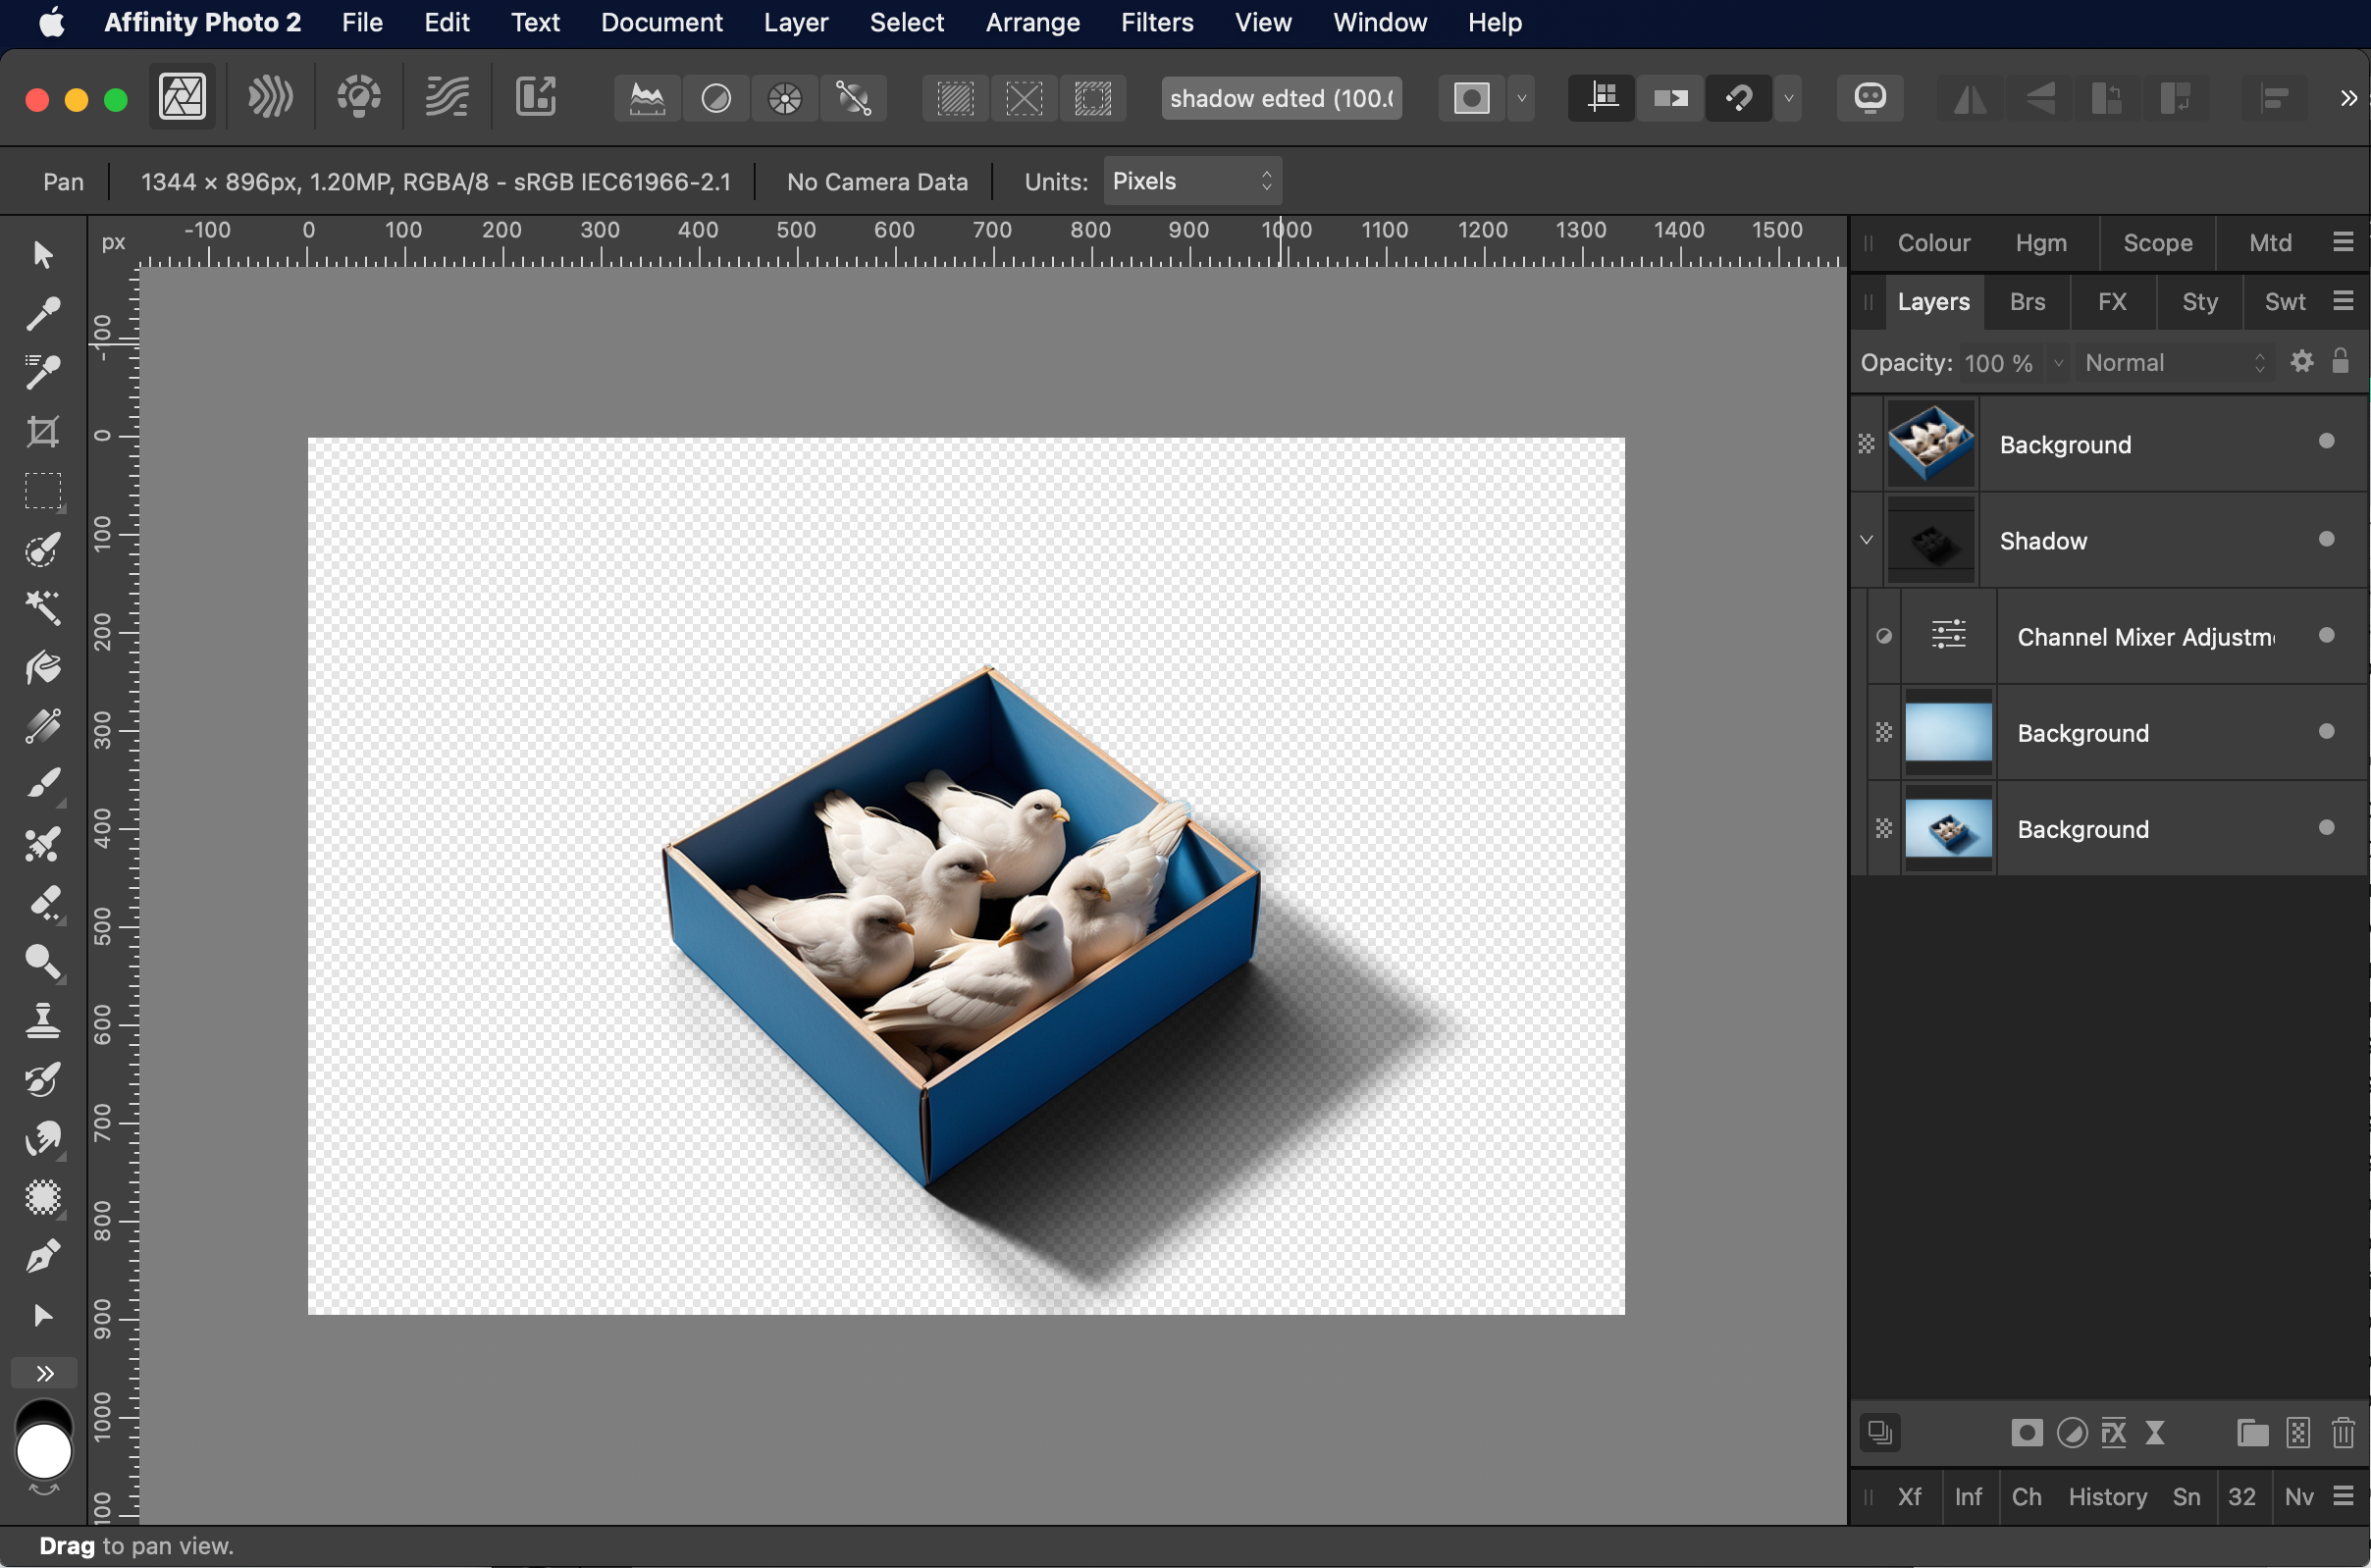
 You can use the 'Shadow' Group as a mask for a dark coloured object over a lighter background, or use it as a mask for an Adjustment such as Curves. To use an object as a mask, drag and drop its thumbnail on the thumbnail (not the name) of the thing that is to be masked.
 -
Divide the original image by your background-only image, and then use a Channel Mixer Adjustment to map the greyscale intensity levels of the result to alpha levels of black pixels.
-
Here's one of many solutions: shadow edted.afphoto

- 7 replies
-
- 2
-

-

-
- affinity photo
- transparancy
- (and 2 more)
-
In general, but there are exceptions, Affinity uses the following modifiers while you drag with mouse left button: Mac cmd = Win ctrl Mac ctrl = Win mouse right button Mac opt = Win alt Mac shift = Win shift combinations of the above
-
You're welcome Translate is a mathematical term for the operation.
-
Just dragging a point with no modifier will both rotate and scale the selected object(s) about the Transform Origin. Translate means move the object(s) without scaling or rotating, like sliding across the page/canvas. On Windows, you will need to hold down the right-button while you drag the point with the left-button.
-
Welcome to the Affinity forums That problem with the crtrl-click recognition has been around for years now, but try ctrl-clicking near the top edge of the required row in the panel.
-
vive la bug! Not even acknowledging the bug? That is seriously f'd up customer service.
-
Nobody said it does. I've been a software developer for four decades, so try preaching at someone else.
-
I think it's more a case of "some are assuming that because the know-how exists at Serif for a particular tool that was in Draw Plus, the tool should be in AD by now."
-
Grays have reddish hue
lepr replied to Yaisog's topic in Affinity on Desktop Questions (macOS and Windows)
The right hand rectangle in the current document is RGB(179, 179, 179), which is 30% black, not 25%. That doesn't explain the red tint on your machine, of course. -
As does pressing esc key
-
I used the current retail version of AD to do the screenshots and exporting, but you could have used my document that was created in AD 1.10.6 in your AD 1.10.6 instead of building a replica
-
The .afdesign file I provided is from v1.10.6.
-
Yes, and it has been in the apps for years. Problem is getting the info past the gatekeeper to the developers. That's one reason why I've abandoned starting bug report threads.
-
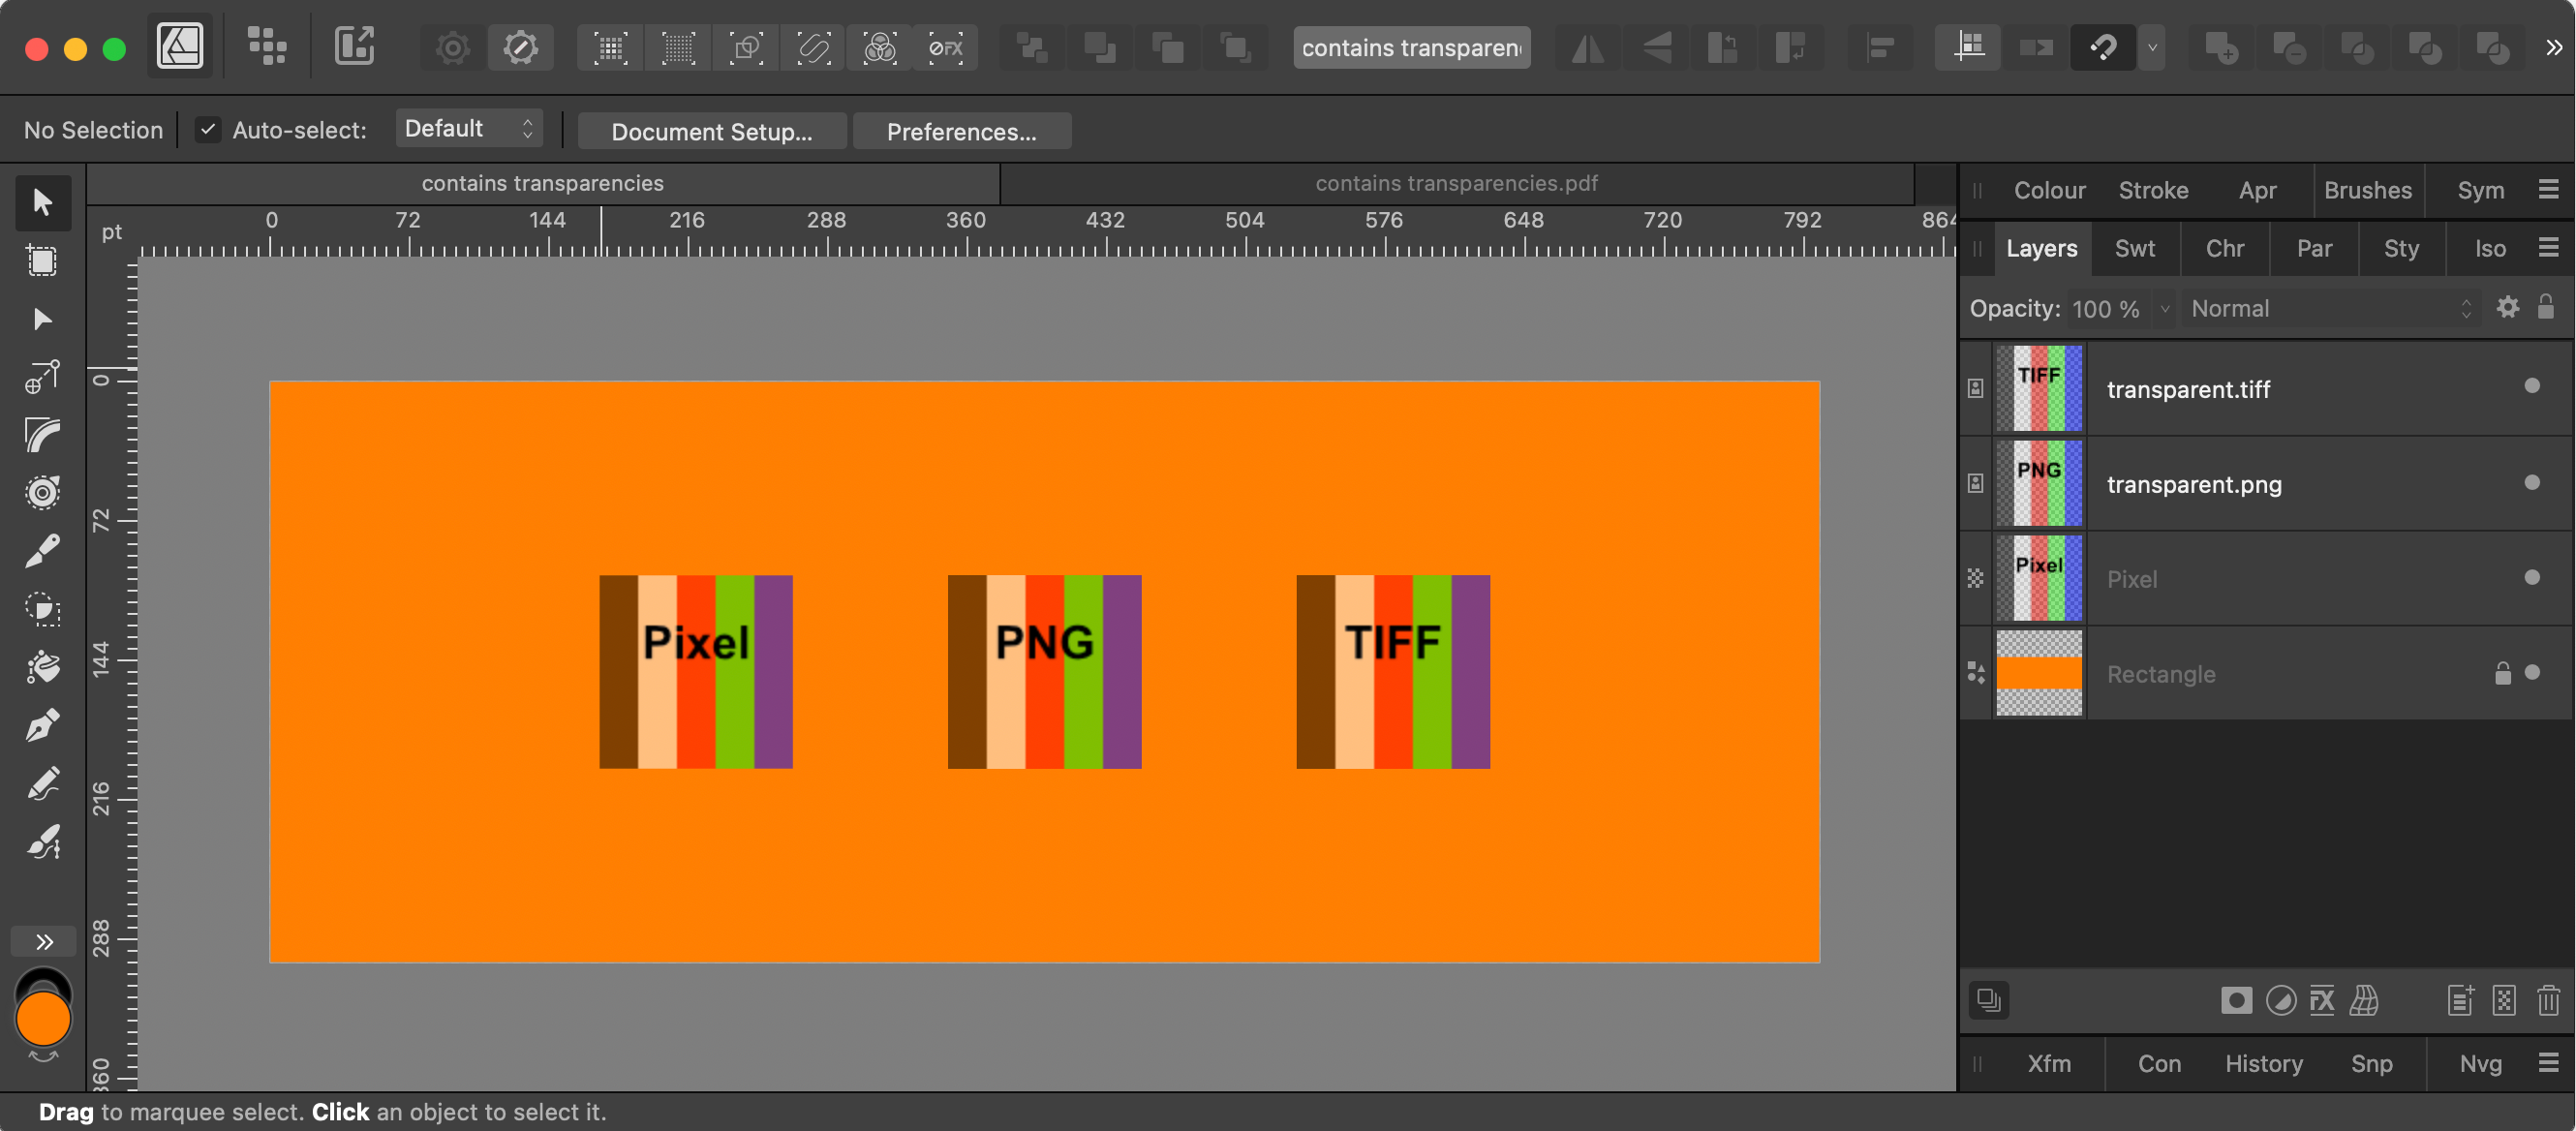
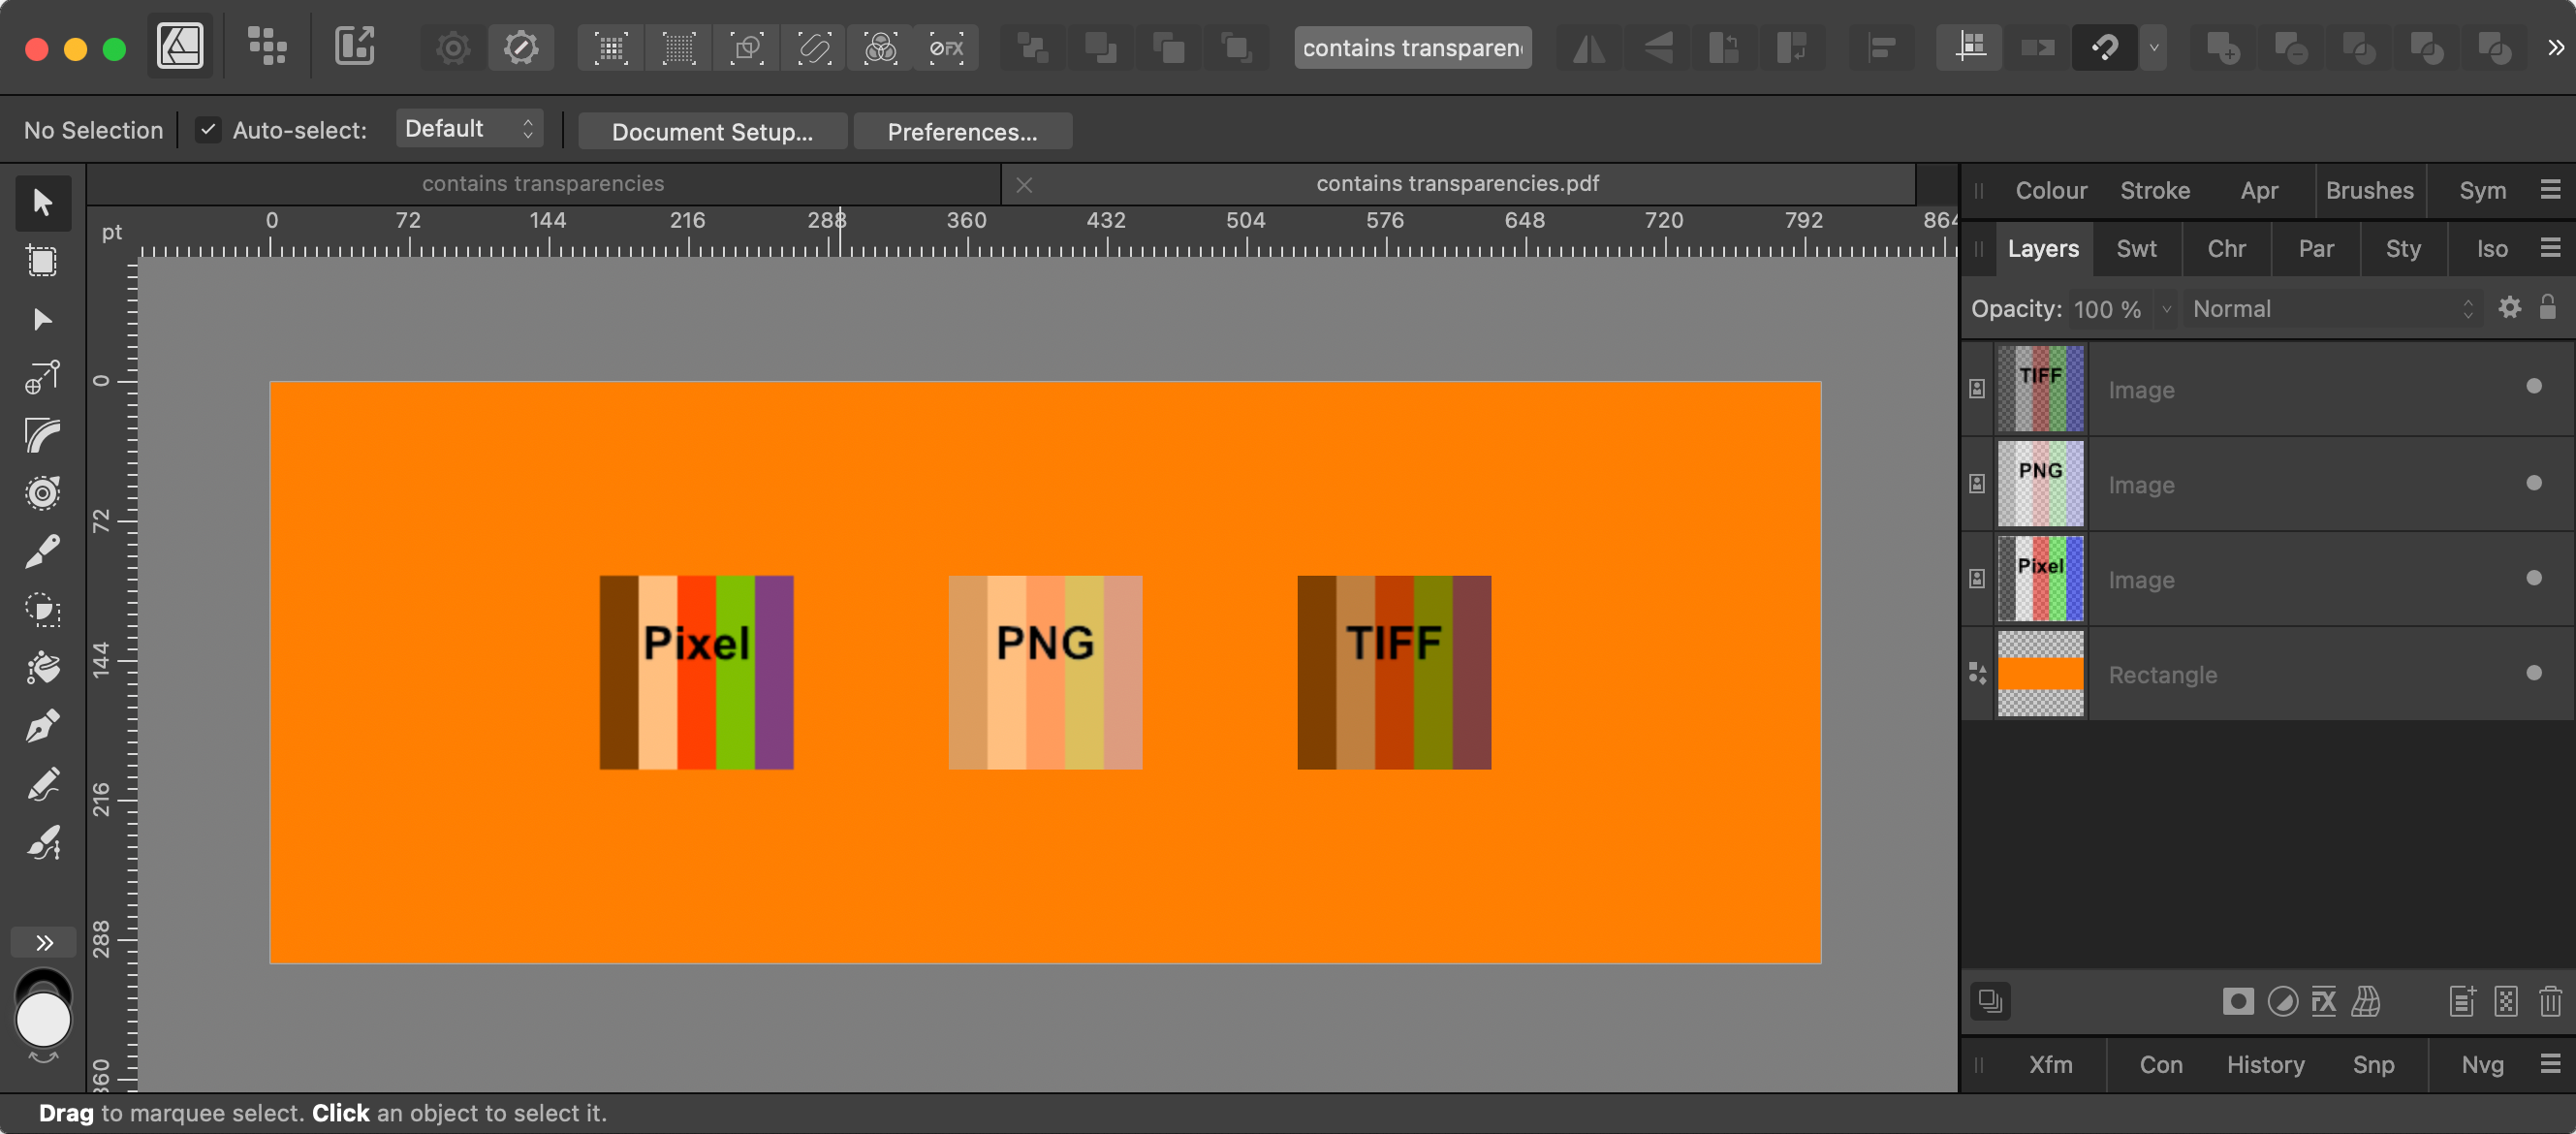
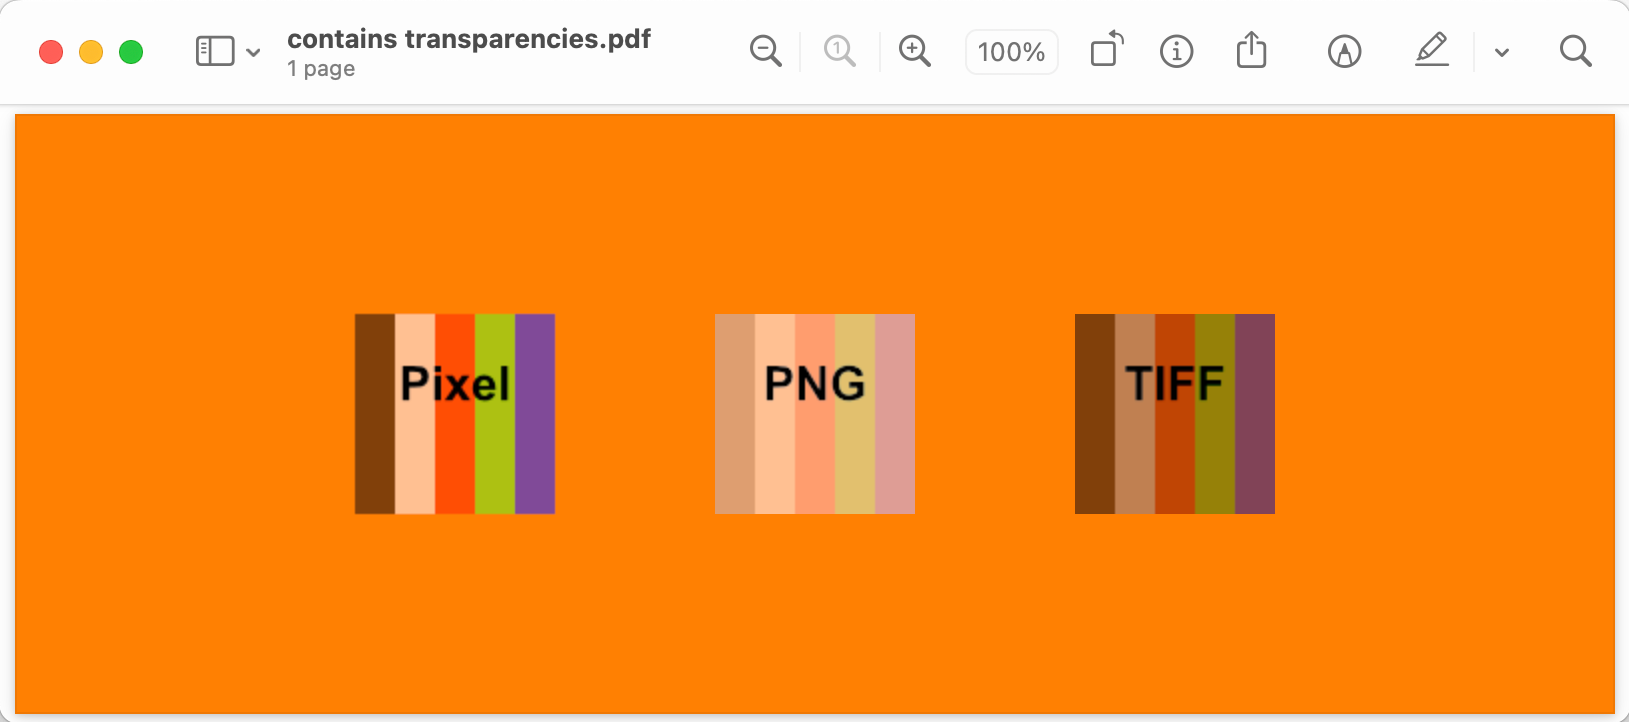
A simple example of the broken PDF export. Source document: contains transparencies.afdesign Exported PDF: contains transparencies.pdf
-
That makes the result look washed out all over when the export ppi is left at 300 and no image resampling occurs. It was the rasterised part of the OP's export that looked ok. Your workaround only works because images are being downsampled (to 72 ppi in your case), which is a form of rasterisation. A bug needs to be logged.
-
Unfortunately, a permabug. At least, it is on macOS. I don't know what happens on iPadOS or Windows. In the case of your ungrouped placed transparent PNG with reduced opacity, the RGBA TIFF inside the exported PDF has correct alpha values taken from the placed RGBA PNG, but its RGB values wrongly are as if the placed PNG was being blended with white. If you substitute a TIFF equivalent of the PNG, the RGBA TIFF inside the exported PDF will have correct alpha values taken from the placed RGBA TIFF, but its RGB values will wrongly be as if the placed TIFF was being blended with black. Warning: Affinity apps have numerous ancient bugs involving transparency, which I assume to be permanent.
-
For your particular workflow, if your document is CMYK, you need to specify K-only CMYK values (that is, C:0, M:0, Y:0) to fill your spare channel to get the spare channel to contain the values you expect. Specifying values in any other way will result in the spare channel containing values that you are not expecting. By the way, I advise you do not use Affinity's Info panel for inspecting CMYK values in a document. Use the colour sampler in Colour panel, as you did in the first video, to discover true values.
-
RESET THE ORIENTATION OF A ROTATED IMAGE
lepr replied to Segnika's topic in Affinity on Desktop Questions (macOS and Windows)
add me to the count, please -
Bilinear will produce moire with your image. You probably meant to write bicubic.
-
No moire is produced when resizing that image to 1500 px with Lanczos or bicubic resampling. Perhaps you are being misled by Affinity's display which is compromised by using mipmaps and a choice of bilinear (view quality = 'Best') or nearest neighbour (view quality = 'Fastest') resampling, whereas Preview's display uses either bicubic or Lanczos resampling.
-
If you upload the full size image (preferably inside a zip file), I'll see what I can do with it in Affinity.
-
Two questions regarding MASKS in APhoto
lepr replied to genkin's topic in Affinity on Desktop Questions (macOS and Windows)
Yes. It's a pain. -
Affinity and layers
lepr replied to Iztok's topic in Affinity on Desktop Questions (macOS and Windows)
Groups, rather than Layers, behave as you require in Affinity (when Auto-select is not set to 'Objects'). Your parts (Curves, Rectangles, etc) are in a Layer currently. Select the parts and press ctrl+G (Windows) or cmd+G (macOS) to wrap them in a Group.