

AnaDia
-
Posts
14 -
Joined
-
Last visited
Posts posted by AnaDia
-
-
I just started using the curves tool a little bit more. Within the develop persona I'm now missing the option to use the curser keys for fine movements of the nodes. Is this feature missing here or is this a bug in the develop persona? It works great for the curves tool in the photo persona.
-
When I tried it here, I first thought, you are right, there is a problem with the plugins in 2.1. But after a while I realized, that my active layer was a raw layer and not a pixel layer, so this won't work. If the active layer is a pixel layer, the plugins are no longer greyed out...
-
Hi Lee,
Thanks for your clarification. It looks like I was a little bit hasty with my reply 🙄
Heike
-
I think, it's not a bug. Just don't hit the "return" button after doing your crop selection, but click the "hand tool". Then you will get your crop selection.
I'm not sure, what hitting return is currently doing, but I think, hitting return is not the expected user action after doing the crop selection.
-
A short update to my post, because I guess it was misleading.
The mentioned .afphoto files are linked in a .afpub file (yearly planner with 12 pictures) and the blurring appeared in the .afpub file.
-
I had a comparable issue with afphoto files which contained linked raw files with some layers. I finally did a merge visible as top (and only active) layer in the afphoto file which worked well as a workaround.
I guess you have some layer work in your afphoto file. Maybe my workaround will help you, too.
-
Hi,
Reading some advice regarding optical alignment for framing, I found a formular which can be used in the transformation panel. Maybe I missed something, but it would be great, if I don't need to input the whole formular all the time I want to use it.
Will it be possible to create a macro or some kind of individual shortcut for the formular? My current use case is for sure only one example for the question behind it. Ah, and not to forget, it should work in all three apps 🙂
So regarding the my use case:
http://www.russellcottrell.com/photo/centering.htm
E.g. being in photo, create an A4 document and add layer with a rectangle. Select the layer go to the transformation panel, make sure, the upper left or at least one of the three upper reference nodes is active and input the following formular for "Y:"
(sw+w)*(sh-h)/(4*sw)
Works well, but it would be nice, to have something like "oc" or "hoc" as input shortcut. I tried to record a macro, but it looks like it doesn't work for that scenario. Or maybe an option to create individual shortcuts could do the job. Something like type "%oc" and get "(sw+w)*(sh-h)/(4*sw)".
-
Hi John NX,
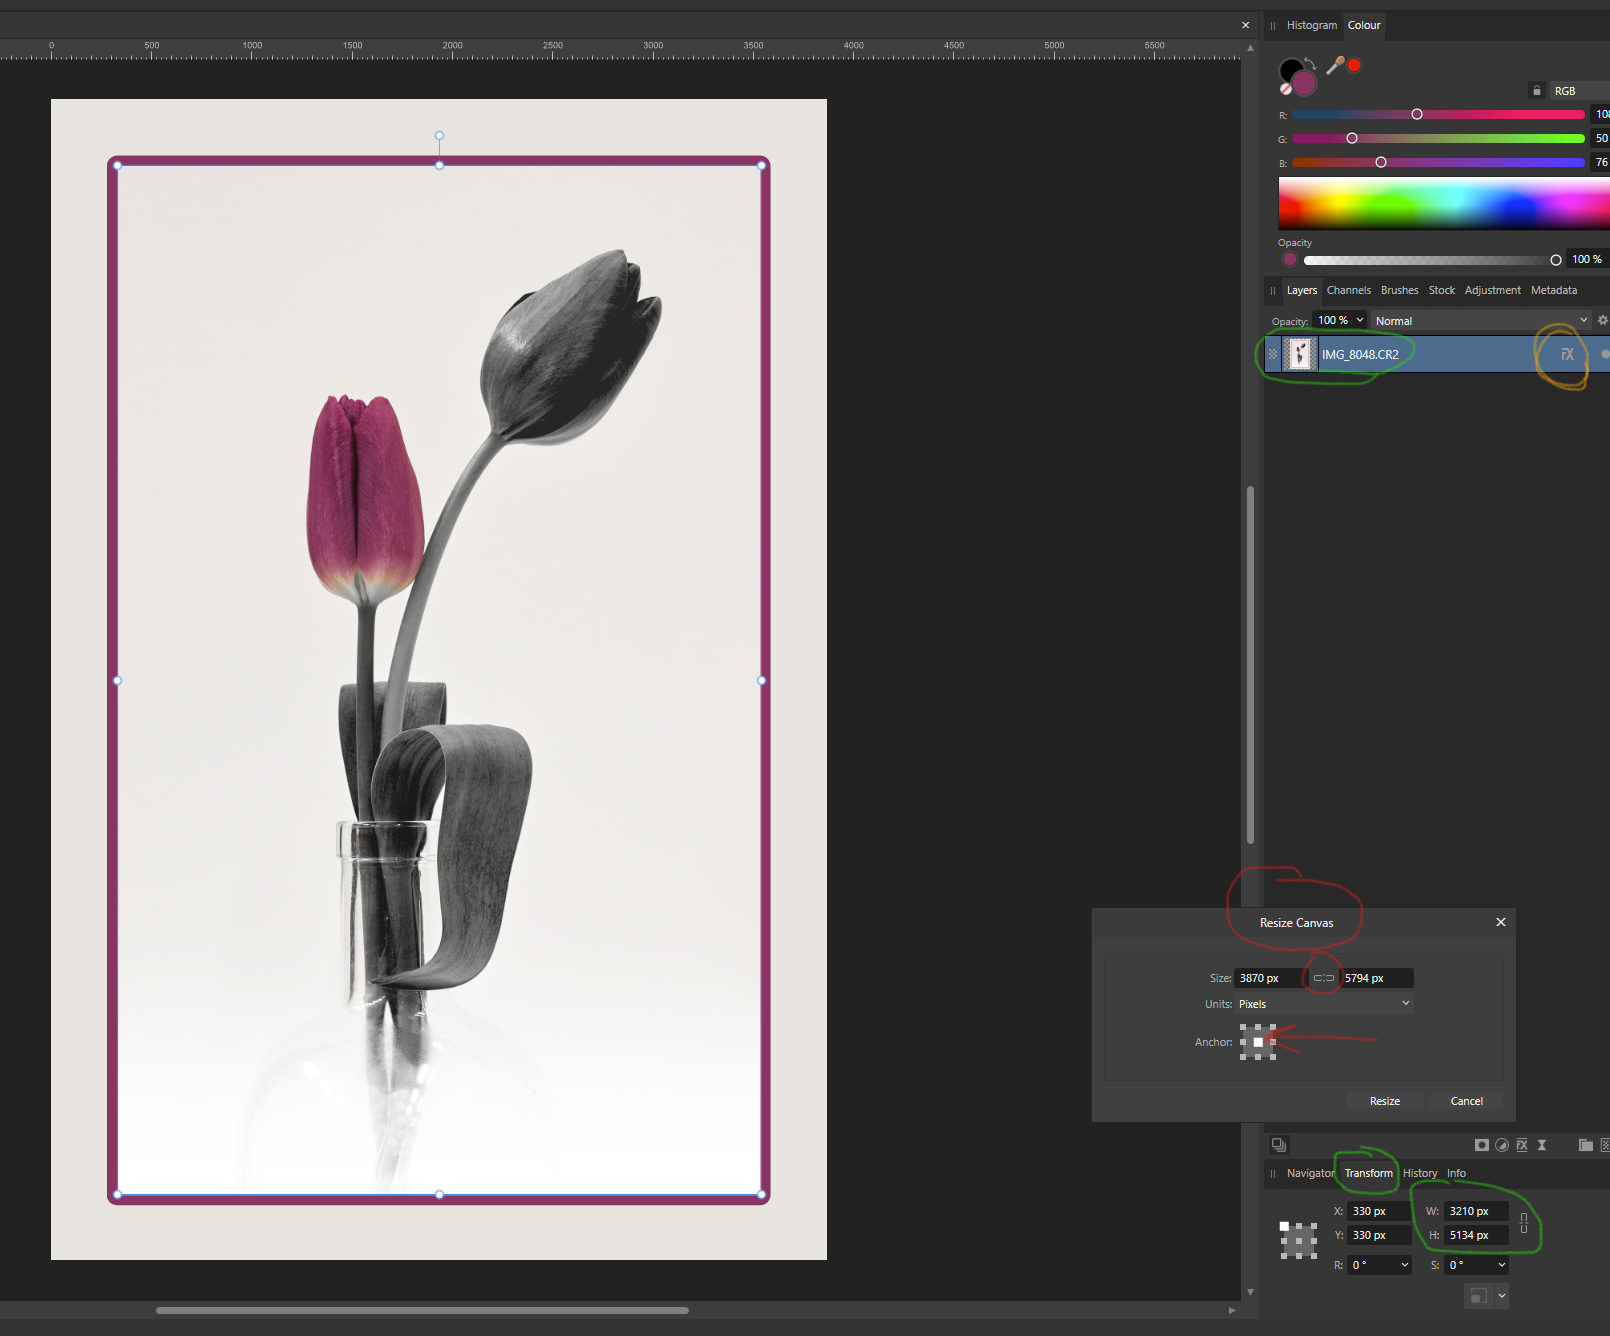
Do you still have the framing problem? I gave it a try, too. I downloaded your initial afphoto file. First I saw, that the canvas hasn't been unclipped. So maybe, one of the essential problems could be, that you maybe didn't resize the canvas. What I did now...
- Delete the rectange and pixel layer
- Resize the canvas by adding 660px to width and hight (2x30+2x300). See also screenshot 1a.
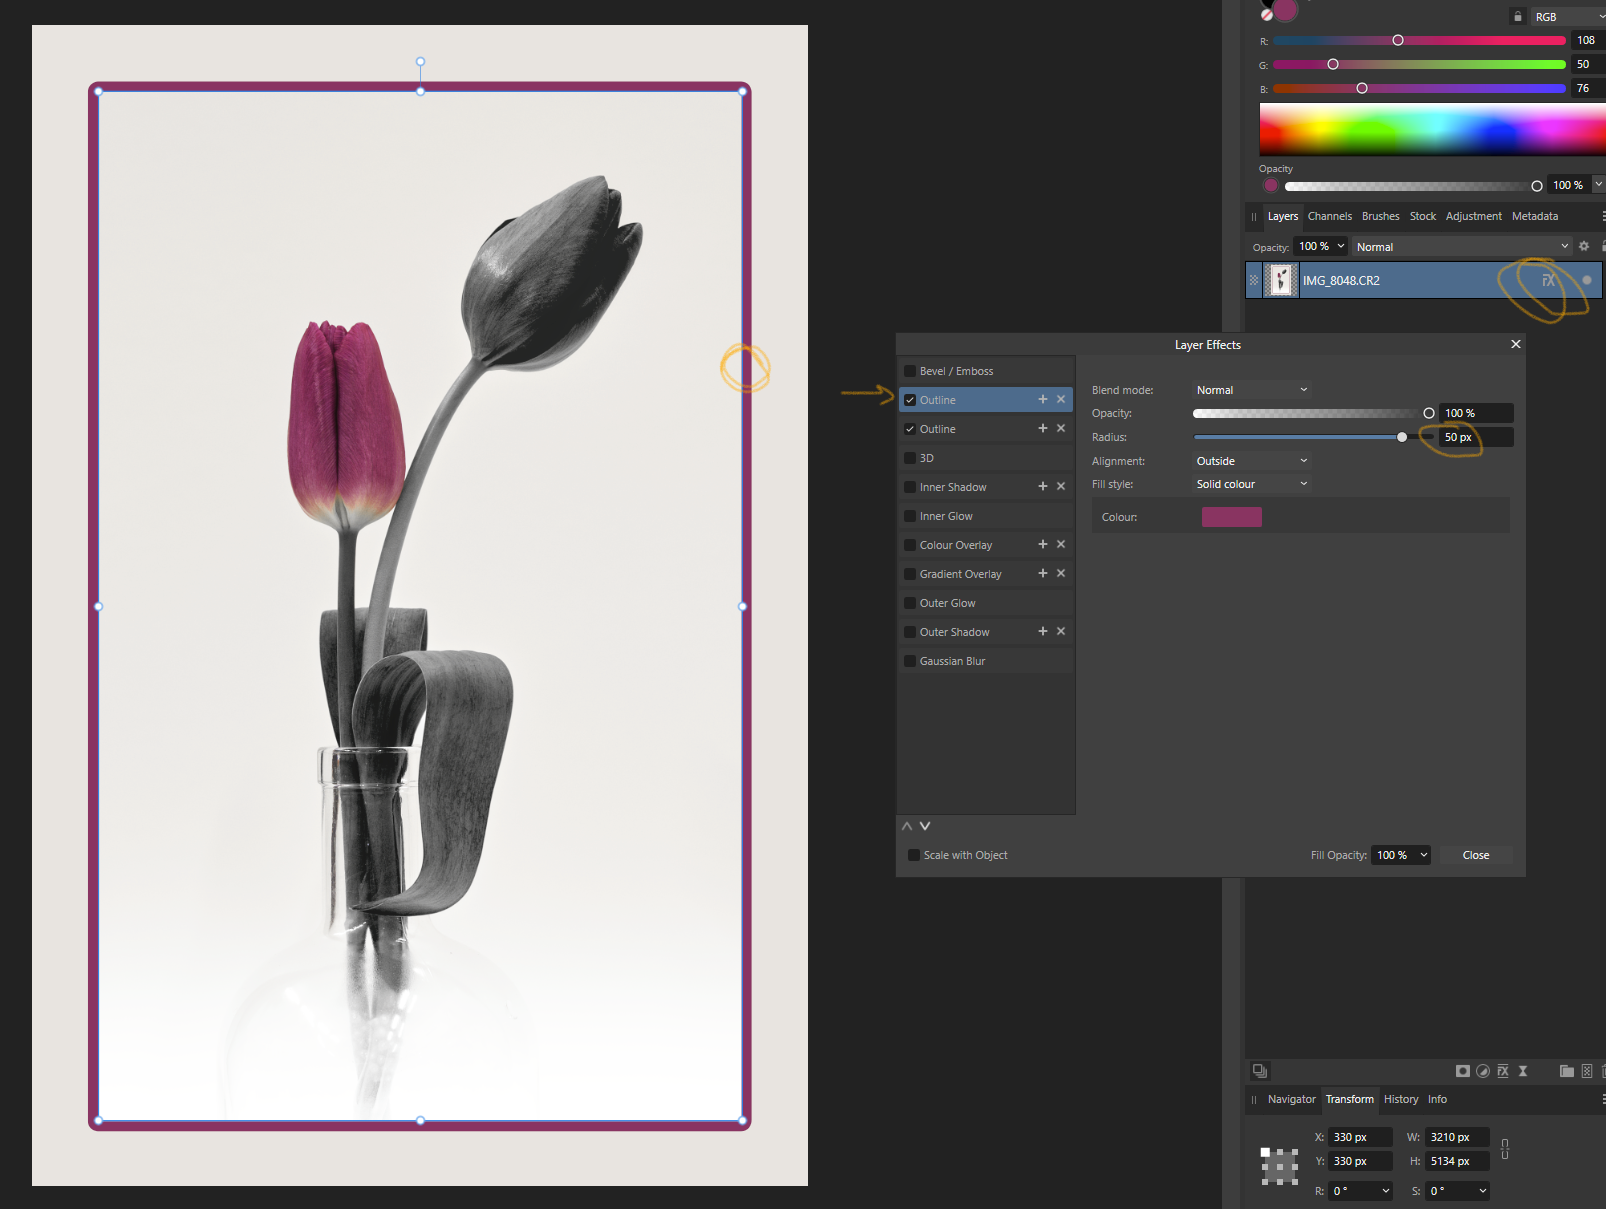
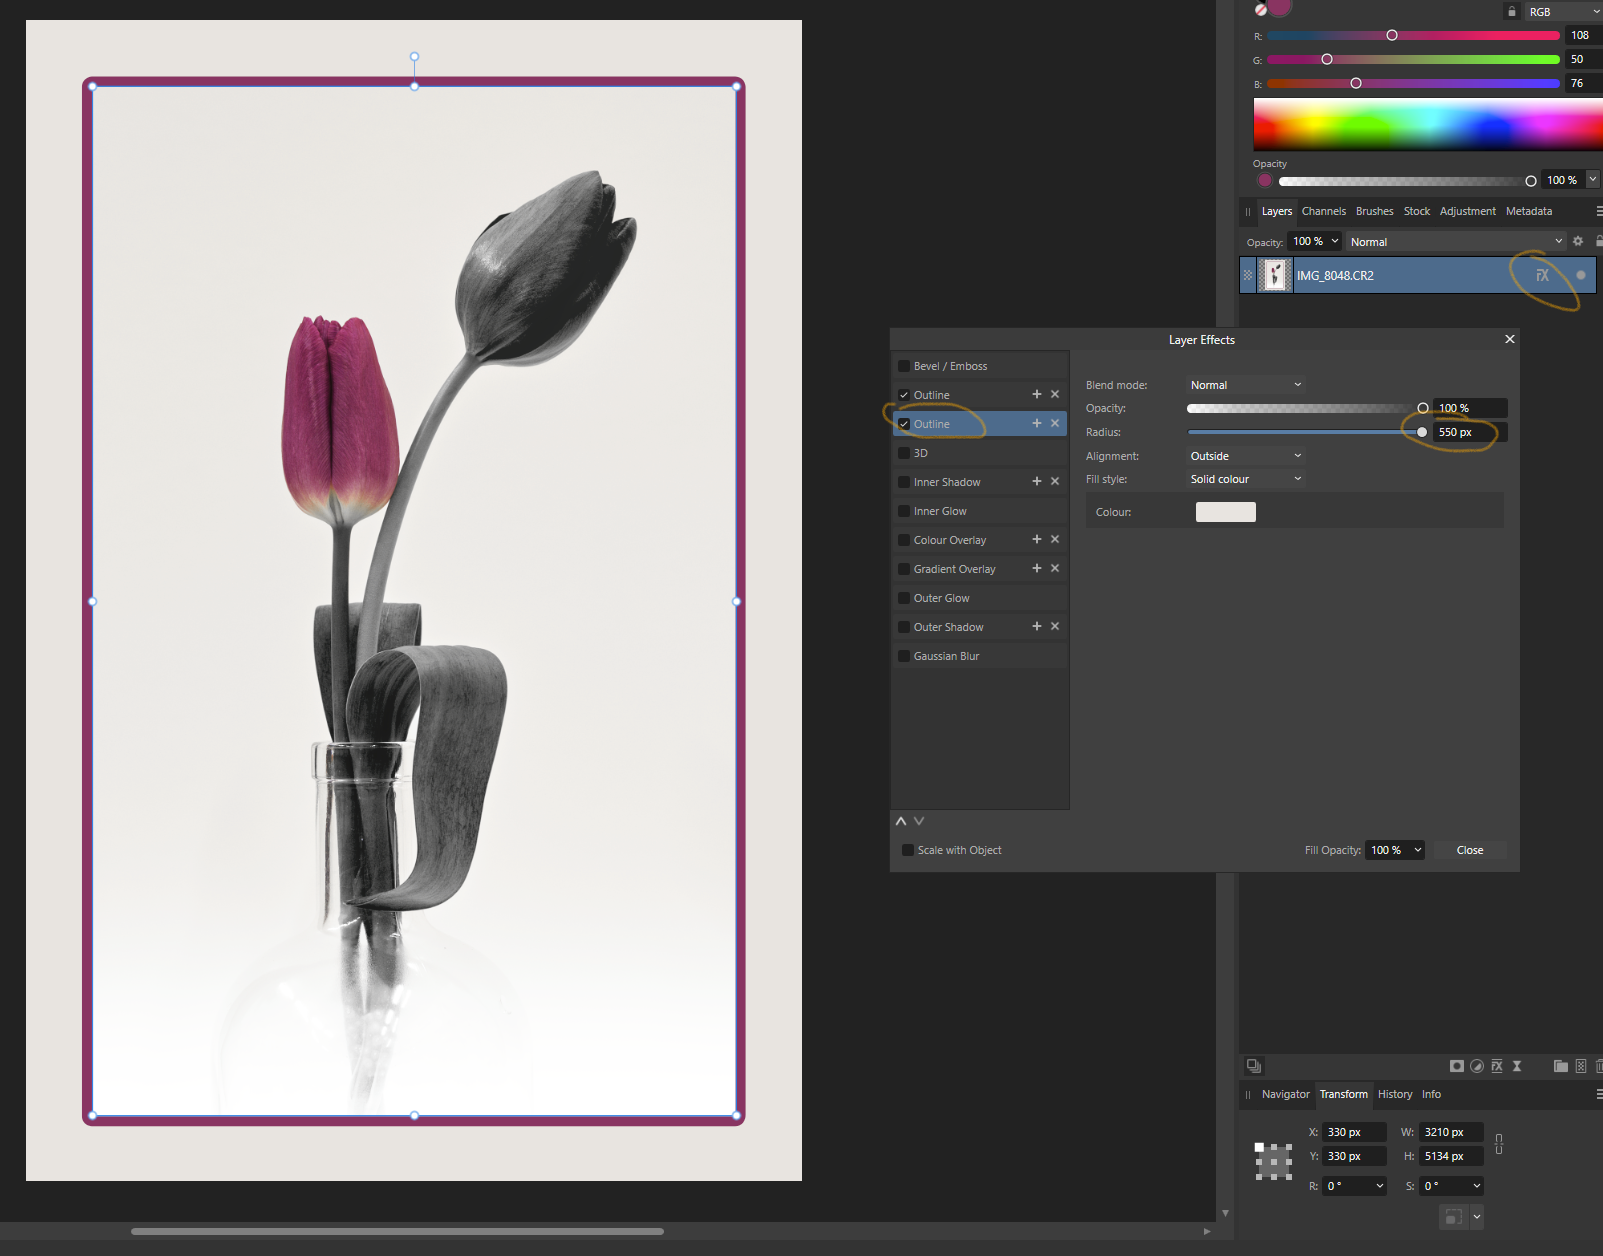
- Then using the "fx" effects on the CR2 layer to add two frames to the layer. See screenshots 1b and 1c. But this is only one way to get the frames. For sure you can use two rectangle layers instead and there are maybe more ways to do it 🙂I also attached the modified afphoto file (AP Photo V2).

-
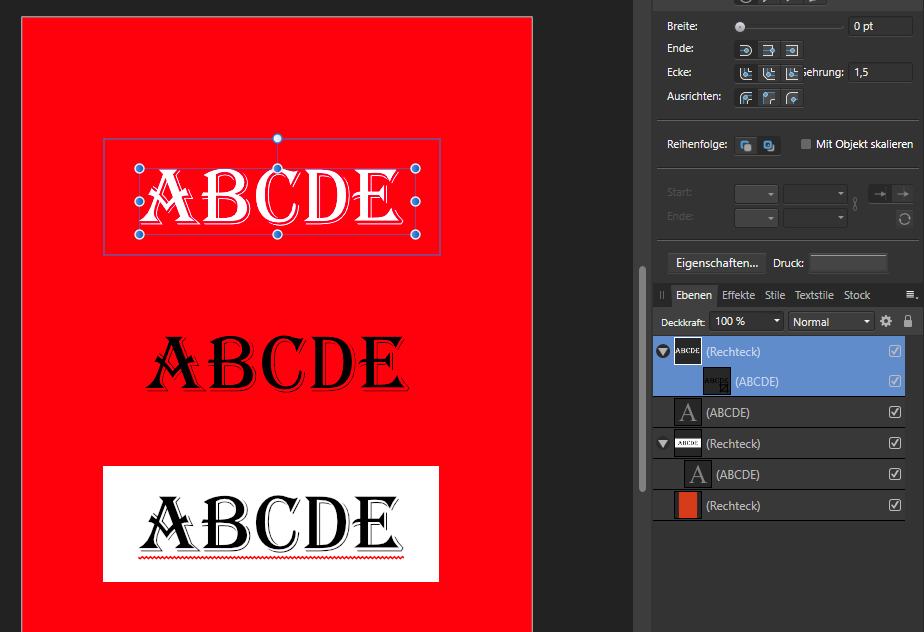
Hi Allan,
Drag the text layer on the white rectangle layer, so that the vertical blue line appears.

-
It looks like, deactivating the internal graphics card does the trick for me.
- Intel UHD Graphics 630 (deactivated)
- NVIDIA Quadro P2200 / driver version 472.39 (activated)
- OpenCL acceleration (activated)
- Windows 10 Pro / version 21H1 / build 19043.1320
After a very quick test, I can't see the overlay brush problem on my system.
-
I can confirm, that the "InternalServerError" during registration can be solved by temporarily changing the app locale from (in my case) German to English (UK). After registration I signed off, changed the locale back to German and successfully signed in again. And I get the brush set within the Photo app.
-
Hi Sean,
thank you for your reply!
I want try to explain, why I used that configuration. I designed a little booklet with a spiral binding (is this the right english wording?) with beta 206 or so. The print has been done as double sided pages and needed the bleed on all four sides. But during the design it was very helpful to see the booket as spreads (facing pages) on the screen to see how it looks. So I more or less used this configuration to simulate a "preview as book". I think, there was asked for such kind of preview in another thread.
I started my booklet with facing master and pages. Design worked well, but when it came to export for print, I get in trouble. I tried some configurations and finally I configured bigger pages, which include the needed bleeding within the page and not as bleeding. When I read the description for beta 238 I thought, that you now implemented my whished behaviour :-) So I thought, my findings are a little bug, but it sounds, it isn't.
I want to add, that I really enjoy using the trio of Photo, Designer and Publisher.
Best regards,
Heike
-
I think, there is a little glitch left with the bleed behavior. I created the attached document with 3mm bleed on all sides and 4 pages. The black frames should help to see bleeds and margins. When I export the document as "all pages", then the first and the last page looks perfect. The bleed get the correct content. But the inner bleed on pages 2 and 3 get the content from the facing page. It's difficult for me to describe, so please have a look at the attached files. The Publisher file, one PDF with "print all pages" and one PDF with "print all spreads". JPG and TIF exports with "include bleeds" look the same.
Best regards,
Heike


2.1.0 develop persona - curves tool
in V2 Bugs found on Windows
Posted
Hi Dan,
Thanks! 👍