toltec
-
Posts
3,560 -
Joined
-
Last visited
Everything posted by toltec
-
 Sure, just select the Fill/Gradient tool and drag it across the Mask Layer. You can select the gradient end stops and change the 'colour' to different shades of grey and just drag them around to get the effect you want.
 -
Expand stroke trouble
toltec replied to Michelle W's topic in Pre-V2 Archive of Affinity on iPad Questions
Hi Michelle W The stroke has to be thick enough for it to work effectively. EDIT or appear to (as Alfred mentions). Here is a single, fat line. I did 'Expand Stroke' and then selected it with the Node Tool Expand Stroke has turned the line into a shape with nodes all around.
-
Hi @Griffithta If you have already converted the Gaussian blur to a Live Filter Layer (lightning bolt) I'm sure you have discovered that you can paint on the layer with black paint to mask (or remove) the blur. To do it the opposite way round, 'Invert' the blur layer first. Select the blur layer, go to the Channels Studio, and on the 'Gaussian Blur Alpha' channel, tap the ellipses (menu button). Tap Invert. You can now paint the Gaussian blur effect on with white paint. You can do pretty much the same thing with your duplicated blend mode layers. Use the + in the Layers Studio to create a Mask layer. Select that and then Invert it in the Channels Studio (Mask Alpha).. You can then paint it on with white paint to 'apply'. You will have to tap the ellipses in the Layers studio to set the layer's blend mode.
-
That was demonstrated to you several times by gdenby and others on the first page but it only works on bitmap images. In the case of your artwork, the Magic Wand (aka Flood Select Tool) selects pixels of the same colour, so will only work on bitmap images (like a PNG) because a bitmap image of your artwork is black pixels filled with white pixels. A vector shape is not filled with anything, it is an outline with a transparent fill, allowing the paper to show through. Therefore the Flood Select Tool has nothing to select.
-
If it is a PC, make sure the background image layer is not selected first, (you can click on one of the layers to select that) then press Alt and drag a marquee. It will select everything you drag around. But not the background. If there are several layers in the background, you will have to select the ones you want individually in the layers panel. That is the purpose of Vector layers in Designer. By organising layers in 'packs' you can exclude certain layers, or not. The 'Edit All Layers' option.
-
Fat fingers, probably
-
No, it is definitely not your fault, it is Serif's fault. This is a known issue that many people (including me) have been complaining about. By far and away the worst thing about trying to use Designer on an iPad. In fact it is nearly impossible to use it. Serif have been very quiet about this but hopefully they will listen to all the complaints from their customers and fix it.
-
AFFINITY TRAIL
toltec replied to Elvis Sivle's topic in Pre-V2 Archive of Affinity on Desktop Questions (macOS and Windows)
This is Designer This is Photo
-
Hi @ydaltak There are 70+ official tutorial videos made by Serif It would be worth starting there.
-
I think you must have missed it I'm not sure of the exact dates but AP 1.6.4 update was released in March. AP 1.6.5 in August ? AP 1.7 is due about now That's three updates within nine months. All free!
-
I recently bought and reviewed an Acer Spin 5, which has almost identical specifications to the Galaxy Book 12. It works very well with Affinity software.
-
The thing is, Affinity treats placed images as embedded documents. They are not converted automatically so that you can resize them anyhow you like, but the original file with it's resolution remains. It is only converted when you output it, using the original file information. If you converted it to the document resolution, then resized it, quality would suffer. This is especially important for slices. If Affinity converted the image to say 300 dpi to match the document. If you then output the placed file at 2x resolution for high definition web sites, the image would be 300 dpi as was the document, when you really want it to be 600 dpi. There is method in Serif's madness. These days most of us have to work with websites and higher resolution (smart phones) in mind. Things have moved on.
-
The end of this year ? I had better save my Xmas budget by cutting down on unnecessary expenses, like presents for the family. They never liked me anyway
-
I very quickly went around with the Selection Brush Tool set to Snap to Edges, then filled it. It picked the sky up in one go. The brush was about the size of the red blob.
-
Works for me. It won't work on an placed Image layer, only a Pixel layer. Could that be it ? If that is it, Rasterise the layer
-
Yes, it does support vector graphics, although you do need to export your file in a format that supports vector graphics, like SVG or PDF or the text will be rasterised when you export it. However, why does your print person need to "scale" the files ? They should really be at the right size to start with or you are likely to have issues with pixellation of the photo as well as the text.
-
Try ... Edit > Defaults > Revert, that will put everything back to basics.
-
Linux Support
toltec replied to who8mypnuts's topic in Feedback for the V1 Affinity Suite of Products
For techno savvy young people, yes, maybe, but it depends on who has to fix it if it breaks down?. For any professional user or designer, I would say that that sort of penny pinching is a false economy. The hours I have wasted on Linux easily covers the cost of buying a 'big' PC. What's more, if my PC goes wrong, one phone call and an engineer calls round to my house to fix it or replace it (for three years). On a Linux machine, a breakdown could mean hours or days of grief, with a customer screaming down the phone. Some things are worth paying for! -
Acer Spin review
toltec replied to toltec's topic in Pre-V2 Archive of Affinity on Desktop Questions (macOS and Windows)
By file name. I often save screen grabs or images to Photos from er, Photo so I can get them off onto a PC. It is even a big problem if I just want to load them into Photo again or upload to the internet. Normally takes two or three attempts to get the right file. The silly iOS file system is a big issue for me. What were Apple thinking? No problems on my Acer Spin -
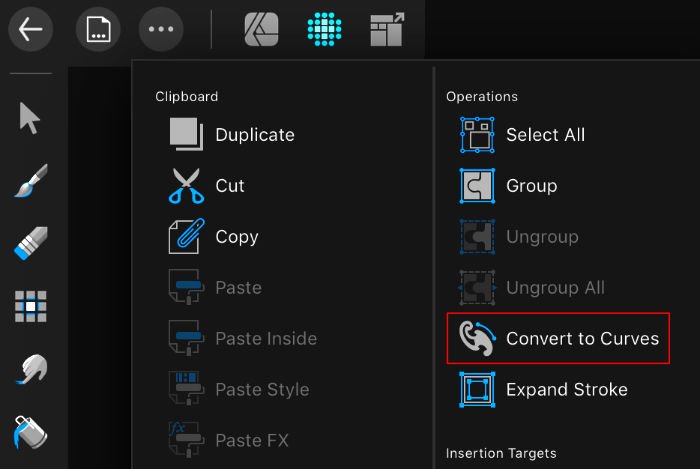
Convert text to outlines?
toltec replied to fandy's topic in Pre-V2 Archive of Affinity on iPad Questions
That is on an iPad. Convert to Curves is the same as Convert to Outlines or Convert to Paths. It turns text into vector shapes. If you select the Pen Tool, you can set the outline width and colour.
-
Acer Spin review
toltec replied to toltec's topic in Pre-V2 Archive of Affinity on Desktop Questions (macOS and Windows)
No mouse or proper keyboard either. That is what I miss the most. Also, how do you find a file by it's name in Photos ? I often end up with more than one version and a thumbnail does not help. -
I would certainly say no. There are too many thing missing from the iPad versions. Spot colours, bleed and printers marks being the main ones that come to mind. The iPad will honour them if they were created on a desktop, but you do need a desktop to create them. I would say definitely get a MacBook if you need page layout. Use the iPad for design concepts (even to show the client) but transfer to the MacBook to finalise the job.
-
Affinity Photo Save cmd in Document window
toltec replied to G-Ramps's topic in Pre-V2 Archive of Affinity on iPad Questions
No. We are talking about this which appears if you 'Open' a file, rather than 'Import' a file. Not the same thing as 'Save a Copy'.
-
? If you make a selection and create a new Adjustment layer, the Adjustment is confined to the selection area. Or am I missing something ?
-
Linux Support
toltec replied to who8mypnuts's topic in Feedback for the V1 Affinity Suite of Products
The point is, I can do all of that on one fast Windows machine that acts as a tablet, a laptop or a desktop (if plugged in to a monitor etc) It was completely plug and play and it runs the full version of Affinity.