Max P
-
Posts
113 -
Joined
-
Last visited
Everything posted by Max P
-
Complex Non-destructive Mask
Max P replied to telemax's topic in Tutorials (Staff and Customer Created Tutorials)
Hi NotMyFault Thank take time for answer to me I' m not a professionnal I'm just a retiree who has time to explore some solutions, in fact my interest is more, the ability to mix transparent images, shots of images included in vector shapes in a plane, an image wider, possibly with a z depth. ( Affinity, Open GL?, blender?). In fact I use less and less mask but more and more layers in Erase mode, with paintbrush with modultation opacity Well I'm not going to waste you more time thank you again -
Complex Non-destructive Mask
Max P replied to telemax's topic in Tutorials (Staff and Customer Created Tutorials)
Wow! Without you, I would never have understood, limited to my understanding. Thank to you telemax and NotMyFault Without error, the formula 1- (0.2126 * R + 0.7152 * G + 0.0722 * B) -a gives the same result in 16 bit or 32 bit, knowing that for a strict mask 8 bit is sufficient, can you confirm me please -
Edit Mask as Pixel Layer
Max P replied to NotMyFault's topic in Tutorials (Staff and Customer Created Tutorials)
according with you, NotMyFault First I dont' want use RGBtoi , because integer 8 bit , (255) perhaps 16 bit, loss of accuracy, salt noise.. prefer work 32 Bit for calculate I use this one Y′=0.299R′+0.587G′+0.114B′ or Y'=0.2126R'+0.7152G'+0.0722B' It 's give me Y' Mode Luminosity I made a copy, substract to a copy of backroung merge it, obtain a color layer mode color ( as l*a*b*) Perhaps it' s not so correct, but Okay for my use If you are no afraid with code, just see arithmetic , https://stackoverflow.com/questions/56198778/what-is-the-efficient-way-to-calculate-human-eye-contrast-difference-for-rgb-val/56200738#56200738 -
Edit Mask as Pixel Layer
Max P replied to NotMyFault's topic in Tutorials (Staff and Customer Created Tutorials)
Hi (R+G+B)/3 ? Sorry that doesn't make sense. We have a significant different weighting for each channel; predominance of Green channel Also you can't just sum the three channels together and divide by three and get something close to the actual luminance of a particular color. -
A Surprising Proposal: HWB
Max P replied to dmstraker's topic in Feedback for Affinity Photo V1 on Desktop
Hi, dmstraker, Your links is very interesting HWB seems more instinctive. Maybe we can imitate him with W = min (R, G, B), B =1- Max (R, G, B), https://en.wikipedia.org/wiki/HWB_color_model https://drafts.csswg.org/css-color/#the-hwb-notation Very Good -
Undo brush tool
Max P replied to Carlos2021's topic in Pre-V2 Archive of Affinity on Desktop Questions (macOS and Windows)
Hi, If I understood your request correctly Duplicate layer Add above a pixel layer, mode erase Erase with any brush ( modulate with brush option, It's very efficient, Eventually make a group, and rasterize -
How to remove light from a photo?
Max P replied to Dyadichev's topic in Pre-V2 Archive of Affinity on iPad Questions
Okay Thank Alfred Here the Macros MP l & C.afmacros see it's not work on the Beta 1.9 Photo Windown, merge down problem, i Think, butwe have the L layer -
How to remove light from a photo?
Max P replied to Dyadichev's topic in Pre-V2 Archive of Affinity on iPad Questions
Hi ,Dyadichev I'm not on Ipad, but perhaps it's good Use this macro, LumaAND Color.afmacro Studio> Macro, Import Macro on the panel Macro (Top panel on the right) It' give you the L component. ( and colorcomponent) On the Top, of this layer, use Level Tool and put the gamma slider at 2 duplicate this, eventually, Triplicate ... Good result with my try. -
Variant of this I use in L*a*b* on a duplicate layer 1 Extract L * Clear A * and B *opponent Rename the layer L Star mode Luminosity 2 Above I fill with any color with Food Fill Tool [G] using a modulation of the opacity on the color whell (To be adjusted later) begin with 50% for example the red color is a good option sensitive...Erase MODE; for simulate Divide 3 Make a group, with 1,2,3 Colour Dodge & Colour Burn or linear burn or some time more easily linear light 3. 6 % 4 Above the layer 2 in Erase mode you can use an alpha LAB or gray 16 bit Alpha curve (optional) Adjust by modulating the transparency of the initial opacity of the opacity of erase mode , the opacity of the group and locally with the alpha curve
-
Hi Big Swifty perhaps on the part of the image to be adjusted add a vector shape (rectangular? ) whose edges would possibly be blurred for the overprinting progressiveness and then play with the HSL, or with the luminance (gray%) gradient...?, and then you can be rasterize the this patch,
-
Hi, Perhaps, select the option on the right side Panel preferences

-
Yes for my part if i use Blend Ranges , I add the word "cog" next to (Pixel). More obvious...
-
Hi Dan C The sreenshot Here the symbol add is not visible ( 2 cross, a cross with a smaller) make me only another selection at the new position No problem with substract drag+Alt option
-
HI , I also confirm on Windows, and version 1.8.3.641 Same observation as Danette
-
Hi, See on develop on Basic the Default exposure is set at 0.73. Is you or the value by default.
-
it looks like a compression ratio too high, see jpg option File > export setting > start with quality 100%
-
Selecting Tonal Ranges
Max P replied to jmagill's topic in Feedback for Affinity Photo V1 on Desktop
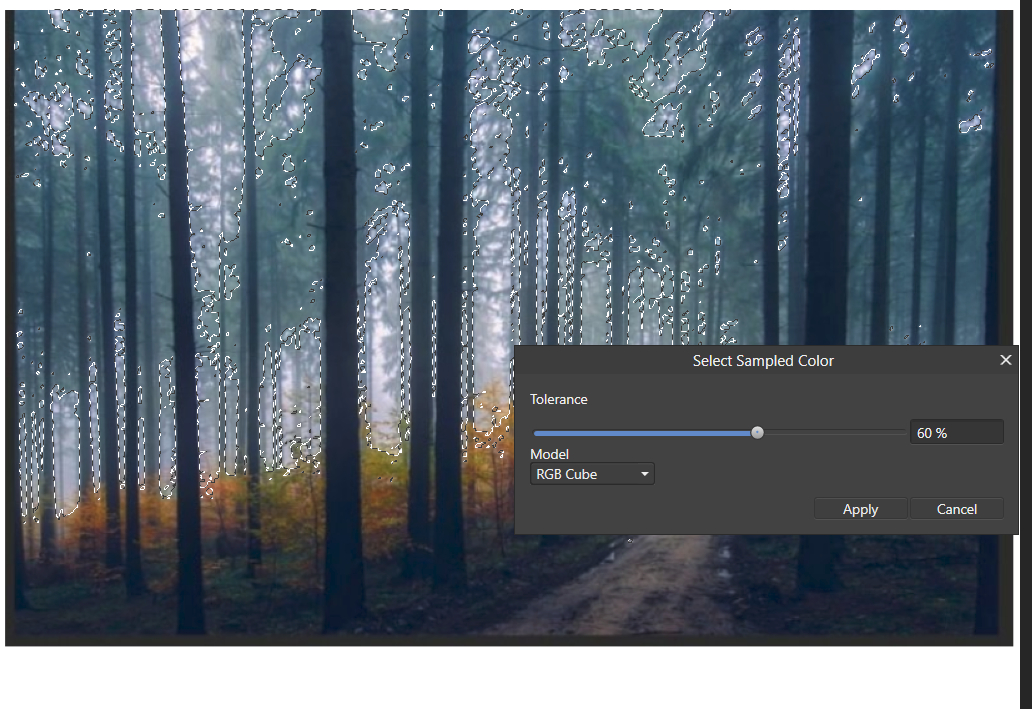
Hi Altheus Okay, you use an image not a pixel layer Right click rasterize it and you have a pixel layer Go select / tonal range / Select highlights you have your selection, CTRL C, CTRL V, you have a pixel layer HL😉 But in this case select manually is better I think, click on HL pixel Select Samples color pixel play with tolerance Have a good day
-
Develop Raw 32 bit
Max P replied to Max P's topic in Pre-V2 Archive of Affinity on Desktop Questions (macOS and Windows)
Okay with this anon2 , understand we have a function as effect * 1 / zoom multiplicande... but, is not my question if i compare the result full screen before develop buton (compilation equivalent , for me...) and see immediately after in personna, differential effect, and the color is litte different ( i made zero adjustement in color here, only in persona) -
Develop Raw 32 bit
Max P replied to Max P's topic in Pre-V2 Archive of Affinity on Desktop Questions (macOS and Windows)
Hi callum very interesting exercice, the differences are not constant and seems to depend on the intensity of the corrections here for one that of the clouds I largely exaggerated to see the effect. Sometimes the difference is almost invisible ... Always remained 32 bit linear, in any case the recovery capacity of Develop is quite incredible and little known does it seem to me On the top In developp, below immediately in personna Thanks Max P HD_.tiff LD.tiff -
Blend Mode or Burn & Dodge on Mask
Max P replied to xwiechers's topic in Feedback for Affinity Photo V1 on Desktop
Ok understand this -
Blend Mode or Burn & Dodge on Mask
Max P replied to xwiechers's topic in Feedback for Affinity Photo V1 on Desktop
easy without mask put a pixel layer above fill it with grey 50 % mode overlay and paint Or if you want mask or see the effect in a preview put a pixel layer above fill it with grey 75 % or + or - % Mode mode overlay and add mask red more here: https://forum.affinity.serif.com/index.php?/topic/105199-dodge-and-burn/&tab=comments#comment-567111 -
about the RAW part I want to share my questions with you : I'm a fan of 32 bit linear development, I accept and assume that I can only use certain linear modes, and only some tool. Typically I start with the clarity tool,in conjunction with the detail tool Refinement after I take care of the left edge of the histogram in interaction with the shadow slider Then I take care of the right edge of the histogram in interaction with the highlight slider No color correction here. Conduct well, at the end of this step on the screen, we get not so bad results the preview screen especially in borderline cases ETTR or overexpose!! But after I click on develop the quality drops! (stay always in 32 bit) Sometimes muddy appearance, loss of precision. As if the "compilation" had slipped in 16 bit internall, or use aggressive rounding.. or had attenuated the clarity tool too much , or some parameter. I take longtime for optimise, in vain... It's no always possible readjust in persona with same efficient ( why ?) During this phase you use a buffer or a process by node ? well, there I suppose that you will not answer me, said differently the order of the stages seems to matter, can you confirm? Your developers should fairly easily resolve this. Please can you answer me on this subject, give a feedback please. On WIN10
-
French translation issue
Max P replied to Roudiere's topic in Feedback for Affinity Photo V1 on Desktop
Thank i never understand the translation before In the same way, more cosmetic but no sens in french Filtres Couleurs Texte Procedurale will be Texture Procedurale -
Hi, I love it, a great potential for adaptation in the tree of possibilities An little observation: The left part has a yellow green component, not an orange yellow component ; this part is too abruptly connected with the right part, this is obvious for the bottom of the image on the water: may be to harmonize the color balance on the images before the composition and may be after with... local ajustment. Playing with luminance layer, HDR (JR preset)? , in 16 Bit or 32 bit By example you should be able to discriminate the different plans and buildings, montain I love this kind of image because it opens up a lot of potential for reinterpretation and large prints. I have some image like that, they serve me as a training image, never abandoned, sometimes improved Have a good day, be safe.
- 2 replies
-
- 1
-

-
- san francisco
- panorama
- (and 1 more)
-
yes it allows very subtle local adjustments once apprehended Test in lab mode, with the gray layer L separated from the color