Roger C
-
Posts
174 -
Joined
-
Last visited
Everything posted by Roger C
-

affinity designer Scientific illustration: Iberian red fox
Roger C replied to IsabelAracama's topic in Share your work
Isabel...You can stop practicing now; Mission accomplished! Your Behance gallery is a delight.- 19 replies
-
- 1
-

-
- scientific illustration
- fox
- (and 3 more)
-
affinity photo Strange goings-on near the shores of Loch Madoor
Roger C replied to GarryP's topic in Share your work
Nailed it again! You really are becoming the go-to Glitch-meister. Bravo.
-
affinity designer Affinity illustrations and experiments
Roger C replied to Deadbyxmas's topic in Share your work
Dreamy combo!
-
These are excellent Garry. I'm loving the Dino and camcorder stills. Glitch-tastic, mate. Well done!
-
Excellent eye popping images! Surely Affinity Spotlight will be asking you for an article sometime. Just Delightful.
- 19 replies
-
- 1
-
-
- insect
- scientific illustration
- (and 6 more)
-
Percentual scaling
Roger C replied to Piet-CLS's topic in Pre-V2 Archive of Affinity on Desktop Questions (macOS and Windows)
Hi Won't ticking Scale with object wherever you see it as an option be of help? e.g.
-
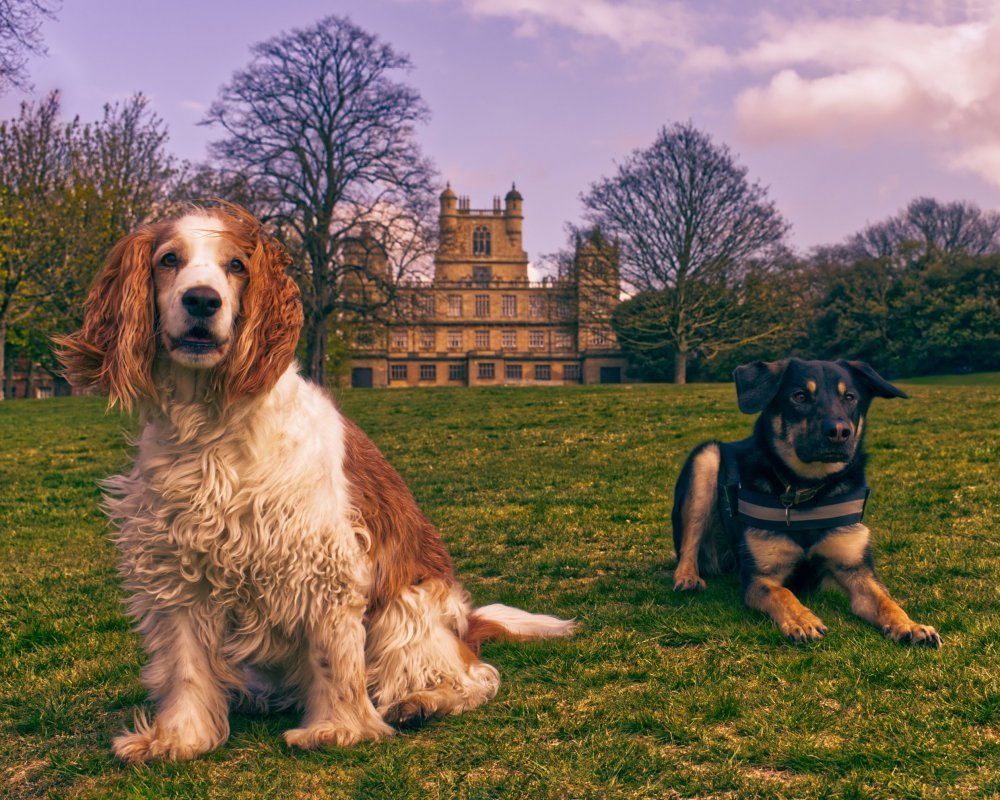
affinity photo Shameless dog pics (+bonus cats!)
Roger C replied to Dan C's topic in Share your work
And here he is, posing with a chum in front of Affinity HQ. But is he a good boy? He seems so innocent, yet maybe it's not such a good idea to sit too close...
-
Hi @Mountaize Welcome to the forums. Your question is better suited to the Affinity on Desktop Questions section. Try reposting there: https://forum.affinity.serif.com/index.php?/forum/5-affinity-on-desktop-questions-mac-and-windows/ Members will try their best to help you!
-
Great reply, James. One Question: The mods and other forum members are being respectful of the OP's post. Would it be possible to encourage the poster to show some respect to other forum users by cutting the obscenities from his posts and username? Even when asterisked they still push an aggressive tone which does nothing to help the forum.
-
Hi dCip It sounds like an anti-aliasing artefact. Here's what the super-helpful @MEB recommends. (Hopefully he's on xmas break at the moment.) MEB QA/Support Moderators 7,702 26,173 posts Report post Posted November 21 Hi Xeevis, Welcome to Affinity Forums As said above this is due to the antialiasing (the background colour is bleeding through the edges of the shapes). For pixel aligned vertical and horizontal edges this doesn't happen but with diagonal/round edges it causes the issues you are experiencing. You can try select one of the shapes, go to the Layers panel, click the cog icon on the top left, then the Coverage Map button and drag the point on the left of the graph to the top (vertically) so both points (left and right) are both on top. Note this may not be applicable in all cases as it changes the antialiasing and may produce stepped lines in other places of the same object. Other solutions if you want to keep the original objects perfectly aligned (no overlapping) is to add a third object behind them with the same colour of one of them just to hide/reduce contrast with the light colour of the background in the object's edges, add a thin stroke with the same colour as the objects to cover the gap or simply add (boolean operations) the objects if applicable/possible (you may have to delete some extraneous nodes or adjust the shapes before the add boolean operation to get a clean shape.
-
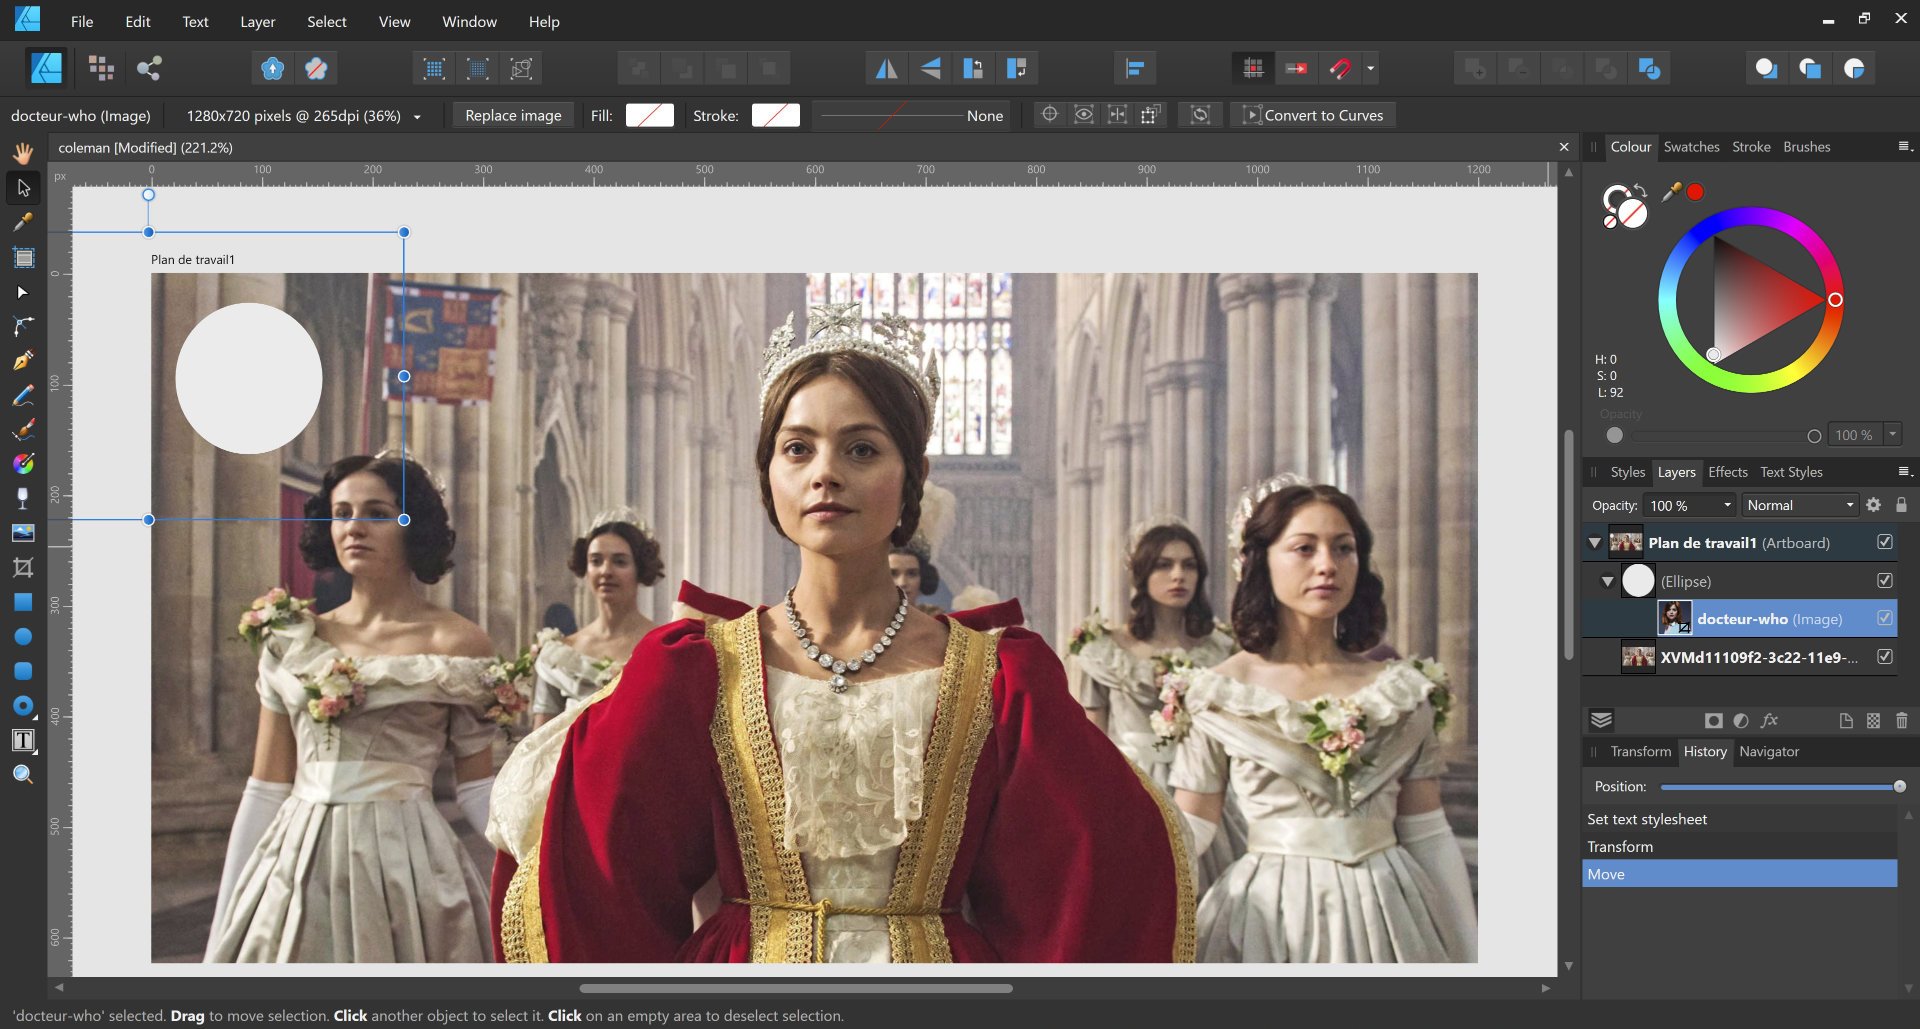
@Dan C Like Pyanepsion above, Place Image is behaving differently with this file compared to your video. With you the placed image appears as soon as it is clipped into the elipse. But not here below. What simple step is missing?
-
Marquee tool
Roger C replied to Starchy97's topic in Pre-V2 Archive of Affinity on Desktop Questions (macOS and Windows)
In Photo, you can toggle visibility of the selection by going to > View > Show Pixel Selection and unticking. You can assign a shortcut key yourself by going to > Edit > Preferences > Keyboard Shortcuts. -
All the legacy Photo videos (pre version 1.7) are here: https://forum.affinity.serif.com/index.php?/topic/10119-legacy-official-affinity-photo-desktop-video-tutorials/ See > Split Toning and Selective Colour https://player.vimeo.com/video/136106053 (Each time I try to paste these links into this post I get an error message for some reason. But the above links do work if you copy and paste them into your browser.)
-
Hi Check if the file you're working on (your document) is greyscale or colour. To do this go to the Document menu and select Convert Format / ICC Profile. In the Convert box that opens up, click Format. Choose a profile from the list in the dialog; in your case try RGB/8. Click Convert. Your file can now show colours. Does this help?
-
alpha channels
Roger C replied to mk3's topic in Pre-V2 Archive of Affinity on Desktop Questions (macOS and Windows)
Absolutely! Absolutely again! For numpties like me using Affinity, the only way to glean extra information when using these apps is to spend hours each week sifting the forum for hopefully relevant nuggets. Sure it has by necessity become my new hobby , but it's not an efficient use of work time. -
Hi and welcome to the forum. This current thread may answer your question: https://forum.affinity.serif.com/index.php?/topic/103266-how-to-select-image-portion-and-paste-onto-the-image/
-
Just stumbled across this thread via @Alfred. Thank you both @Erwe and @Pollux. Delightful.
-
Scott I feel the patient and deliberate presentation in your videos will surely make them accessible to a wide global audience on Youtube. Bravo!
-
Hi SusanneB and welcome to the forum! Searching the Affinity forum for previous threads (using the Search box in the top right of each page) is always worth a try. Searching with 'xp-pen' gives several different threads relating to similar problems. -------------------------- There are a number of excellent forum members with expertise in this area who can swoop by to help. Maybe @SrPx or @firstdefence (among many talented others) are flying about and ready to stop by with a pair of pliers and an oil can.
-
PMS Colors?
Roger C replied to Friksel's topic in Pre-V2 Archive of Affinity on Desktop Questions (macOS and Windows)
@Friksel I've just 'liked' all three contributors on your behalf (and my own of course). Such a helpful forum! You could learn a lot hanging out around here... -
affinity designer Affinity Designer - Some Isometric Stuff.
Roger C replied to Rob Necronomicon's topic in Share your work
Yes, chiming in with others; these are very nicely done indeed. You've nailed the look completely. That server is a work of art in itself, and the photocopier looks good enough to sit on. Bravo. -
Lines at an angle
Roger C replied to jackamus's topic in Pre-V2 Archive of Affinity on Desktop Questions (macOS and Windows)
@catlover and @MEB, Ah yes, the protractors are in the assets folder; they were just obscured by a bit of screen glare! They work well and are a great resource. Thanks for sharing them. -
Lines at an angle
Roger C replied to jackamus's topic in Pre-V2 Archive of Affinity on Desktop Questions (macOS and Windows)
@catlover When I import the assets into the current version of AD, all I can see is the "How to" instruction sheet. Maybe the assets are no longer compatible with 1.7.2.471? But thanks anyway. Things move on... -
Wow. Along with the afdesign file of your first post, this reply is a complete step-by-step tutorial such as you might hope to find in a published workbook! Amazingly generous of you, @Wosven. Merci
-
affinity designer Zwickau / tramway and train / transitdiagram
Roger C replied to transitdiagrams's topic in Share your work
Both versions look good, but to my eyes some of the routes don't stand out as clearly as usual. Maybe giving more depth to the colours of routes 3 and 5? Something like this perhaps? However, I hesitate to comment negatively in any way. Your colour scheme may well have a specific reference, and certainly your work is always stylish. (Please excuse me adapting your image above; I just thought it would be the most concise way of showing what I meant. I am very aware it could be seen as me arrogantly "correcting" your work. That really would be a hideous intrusion on your thread and is not my intention at all. If I've offended, just tell me and I'll delete this post immediately).