
Gnobelix
-
Posts
948 -
Joined
-
Last visited
Everything posted by Gnobelix
-
Dragging Document with Huion Tablet is Incredibly Janky
Gnobelix replied to TheMetaFace's topic in V1 Bugs found on Windows
Hello @TheMetaFace, I use a Huion H1060P tablet, without any problems. Is the latest driver installed? click here. Set in Preferences-Tools on HIGH PRESION, then all pen-button settings should work. Disadvantages is, two points are set when the pencil is placed on the tablet. Is set in Preferences-Tools Windows INK, then pen-button do not work. This should be known to Serif, it has been reported several times a long time ago. Cheers -
wow, big cinema.
-
not able to draw using drawing tablet
Gnobelix replied to cabinfeverclay's topic in V1 Bugs found on Windows
Hi @cabinfeverclay, I use a Huion Inspypiroy 1060 P without problems in Affitiy. Maybe it helps if you update the driver for the Huion Tablet, click here. Cheers -
Hello Philip, very strange indeed. I did the following. The Grey Layer erased The Layers with the FFP-Mask duplicated High-Pass-Filter applied and merge, set these layers to blend mode vivid Light or hard Light. see attachments Cheers face-mask-2.afphoto
-
Hi Philip, the high-pass filter works fine for me. My method of approach 1. open the Image 2. duplicate the Image 3. apply High-Pass-Filter 4. merge the Filter and set the image to the desired blend mode 5. or set the filter layer (high-pass filter) to the desired blend mode. I hope this helps Cheers
-
@Charlotte721 welcome to the Serif Affinity forums. Some suggestions have already been made. I would do it this way. Steps: 1. The wing mirrors layer (right) and the Background layer combined into one layer, and rename copy-bachground. 2. Select the layer copy-background , then Filter- Color-Remove White Paper. 3. Click with the left mouse button + CTRL on the Thumbnail (a selection is created. 4. Created a new fill layer. 5. Choose a colour of your choice. 6. Group the layers copy-background and the new-fill-layer and deselect the selection. Is a little more elaborate,I hope this helps. Cheers campervan outline BW-2.afphoto
-
The problem has also been reported elsewhere. Cheers
-
Hi @bachz, Welcome to the forum. I have a similar problem with the Color Replacement Brush. I think it has something to do with the Brush setting. Try the following, change the Spacing of the brush from 1% to 20%. Whether OpenCl is on or off does not change this problem. Whether this problem is classified as a bug can only be judged by the developers. Cheers Brush.mp4
-
Yes, with version 1.10.1.1142, you can see the problem, a bug???? Cheers
-
The lastest beta of Affinty Photo (1.10.0.1127) does not seem to have this problem as described above. Opened with Photoshop Opened with Affinity Photo Cheers

-
Hello @JeffGreen, Welcome to this forum. I think the problem is the lens correction... Affinity Photo applies the Sony EP2 18_105mm f/4 G OSS profile, this does not seem to be the right one.why ever. Set the distortion to minus 27, or apply the profile Sony FE 24-105mm f/4 G OOS. I hope this helps. Cheers
-
Hello @Eric and Marie, welcome to the Forum. Do you mean the clarity-filter? I think Affinity-Photo remembers the last setting of the clarity-filter, when Affinity is closes. Cheers
-
Here too the warning message under windows 10 as described by @R C-R Cheers
-
Affinity Photo Crashed with New Version 1.10.0
Gnobelix replied to JAKline's topic in V1 Bugs found on Windows
I can only confirm this. It does not matter whether, with GPU acceleration or without GPU acceleration. Something similar can be observed in the last beta version of Photo. dmp file is attached Cheers c8f31c03-7f4a-48a8-b09f-6be3833ff48f.dmp -
Constant freezing of Affinity-Photo (.1127)
Gnobelix replied to Gnobelix's topic in [ARCHIVE] Photo beta on Windows threads
Hello @Subclavius, A good idea, I will try it out. Cheers -
Constant freezing of Affinity-Photo (.1127)
Gnobelix replied to Gnobelix's topic in [ARCHIVE] Photo beta on Windows threads
Hello @SPaceBar, Thanks for the answer. Unfortunately, it also happens with other photos. The only commonality I can see is the use of the Live Filter Perspective. I'll keep testing, maybe I'll discover another commonality. Cheers -
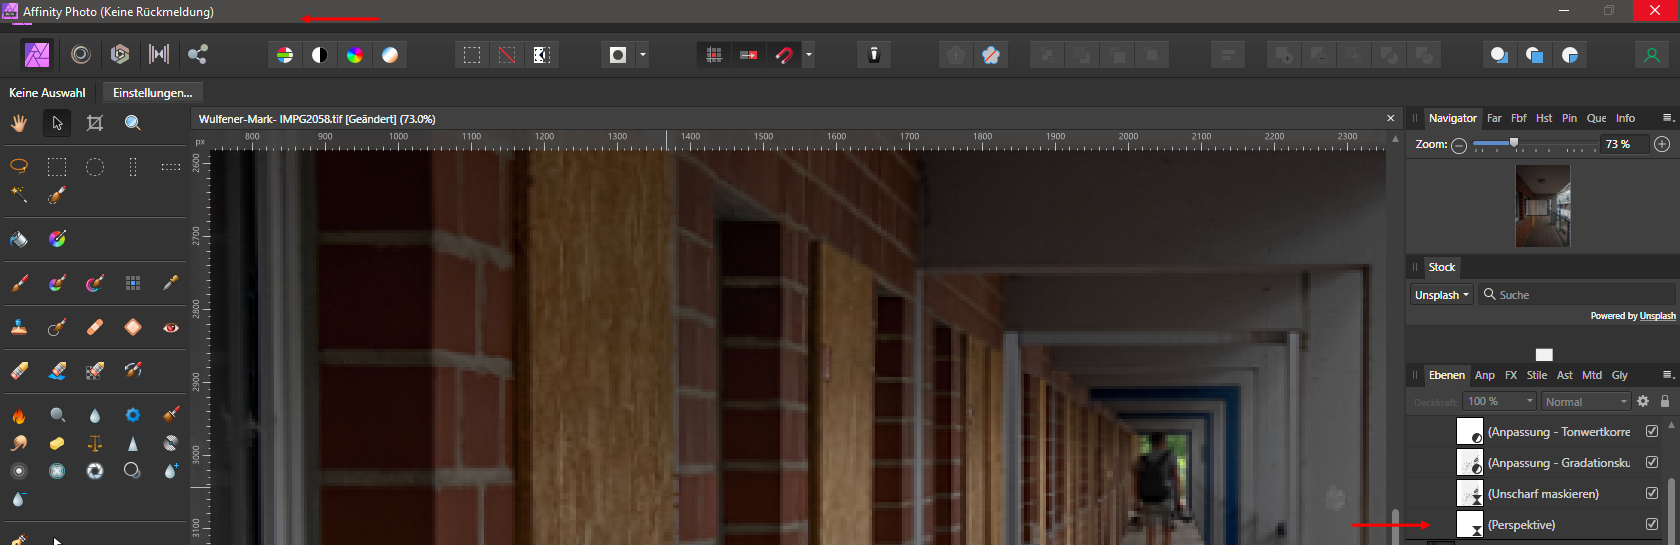
When editing photos that require perspective correction (Live-Filter-Layer), Affinity-Photo freezes and can only be terminated with the task manager. It does not matter if OpenCL is enable or disenble. I used DDU (Display Driver Uninstaller) to delete the NVIDIA driver. A new installation of the actual NVIDIA Studio driver (471.41) also brought no improvement. The same problems also occurred in the beta (.1115) Does anyone have similar problems? cheers attachment_Log.txt df25465b-2452-40c6-a4b1-cee782e6e1fb.dmp
-
I can reproduce the crash, as described by Walt and Andreas. Cheers
-
Hello Nic, as @RNKLN has already mentioned above, Affinity Photo cannot display all the smart objects of Photoshop. So the mock-up files have to be edited a little. Add a new LifeFilter Perspective layer to the "Edit Here layer", and edit the perspective as desired. Now the inserted images are displayed with the correct perspective. See attached Affinity files. Cheers herrei1.afphoto herrei6.afphoto herrei7.afphoto
-
Hello @DavidDoesAffinity, in Affinity Photo and Disigner there is no possibility to edit a text frame, this feature is only available in Affinity Publisher. As Walt has already mentioned, this function can in Photo be simulated with a rectangle. Cheers
-
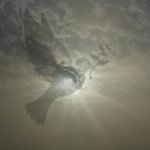
Hello @durloch, Welcome to the forum. Oh, oh, a not so easy task. I would solve the task as follows. Duplicate the black and white layer, and convert to RGB colour space. (Duplicate is always the first Step) Create a selection of the hair with the selection brush tool. Duplicate the selection with the short cut CTRL+J (maintain the selection, running ants) Create a new fill layer with your desired colour and set the Blend Mode to colour. (Colour can be changed afterwards) It is difficult to select the fine structures of the hair at the edge with. Therefore create a new pixel layer, drawing the missing structure (Hairs) with Paint Brush Tool (small brush tip, about 1px to 2 px),play with the opacity. The image is by Jery Gorecki and was downloaded from Pixabay. There are other ways to achieve this, but this is my favourite. Cheers Model-4 ( Jerzy Gorecki _Pixabay)..afphoto
-
Updates
Gnobelix replied to Jerena Ryan's topic in Pre-V2 Archive of Affinity on Desktop Questions (macOS and Windows)
Hello @Jerena Ryan, Welcome to this forum Normally, updates are displayed automatically when the programme is started. Cheers -
Hello Pavel, Welcome to this forum. Unfortunately, I am not familiar with Mac systems. I had a similar problem with PEF-Files. Set disenable, the Option Exposure bias in Develop-Assistant. It has helped with me. Cheers
-
macros
Gnobelix replied to lanna's topic in Pre-V2 Archive of Affinity on Desktop Questions (macOS and Windows)
Hello @lanna, Take a look here. (List for Windows) I don't know whether the list is up-to-date. Cheers


.jpg.4f78ceab59b1f2aed0cd4598f1fde223.jpg)
-1.jpg.724ebe2e4b65eed6e26e5ce7faeadfe0.jpg)
