altae
-
Posts
149 -
Joined
-
Last visited
Everything posted by altae
-
I might be overkill to open a topic just for this but I sincerely want to thank you guys for bringing back the old Shadows/ Highlights (Live) Filter in Photo Persona with the latest beta (1.7.2.424). In my opinion the old version (1.6) is so much better than the new implementation introduced with 1.7.
-
Phoто Customer Beta - 1.7.1.404 RC2
altae replied to Petar Petrenko's topic in [ARCHIVE] Photo beta on Windows threads
Now that's dedication -
Dirty? Why? You don't lose anything. It's inconvenient, yes I already wrote that. But it works perfectly and the color space stays consistent throughout the whole processing chain. And to be honest it also does not take up too much extra time because starting the plugin from within Affinity, making the desired adjustments and handing the result back to Affinity also takes up some time. But I agree, Serif should definitely fix this issue, in fact they claim their software is compatible to Photoshop plugins when in reality this compatibility is somewhat crippled as we can see in this thread.
- 98 replies
-
- 1
-

-
- color
- nik collection
- (and 3 more)
-
I agree that it's very disappointing that these issues still have not been fixed. But there is a workaround: Export the image as 16 bit Tif in the desired color space, use the standalone version of the plugin (the Nik tools have them and most Topaz plugins too), process the image as desired and export again to 16 bit Tif. After this you can continue in Affinity Photo. Certainly not very convenient but it works.
- 98 replies
-
- 2
-
-
- color
- nik collection
- (and 3 more)
-
Beta update?
altae replied to Gregory St. Laurent's topic in [ARCHIVE] Photo beta on Windows threads
A new beta has just been released. I hardly use the stable version anymore since betas are usually stable enough to work with. So a new beta now and then really is enough progress for me. -
Yes, indeed it's finally there
-
Well apparently someone at Serif does not like it (or thinks it's of low priority). But instead of ignoring all the people that have posted in this thread so far someone from Serif could post a statement explaining why this feature has not been implemented yet.
-
I'm well aware of the fact that only 100 % view is accurate. Nonetheless it should not happen that merging a live filter to a new layer makes the preview of the effect disappear completely. This is also not the case with other live filters, e.g.the high pass filter or the highlights & shadows filter. Such a behavior is highly confusing in my opinion.
-
Thanks for the confirmation
-
Like mentioned in the title: Clicking on a mask layer (which is assigned as a child to a pixel layer) while holding down "alt" does not bring up the mask edit mode (which shows the mask in grey scale) anymore. Is this change by design or is it a bug?
-
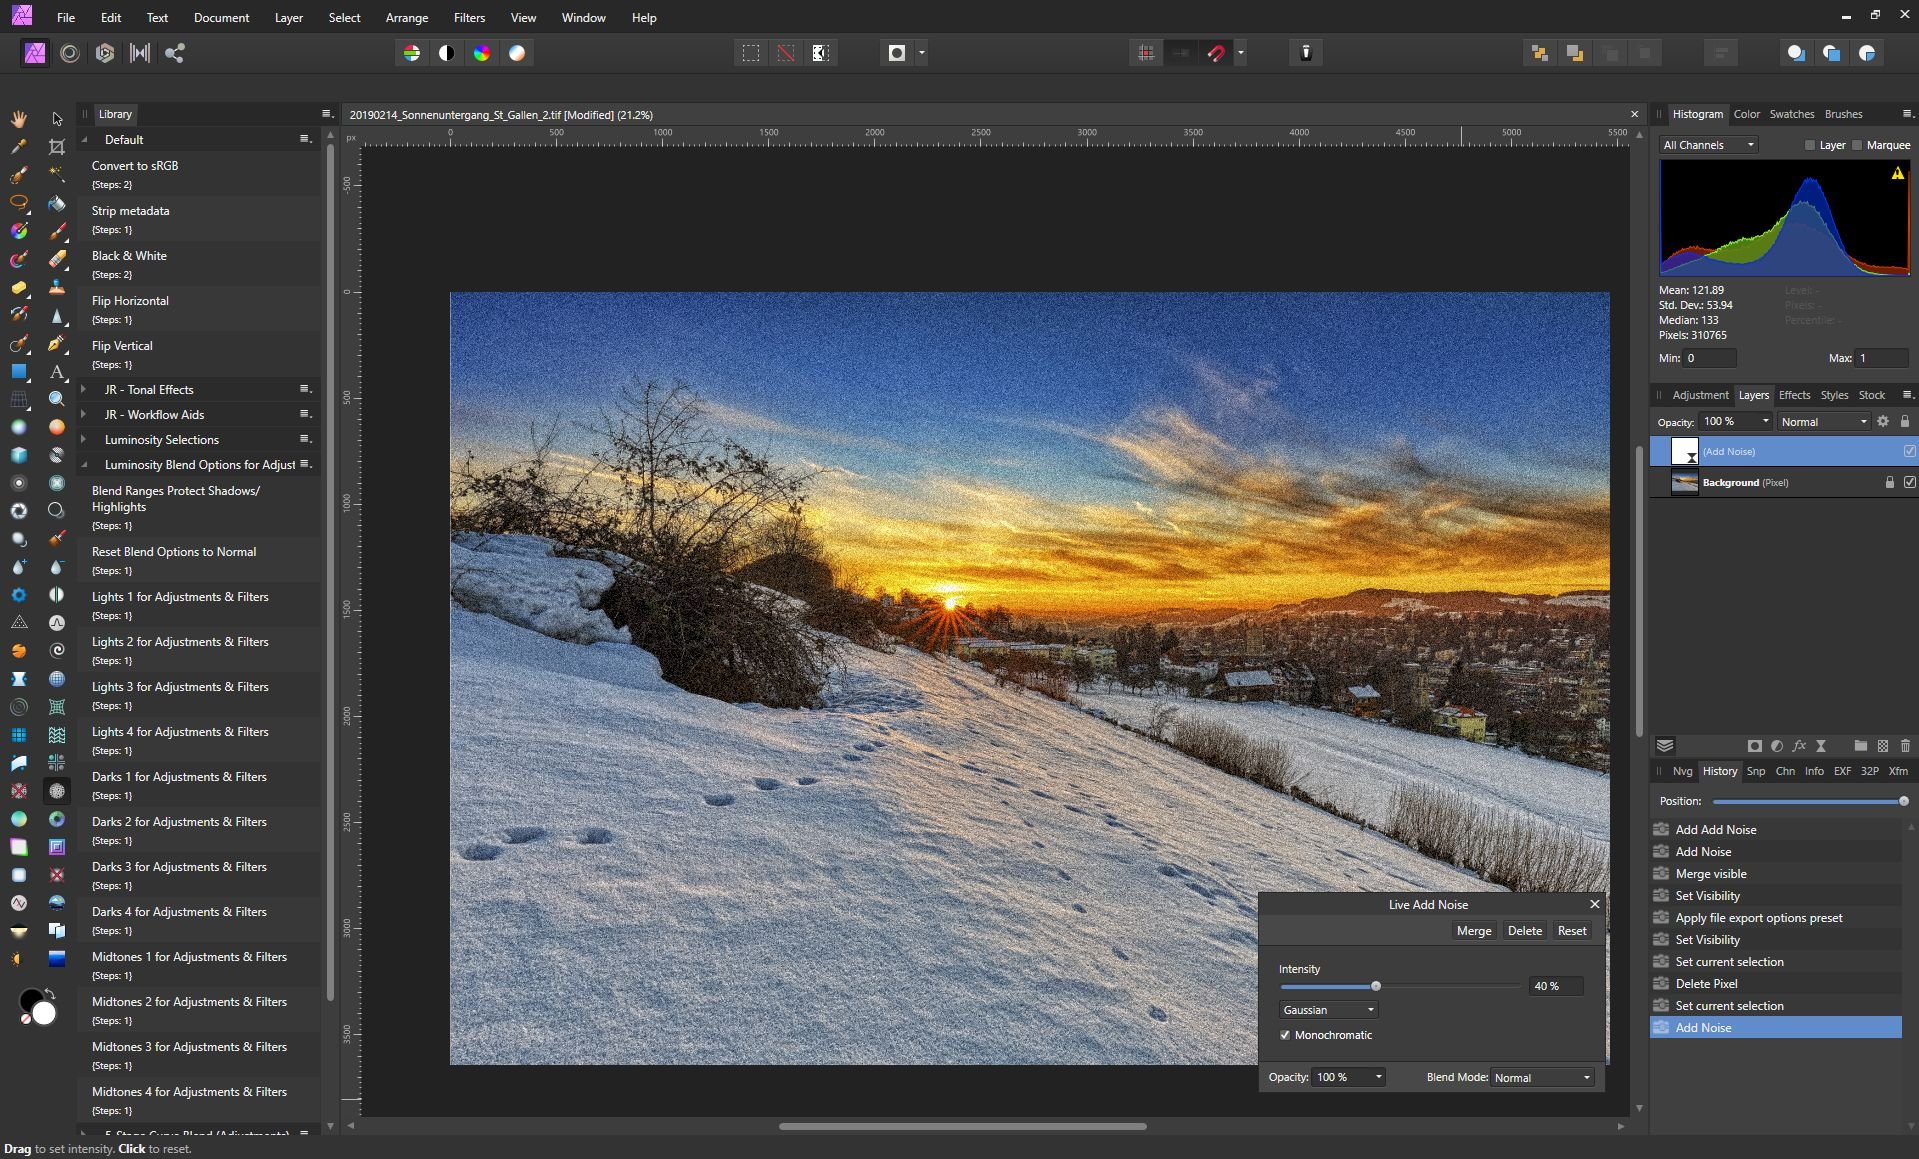
Sorry for the long time without reply, I was very busy during the last weeks. But I finally found time to investigate the issue further and provide more precise information. First and foremost: I was wrong because it is in fact a display issue. The exported results are correct, they contain noise even if the image is merged to a new layer before the export. Sorry for that Like I mentioned it's a display issue. What you need to do in order to reproduce the issue is the following. Take any image available and set Affinity Photo to a zoom level below 100 %. Add a "Add Noise" live filter and add some noise. Next merge everything to a new layer using the command "Merge Visible" (right click on the "Add Noise" live filter). Now the noise in the preview disappears. As soon as you deactivate the newly created layer the noise reappears. Now activate the layer above the live filter again and gradually zoom into the image. With every step you can see the noise reappearing gradually until you reach 100 % where there is no more difference between the merged layer on top and the live filter underneath. I've also attached a few screen shots which should help to further clarify the situation. P.S. I updated to the latest beta as you can see in the screen shots, the behavior is still the same.

-
It cannot be a preview issue as the noise is also not present in the exported file like I wrote in my post from an hour ago. I will provide a screen shot later.
-
Hm, are you sure you used the Live Filter and not the conventional filter for your tests? Because I am solely talking about the Live Filter version of "Add Noise". And attaching a file would be pretty useless in my opinion as it happens with all files, no matter if I use a Affinity Photo file, a tiff or a jpg file. I could of course add a screen shot if my description is not self explanatory but only later as I am currently not at home. And just to make sure: I am talking about merging everything down to a new layer without losing the layers beneath. I am not talking about merging everything to a single layer (and thus losing the layers beneath). I am quite surprised that there seems to be a problem to reproduce this as like I said on my machine (Windows 10 Pro, 64 bit) it happens every time I use the "Add Noise" Live Filter and try to merge the result down to a new layer. What's more it cannot be a preview issue as the noise is also missing from the exported file after having merged everything to a new layer.
-
Just a quick bug report: The noise added by the Live Filter "Add Noise" disappears again if merged down to a new layer. Can be reproduced with any image.
-
The file recovery is absolutely unreliable. In my experience the option to recover a document is only offered for 1 out of 10 crashes (or even worse). Don't count on it! The only thing that actually keeps you safe is ctrl + s. By the way, why is it so hard to press such a simple combination every few minutes? Nevertheless I'd also welcome a real autosave feature.
-
Presets for blend ranges
altae replied to altae's topic in Feedback for Affinity Photo V1 on Desktop
Thanks for your input. I know that there are ways to workaround the issue. But most of them involve almost as many clicks as simply setting the curves (my curves are not too complicated). I just wish there was a way to save my curves so I could use them whenever appropriate. -
Presets for blend ranges
altae replied to altae's topic in Feedback for Affinity Photo V1 on Desktop
This does not help me as I use blend ranges for adjustment layers and live filters. -
Please add customizable presets to blend ranges. I use them a lot, e.g. to protect highlights while sharpening the image or in order to restrict noise reduction to dark areas of the image. This means I have to set the same "curve" for blend ranges over and over again with no way to save my settings for further use with other layers and in other images.
-
Yes, please. Use layers and masks where appropriate (e.g. focus stacking) and where it's not possible to use layers give us other means of returning to the previous step in order to fix errors and improve the result (e.g. HDR and the panorama tool).
-
And why don't you simply enter the e-mail address you used to purchase the software and the product key you received after your purchase? As others have already mentioned this should fix the issue.
-
Denoise filter does not work in LAB mode
altae replied to altae's topic in [ARCHIVE] Photo beta on Windows threads
I'm not talking about the live filter (haven't tested that one). And the behavior you describe is definitely not normal. In RGB mode even a strength of 50 % has a very strong effect. -
Apparently the denoise filter does nothing in LAB mode. A working denoise filter is important for the LAB denoise technique. There is no preview and if I'm not mistaken the effect is also not applied to the image after clicking "apply".
-
I can confirm that the filter works again in the latest Beta. Now it's possible to darken or brighten the shadows/ highlights.
-
Thanks for the clarification. Looking forward to it's correct implementation as it's one of the tools I heavily rely on.
-
I've noticed that the shadows/ highlights filter (live and destructive) behaves differently than before. The old version used to offer much more control over the result. But what's even more important: In 1.6 the highlights filter used to reduce (darken) highlights, now it increases (brightens) them. Is this really the idea behind it? The shadows/ highlights filter used to be a superb tool to fix areas that were either too dark or too bright. Now it simply feels like one more redundant tool. Could anyone from Serif comment on this and clarify whether this is the intended behavior or if it's a bug?