Shotster
-
Posts
61 -
Joined
-
Last visited
Everything posted by Shotster
-
Siri's response: I guess we should all learn binary and hexadecimal, and learn to program in assembly language. 😜

-
No offense, but this is complete nonsense! The whole point of a GUI is to empower folks who have neither the time nor desire to poke at their keyboards and remember arcane commands. You can even do programming and build entire apps these days without mucking around in a terminal window. And things are only going to improve from there. 🙂
-
Ha! That shows you how intuitive this interface is. I didn't realize I had previously posted and resolved this issue months ago... Good grief, can we please improve the UX on this! 😐
-
I'm with @Phil_rose here. I'm on a Mac, and this feature simply doesn't work as described in this thread or as I would expect. Why, after entering an export path into that field, does the program still prompt me where to save the file? I could even live with that if it defaulted to the directory I specified, but it doesn't! Can anyone clearly and concisely explain how to use this feature to get files to be output at the location entered into the Path field? I've tried relative paths and absolute paths, and all the program does is prompt me where I want to save the exported file!
-
Editing Mask
Shotster replied to jmillz's topic in Pre-V2 Archive of Affinity on Desktop Questions (macOS and Windows)
That's odd. I just assumed that any adjustment which affects luminosity would work on a mask. 😕 Of course, curves (or even levels, as you indicated) will give you more control in that regard. -
Editing Mask
Shotster replied to jmillz's topic in Pre-V2 Archive of Affinity on Desktop Questions (macOS and Windows)
-
No, as long as I can specify the resolution, PNG format is acceptable. That said, being able to output in vector format would be ultra sweet. I do wish, though, that Affinity had better PNG optimization. I routinely get 50% to 70% reduction in file size using a free online utility. 😐
-
I'm not an expert, so this might not be the most efficient way to go about it, but you could define each art board as a slice and then export the slices in one fell swoop. You might want to familiarize yourself with the export persona. You can even specify file naming conventions.
-
Even works with transparency gradients! Wow, this is huge! Why didn't somebody tell me about this before! 😜
-
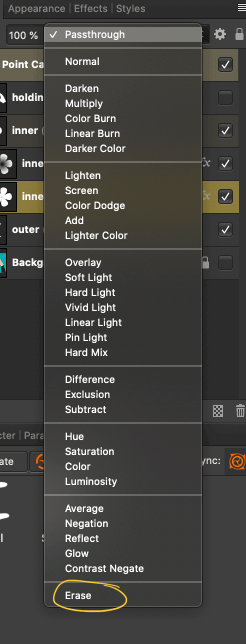
Correction: The effect is constrained to the group in which the erasing layer resides. This is even more useful! I was able to achieve the desired effect with just layers and blend modes... I wish I'd been aware of this long ago. I've got a lot more experimenting to do. This is huge! 😃
-
Wow, I just learned that the Erase blend mode is in the Appearance panel for strokes and fills! The only problem is that it doesn't work like it does for layers. For layers, the Erase blend mode erases everything in all layers below, whereas in the Appearance panel for a specific layer, it affects only that layer. I guess that kind of makes sense though. I was previously unaware of this, and it's a big deal, because it means I can do certain things more easily now. I'll have to experiment a bit, but this looks quite promising! 😁
-
😐 Some additional info... There's an "erase" blend mode for layers. Why can't we have that option wherever a blend mode can be selected, such as for outlines in the layer effects panel?
-
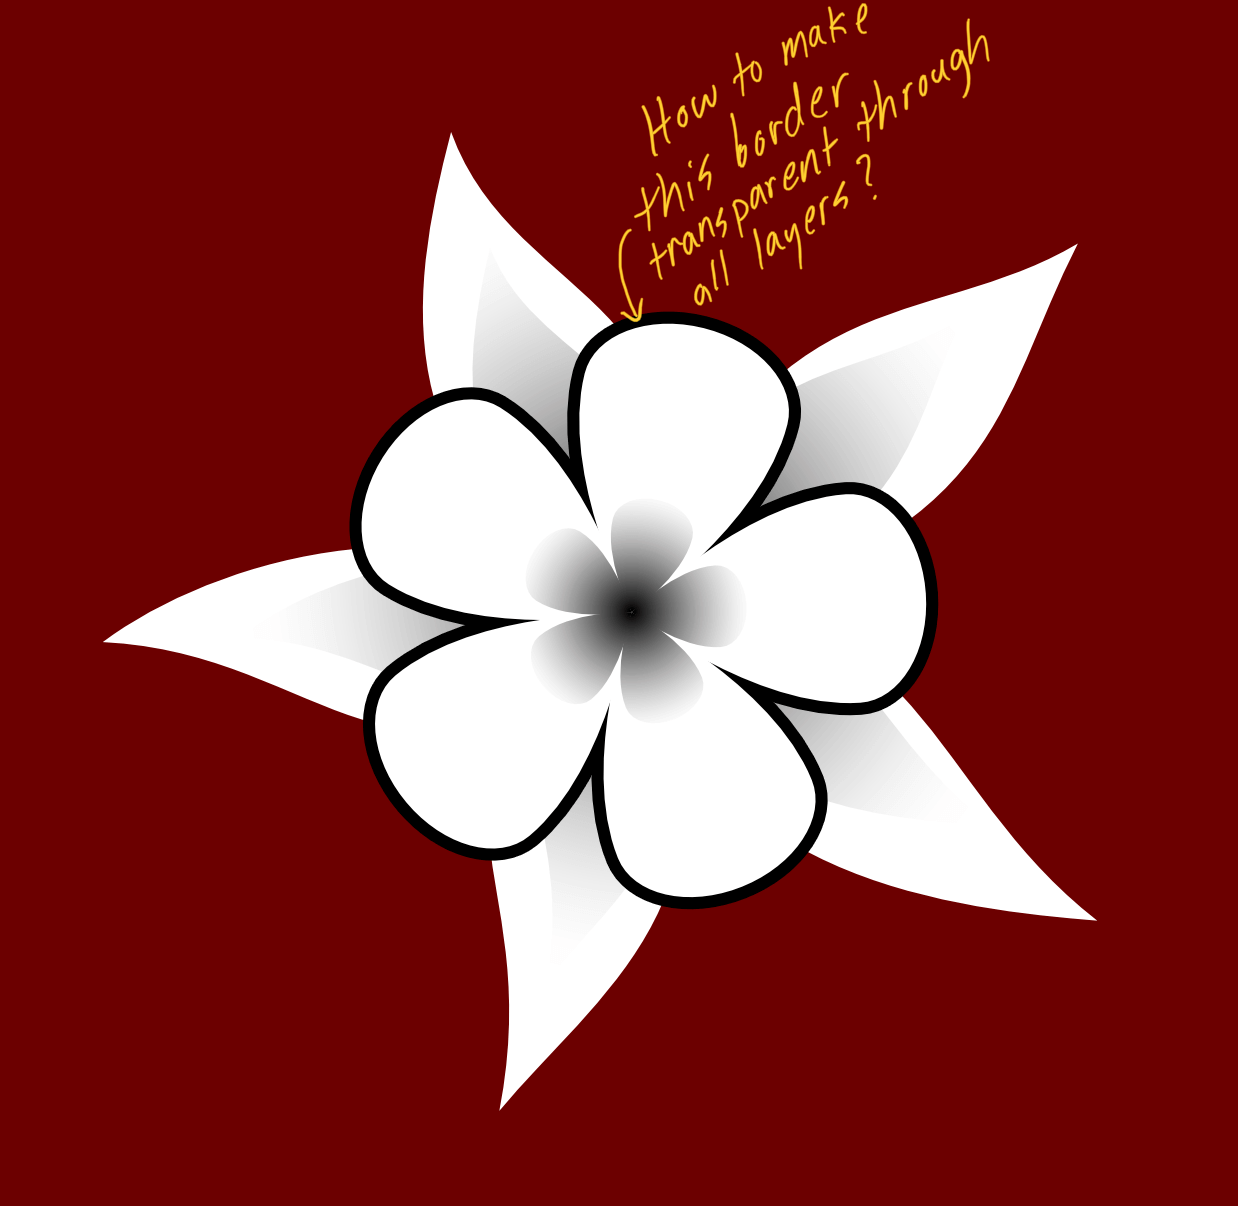
I often find that I want to make a border or outline transparent such that it "cuts through" all underlying layers. For example, consider the attached image below. Is there a way to make the outline transparent such that the red background appears? I realize I can jump through all kinds of hoops by expanding strokes and performing boolean operations, but that's quite cumbersome and time consuming. Is there a way to set transparency such that everything beneath (save perhaps for the art board) is transparent? (Only a "yes" response is valid. 😉)
-
Editing Mask
Shotster replied to jmillz's topic in Pre-V2 Archive of Affinity on Desktop Questions (macOS and Windows)
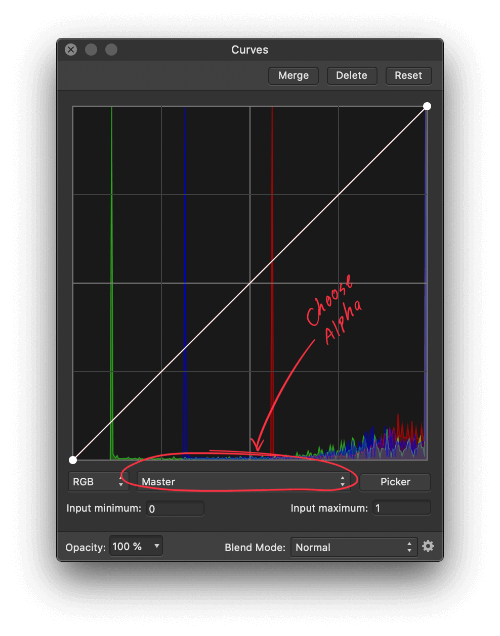
Thanks! That never occurred to me. I even searched the docs and couldn't find info on how to apply adjustments to a mask. QUESTION: Just curious, from a UX perspective, why it's even necessary to choose the alpha channel after nesting the adjustment layer under the mask layer. If that's not done, the adjustments seem to have no effect at all; so why wouldn't the program do it automatically? It seems like that step could be eliminated for the user. Or are there scenarios where the other channels could be also be used when the adjustment layer is the child of a mask layer? -
Why no "Zoom Blur" live filter?
Shotster posted a topic in Feedback for Affinity Photo V1 on Desktop
I like to do as much as possible non-destructively, so I was surprised to learn there was no live filter for Zoom Blur. That forced me to merge everything to a new pixel layer and then apply the Zoom Blur from the Filters menu. I was just curious if there was a technical reason it was omitted or if it's just an oversight. Also, as I recall, this effect is referred to as Radial Blur in Photoshop, so when I discovered that Radial Blur in Affinity Photo was not what I wanted, I almost gave up, thinking Affinity Photo didn't have this feature. FWIW, "Radial Blur" seems a more apt description of the effect, whereas what Affinity Photo calls "Radial Blur" would IMHO be more aptly named "Circular Blur". -
Thanks! I was wondering exactly the same thing.
-
Good to know. Thanks! 🙂
-
A fill can be added to an artboard, but not a stroke. Why not? You can specify a stroke, but nothing at all happens. 😕
-
This issue happened again, and I can't get the !X@#%$# toolbar back! Seems the toolbar is invisible and not where it should be on the screen. See attached animated GIF that depicts choosing Customize Toolbar from the View menu. The toolbar editor comes "out of nowhere". (Sorry for the poor quality, but I tried to keep the file size down.)
-
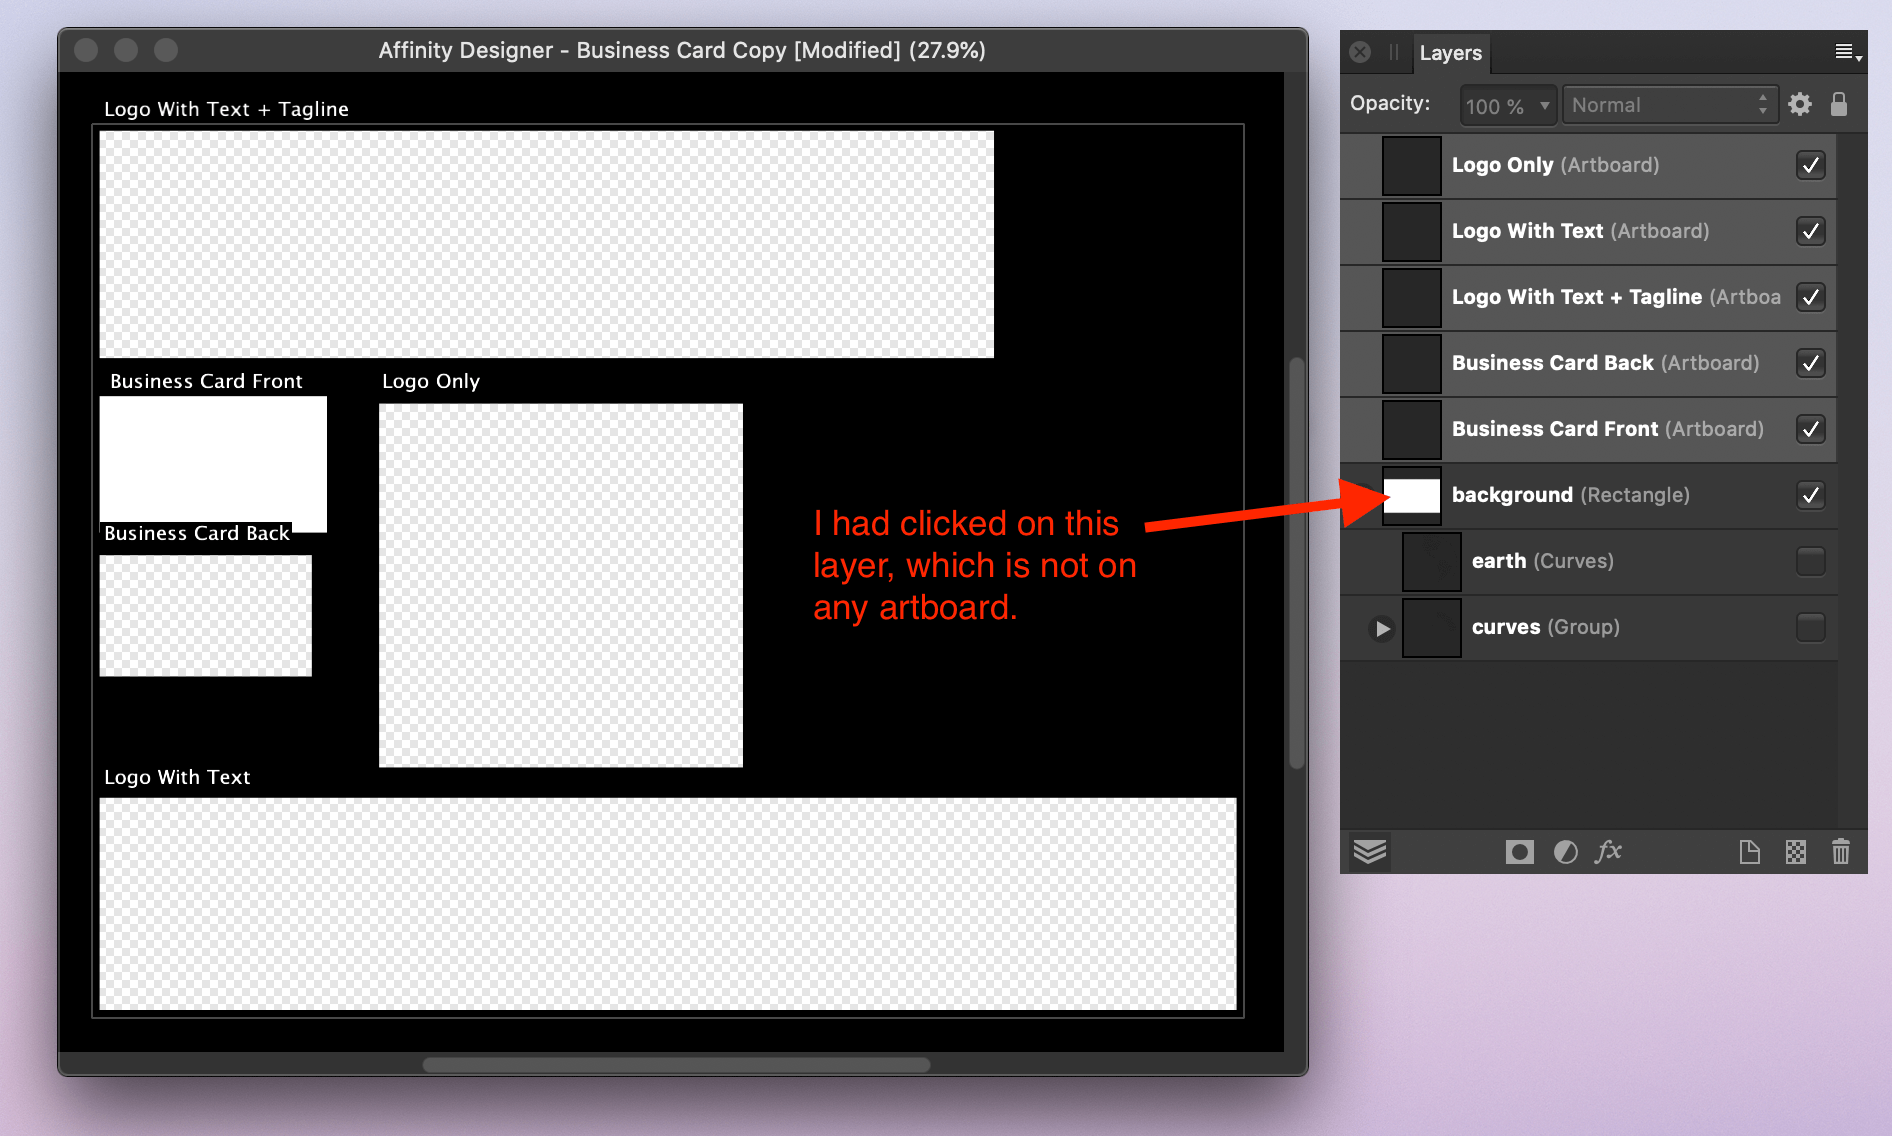
Ok, so I had apparently clicked on a layer that was outside all art boards, so the bleed outline appeared around the entire document. Perhaps that's the intended behavior? It does work as expected when individual art boards are selected - i.e. the outline appears around only that art board.
-
That worked! I'm back in business! (...except, of course, for having lost my custom settings) Thanks, @MEB and @Joachim_L!
-
Your answer implies that all artboards should have a bleed, albeit the same value. However, when I “show bleed”, I see an outline around the entire document - not around each art board.
-
Yes indeed, several times. Has no effect. It does not appear when not in separated mode either. EDIT: Oh wait, I’m not sure I tried toggling the context toolbar while not in separated mode. I’ll try that when I get to my machine. I have had an iPad connected to this machine via Sidecar, but not using AD per se. Maybe there’s an issue with AD and Sidecar?
-
Thanks, but no, it’s checked. I’m going to try nuking the prefs folder if I can find it.
-
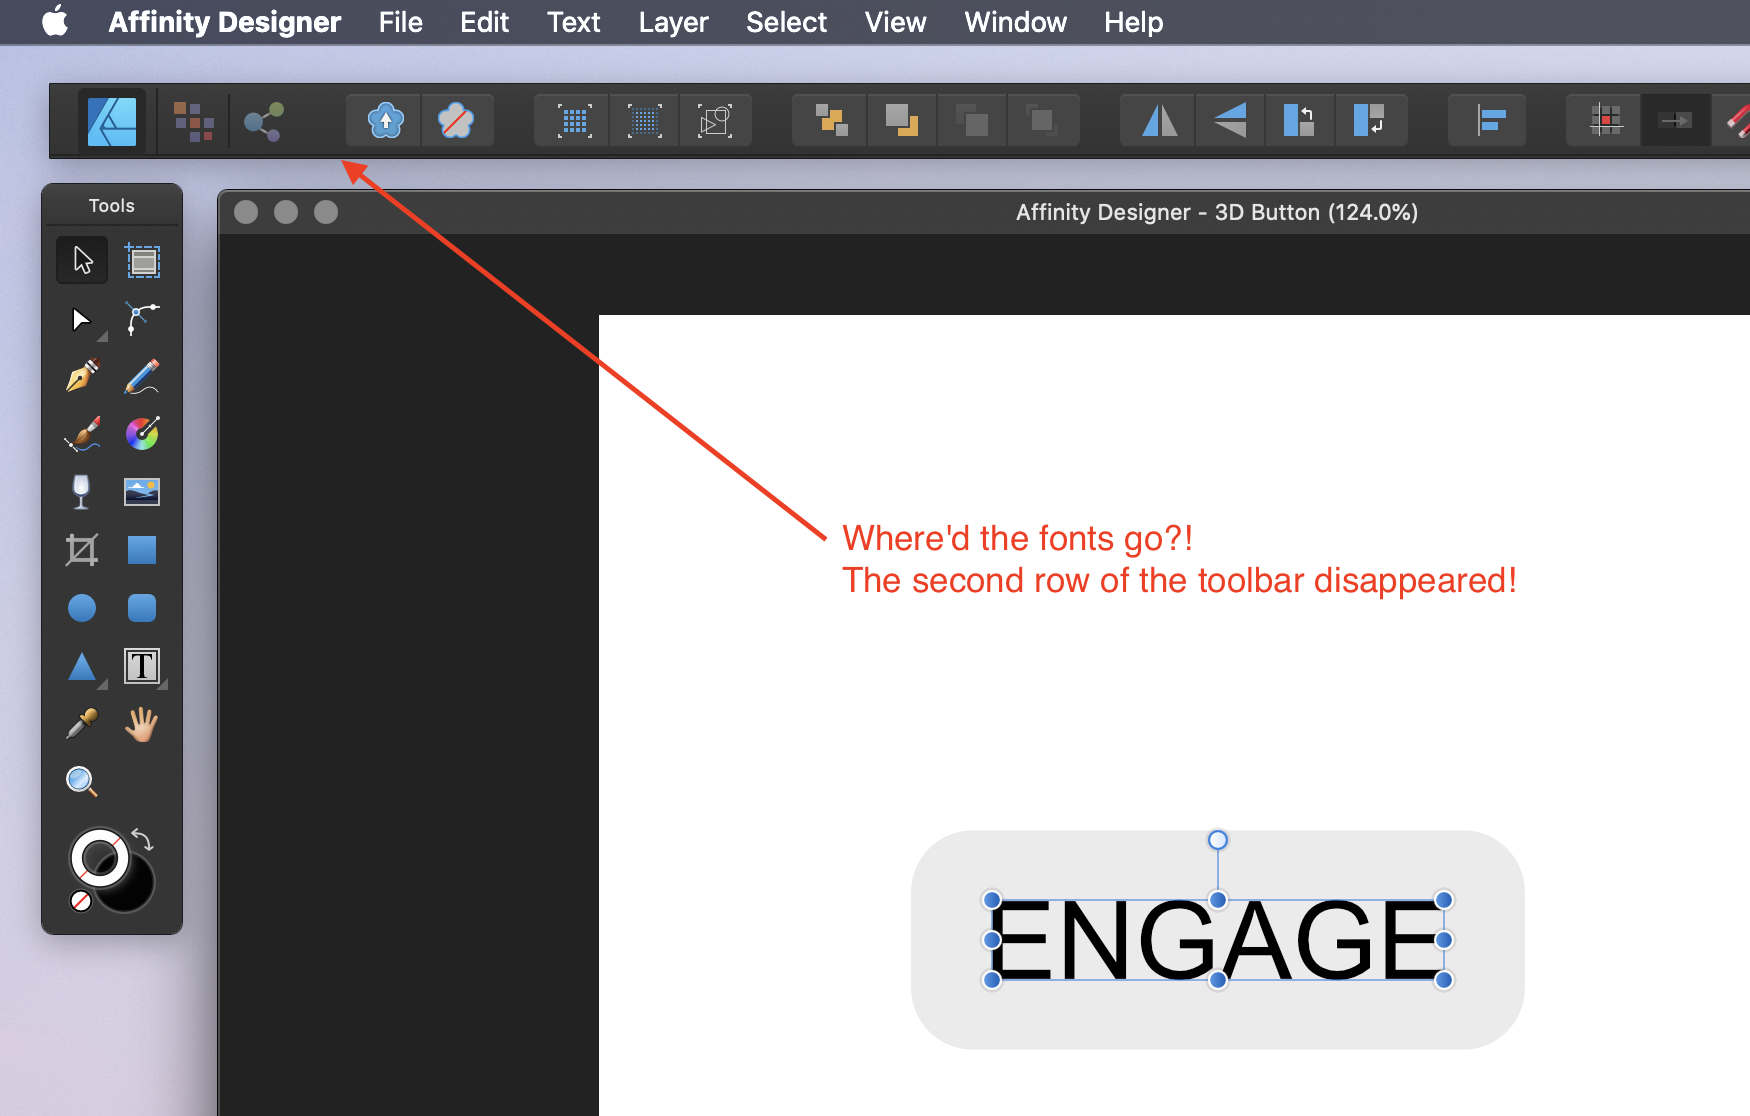
I have already spent more than an hour trying to figure out how to get my font menu back in AD. The entire toolbar disappeared for some reason, and I managed to get it back (sort of) by resetting everything (control + restart app). However, the 2nd row of the toolbar, which contains the font menu etc. is nowhere to be seen! Anyone have any idea how to get it back? I'm at my wit's end. Everything is fine in AF, but AD just inexplicably flaked out. Something occurred at one point that led me to suspect that AD thought there was a touchbar present, but I'm on an iMac. Any suggestions?