silverdust
-
Posts
55 -
Joined
-
Last visited
Everything posted by silverdust
-
 I can but the 2 reasons why I'm not doing so is 1) These circles are just a contrived example. In the real case, one of the circles is a group of shapes that make up a logo. Clicking it against the single circle does not allow the combine feature since it's a group. 2) I would like to repeat this same thing with mix-blend-mode on the web so I wanted to know how best to achieve this with affinity blend modes.
 -
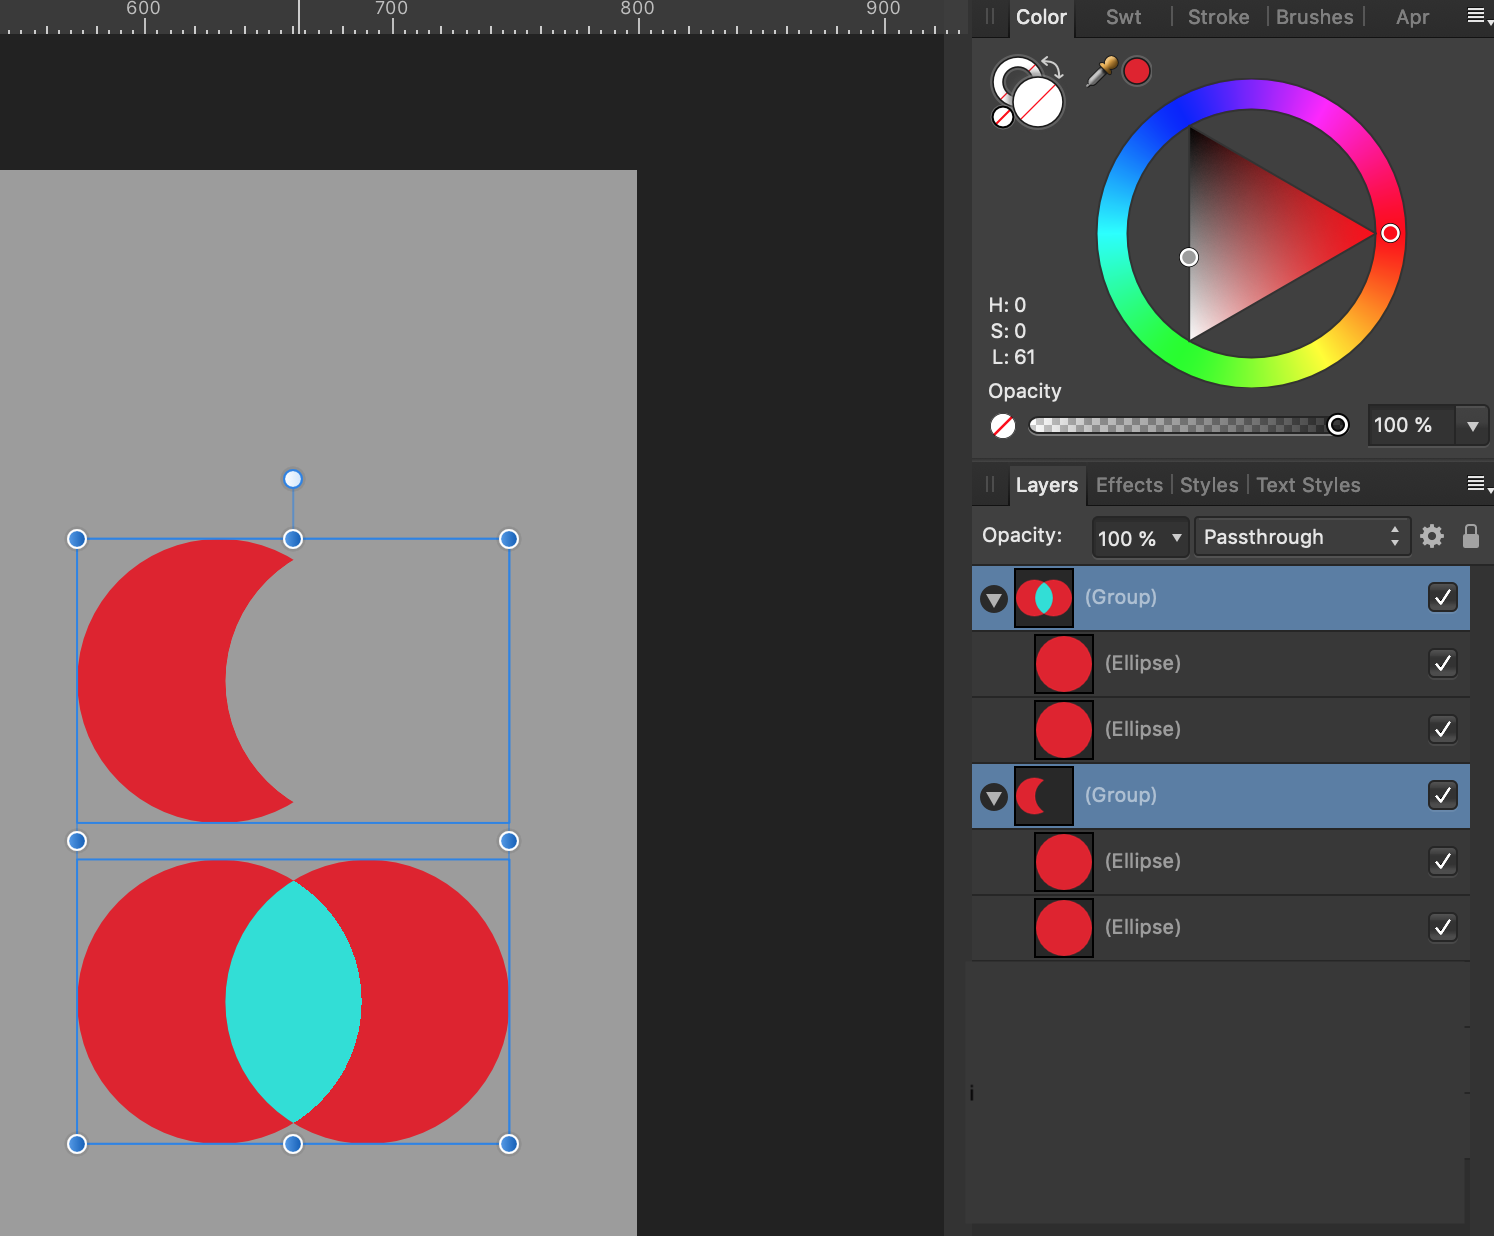
I am trying to get a sort of contrast negation where I erase the part where 2 shapes intersect. In my first example, I placed both circles in a group and I apply an Erase blend mode on the first. This totally erased the other circle from the intersection point. In my second example, I use the contrast negate blend mode and it gives something closer to the result I want. I want it to erase the intersection area but retain the other parts. How may I do this? i.e that teal-like color should go away and take the background gray color.

-
Thanks @v_kyr
-
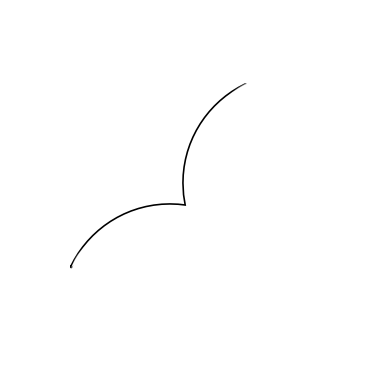
@firstdefence the shape formed from the subtracted circles is exactly what I'm trying to avoid. Can I just clean it off? Is there a path eraser tool? I want to be left with this:
-
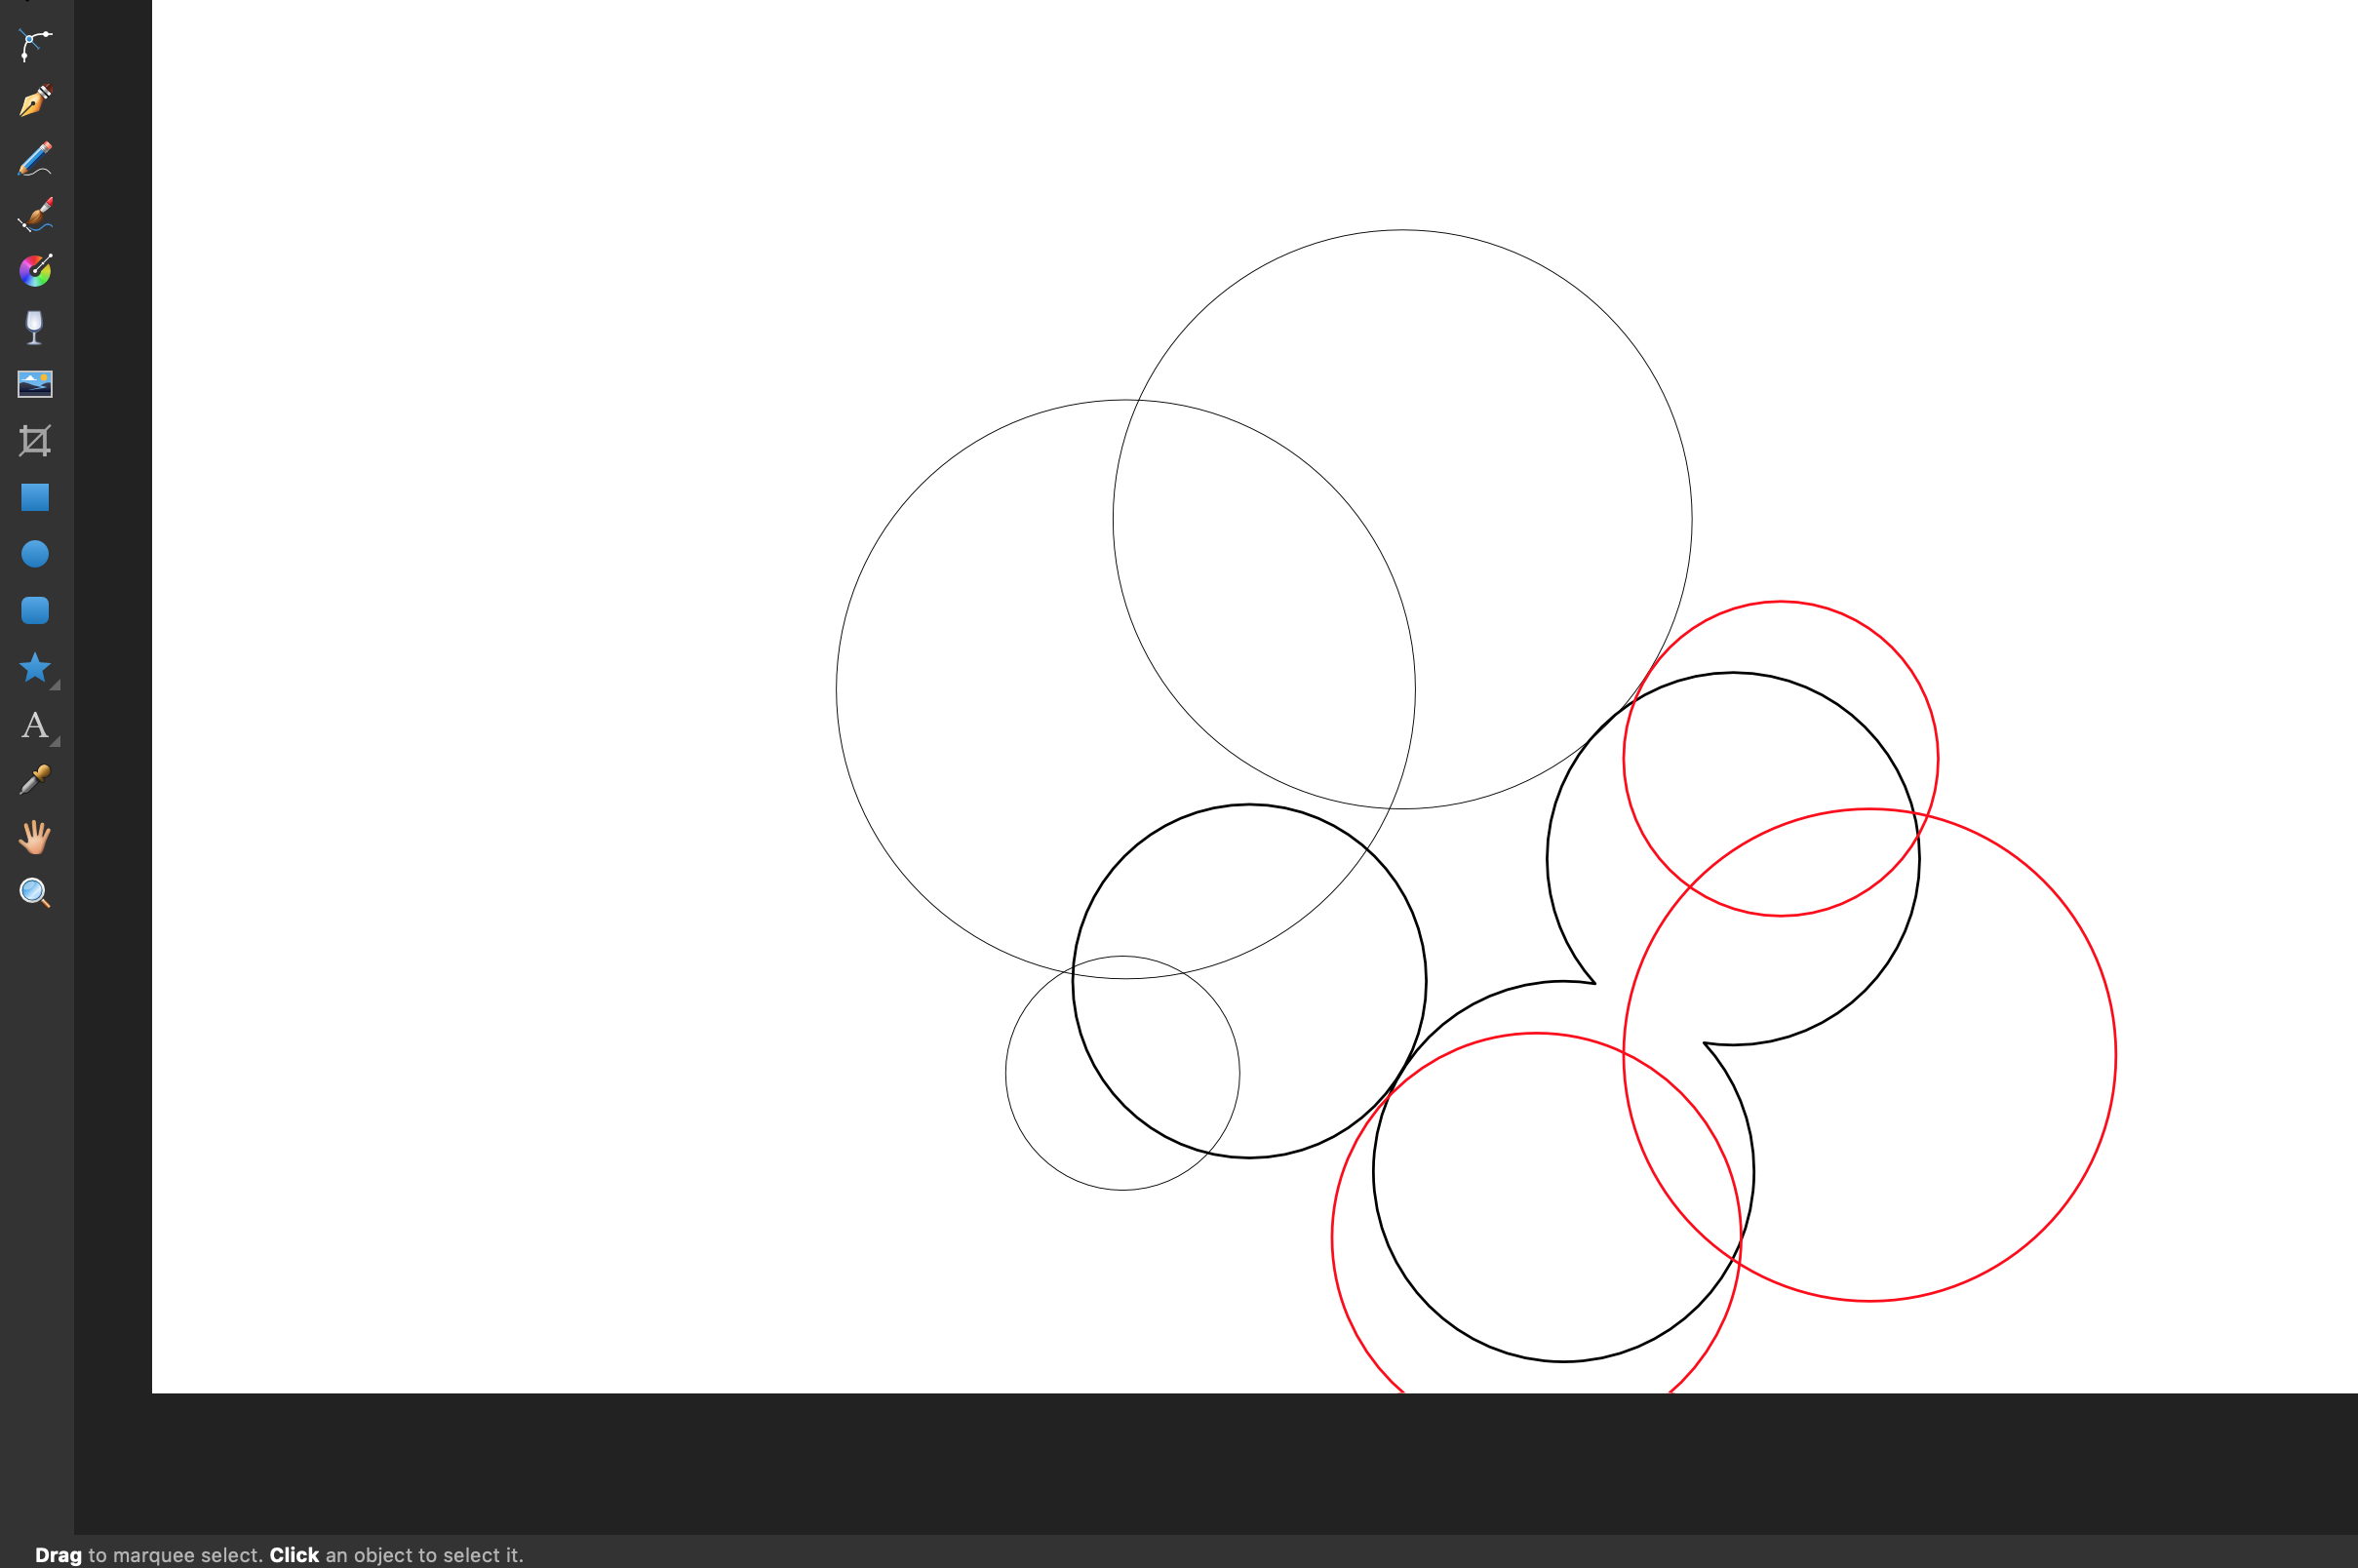
I've looked through the forums for existing questions on the shape builder tool and it seem like it's yet to be implemented. I'm stuck on building something and I'll like a help with the best approach to go about it in affinity designer. The red circles in the attached image indicate parts that I want to subtract from the thick black circles. But unlike regular subtraction, I don't want those ends taking the shape of the subtracted shape. I want something like the behavior of shape builder where I completely erase those red circle areas
-
Thanks so much @walt.farrell and @reglico
-
Is there a way to convert a shape or curve to picture frame. I was designing a mockup in Designer and I wanted to import an image into a custom sized rectangle and have it adjustable within the shape to show parts of the image I want. Any good suggestions on how to do this? And if none, can this be added to Designer?
-
Shaped Image Boxes / frames
silverdust replied to epenrice's topic in Feedback for Affinity Publisher V1 on Desktop
@αℓƒяє∂ my bad. I had just searched the forum and found this. Do you know if this can be done in Designer? -
Shaped Image Boxes / frames
silverdust replied to epenrice's topic in Feedback for Affinity Publisher V1 on Desktop
Hey @MEB I don't see Convert to Picture Frame. Here's a screenshot of my Layer Menu in Affinity Designer
-
Slicing curve
silverdust replied to silverdust's topic in Pre-V2 Archive of Affinity on Desktop Questions (macOS and Windows)
Thanks so much @Alfred . Got it to work this way -
Slicing curve
silverdust replied to silverdust's topic in Pre-V2 Archive of Affinity on Desktop Questions (macOS and Windows)
Hi @Alfred your idea sounds nice but I don't get how the divide button and the cog tool come together exactly? Like do I create a cog first and convert it to curve then try to divide with the divide tool? The previous method already works but I'm curious and would like to weigh them both to see which'd better to use in the future -
Slicing curve
silverdust replied to silverdust's topic in Pre-V2 Archive of Affinity on Desktop Questions (macOS and Windows)
Wow thank you so much @toltec -
I have a vector pizza and I'd like to slice it like I'm slicing a real pizza but now into different layers/layer groups. How can I do this?
-
@JimmyJack I'll have to try this on something else soon so I don't forget. Thanks
-
Yes @R C-R it was spread that did it for me. @toltec led me in the direction and I figured that I needed "include spread mid points". Thank you
-
Thanks @toltec. Just what I needed
-
Sometimes when I hold an object and move it around in a canvas or an artboard, it can snap at the vertical and horizontal centers. For a while it's not been snapping when I do that. I have all the options for snapping turned on yet it doesn't snap to center. Maybe I've disabled something accidentally. Would just love to get that back. I've since had to use ruler guides or arrange which are longer to me than simply just snapping to center.
-
Thanks once again @reglico . I didn't even think of this. Was too focused on achieving it with "Break Curve"
-
@R C-R I totally didn't see your message. Sorry if it seem like I ignored it. Just saw it in my email and was like I didn't see that on the website
-
Oh did you just add the screenshot? Didn't see it earlier. That's what I get. I guess it works for me then. Thanks for the tip. But I could use a little tip since I'm still here although it's not completely related to the topic. I've been trying to break the S to two curves and it's trickier than breaking basic shapes. Could use some help perhaps a screenshot. I just want to cut out the upper curve of the S and place it above something else
-
Ctrl + click on my Mac gave me a secondary click (right-click) option which had the "convert to curve". That's probably not what you meant but cmd + click wasn't doing much
-
Thank you @reglico I almost never use the main menu. I should have seen it there
-
I can convert shapes to curve but I'd like to know if I can convert text to curve as I don't see an option for that in the context menu when I have a text selected. What I'm really trying to do is break up a text so I could put one part of its layer above an object and the other behind the object like the object is going through it. It's actually just the letter S.
-
Thanks. My problem for now is it also affects the background image. Maybe I can figure some way around it if I hack around more but any tip would be appreciated
-
How can I achieve this kind of effect on a drawing . Like it's sorta cleaning off