Gregory-CJ
-
Posts
190 -
Joined
-
Last visited
Everything posted by Gregory-CJ
-

Time Lapse Video Recording for AP
Gregory-CJ replied to Gregory-CJ's topic in Feedback for Affinity Photo V1 on Desktop
Thanks v_kyr for your info. Looks like my version of Camtasia is so old that it doesn’t have those kind of input capture settings. thanks for your recommendation about hustl. I have started using IShowU and am very happy with it’s robustness and functionality. Are programmers the only ones to use underscores in their name/alias ? -
Share your Work-- Forum overhaul
Gregory-CJ replied to Gregory-CJ's topic in Feedback for the V1 Affinity Suite of Products
Yes the gallery app looks like a fine solution! Whether Serif has the time /interest or resources to deal with this upgrade is the question. -
Time Lapse Video Recording for AP
Gregory-CJ replied to Gregory-CJ's topic in Feedback for Affinity Photo V1 on Desktop
UPDATE. So I " recorded" a test painting with the method fo making snap shots of the process as it developed, then made a QT recording of the event by enabling the snap shots in sequence . It did produce a somewhat artificial looking time lapse effect but nothing near the time lapse effect that I am looking for. I have downloaded and played with iShowU software and this is just what I am looking for. Produces really great Time lapse QT or MP4 movies. -
Share your Work-- Forum overhaul
Gregory-CJ replied to Gregory-CJ's topic in Feedback for the V1 Affinity Suite of Products
Artstation looks like a fabulous place for artists and of course Instagram (which appears to take years to build any kind of following) Then there is CG society and Deviant Art ( which is poorly designed and needs a major overhaul. I will probably cancel my acct there.) As you suggest , in time Affinity forums could become more robust.. -
Share your Work-- Forum overhaul
Gregory-CJ replied to Gregory-CJ's topic in Feedback for the V1 Affinity Suite of Products
I did hesitate initially about posting the request to overhaul the "share your work forum" as I would rather that Serif focus in on perfecting their software but having said that, it would be nice to "see" what people are doing....sketching or polished work in a thumbnail UI rather then "reading" titles in a text based UI. Thanks Garry P for the spotlight link... definitely a curated environment. Perhaps a thumbnail UI for Share you work forum would encourage more traffic and participation of the end users. Right now I wonder if it is really worth my time to post there? -
Affinity photo is such a great tool and I would like to see an image/ thumbnail based UI for the Share your work portion of this forum. Right now with the text based forum presentation, it doesn't really lend itself to browsing , in my option. A richly, decorative page with the current thumbnails of images created by the users would be very attractive and would invite more participation within the share your work forum. Your thoughts would be appreciated. see attachments.

-
Time Lapse Video Recording for AP
Gregory-CJ replied to Gregory-CJ's topic in Feedback for Affinity Photo V1 on Desktop
Thanks v_kyr for your suggestions. My experience to date has been running Camtasia 2 on my old Mac workstation.. and with no apparent time lapse feature.. needless to say drowning in oceans of GB's of unedited video is not a fun experience. I did find two Mac products that offer time lapse at a reasonable price point. ~ $24- $35 USD ishowU and Screenflicks , both offer a way of setting the frame rate down to very low numbers... 3FPS or even 1FPM (minute)... from the standard 30 FPS This could work for me. But giving the snapshot feature within AP more thought and the advantages, as I see it, are You control what stage of the image is saved as a snapshot. you control when a stage of the image is saved. Snapshot doesn't record the zooming nor the rotation functions so the image can be kept to perpendicular - which enhances the video presentation. (watching a tutorial that has a lot of zooming and rotation can be uncomfortable ) you can leave AP at anytime without the concern of remembering to turn off/pause the recording video there is no nagging feeling that a recording software in turned on and is recording your mistakes/pauses ( unless you want your mistakes to show) So how to deal with a large library/history of snapshots? Exporting each snapshot as a new file is one option but not practical if you have 200+ snapshots of your image. Since I can spend upwards of 40+hrs on painting an image and need an alternative from exporting each single snapshot. This solution came to me last night when I should have been sleeping. Say it takes me 40 hrs to complete an image and I have 200 snapshots stored in the snapshot panel as a result. So working backwards, first determine the length of the video you are shooting for...say 10 minutes. 10 minutes = 600 secs 600 secs /200 snapshots = 3 seconds per snapshot. I would simply run Quicktime -screen capture , determine the screen area I want to capture , ie., the whole image only /or with UI and with the snapshot panel off camera, I would click through the history of the snapshots starting from the very first one, pausing 3 seconds before selecting the second snapshot and so on until the entire library /history of snapshots have been enabled and recorded. Now there you have it, a video 10 minutes in length showing the complete development of the newly painted image. Obviously, this "formula" can be modified. Then I would take this raw video footage into a video editing software to add titles, slow down or speed up specific areas of the movie , add special effects etc. I think this method is clean and simple and prevents drowning in GB's of raw video footage. Your thoughts are appreciated . -
Time Lapse Video Recording for AP
Gregory-CJ replied to Gregory-CJ's topic in Feedback for Affinity Photo V1 on Desktop
Totally Brilliant Solution Old Bruce... thanks .....that solves the problem of dealing with a massive amount of video that needs to be edited....... I can just pick and choose what I want captured and then string all the images together in my video editor ,, and wall-a I have a video....And I can change it up ,, as the screen capture only captures the image and not the UI... if I want, I can command shift 4 + space bar to give me a capture of the whole UI..... brilliant . I have run up against the limitations of Procreate's video recorder.. if you choose a low resolution then the video is poor and if you choose 4 K video , the video might be so large after you finish the painting , that you cannot open it... happened to me..... so again Thanks Old Bruce.! -
One nice feature that I could really use when digitally painting in AP would be a way of recording the development of the painting as I went through the process of creating it , from start to finish. This would greatly simplify the making of Youtube videos on how I create digital paintings in AP. I know that Procreate has a built in time lapse recorder that seems to record every 20th or so stroke and comes up with a very nice yet abbreviated video of the creative process. This is probably the main reason one sees more videos featuring art created in Procreate than AP. I know there are other video recording options, like Quicktime etc. but these options record the entire process and produce huge video files and a large amount of time is needed to edit these movies. Procreate's time lapse recorder makes it simple and as I have stated, it does not record every stroke but does some kind of averaging.... by recording every 20th stroke or something like that. Thanks for considering this idea.
-
Yes, moving the eye over a few pixels helped... thanks
-
Yes, I can see that, will give it a go ..... just nudge it a few pixels and see if there is any improvement.
-
Hi Gabe, Thought that you might enjoy seeing my latest digital painting. hhttps://forum.affinity.serif.com/index.php?/topic/81071-beautiful-lady-in-purple/
- 8 replies
-
- 1
-

-
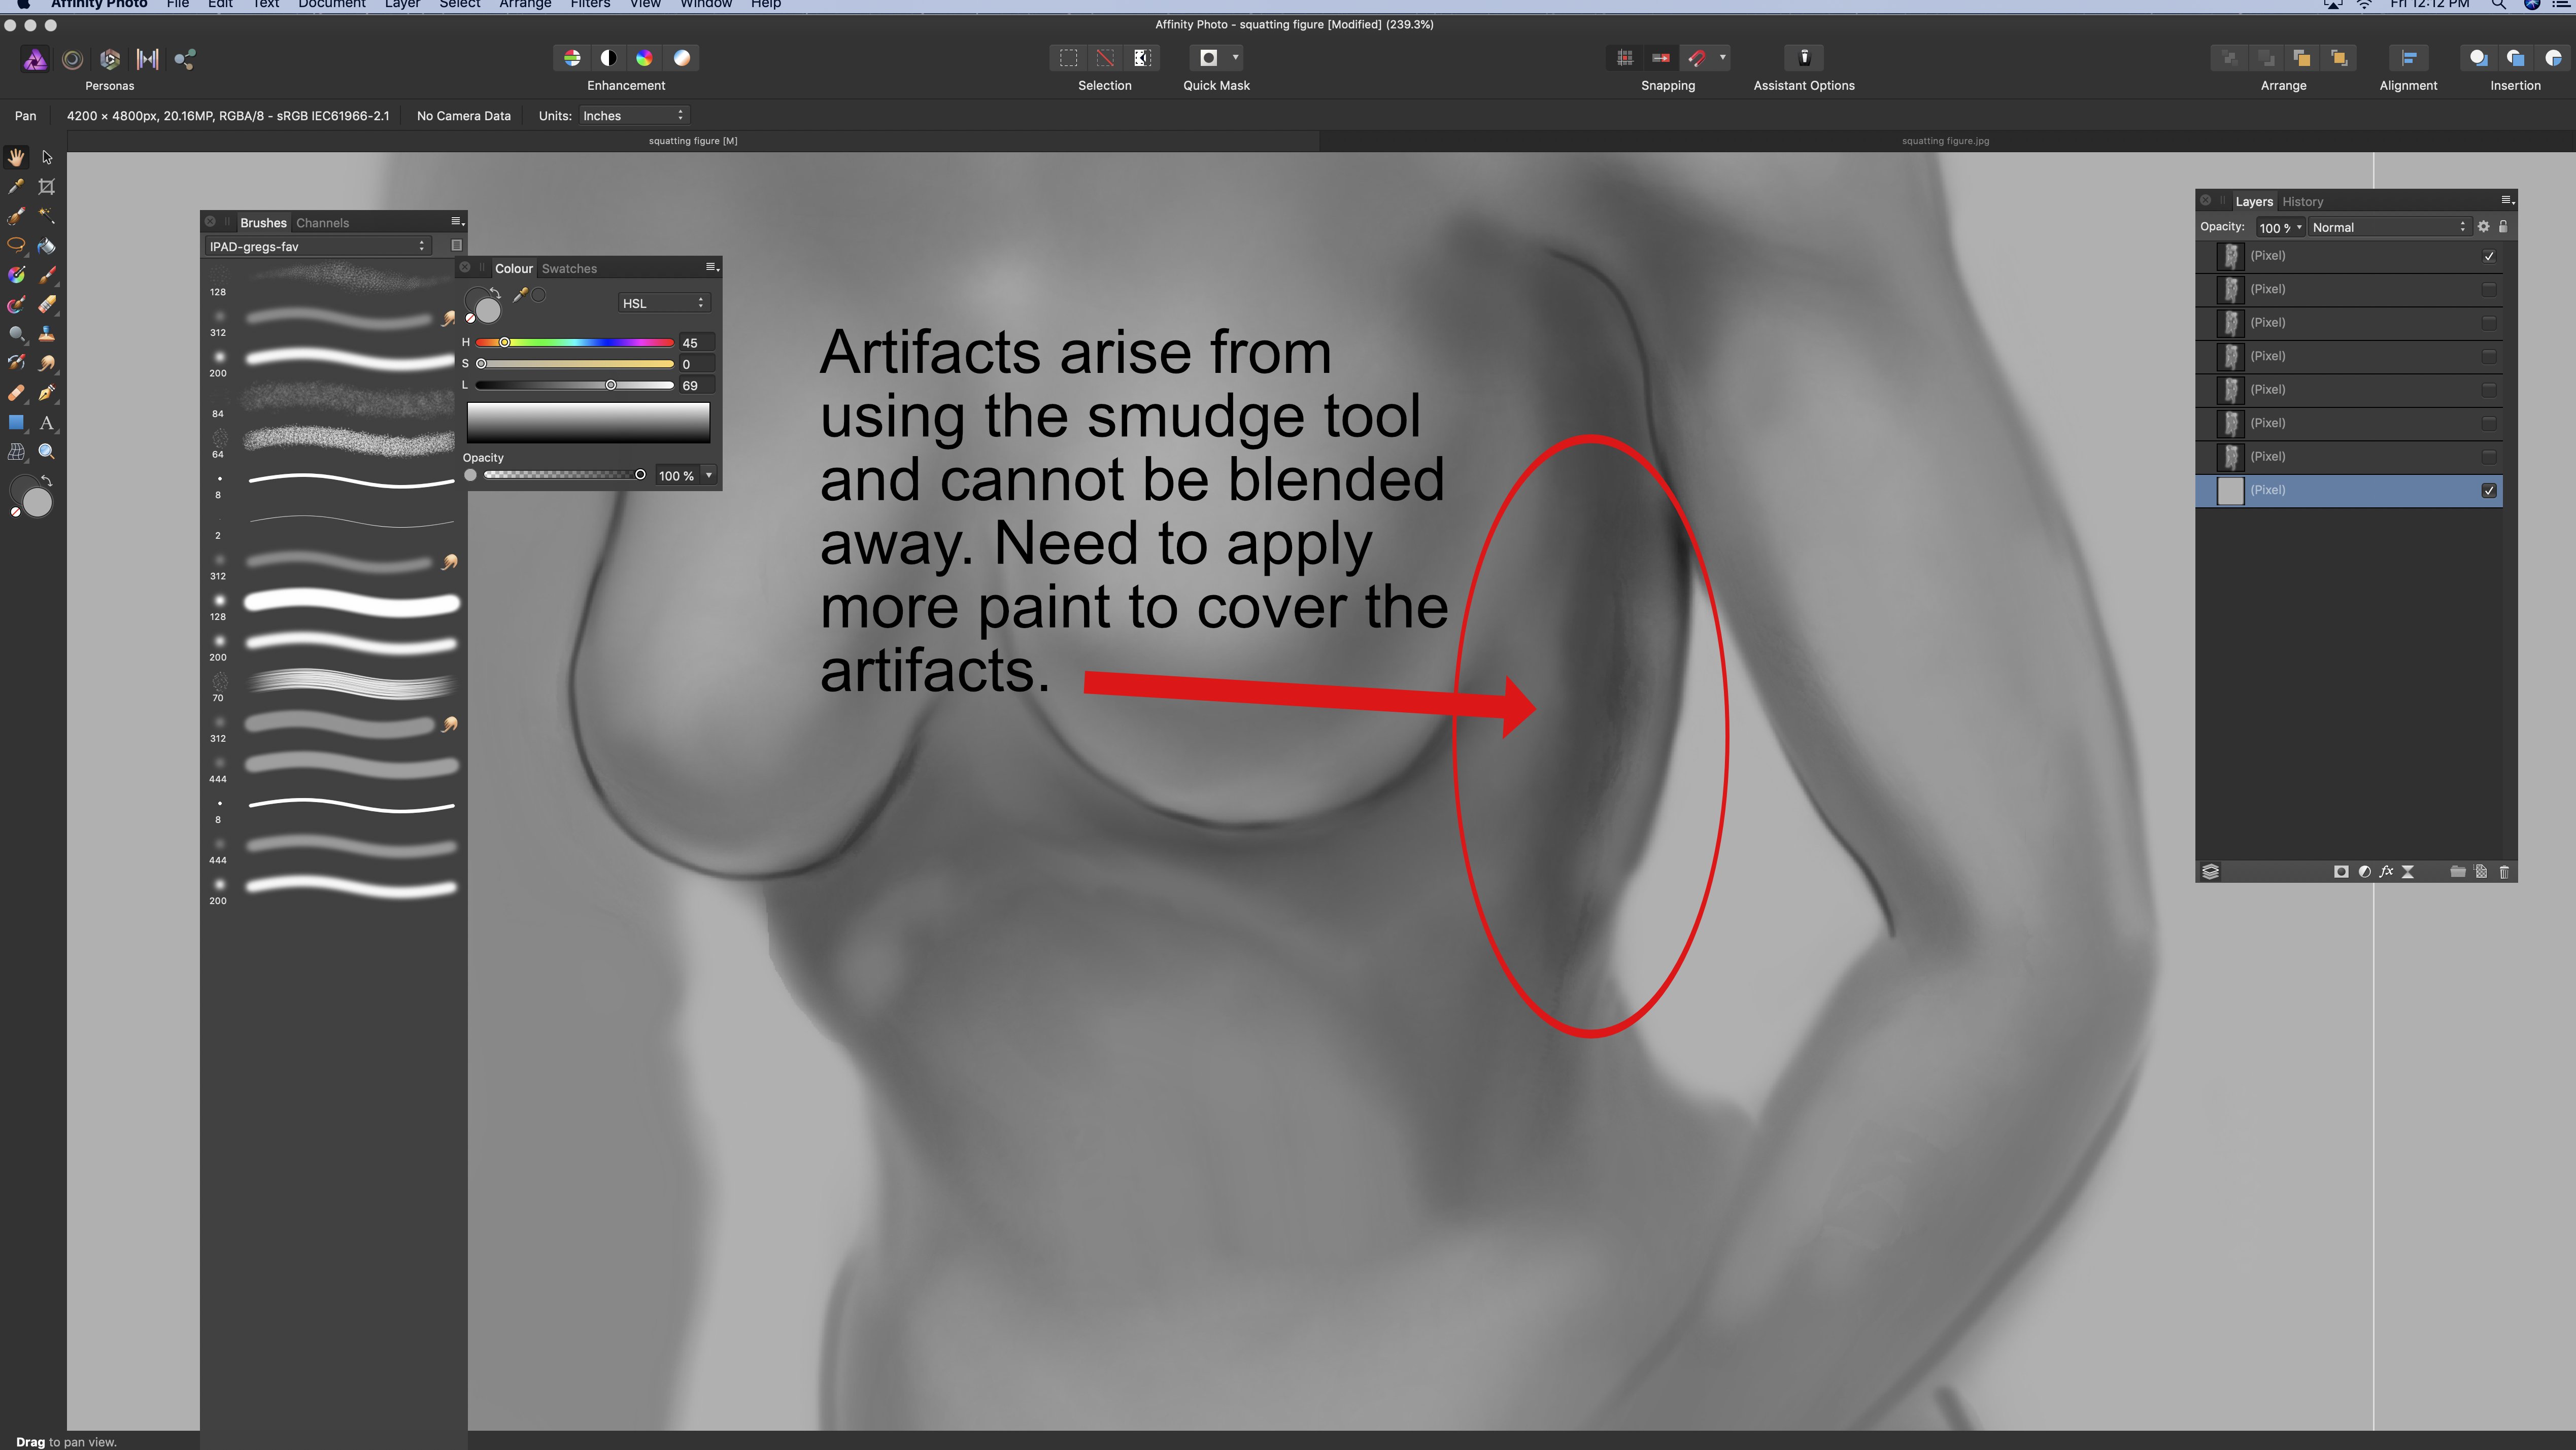
- smudge tool
- smudge tool producing artifacts
- (and 2 more)
-
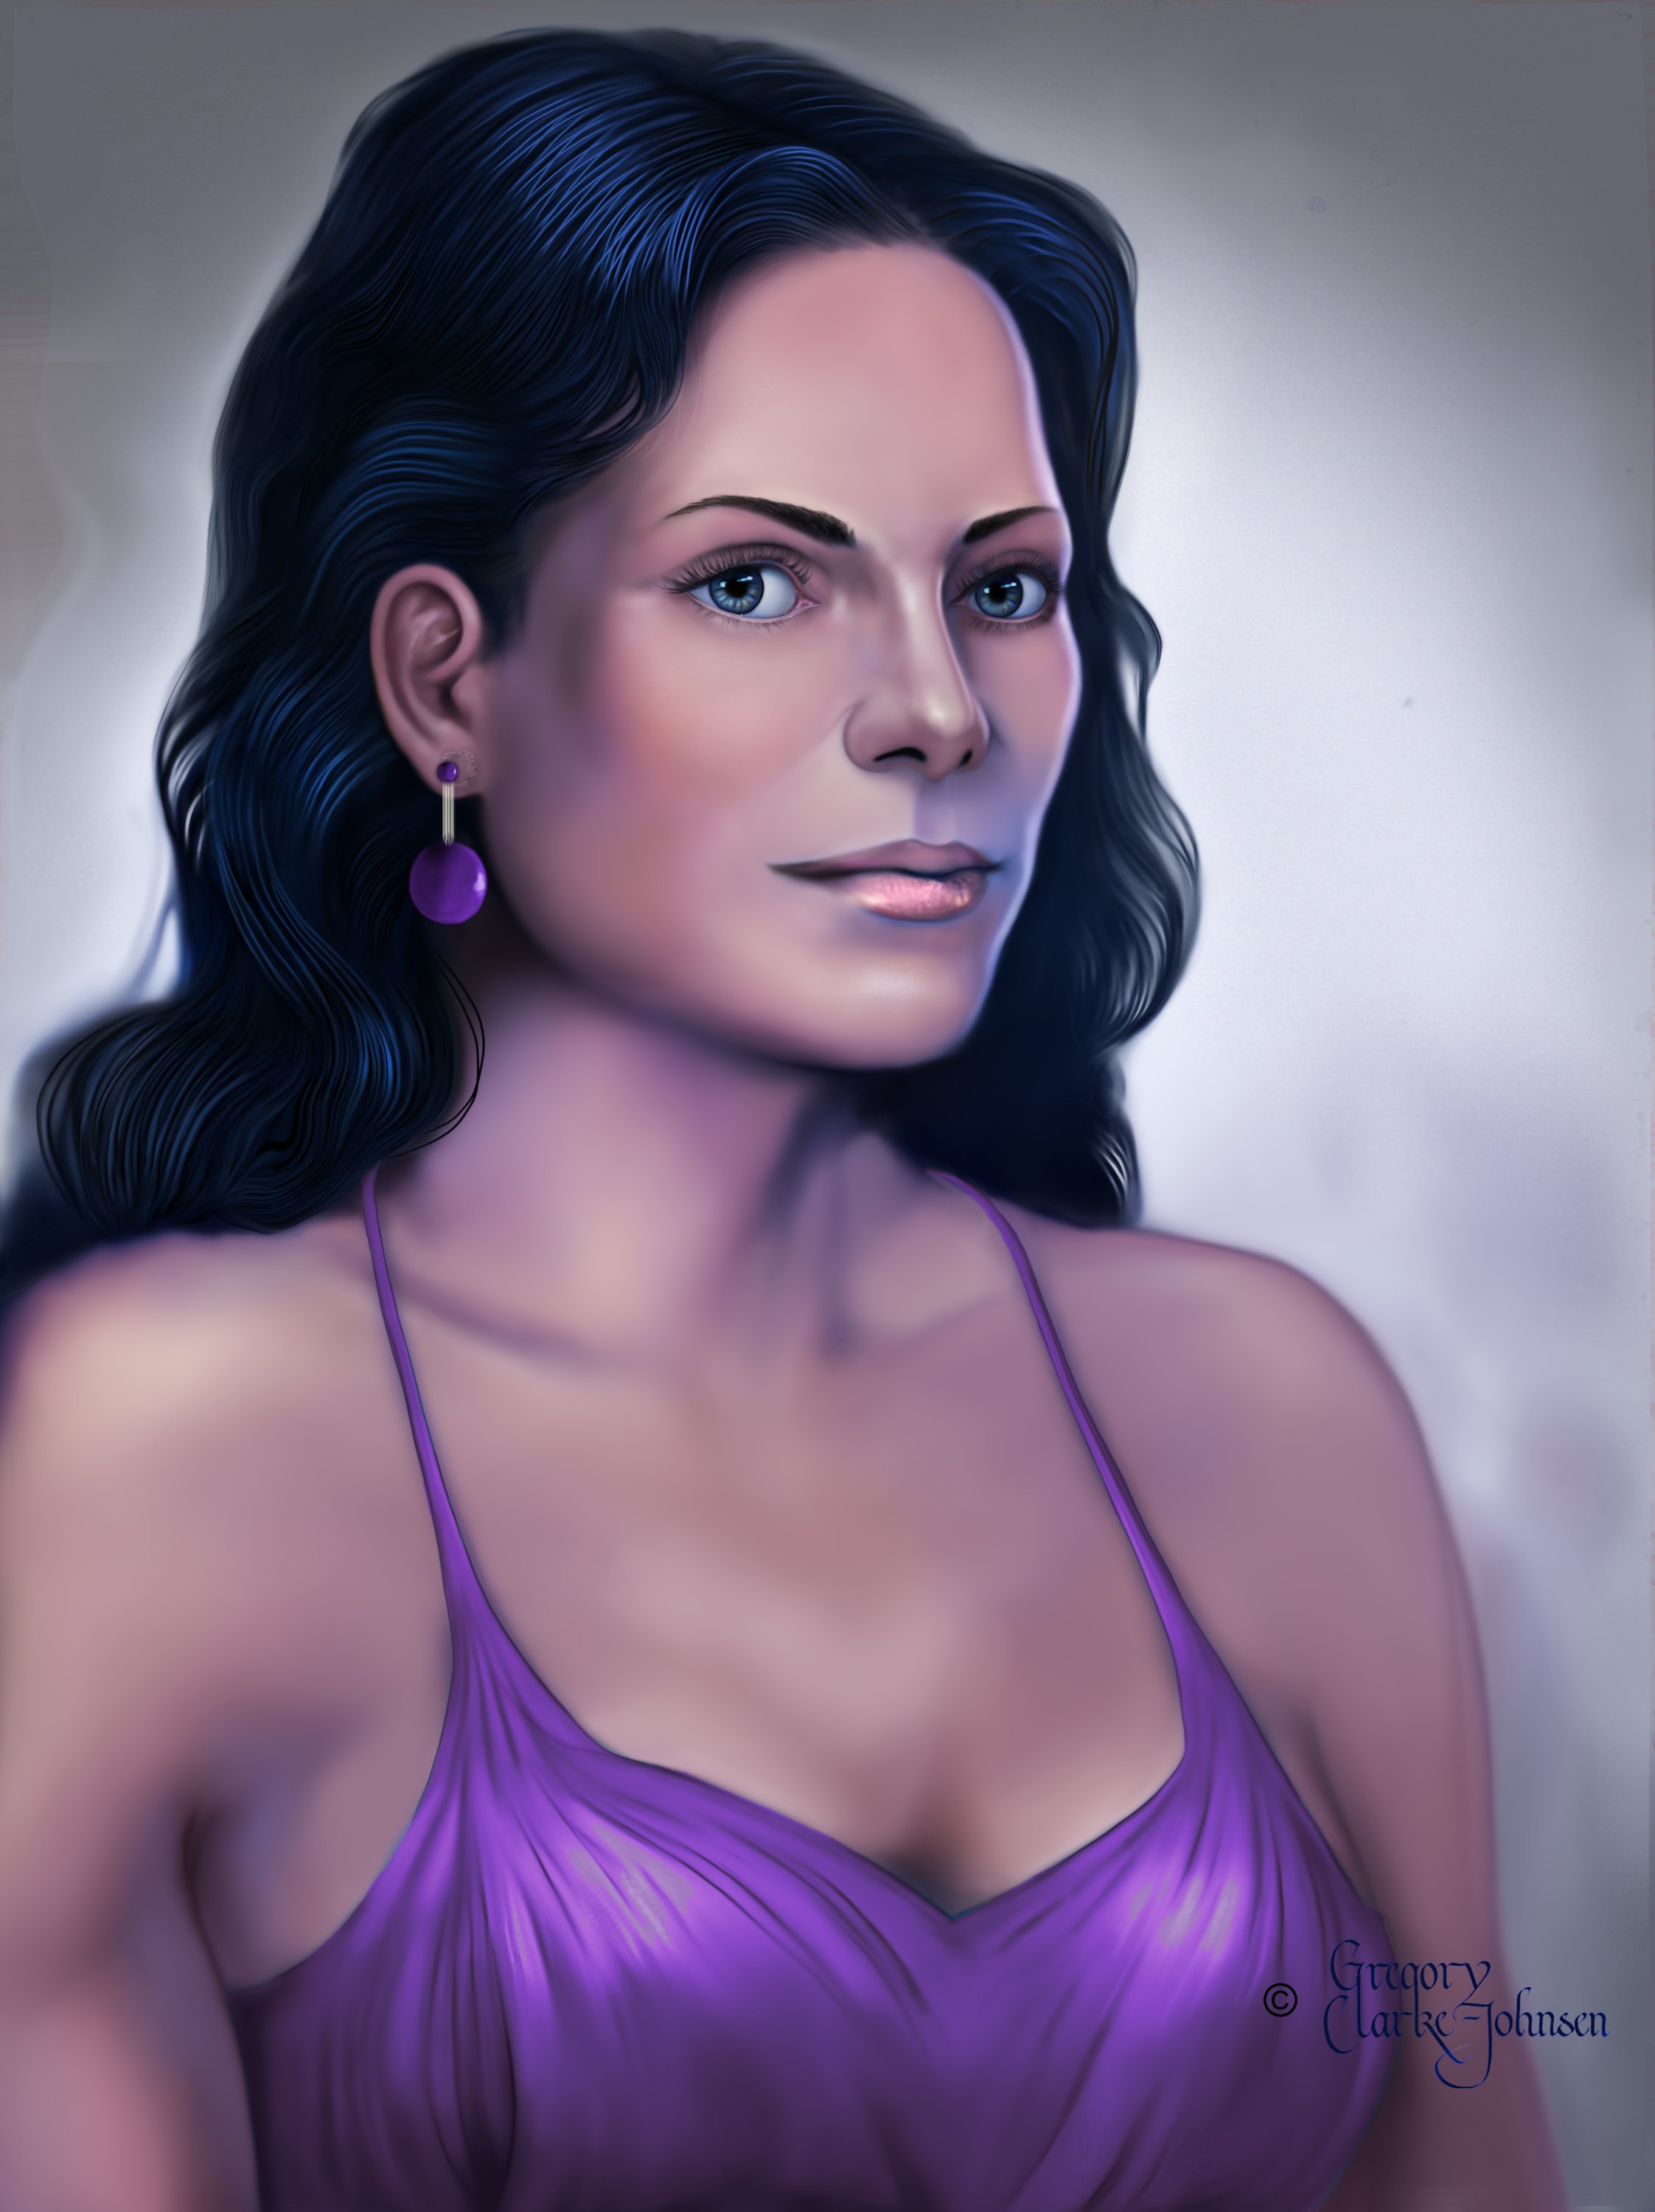
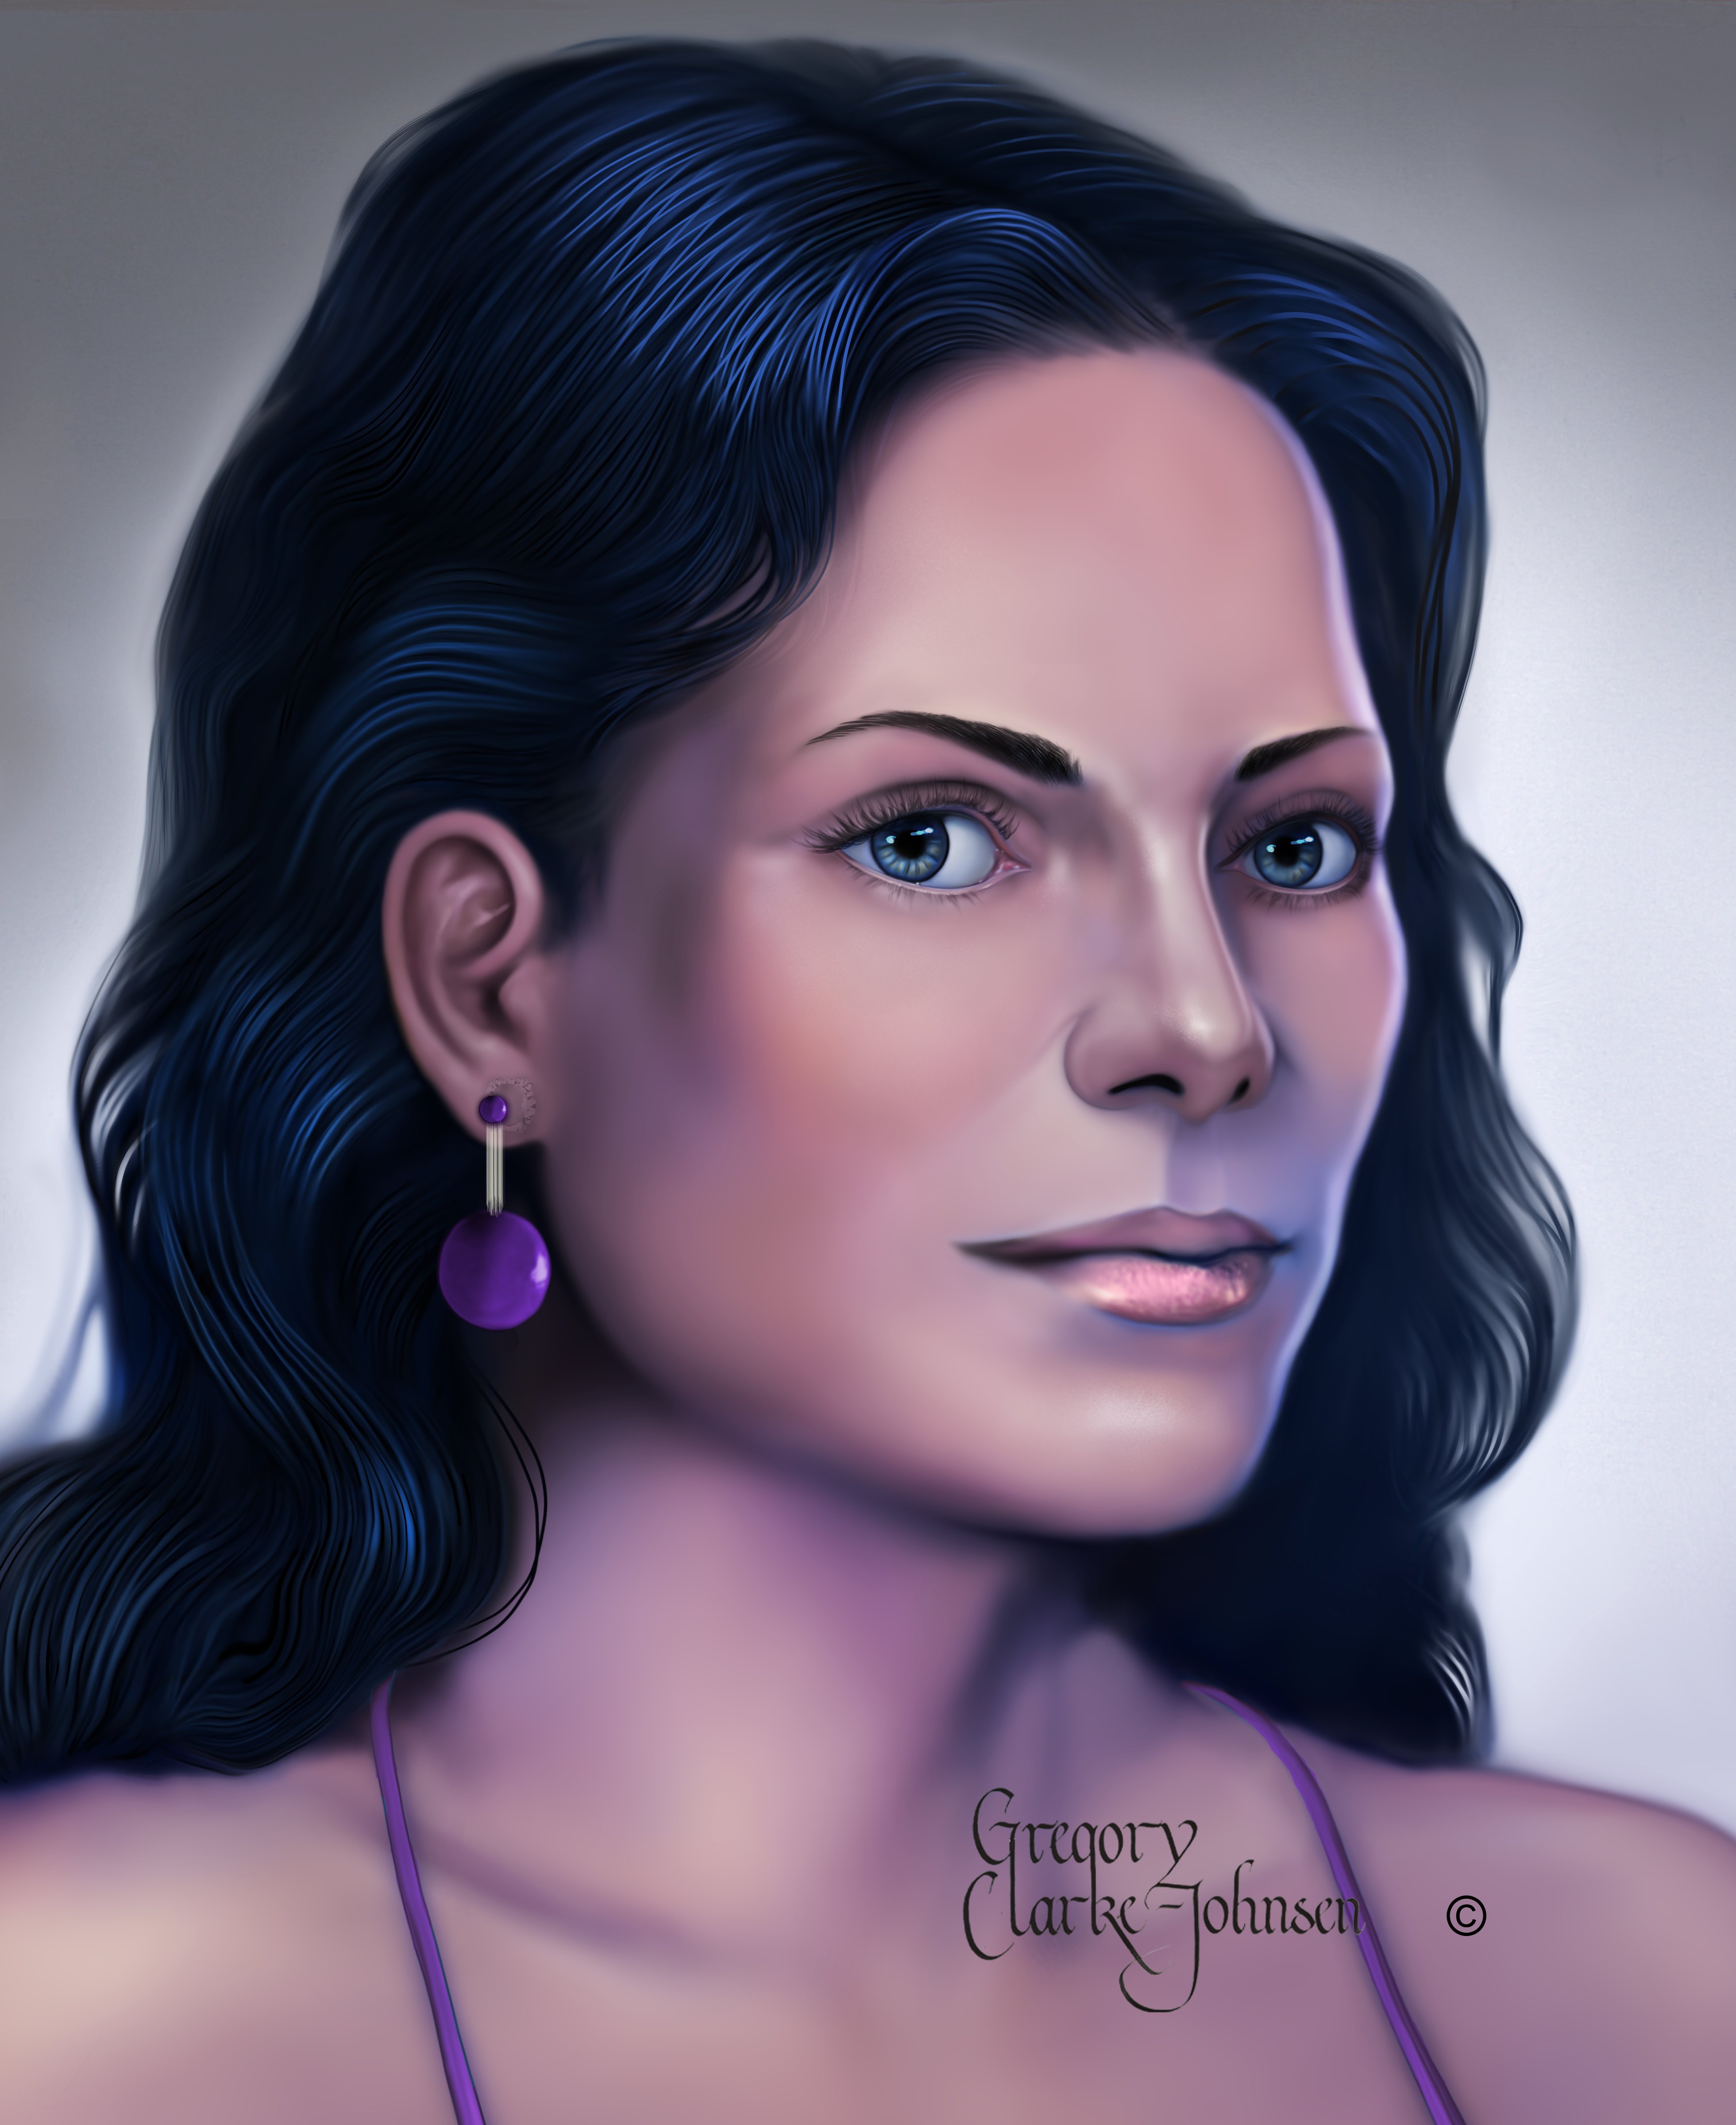
Here is my latest digital painting , hand painted in AP. Comments welcomed.
-
Thanks for the clarification on these two tools. Will spend some time getting more familiar with the paint mixer brush. Do you know of or have any sample paintings done with the paint mixer brush? Thanks again Gabe,
-
Thanks Gabe, I reply on the smudge tool a lot in creating my artwork. Question, how does the smudge tool differ from the blending capabilities within the paint mixer brush? The blending function within the paint mixer brush could be quite useful if more control could be programmed into it. Your thoughts would be appreciated.
-
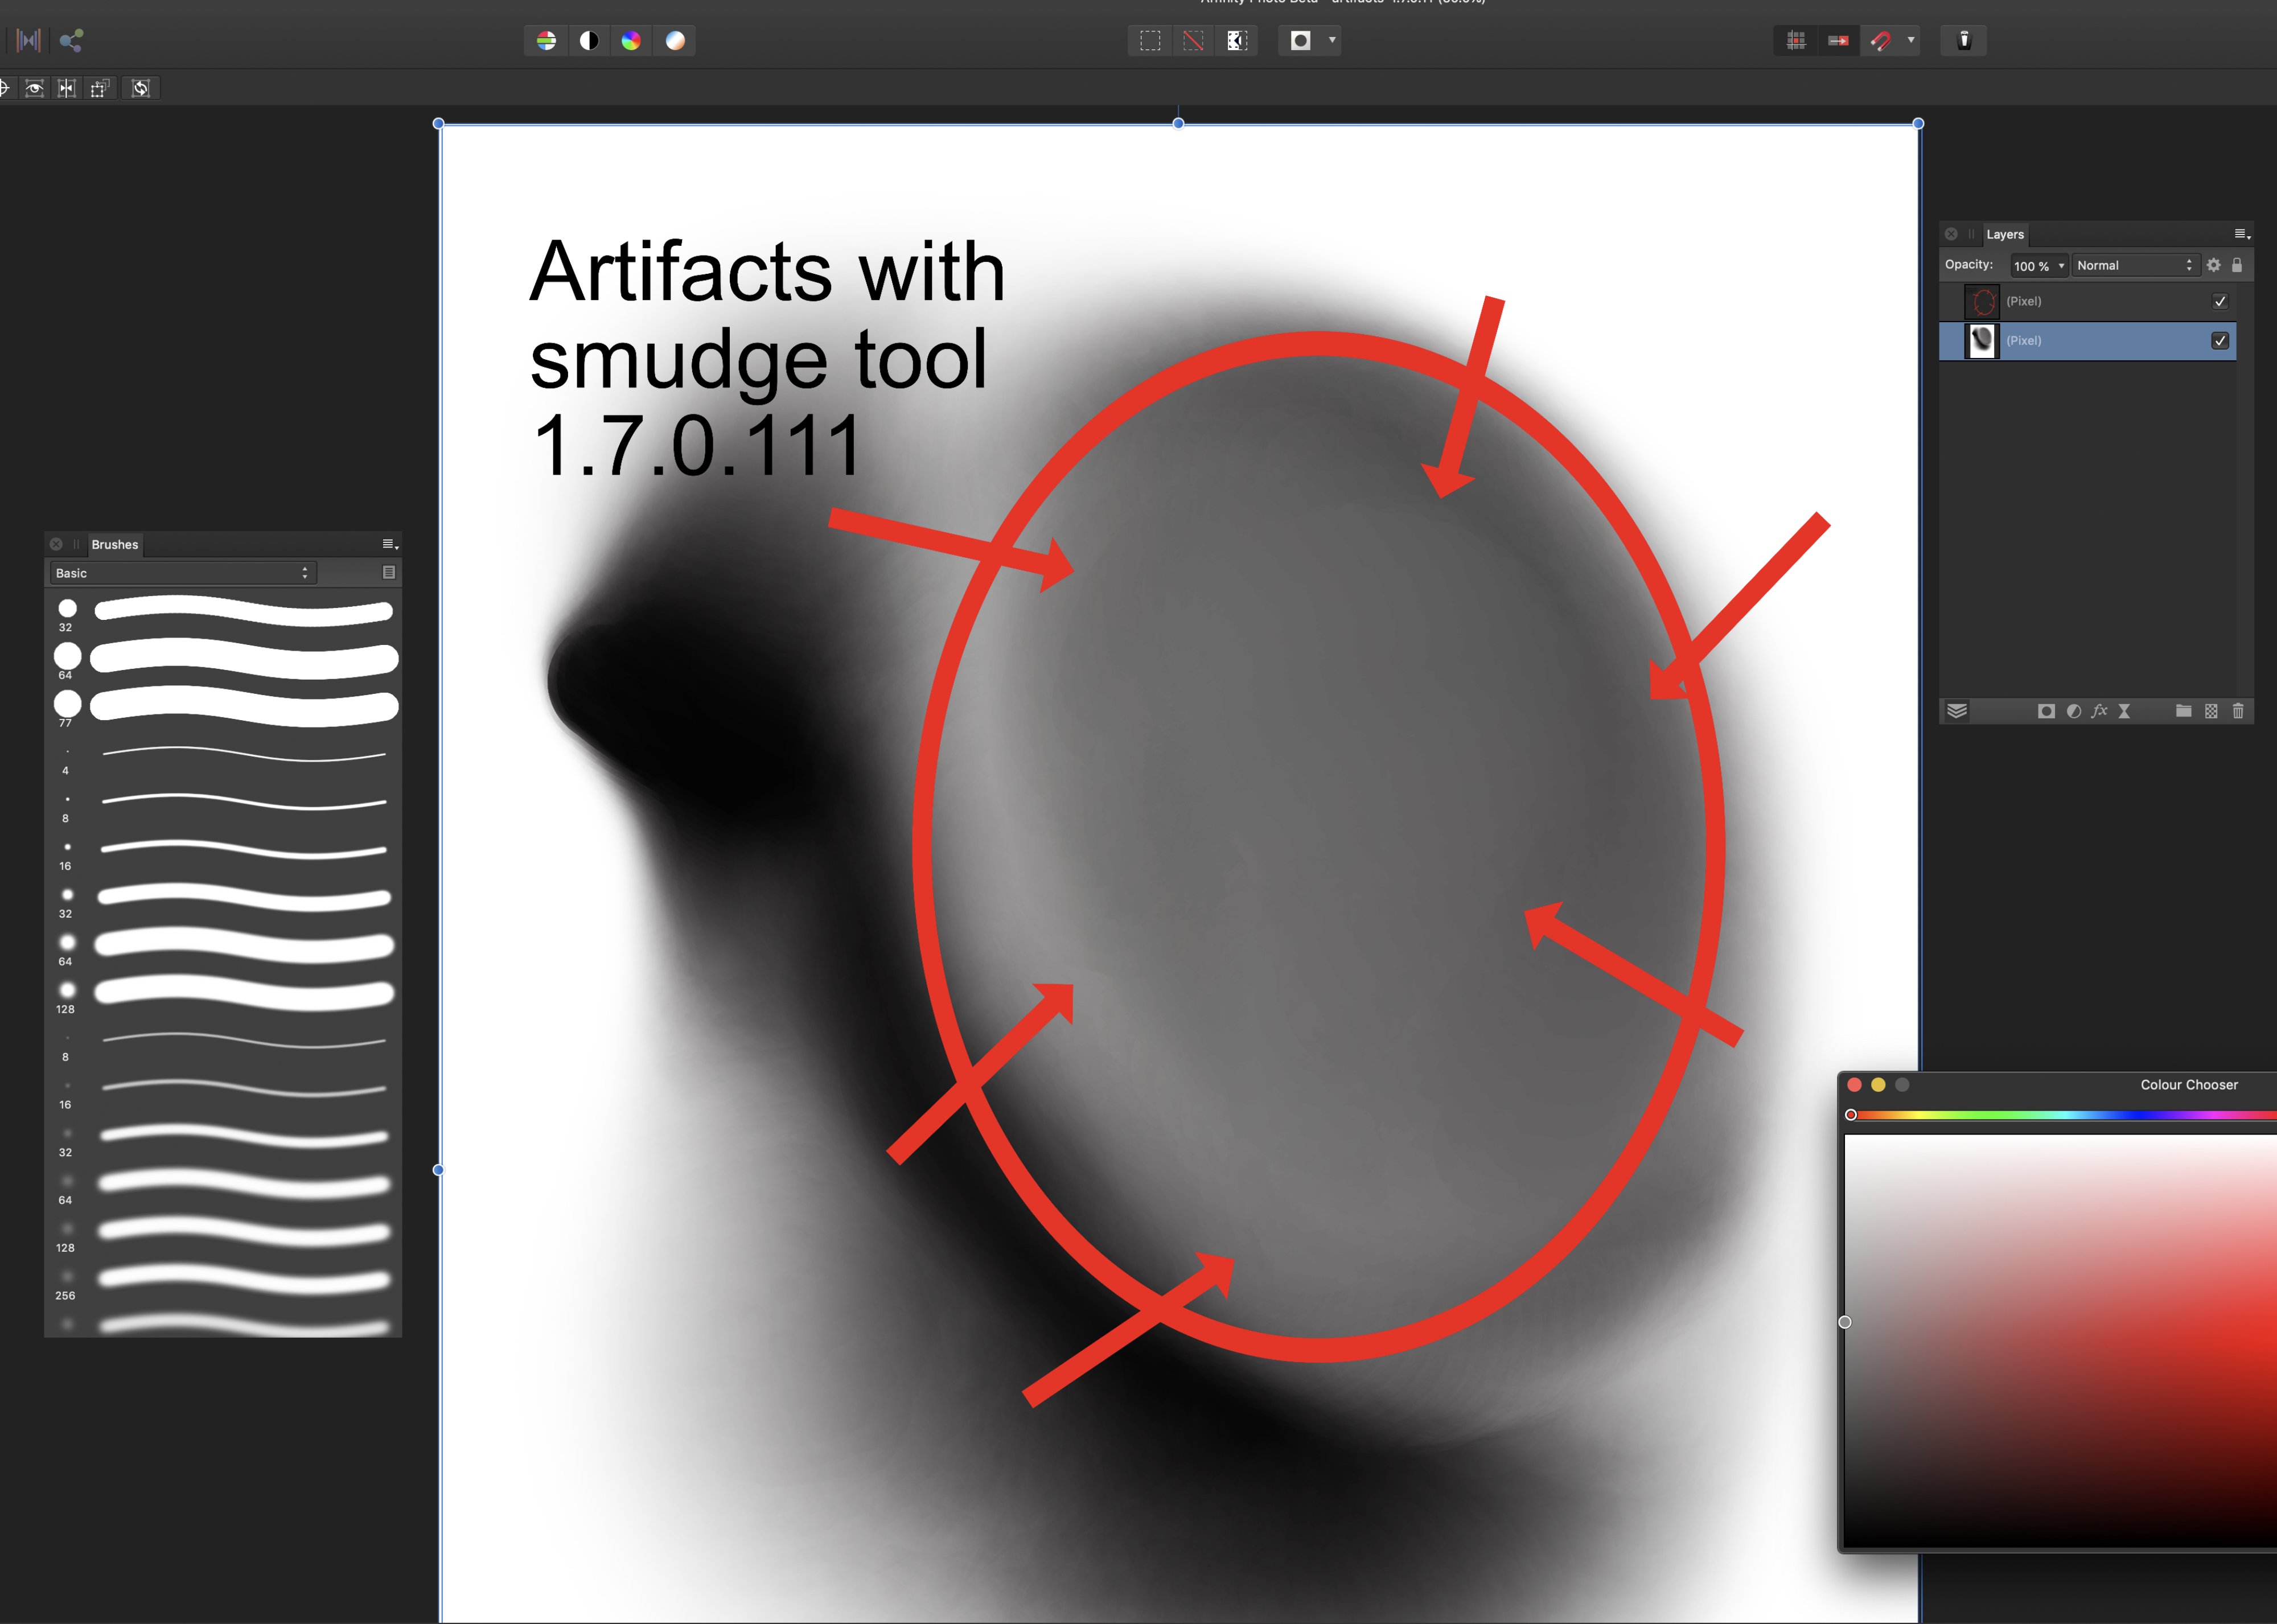
Hi Gabe, Thanks for your quick reply. So yes, I was able to replicate the artifacts from the smudge tool in both AP versions. 1.67 & 1.7.0.111 To keep it simple I created a white pixel layer and painted several brush strokes adjacent to one another using the basic round brushes for both version examples. Then using the smudge tool with the round light/soft brushes, I blended the different tones attempting to achieve a nice gradation. In both versions I got the artifacting or unbendable edging. With the 1.7.0111 the blending was really not satisfactory with the brush settings around "50" flow & "50" strength. To compensate I increased the strength to a higher value , which allowed to a forced blending but lost the necessary subtle approach that I usually look for. See screen captures. PS For some unknown reason, this upload will not accept a screen capture .png for an iMac ,, have to convert the file to a jpeg.
-
I'm running AP version 1.67 and find the smudge tool works properly most of the time but does produce artifacts which cannot be blended out to a smooth transition. The only solution, I have found, is to add more paint to cover the anomaly generated by the smudge brush. Your thoughts. View screen capture. Even though in the screen capture the bottom layer is selected , actually the problem showed up as I worked the top pixel layer. After the artifacts showed up on while I worked the top pixel layer, I then ran through the layer stack to see if any subsequent layer was impacting the top layer's performance and that is when I took the screen capture with the bottom layer selected. Again the smudge issue is with the top layer.
-
When using Affinity photo, as a digital painter, I rely heavily on the smudge tool for blending. Could the AP developers improve/enhance the smudge tool to match the blending functionality of the Paint mixer brush when the basic round light brush is selected? You might say , just use the Paint mixer brush , but there are other properties of the paint mixer brush that don't work for me. The paint mixer brush offers a level of complexity which I don't need in my workflow. Right now I just apply the paint and the smudge/blend it.. is so simple! Just need a more robust blender/smudge tool...like the Procreate app has... superb blenders! Thank you!
- 1 reply
-
- 1
-
-
- smudge tool
- enhanced smudge
- (and 4 more)
-
Paint Mixer Tool - Continuous line
Gregory-CJ replied to Gregory-CJ's topic in [ARCHIVE] Photo beta on macOS threads
As a digital painter, I started out with Photoshop #3 a few decades ago. Simply stated, my approach to painting is and has been the laying down colours adjacent to one another and blending them together. I, along with many digital painters of that time, struggled with the fact that in PS #3 there was no blending tool for us (an opinion that was expressed throughout the forums of the day). At a time before Wacom was on the scene , it was hard to create digital paintings using a mouse and without the necessary blending options. PS's smudge tool was a complete disaster and did not offer any blending options. We had to wait several years before Adobe's release of release of PS CS6 in which Adobe attempted to address the lack of a workable blending tool. Adobe's solution was the Paint Mixer Brush Tool. Many of us at the time, felt that Adobe was playing catch up with Corel's Painter software which had long offered the mixing palette. Corel's mixing palette was simply designed and worked well. But for me there were other issues with Painter which prevented me from becoming a user of their software. So I stuck with Adobe and explored the Paint mixer brush tool . After much time invested in "trying to make it work" , I concluded that the Mixer Brush offering was " over thought and over engineered by the programmers of Adobe. IMO it didn't have the " pick it up and use it functionality"... You had to fight it to get it to do wanted. Fast forward several years and Affinity Photo comes on the sense and Yes, a great piece of software, indeed, thank you! But I was surprised that Affinity Photo had included their version of the Paint mixer brush. Granted its still in its early stages (version 1.7.0.111) Now, having spent several hours exploring the paint mixer brush, I see the same issue plaguing Affinity photo's paint mixer brush and did plague Adobe's offering. IMO , it lacks the " pick it up and use it functionality" but rather its more like " let's struggle and see what happens approach. I do appreciate that this is version 1.7.0.111 and can only get better. From a digital painter's perspective who specializes in realism, I find that the approach offered by the paint mixer brush doesn't work for me. I can see that abstract painters could find the Paint mixer tool useful in creating patterns of colour, though. I would be curious to know many people use the paint mixer brush regularly in their work flow? The one redeeming quality of the Paint mixer brush is how it blends with the basic round light brush. As of today when using Affinity photo, I rely heavily on the smudge tool for blending. Could the AP developers improve/enhance the smudge tool to match the blending functionality of the Paint mixer brush when the basic round light brush is selected? You might say , just use the Paint mixer brush , but the other properties of the paint mixer brush don't work for me. It offers a level of complexity which I don't need in my workflow. Right now I just apply the paint and the smudge/blend it.. is so simple! Just need a more robust blender/smudge tool...like the Procreate app has... superb blenders! -
Paint Mixer Tool - Continuous line
Gregory-CJ replied to Gregory-CJ's topic in [ARCHIVE] Photo beta on macOS threads
Hi Chris, Thanks for the quick response. Using the very latest AP version 1.7.0.111 tested the mixer brush with 1% settings on the basic brush selection and as you can see from the attachment, two categories, round and round soft worked well but the round light brushes just sputtered and did not generate a continuous line of colour. Your thoughts.
-
AP Beta 1.7.0 release. SMUDGE TOOL / PAINT MIXER BRUSH SMUDGE TOOL As a digital painter my approach is all about laying down colours and blending them together. Currently, in version 1.6.7 , I use the paint brush and the smudge tool for blending. (Wish the smudge tool was better at blending colours) The smudge tool in Beta 1.7.0 performs about the same as in 1.6.7 which is adequate , but not fantastic .Using the smudge tool sometimes produces artifacts within the colour which can be eliminated with a circular brush stroke. PAINT MIXER BRUSH I'm trying to get my head around the paint mixer brush which holds a lot of promise for digital painters. I'm assuming that one should be able to paint a continuous line of paint but for some reason I can only get a start of a painted line then the colour falls off. I played with the different settings but no luck. Am I missing something here , or should one be able to put down uninterrupted strokes of paint and blend them? Thanks for this awesome software. See screen capture
-
affinity photo GODDESS SERIES- HAND PAINTED PORTRAITS IN A P
Gregory-CJ replied to Gregory-CJ's topic in Share your work
Here is a link to the final painting entitled : Goddess of Light" check it out! https://forum.affinity.serif.com/index.php?/topic/79104-goddess-series-final-painting-dragon-ap/ -
affinity photo GODDESS SERIES -FINAL PAINTING & DRAGON -AP
Gregory-CJ posted a topic in Share your work
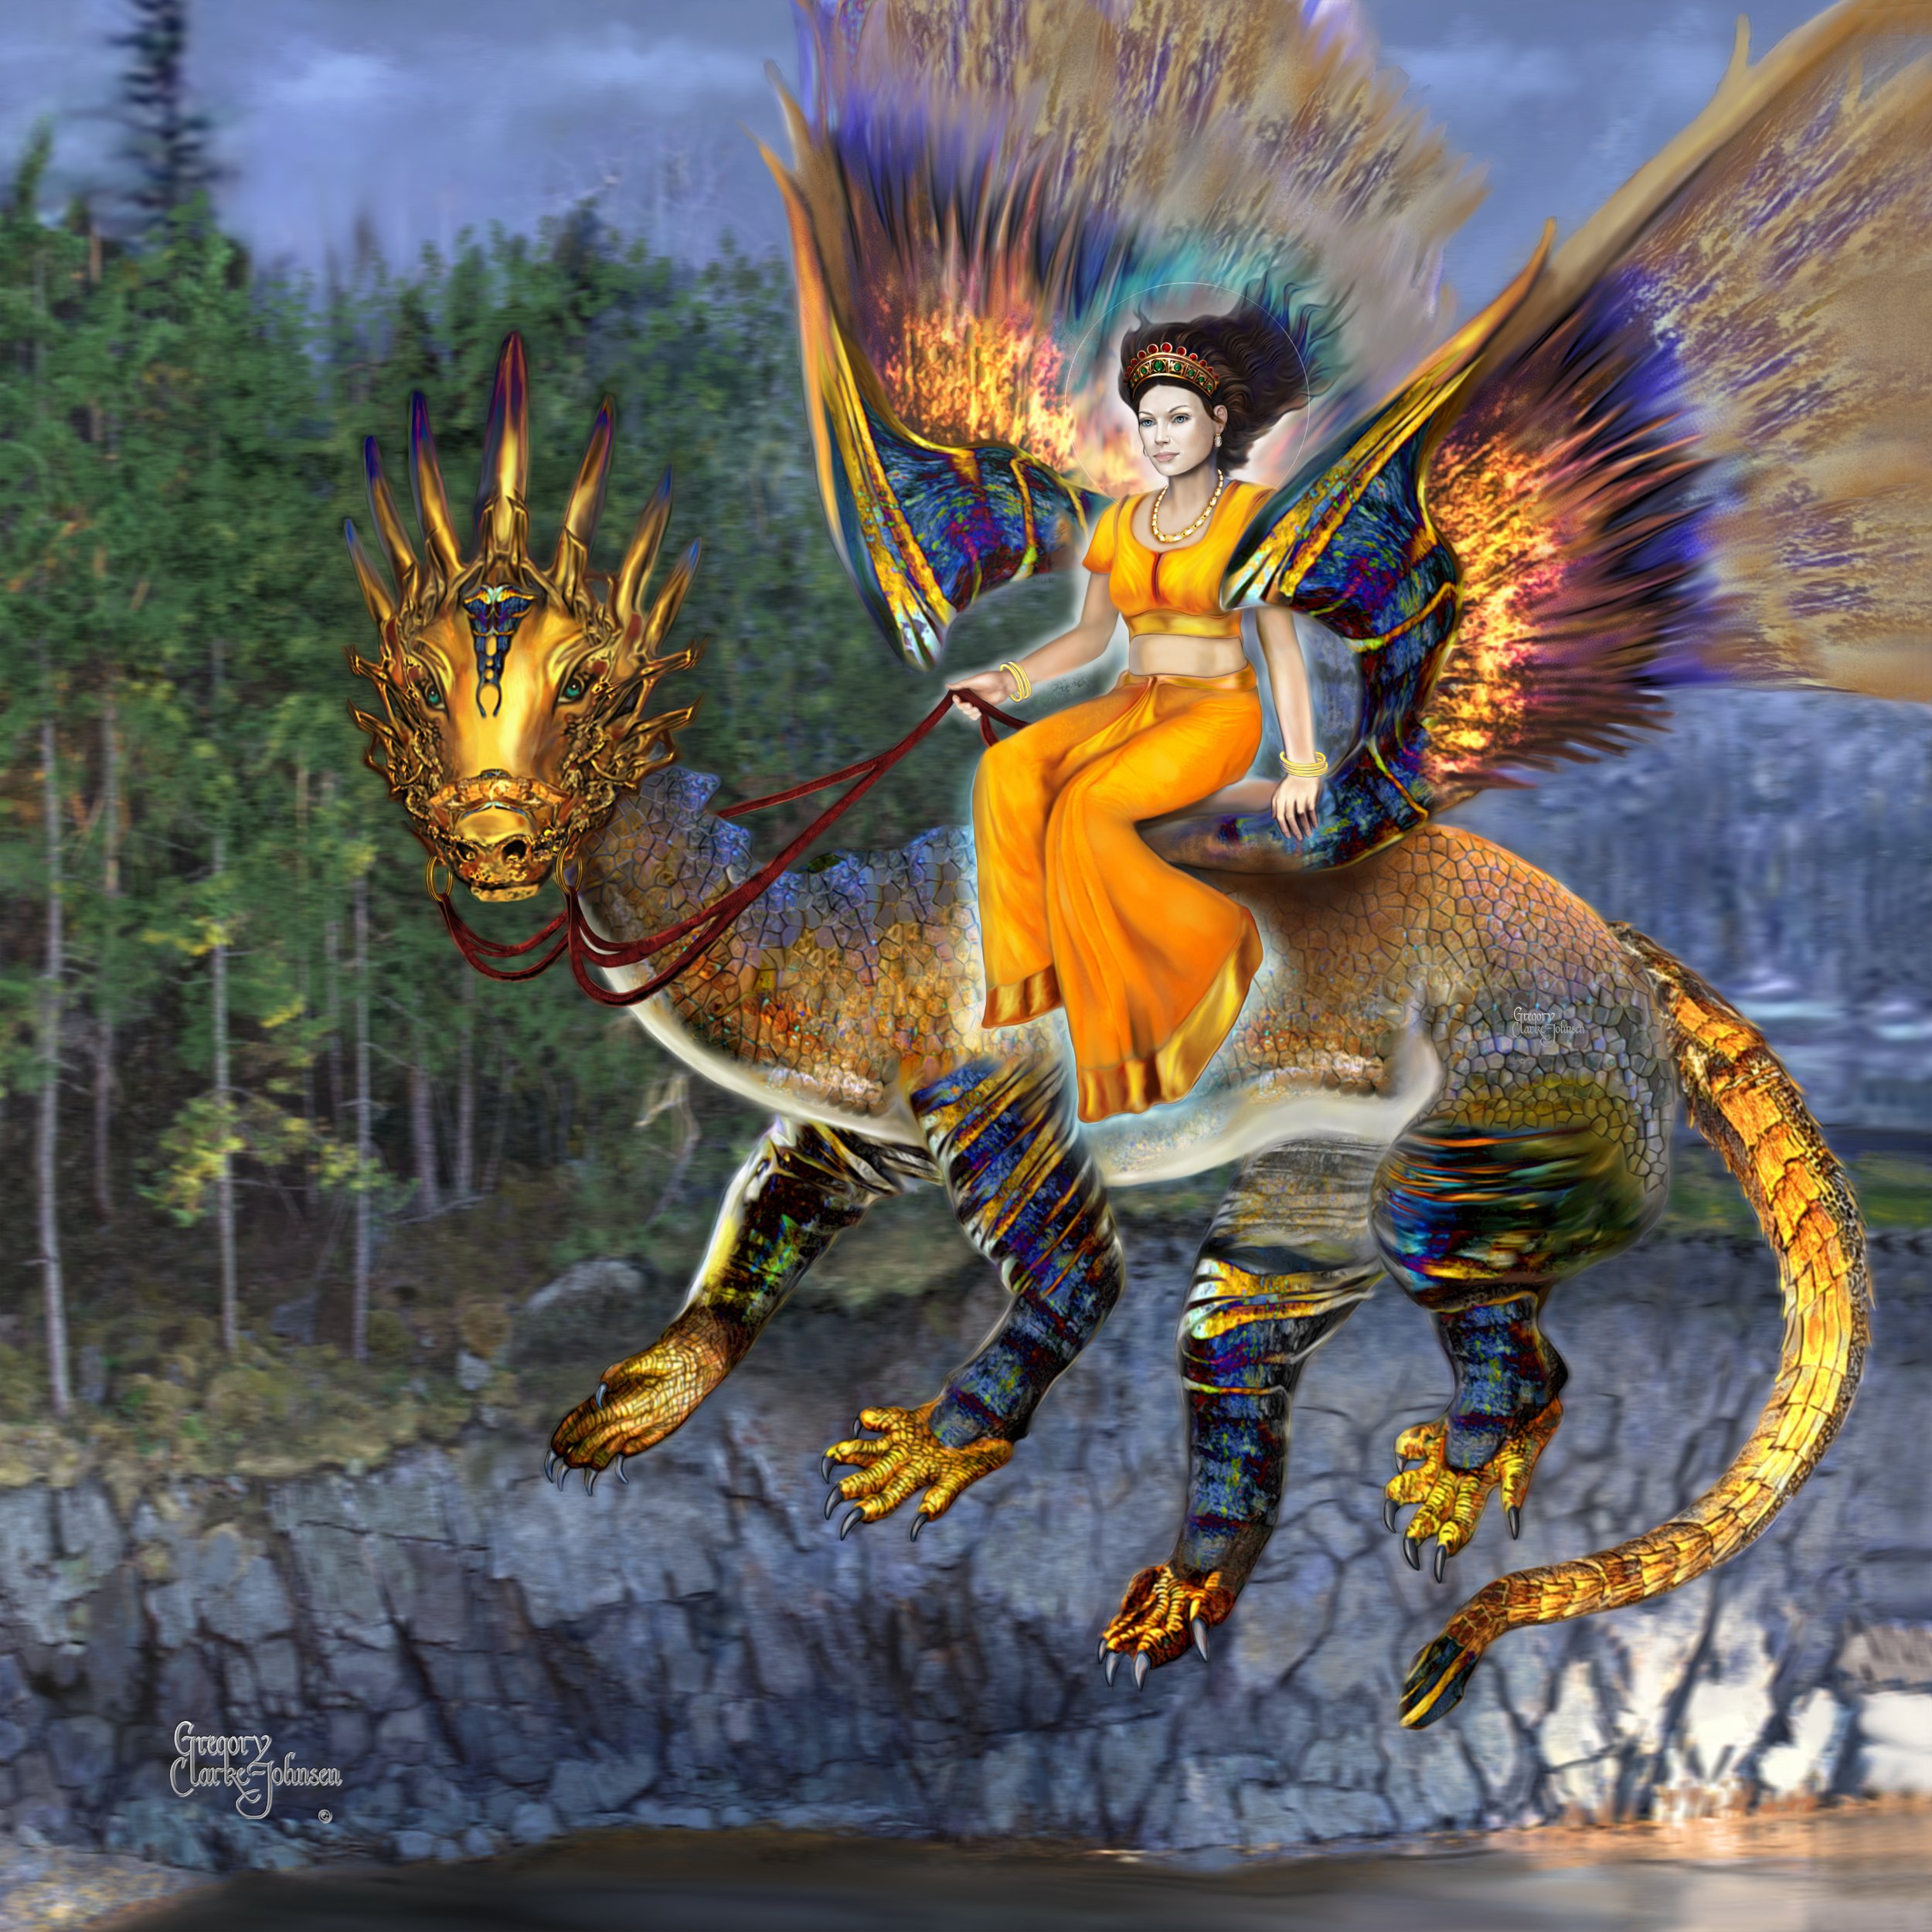
Here is the final painting that I have been working on for some time. It's entitled " Goddess of Light" The entire piece was painted using Affinity Photo. Comments are welcomed. Enjoy!
-
- 2
-
-
- dragon
- digital painting
- (and 2 more)
-
affinity photo GODDESS SERIES- HAND PAINTED PORTRAITS IN A P
Gregory-CJ replied to Gregory-CJ's topic in Share your work
Thanks Bodobe for your kind words! -
affinity photo GODDESS SERIES- HAND PAINTED PORTRAITS IN A P
Gregory-CJ replied to Gregory-CJ's topic in Share your work
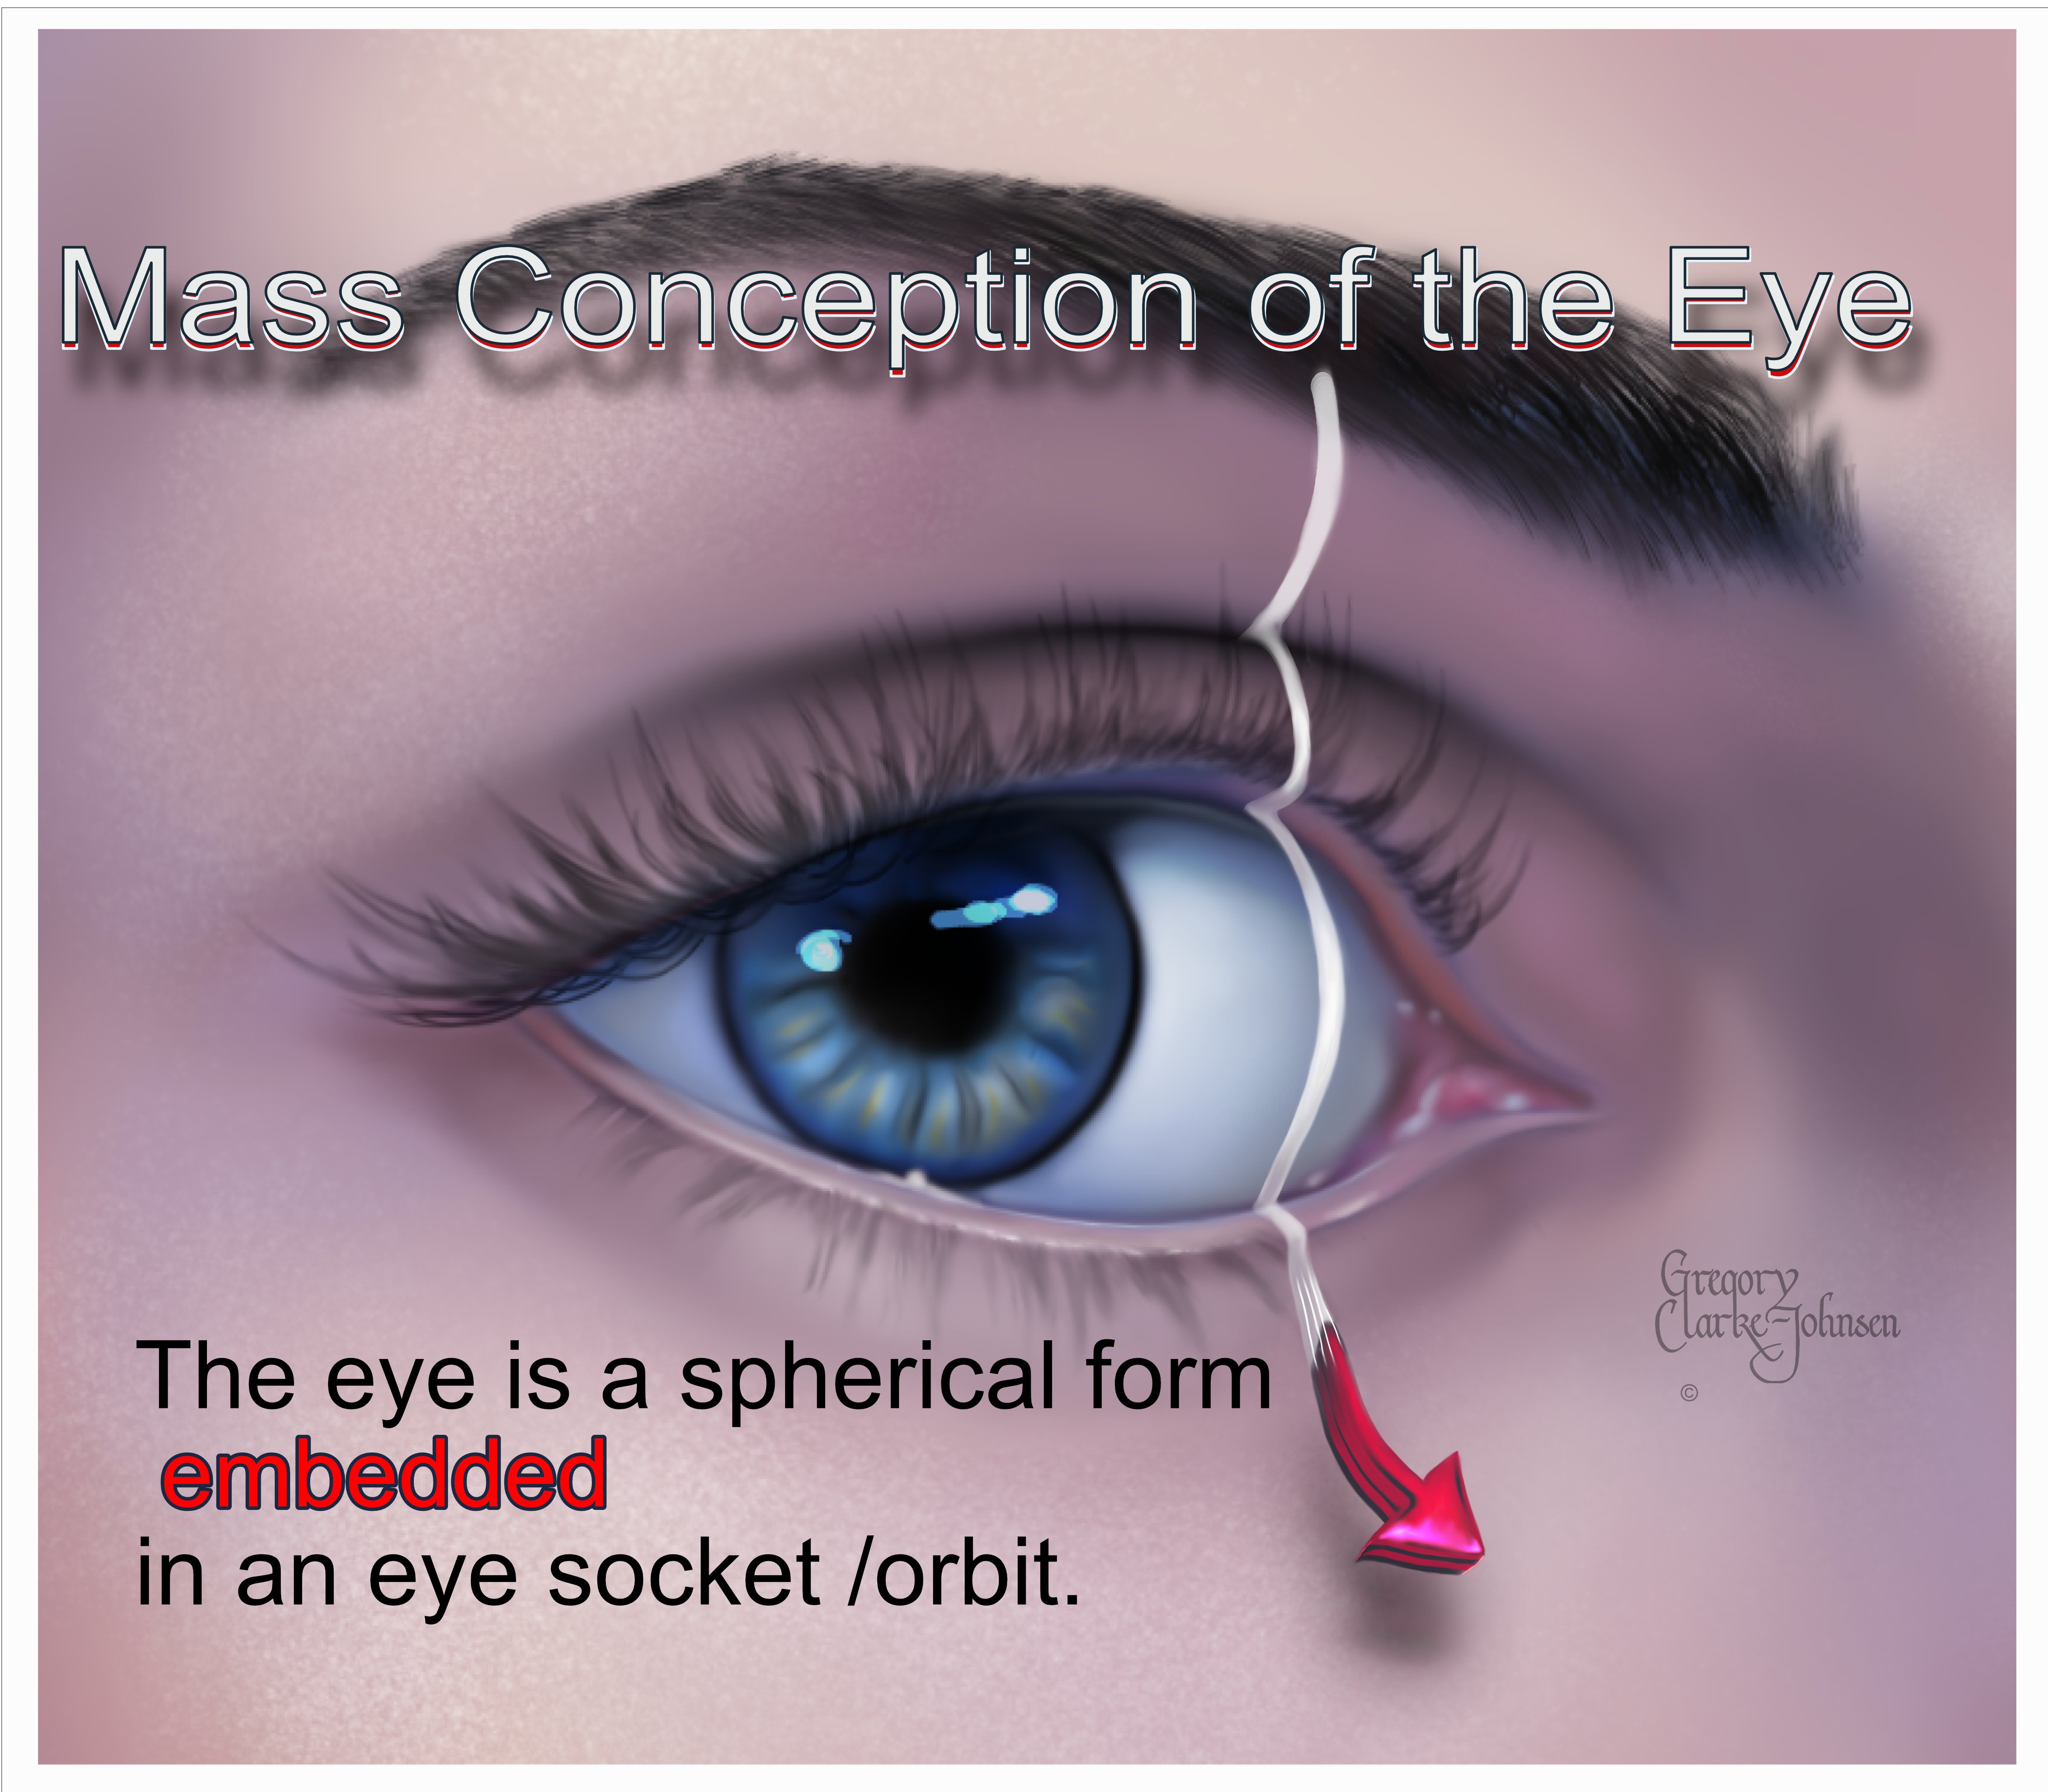
Sure. Well all the brushes I use are default brushes. Basically I use two tools. The paint tool with default brushes my favorite is under the Basic Category > round light brush (different sizes) The settings in the context tool bar at the top of the UI should generally be set to Opacity 50% or less Flow 50% or less hardness= 0% Sometimes I may increase the flow to greater than 50% is I need more paint applied. But you want to build up the paint layer slowly. Of course, I will use other brushes for textural effects . Second tool is the smudge tool ( for blending and smoothing the paint areas) Now in case you haven't figured it out , the smudge tool will default to using whatever brush you have selected with your painting tool. In other words, lets say you are using a fancy brush with the paint tool, it may happen that when you switch to the smudge tool, it may be that the smudge tool will be using the same fancy brush for blending. What I have found out is that not all types of brushes work well with the smudge tool. To insure that I get a nice, predictable , controllable blend I only use the basic brushes ( mainly the light rounds) for blending with the smudge tool. Here is an explanation I made a few months ago about blending in AP https://forum.affinity.serif.com/index.php?/topic/68279-discovering-a-great-blending-tool-in-ap/&tab=comments#comment-353333 I also use the liquify persona a lot to make adjustments in my painting. Using liquify is like 2d Sculpting. One more thing, in painting the hair, I will block in the general shape with a large basic light round brush and then for hair detail, will move to a smaller brush set to 100% hardness with the stabilizer enabled---Rope option----- length =3.5 Hope this helps you.- 5 replies
-
- 1
-
-
- digital painting
- goddess painting
- (and 2 more)