HVDB Photography
-
Posts
1,001 -
Joined
-
Last visited
Everything posted by HVDB Photography
-
 You need to select the Move Tool (V) to select an individual layer
 -
Masks
HVDB Photography replied to ChEV's topic in Pre-V2 Archive of Affinity on Desktop Questions (macOS and Windows)
Jus click on the mask thumbnail to select it -
This is often caused by increasing contrast and / or sharpening too much. If you add a new pixel layer on top and set it's blend mode to darken. And then select the clone brush and set the source to current layer and below. You can easily clone that thin line away . CloneDarkenMode.mp4
-
It has to do with the zoom level. But does not affect the final result.
-
I think you shifted the selection to the right which reveals the (white) canvas !
-
Did you use a soft brush ? And maybe lower the opacity too ...
-
Are there crash dump files created ? Dir Location: %AppData%\Affinity\Photo\1.0\CrashReports\reports
-
Betas and desktop settings
HVDB Photography replied to henryg's topic in [ARCHIVE] Photo beta on Windows threads
Indeed Definitely yes .. C:\Program Files\Affinity\Affinity Photo C:\Program Files\Affinity\Photo Customer Beta Hubert -
WIndows Defender message ? https://www.tenforums.com/tutorials/105533-enable-disable-windows-defender-exploit-protection-settings.html
-
If you click on the hamburger icon in Develop Persona, you can save your RAW changes as a preset. unfortunately you have to make a separate preset for each tab (.. lens, details, tones etc.) for which you have made changes. These presets are stored in the global develop.propcol file ( Dir %appdata%\Affinity\Photo\1.0\user (Windows) ).
-
failure opening canon cr3-file
HVDB Photography replied to KoBu's topic in [ARCHIVE] Photo beta on Windows threads
No problems encountered (both files) Using the latest beta - 1.8.0.555 Both files open and develop error-free. Greetings, Hubert.
-
Well, there should at least exist a "Default" category. Clicking on "create new category" doesn't show a popup, it immediately creates a new category named "macros" which you can rename to whatever.
-
If you have a one layered document active and transparent background is not checked ( = white canvas), then what you see is correct.
-
As far as i can see, there are no categories defined ! You need at least one to save your macro into.
-
Maybe it has something to do with the amount of fonts installed on your system !!
-
Are your files stored on Google Drive or somewhere else in the cloud ?
-
I think the OP is on Photo ...
-
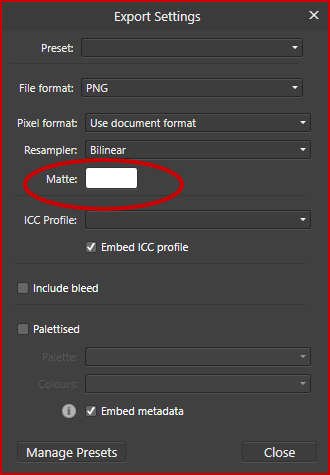
On the Export dialog click the More button
-
Irrationales Verhalten bei Copy & Paste
HVDB Photography replied to Sunny Burnett's topic in V1 Bugs found on Windows
Indeed, CTRL + SHIFT + C makes a flattened (rasterised) copy. I overlooked it. -
Irrationales Verhalten bei Copy & Paste
HVDB Photography replied to Sunny Burnett's topic in V1 Bugs found on Windows
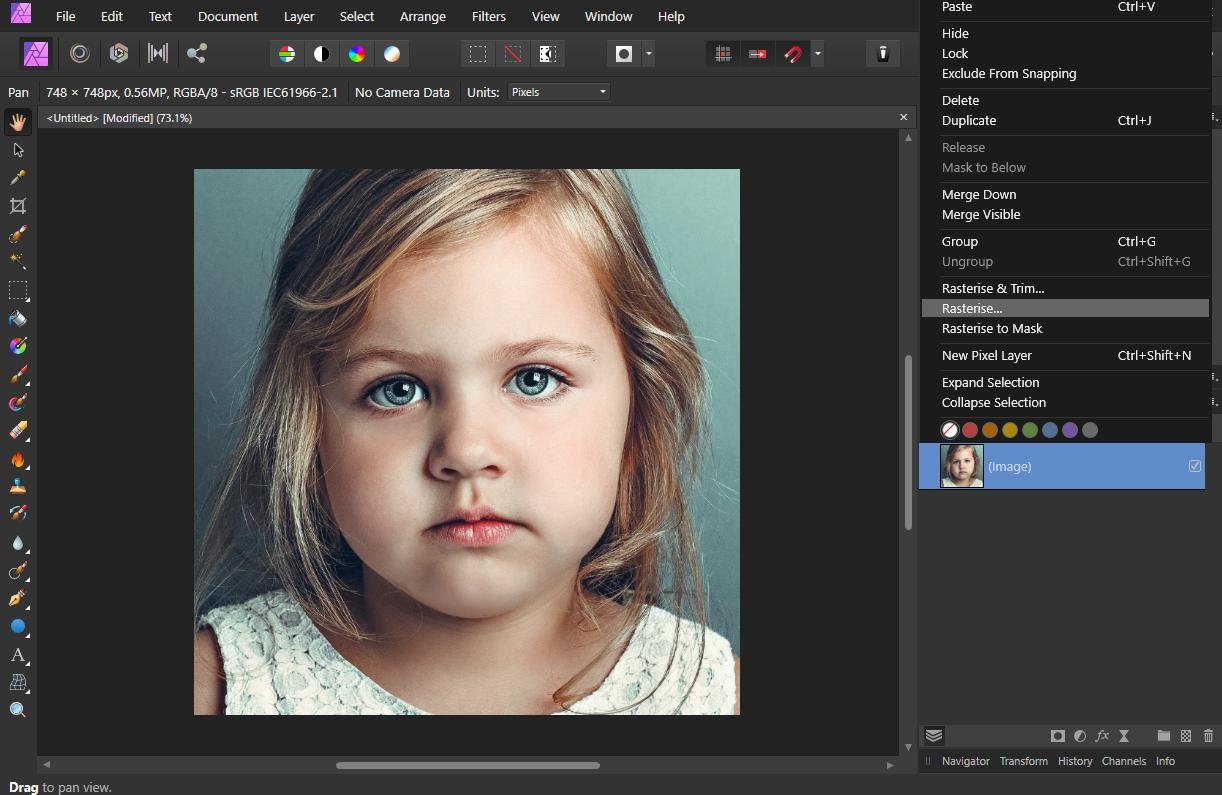
"New from clipboard" will import that as an (image) layer. You'll need to rasterize it first.
-
View > zoom > Zoom to fit or CTRL+0
-
I think channel selection will do a better job ...
-
Thank you, great that you like my tutorials.
-
Hi Bruce, I gave it a try. I removed the white background using the blue channel to create a grayscale version, which allows to rasterize it as a mask. I attached the .aphoto file and numbered the steps I took to come to this result. IMG_0513.afphoto