hammarbytp
-
Posts
10 -
Joined
-
Last visited
Recent Profile Visitors
457 profile views
-
 hammarbytp reacted to a post in a topic:
Can't export or merge an image
hammarbytp reacted to a post in a topic:
Can't export or merge an image
-
hammarbytp reacted to a post in a topic:
Can't export or merge an image
-
 hammarbytp reacted to a post in a topic:
Can't export or merge an image
hammarbytp reacted to a post in a topic:
Can't export or merge an image
-
I've had a little play around and had other issue. I think it comes down to how I generate the star field. I do this in a pretty standard way by taking a black layer, adding monochrome noise then using levels adjustment to increase the sparcity of the star by narrowing the gap between white and black. The problem is although at 100% screen width the stars look sparse, if I zoom in, the field is actually far more congested. It appears that when zoomed out, it is removing much of the detail. This makes it very difficult to create the kind of background that I want. It also seems to effect layers and export output. I also have an issue that various blurs like rotate don't work very well on point structures. This makes creating a star field more difficult than it should. Any other suggestions on how to create a start field?
-
Hi, thanks for your response. I'm exporting to a JPG, although I also tried TIFFS. However I also get the same issue if i merge visible. The original is huuge, and would take an hour to upload, so i have uploaded a smaller version (6000px -> 2048 px). Weird thing is, if I resize to 1024 pixel, I don't have an issue. The 2048 px version is not as bad as full size, but the effect is still there I have added a link to the photo. I will be interested to know if anyone sees the same effect https://drive.google.com/file/d/1H9F_oApB20HfIoohGL9TwtMUfE1YxA6e/view?usp=sharing
-
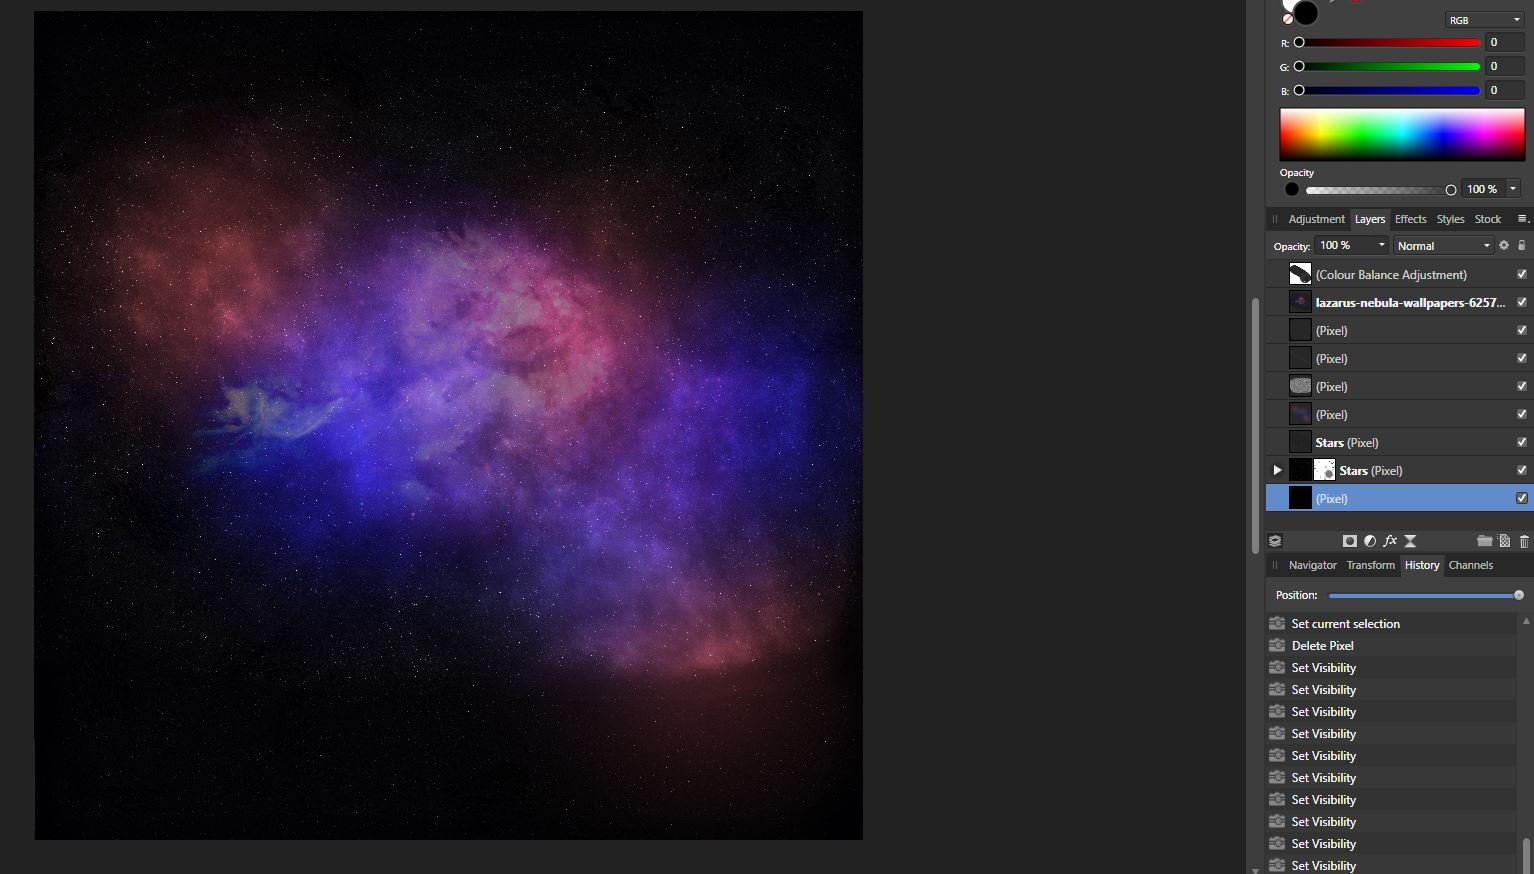
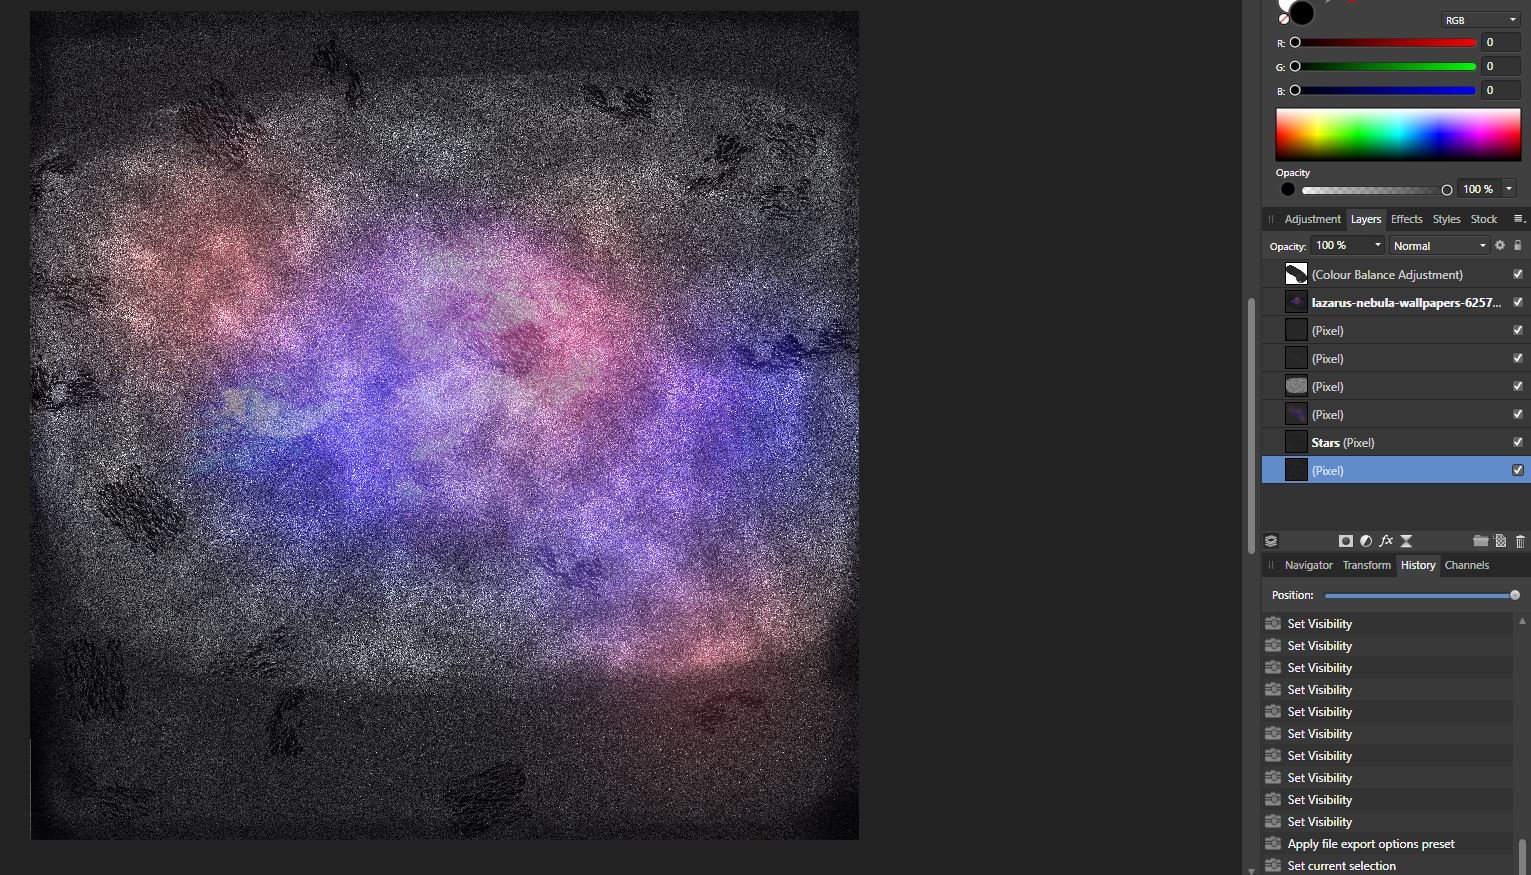
I am creating a nebula backgroud. The affinity image is looking good, but when i try and export the image or merge the bottom but one layer I get something totally different. Nothing appears to allow me to get the 1st image

-
Wosven reacted to a post in a topic:
Rubylith Mask overlay
-
Thanks...it simple when you find it.
-
How do we change the units used in things like layout? For example if we create a print document it defaults to inches. If I want to align some layers I may want to do it in pixels, however I can find no way to change the default units
-
Problem is how can we mask an area with enough precision if we cannot overlay the mask on top of the image? ALT+click shows us the mask, but not in relation to the actual image being operated on
-
While it is possible to see a rubylith overlay for quick masks, it is not possible when just editing a mask. This is useful because it can useful to know what areas of the image the mask is operatintg on and allows better control over the editing of masks
-
Thanks for the response. It is not a show stopper, but I will not waste any more time looking for it. Thanks for the response
-
In Photoshop I can view which part of the mask is affecting the image via a Rubylith overlay. While you get something similar in quick masks is there a method of viewing a overlay at any point (i.e not a quick mask)?