Trinity
-
Posts
28 -
Joined
-
Last visited
Everything posted by Trinity
-
Have a look at this video by James Ritson Macros (Affinity Photo) - YouTube
-
Live filters act in a very similar way to smart objects in ps. You can apply one and then go back some time later to edit it.
-
Filters not working
Trinity replied to fenman's topic in Pre-V2 Archive of Affinity on Desktop Questions (macOS and Windows)
Hello Fenmnan, It looks as if you have somehow inverted the high pass mask. The mask should be white and not have the black middle section. Try selecting the mask and pressing control - I for windows and you should see the image turn grey as expected. -
Hello Using latest Beta 1] duplicate background 2] create folder 3]several adjustments 4] merge layers 5] Add live High Pass filter - - programme crashes 4 attempts - same result Here are I think the crash reports: 191495b1-0f63-4823-8d96-c5a856ed8a18.dmp c3ca95eb-ed26-4fbf-ae4a-ce84c1481d82.dmp 01560b45-230b-43f9-9969-1204a41106fa.dmp 730a1934-7f90-4bcf-a046-824514d2467a.dmp
-
I miss this feature from PS
Trinity replied to DJS1705's topic in Feedback for Affinity Photo V1 on Desktop
Yes works exactly the same - press tab key and all you are left with is your image interface hides.... -
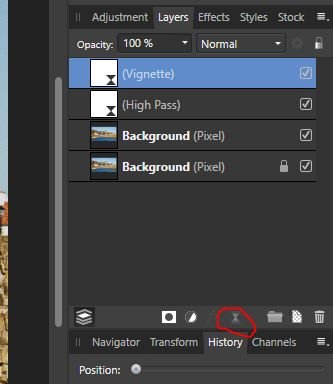
Sorry Chris - I think this is just me causing chaos - after coming back to open Affinity Beta again it seems ok. Attached is screenshot of layers panel which looks okay to me - but what I do know! . Display is 1920 x 1880 . This happened in Beta version 1.8.0.532. I meant to move the topic to the correct forum- but things happened - Sorry to cause you any extra work. Take care.

-
Sorry this is wrong forum - I will put it where it should be in the BETA forum...
-
I don't know if this is just me but I find that the live filter shortcut at the bottom of the layer panel - which I use a lot - appears to be greyed out compared to the adjustments/ mask layer shortcuts. The shortcut still works but it seems odd and certainly makes it slightly harder to find - its no big deal but perhaps needs tidying up. Or perhaps it's meant to be that way....
-
Affinity Photo crash
Trinity replied to Watcher900's topic in [ARCHIVE] Photo beta on Windows threads
confirmed still happening in 1.7035 -
Affinity Photo crash
Trinity replied to Watcher900's topic in [ARCHIVE] Photo beta on Windows threads
yes I am afraid so -same result -
Thanks for that working perfectly now...very useful indeed...
-
Sorry cannot locate " Alternate Futures for Document history have been added. Traditionally, if you roll back the undo history then do something else all your changes after that point have been lost. Photo will now display a small branch icon in the history tab when you do this. Pressing that button will cycle between all the different futures after that history entry.-- meaning you will never lose any work you have done." Where is this branch icon?
-
Need help to brighten up this photo
Trinity replied to vijayessar's topic in Tutorials (Staff and Customer Created Tutorials)
One way would be to select the gold area and use a highlights and shadows live filter to adjust as required. -
paint brush Beta 1.6.3.99
Trinity replied to Trinity's topic in [ARCHIVE] Photo beta on Windows threads
Thank You all, help very much appreciated ...something else learnt.... -
This is odd - when I use the paint brush after I set the size and hardness and begin to paint, instead of the normal circle I now get a small pink line with two small blue circles at either end....The brush seems to work and do what it's supposed to do but it is very difficult to follow and see exactly where you are. Is this supposed to happen?
-
edit exif data
Trinity replied to Trinity's topic in Pre-V2 Archive of Affinity on Desktop Questions (macOS and Windows)
Thank You Jon I have just recently installed a copy of Bridge to use as a DAM, and have worked out how to edit the details in there. Many Thanks -
Hello, I have just started a course on photography and am being asked if I can ensure that my name as author of the picture is embedded in the exif data. I cannot find any way of doing this. Can you help? Many Thanks David Adams
-
Thanks very much for that, I have always used either the tool bar at the top or the small button at the bottom of the studio to access adjustments, had forgotten completely about accessing them this way. Isn't it rather over kill to have three ways of accessing adjustments? There should be a way of putting all the presets under one button... but then again I am not a programmer..so maybe not! Anyway thanks for the help, it's greatly appreciated!
-
This is probably a silly question and I am sure I am missing something simple. But when I am in persona and go to layers and then go to new adjustment layer and then exposure and create a preset. How then do I apply that preset to another picture?
-
Straight verticals
Trinity replied to adimodoran's topic in Tutorials (Staff and Customer Created Tutorials)
hello ..if you go the develop module and under the lens tab you will find sliders to adjust your image, horizontally, vertically and also the option to rotate and scale it. In the persona module the only option is to go to the crop tool, and then take your cursor to the corner and click just outside your image, your cursor will change and a set of guidelines will appear inside your image you will then be able to rotate it using the guidelines to straighten your verticals. Hope that helps. -
Hello, I think what you are referring to can be found on the top right hand side of the screen under the tab colour. You should see the histogram, colour, swatches and brushes tabs. There you can change from black to white by pressing the shortcut x. That will give you the ability to erase the dirt on your image using the white paint, or if you go to far and make a mistake to rectify it by using the black paint. Also make sure you have selected a pixel layer Hope that makes sense. good luck...
-
Scroll Wheel Slider Adjustment
Trinity replied to Mithel's topic in Tutorials (Staff and Customer Created Tutorials)
That's good - I didn't know that! :) -
Scroll Wheel Slider Adjustment
Trinity replied to Mithel's topic in Tutorials (Staff and Customer Created Tutorials)
If you place your cursor in the box with the values you can then use your scroller on your mouse to adjust the values in single increments. Hope that makes sense! -
Thank you for that - got it now - as i thought I had missed something simple again! :)
-
In Lightroom I had the ability to print two images on one A4 page and create as many pages as I liked - is this feature available in Afinity Photo? If it is it's well hidden - I cant see any flexibility either in the print menu or the Export Persona. They do give you the ability to change the size of the document, but that seems to be it. If its not there could we please have it as soon as possible? Or have I missed something simple again!